Table of Contents
Advertisement
DCM-Lx Series Operation Manual
Concert audio has to be uncompromising, reliable and efficient. Carvin power
amps have made their mark serving top artists and concert venues for decades.
The DCM-Lx series power amps with CARVIN's X-Drive™ signal processing
incorporate the flexibility of digital control with the exceptional sound and
durability of DCM power. Take full control of your amps from the front panel or via
USB to Microsoft™ / Mac™ laptops using the Xdrive™ software with highly
effective processing for live use or installations. All models incorporate large heat
sinks, high headroom power supplies and lightweight aluminum main frames - all
backed by a solid 3 year warranty. Exceptional sound and reliability combined
with the flexibility of DSP and ultra-light weight make the DCM-Lx a valuable
addition to any rack system.
GETTING STARTED: An easy way to get familiar with the features of the DCM-Lx
is to download the free Xdrive™ software on your computer. Just run the software
and press the blue button with the product name. The control window will appear:
DCM2000Lx
DCM3800Lx
DCM2004Lx
Advertisement
Table of Contents

Subscribe to Our Youtube Channel
Related Manuals for CARVIN XDrive DCM2000Lx


Summary of Contents for CARVIN XDrive DCM2000Lx
- Page 1 DCM2000Lx DCM3800Lx DCM2004Lx Concert audio has to be uncompromising, reliable and efficient. Carvin power amps have made their mark serving top artists and concert venues for decades. The DCM-Lx series power amps with CARVIN’s X-Drive™ signal processing incorporate the flexibility of digital control with the exceptional sound and durability of DCM power.
-
Page 2: Table Of Contents
TABLE OF CONTENTS page Safety and Warranty Information ___________________________________________ 4 Introduction_____________________________________________________________ 5 REAR PANEL ___________________________________________________________ 6 FRONT PANEL CONTROLS ________________________________________________ 7 SYSTEM MENU______________________________________________________ 8 QUICK SETUP __________________________________________________ 8 4.A.1 FLAT CHANNEL_________________________________________________ 9 4.A.2 COPY CHANNEL ________________________________________________ 9 4.A.3 BRIDGING CHANNELS ___________________________________________ 9 4.A.4 SPEAKER PRESET (LOAD from memory) ___________________________ 9 4.A.5... - Page 3 USB CONNECTION _________________________________________________ 19 COMPUTER CONTROL / GRAPHIC INTERFACE ______________________________ 20 SYSTEM SETTINGS _________________________________________________ 20 SYSTEM LOAD/SAVE ___________________________________________ 20 6.A.1 SYSTEM NAME ________________________________________________ 20 6.A.2 SYNC TO SOFTWARE ___________________________________________ 20 6.A.3 SYNC TO HARDWARE __________________________________________ 20 6.A.4 UPLOAD FIRMWARE____________________________________________ 20 6.A.5 INPUT SETTINGS ___________________________________________________ 21 LOAD/SAVE ___________________________________________________ 21...
-
Page 4: Safety And Warranty Information
This equipment has been tested and complies with international safety standards. LIMITED WARRANTY Your Carvin DCM power amp is guaranteed against failure for 3 YEARS unless otherwise stated. Carvin will service and supply all parts at no charge to the customer providing the unit is under warranty. Shipping costs are the responsibility of the customer. -
Page 5: Introduction
EFFICIENT COOLING An important key to reliable power is a high efficiency heat transfer system. CARVIN DCM-Lx amplifiers offer advanced cooling with high ratio 6063-T5 flow- through aluminum heat sinks to remove heat fast and keep power devices within thermal limits. Multi-speed fans pull air from the rear and exhaust to the front to... -
Page 6: Rear Panel
3. REAR PANEL 2ch. amp 4ch. Amp AC POWER Your amp will work at 50 or 60Hz with specific 100VAC, 120VAC, or 240VAC models. Be sure to check your amp model and power source before plugging into a grounded (3 prong) outlet. The standard IEC inlet accepts universal grounded AC cords. Firmly push the AC cord all the way into the receptacle or the amp may be intermittent. -
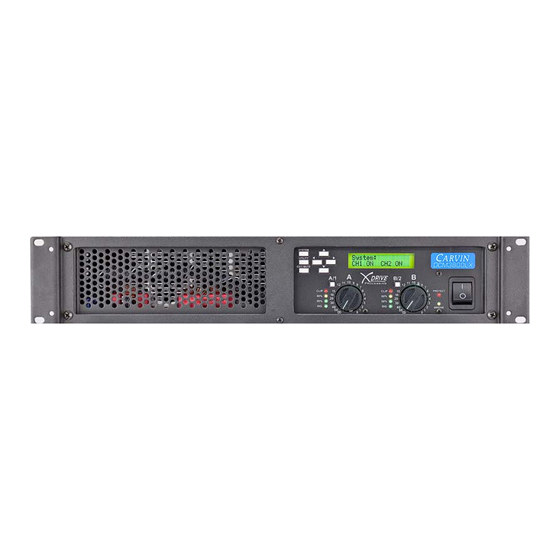
Page 7: Front Panel Controls
4. FRONT PANEL CONTROLS 2 ch. amp 4ch. amp VOLUME ATTENUATOR CONTROLS: A, B (C, D) Adjusts the channel INPUT levels. For bridge mode use A (or C). Set to “0” (maximum) to match the input sensitivity DSP setting in the UTILITY menu. DSP settings such as EQs, GAIN and LIMITER can affect output volume if not set to “0”. -
Page 8: Asystem Menu
Hi – Low Freq: 2.30kHz (e.) Press SYSTEM to exit the QUICK SETUP mode. Note: The default Crossover Filter Type: Linkwitz-Riley 24dB/Octave can be changed in the Output Settings. DCM2000Lx, DCM3800Lx: Mono2Way: Mono 2-way (Bi-amp) Input: A Crossover: Low/High... -
Page 9: Flat Channel
(c.) Press SYSTEM again to finish or EXIT to end. 4.A.5 SPEAKER PRESET (LOAD from memory) You can recall speaker presets optimized for specific CARVIN loudspeakers and load them to OUTPUT channels. The presets contain optimized settings for crossover frequencies, EQ, Delay (alignment), and Threshold (Limiter) which are tuned for the specific speaker elements in the speaker cabinet. -
Page 10: System Name Edit
4.A.6 SYSTEM NAME EDIT (a.) Press SYSTEM, Right (6x) for “SysName:” then SYSTEM. (b.) Use Left/Right to select a character. (c.) Use Up/Down to edit the character. (d.) Press SYSTEM or EXIT to save. 4.A.7 SAVE SYSTEM SAVE SYSTEM will save a complete setup into a memory location, including all Input/Output settings. -
Page 11: Butility Menu
4.B UTILITY MENU Press the UTILITY button to open the UTILITY menu. Use the Left/Right buttons to move through the menu. Press EXIT to return to the channel screen. 4.B.1 DELAY UNITS (a.) Press UTILITY for “Pg 1”. (b.) Use Up/Down to display delay times in Seconds, Feet or Meters. (c.) Press Right for Page 2 or EXIT to escape. -
Page 12: Unit Id
*Note: The factory set default password is 1122. 4.B.7 UNIT ID Multiple DCM-Lx’s and other CARVIN X-Drive™ products such as the XD360, EQ230 and EQ430 can be controlled with the Xdrive™ software through USB from a single computer. When doing this, set the UNIT ID for each device to a different number. -
Page 13: Dchannel Settings
4.D CHANNEL SETTINGS Pressing a CHANNEL button (A/1, B/2, C/3, D/4) will cycle through 3 display modes: - MAIN SCREEN: displays System name and Mute status. - INPUT: Displays a Channel letter (A, B, C, or D) and graphic EQ. - OUTPUT: Displays a Channel number (1, 2, 3 or 4) and parameter(s). -
Page 14: Output) Source
4.D.3 (OUTPUT) SOURCE The SOURCE setting will determine which Inputs are routed to which Outputs. (a.) Press (A/1, B/2, C/3 or D/4) to enter OUTPUT mode (CH, Number). (b.) Press Left or Right until the screen above is shown. (c.) Use Up/Down to choose A, B, or A+B, (or C, D, or C+D on the DCM2004Lx). -
Page 15: Output) Limiter
BUTTER 12 : Butterworth 12db/octave slope (2 order) BUTTER 18 : Butterworth 18db/octave slope (3 order) BUTTER 24 : Butterworth 24db/octave slope (4 order) BUTTER 48 : Butterworth 48db/octave slope (8 order) BESSEL 12, or 24: Bessel (2 order) or (4 order) LINKWZ 12, 24, or 48: Linkwitz-Riley (2 order), (4... -
Page 16: Output) Parametric Eqs (Peq 1-4)
4.D.8 (OUTPUT) PARAMETRIC EQs (PEQ 1-4) The four bands of Parametric EQ on each Output are used to EQ the amp channels independently. Example: Output 1 Parametric EQ #4 BW=1/3oct -4dB @ 6.8kHz (a.) Press (A/1, B/2, C/3 or D/4) to enter OUTPUT mode (CH, Number). (b.) Press Left or Right until a screen like the one above is shown. -
Page 17: Output) Channel Name
4.D.9 (OUTPUT) CHANNEL NAME (a.) Press (A/1, B/2, C/3 or D/4) to enter OUTPUT mode (CH, Number). (b.) Press Left or Right until the screen above is shown. (c.) Use Left or Right to select a character to change. (d.) Press Up/Down to change the character. (e.) Use LEFT/RIGHT to choose the other characters to edit. -
Page 18: Computer Setup
5. COMPUTER SETUP The DCM-Lx has a USB port allowing use with Carvin’s Xdrive™ software. 5.A SOFTWARE 5.A.1 MINIMUM REQUIREMENTS Windows: XP or later. Mac: OS 10.6 or later. 5.A.2 INSTALLATION Download the software from: www.carvin.com/xdrive To install the Xdrive™ software for the DCM-Lx: 1. -
Page 19: Busb Connection
Connect the USB cable to both the computer and the DCM-Lx. Run the Xdrive™ software on the computer. A picture of the connected Carvin Xdrive™ compatible device(s) will appear, with device name, firmware version and USB ID number (under the “Online”... -
Page 20: Computer Control / Graphic Interface
DCM-Lx hardware memory. To perform a DCM-Lx firmware update: Download new firmware to your computer from www.carvin.com/xdrive. Save the file in a known location on your computer. Click on the “UPLOAD FIRMWARE” button at the top right of the screen. -
Page 21: Binput Settings
6.B INPUT SETTINGS (top 1/3 of screen, after SYSTEM) 6.B.1 LOAD/SAVE Load preset input settings or save them to your computer. 6.B.2 INPUT SELECT A, B, (C, D) buttons select and display Graphic EQ settings for each Input. 6.B.3 COPY/PASTE Copy output settings from one output to another. -
Page 22: Crouter (Matrix)
6.C ROUTER (MATRIX) (middle left screen) 6.C.1 BRIDGE CHANNELS BRIDGE 1-2, (3-4) button(s) combine amps 1 & 2 (or 3 & 4) for a single high power output. Use the appropriate output jacks when bridging amps. *Note: the minimum impedance for a BRIDGED output is 4 ohms for 2 channel amps, and 8 ohms for the DCM2004Lx. -
Page 23: Eoutput Settings
6.E OUTPUT SETTINGS (bottom of screen) 6.E.1 LOAD/SAVE Load preset output settings or save them to your computer. 6.E.2 OUTPUT CHANNEL SELECT Buttons 1,2 ( 3,4 ) : Select to display the settings for each output. The output’s curve will be highlighted if displayed on the Frequency Chart. 6.E.3 COPY/PASTE Copy output settings from one output to another. -
Page 24: Manual Setups
7. MANUAL SETUPS 2-WAY (Biamp): (a.) Press A/1 to enter OUTPUT mode. (b.) Press Left or Right until the “CHANNEL 1 … LPF” screen is displayed. (c.) Use Left/Right to choose LPF Freq. (d.) Use Up/Down to change the LPF to 2.30kHz for CH.1 (e.) Press Right. -
Page 25: Loudspeaker Settings Chart
8. LOUDSPEAKER SETTINGS CHART... -
Page 26: Specifications
General: Dimensions: 19”W x 3.5”H x 11”D (483mm x 90mm x 280mm) Weight: DCM2000Lx, DCM2004Lx: 10 lbs (4.5 kg) DCM3800Lx: 15 lbs (6.8 kg); Power: 100, 120 or 240 VAC models, 50/60Hz standard IEC inlet (V-lock™ compatible) Internal fuses: SLOW BLOW... -
Page 27: Menu Navigation Chart
10. MENU NAVIGATION CHART 11. BLOCK DIAGRAM...
Need help?
Do you have a question about the XDrive DCM2000Lx and is the answer not in the manual?
Questions and answers