Table of Contents
Advertisement
Quick Links
Advertisement
Chapters
Table of Contents

Related Manuals for Acer TravelMate P643-MG


Summarization of Contents
Chapter 1 Hardware Specifications
Features
Summary of the computer's features, including vPro models.
Platform
Details the Huron River or Chief River platform and chipset.
System Memory
Specifies DDR3 DIMM slots, capacity, and dual channel support.
Display
Describes the 14" HD display, resolution, and features.
Graphics
Details UMA and Discrete graphics controllers and resolutions.
Storage Subsystem
Information on hard disk drives and SSDs.
Audio Subsystem
Covers audio support, speakers, microphones, and codec.
Communication
Details webcam specifications and software.
Wireless and Networking
WLAN and WPAN specifications, including chipsets.
Privacy Control
Features like ProShield Security Manager and password options.
Power Adapter and Battery
Specifications for AC adapters and battery packs.
Keyboard and Pointing Device
Describes keyboard features and touchpad functionality.
I/O Ports
Lists all available input/output ports like USB, HDMI, etc.
Software and Tools
Lists productivity, manageability, security, and multimedia software.
Optional Items
Lists optional accessories like ProDock and extra battery packs.
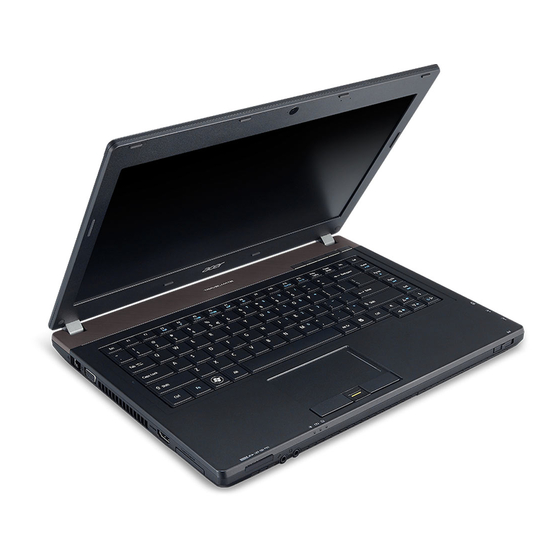
Notebook Tour
Overview of notebook features and functions.
Open Front View
Identifies components visible when the notebook is open.
Specification Tables
Detailed technical specifications in tabular format.
Computer Specifications
General specs like dimensions, weight, input power, temperature.
Chapter 2 System Utilities
BIOS Setup Utility
Program for hardware configuration via BIOS.
Navigating the BIOS Utility
Instructions on using the BIOS setup menu options.
BIOS Menus
Description of Phoenix SecureCore Tiano BIOS menu tabs.
Information
Tab showing summary of computer's hardware information.
Main
Set system time, date, boot options, and D2D recovery.
Security
Safeguard computer from unauthorized use via passwords.
Setting a Password
Step-by-step guide to setting user or supervisor passwords.
Removing a Password
Procedure to remove existing user or supervisor passwords.
Changing a Password
Instructions to change existing BIOS passwords.
Boot
Set preferred drive sequence for booting the operating system.
Exit
Save or discard changes and close the BIOS Setup Utility.
BIOS Flash Utilities
Procedures for updating the system BIOS Flash ROM.
DOS Flash Utility
Using the DOS utility to update the BIOS.
WinFlash Utility
Using the Windows utility to update the BIOS.
Remove HDD/BIOS Password Utilities
Explains how to remove HDD and BIOS passwords.
Clearing the BIOS Passwords
Detailed steps to clear BIOS passwords using a hardware gap.
Using DMI Tools
Copying BIOS info to EEPROM for hardware management.
LAN EEPROM Utility
Utility to change the MAC address.
Chapter 3 Machine Maintenance
Machine Disassembly and Replacement
Step-by-step procedures for disassembling the notebook.
Recommended Equipment
List of suggested tools for disassembly.
Pre-disassembly Instructions
Actions to take before starting disassembly.
Disassembly Process
Stages of disassembly: external, main unit, LCD.
External Module Disassembly Process
Procedures for removing external components.
Removing the Battery Pack
Step-by-step guide to remove the battery.
Removing the ODD Module
Steps to remove the optical disc drive.
Removing the HDD Module
Steps to remove the hard disk drive.
Removing the Memory Modules
Guide to removing RAM modules.
Removing the WLAN Module
Steps to remove the wireless LAN card.
Main Unit Disassembly Process
Procedures for disassembling the main internal components.
Removing the Keyboard
Step-by-step guide to remove the keyboard.
Removing the Palmrest Module/Upper Cover
Instructions for removing the palmrest assembly.
Removing the CPU
Procedure to remove the central processing unit.
Removing the Thermal Module
Steps to remove the CPU heatsink and fan assembly.
Removing the Mainboard
Guide to removing the system's main circuit board.
LCD Module Disassembly Process
Procedures for disassembling the LCD unit.
Removing the LCD Bezel
Steps to remove the LCD screen's front frame.
Replacing the LCD Panel
Procedure to reinstall the LCD screen.
Main Unit Reassembly Process
Procedures for reassembling main internal components.
Replacing the Keyboard
Step-by-step guide to reinstall the keyboard.
External Module Reassembly Process
Procedures for reinstalling external components.
Replacing the WLAN Module
Steps to reinstall the wireless LAN card.
Replacing the Memory Modules
Guide to reinstalling RAM modules.
Replacing the HDD Module
Steps to reinstall the hard disk drive.
Replacing the Base Door
Procedure to reinstall the access door on the base.
Replacing the ODD Module
Steps to reinstall the optical disc drive.
Replacing the Battery Pack
Step-by-step guide to reinstall the battery.
Chapter 4 Troubleshooting
Introduction
Information about troubleshooting common computer problems.
General Information
Guides for troubleshooting procedures and gathering info.
Power On Issues
Steps to resolve problems where the system does not power on.
No Display Issues
Steps to resolve when the display does not work.
LCD Failure
Procedures for diagnosing and resolving LCD panel issues.
Keyboard Failure
Steps to resolve issues with the keyboard not functioning.
Touchpad Failure
Troubleshooting steps for a non-functional touchpad.
Internal Speaker Failure
Steps to resolve issues with internal speakers.
Microphone Failure
Steps to resolve issues with internal or external microphones.
USB Failure
Troubleshooting steps for non-functional USB ports.
WLAN Failure
Procedures for diagnosing and resolving wireless LAN issues.
Bluetooth Failure
Steps to resolve issues with Bluetooth connectivity.
Card Reader Failure
Troubleshooting steps for the memory card reader.
Thermal Unit Failure
Procedures for diagnosing and resolving thermal issues.
Intermittent Problems
Diagnosing and resolving system hangs or instability.
Undetermined Problems
Procedures for isolating failures when the cause is unclear.
Error Codes
Lists and explains common error codes and messages.
BIOS Beep Codes
Interpreting beep codes for POST routine status.
POST Codes
Explanation of progress and error codes during system boot.
Component Codes
Values assigned to specific hardware components for POST.
Progress Codes
Describes progress code values during system boot.
Chapter 5 Jumper and Connector Locations
Mainboard Layout
Diagrams and labels for top and bottom of the mainboard.
Clearing Password Check and BIOS Recovery
Procedures for clearing BIOS passwords and recovery.
Clearing the BIOS Passwords
Steps to clear BIOS passwords via hardware gap.
Performing a BIOS Recovery
Guide for recovering the BIOS using a crisis disk.
Chapter 6 FRU List
TravelMate P643V/P643M/P643MG Exploded Diagrams
Visual breakdown of main and LCD assemblies.
Main Assembly
Exploded view and part numbers for the main notebook components.
LCD Assembly
Exploded view and part numbers for the LCD unit components.
FRU (Field Replaceable Unit) List
Comprehensive list of replaceable parts and their numbers.
Chapter 7 Test Compatible Components
Microsoft Windows 7 Environment Test
Lists components tested under Windows 7.
Chapter 8 Online Support Information
Online Support Information
Details on accessing online support, service guides, and utilities.
Need help?
Do you have a question about the TravelMate P643-MG and is the answer not in the manual?
Questions and answers