Table of Contents
Advertisement
2
. . . . . . . . . . . . . . . . . . . . . . . . . . . . .
. . . . . . . . . . . . . . . . . . . . . . . . . . . . .
. . . . . . . . . . . . . . . . . . . . . . . . . . . . .
User's Manual
KODAK
Professional
DCS 410
DCS 420
DCS 460
NC2000e
Digital Cameras
© Eastman Kodak Company, 1997
This manual and the accompanying software are protected by United States and international copyright laws. You may
make one backup copy of the enclosed software and one copy of this manual. Do not make additional copies of the
software or copies of the manual or electronically transmit them in any form whatsoever, in whole or in part, without
the prior written permission of Eastman Kodak Company.
Advertisement
Table of Contents
Troubleshooting

Related Manuals for Kodak DCS 460


Summary of Contents for Kodak DCS 460
-
Page 1: Digital Cameras
Do not make additional copies of the software or copies of the manual or electronically transmit them in any form whatsoever, in whole or in part, without the prior written permission of Eastman Kodak Company. - Page 2 ......
-
Page 3: Warranty Repair Coverage
THIS WARRANTY APPLIES TO EQUIPMENT PURCHASED IN THE UNITED STATES. Warranty Time Period Kodak warrants your camera to be free from malfunctions and defects in both materials and workmanship for six months from the date of purchase. Warranty Repair Coverage... - Page 4 Kodak. Such damages for which Kodak will not be responsible include, but are...
-
Page 5: Outside The United States
In countries other than the United States, the terms of this warranty may be different. Unless a specific Kodak warranty is communicated to the purchaser in writing by a Kodak company, no other warranty or liability exists beyond the information contained above, even though defect, damage or loss may be by negligence or other act. -
Page 6: Software License Agreement
TIONS. IF YOU DO NOT AGREE WITH THEM, YOU SHOULD PROMPTLY RE- TURN THE DISKETTE PACKAGE(S) UNOPENED, ALONG WITH THE ACCOMPA- NYING MATERIALS. Eastman Kodak Company (Kodak) provides this software and licenses its use worldwide. You assume responsibility for selection of the software to achieve your intended results, and for installation, use, and results obtained from the software. -
Page 7: Limited Warranty
LIMITED WARRANTY Kodak warrants the diskettes on which the software is furnished to be free from defects in materials and workmanship under normal use for a period of ninety (90) days from the date of delivery to you as evidenced by a copy of your receipt. -
Page 8: Limitations Of Remedies
Kodak’s entire liability and your exclusive remedy shall be: 1. the replacement of any diskette not meeting Kodak’s “Limited War- ranty” that is returned to Kodak or your dealer with a copy of your receipt, or 2. if Kodak or the dealer is unable to deliver a replacement diskette that is free of defects in materials or workmanship, you may terminate this Agreement by returning the software. - Page 9 This Agreement will be governed by the laws of the State of New York. Should you have any questions concerning this Agreement, you may contact Kodak in the United States at 1-800-23-KODAK (1-800-235- 6325), in Canada at 1-800-GO-KODAK (1-800-465-6325), and in other countries through your nearest Kodak representative.
-
Page 10: Important Safeguards And Precautions
......Important Safeguards and Precautions The exclamation point in an equilateral triangle is in- tended to alert the user to the presence of important operating and maintenance (servicing) instructions in the literature accompanying the equipment. - Page 11 Be certain the camera off. Using a damp cloth, clean only the outside cabinet and the liquid crystal display (LCD) on the KODAK camera back. Do not use liquid cleaners or aerosol cleaners on the outside of the equipment. (Refer to Chapter 7 for directions on cleaning the imager in the camera back.)
- Page 12 ......camera as the only external device attached to a PowerBook com- puter (refer to Chapter 4).
- Page 13 Opening or removing covers may expose you to dangerous voltage or other hazards. Never open the KODAK camera back. (Refer to Chap- ter 7 for directions on separating the KODAK camera back from the Nikon N90s Camera to clean a dirty imager.) ©...
- Page 14 AC battery charger/adapter, you should charge the battery for at least two hours before using as described in Chapter 4. If the unusual behavior continues for more than five minutes, the battery may need to be replaced; contact Kodak.
- Page 15 Do not plug the AC battery charger/adapter into any equipment other than the camera. © The rechargeable battery in the KODAK camera back becomes warm during charging; this is normal operation. © Under normal conditions, charging the battery for at least two hours provides optimal capacity.
-
Page 16: Electromagnetic Emissions
......Electromagnetic Emissions This equipment has been tested and found to comply with the limits for a Class B digital device, pursuant to Part 15 of the FCC Rules. -
Page 17: Table Of Contents
......Contents 1 1 1 1 1 Before You Begin 1-1 Macintosh Computer — Hardware and Software 1-2 Required Computer, Memory, Hard Disk 1-2 Computer 1-2 Memory 1-2... - Page 18 Inserting and Removing a PCMCIA Card 4-27 Inserting a PCMCIA Card 4-27 Removing a PCMCIA Card 4-31 Installing the KODAK Driver 4-33 Accessing the Camera from the Driver 4-36 Special Instructions for TWAIN-compliant Software 4-36 Final Steps to the Driver Window 4-38...
- Page 19 ......Taking Pictures 5-8 Reading the Frames Remaining Indicator and the Frame Counter 5-9 Frames Remaining 5-9 Frame Counter 5-10 Deleting Pictures (Optional) 5-11...
- Page 20 Timing Considerations 7-3 KODAK Camera Back Controls 7-4 Liquid Crystal Display (LCD) 7-4 Battery Indicator 7-6 Frames Remaining Indicator — KODAK Camera Back 7-7 Frame Counter — Nikon N90s Camera 7-7 ISO Warning 7-9 Disk Indicator 7-10 Disk Error Indicator 7-10...
- Page 21 Determining If the Imager is Dirty 7-41 Examine a Test Image 7-41 Visually Inspect the Imager 7-41 Cleaning a Dirty Imager 7-43 Separating the Camera from the KODAK Camera Back 7-43 Wiping the Imager 7-49 Reassembling the Camera 7-51 Using a Flash 7-53...
- Page 22 ......8 8 8 8 8 Reference — Kodak Driver Software 8-1 General Features 8-2 Defaults —...
- Page 23 ......Take Picture Icon 8-17 Camera Control Icon 8-17 Load Camera Firmware 8-19 Set Clock 8-20 Erase 8-20 Format 8-20...
- Page 24 ......8 8 8 8 8 Reference — Kodak Driver Software (continued) Commands (continued)
- Page 25 Messages — Kodak Driver Software 8-54 9 9 9 9 9 Appendices 9-1 Appendix A — Specifications DCS 410, DCS 420, DCS 460, NC2000e A-1 Appendix B — Glossary B-1 Appendix C — Updating Your KODAK Software Driver C-1 Appendix D — Repacking Instructions D-1 Appendix E —...
-
Page 27: Before You Begin
(You may be able to use the camera on other computer platforms, or with additional operating systems, using drivers prepared by companies other than Kodak, or by developing your own driver. Contact Kodak for information.) ©... -
Page 28: Macintosh Computer - Hardware And Software
Software The following sections list the required and optional computer hardware and software needed to run the Kodak Driver for use with Adobe Photo- shop Software on an Apple Macintosh computer. IMPORTANT: Refer to the read-me files on the supplied software driver diskette for additional details or revisions to these requirements. -
Page 29: Required Systems Software
......acceptable. You need the appropriate display card for the monitor in use; we recommend a 16-bit or 24-bit video display card (which can display more than 16.7 million colors). -
Page 30: Ibm Pc Or Compatible Computer - Hardware And Software
Hardware and Software These sections list required and optional hardware and software needed to run the Kodak drivers for TWAIN-compliant PC applications. IMPORTANT: Refer to the read-me files on the supplied software driver diskette for additional details or revisions to these requirement. -
Page 31: Required Scsi Interface
Microsoft Windows 95 or Windows NT 4.0. Required Applications Software A TWAIN-compliant software application. The Kodak driver for use with TWAIN-compliant PC applications can be used with software such as Adobe Photoshop and may work with other software applications that support TWAIN specifications. -
Page 32: Other Optional Equipment
Equipment & Spare Parts List” and to the text files installed during software installation that list system and software solutions available from third party vendors. Optional Camera Equipment Kodak accessories, for example a shutter release cable and PCMCIA cards. Electronic flash and accessories. Extra lenses for the camera. -
Page 33: Introduction
............ - Page 34 Kodak. You can then use the image in other applications or edit it with your image editing software. You can also record sound with the built-in microphone in the camera and play the sound files through your computer system.
-
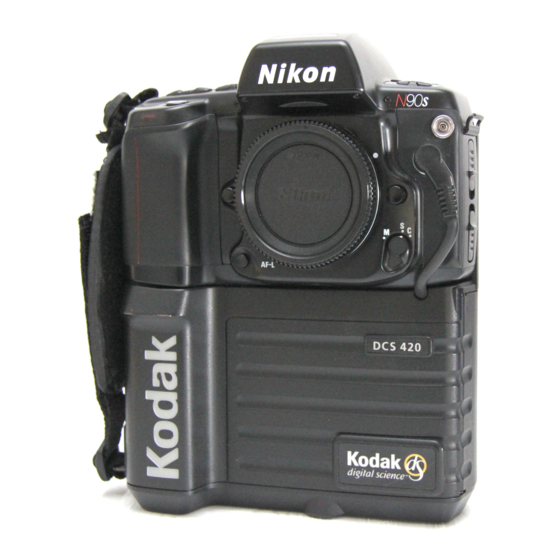
Page 35: Kodak Camera Back
......KODAK Camera Back The KODAK camera back is a sealed, one-piece unit. A single mounting screw attaches it to an unmodified Nikon N90s camera body that has had its film back removed. -
Page 36: Features
......Features The KODAK camera back incorporates the following features: © A KODAK charge coupled device (CCD) imager with image data recorded as listed in the Specifications appendix. © Exposure indexes equivalent to film speeds as listed in the Specifica- tions appendix. - Page 37 ......DELETE button Card busy light Remove/insert PCMCIA card here. Multipurpose connector ©...
- Page 38 ......© A built-in microphone records sound as “.WAV” files at “telephone quality”—...
-
Page 39: Quick Start
© If you are experienced with previous Kodak digital cameras, with personal computers, and with the Nikon N90s, you may be able to follow these steps without referring to other material. - Page 40 1. Obtain and mount a lens on the camera. A lens is not supplied with the camera system, but is available from Kodak (and elsewhere). Refer to the appendix “Optional Equipment & Spare Parts List,” and to the quick reference card regarding lens behavior.
- Page 41 ......6. DCS 460 Only: Install the Calibration File. A. Macintosh: Load the diskette with the calibration (CAL) file for your camera.
- Page 42 ......10. Place a supported PCMCIA card into the camera. Open the door on the side of the camera, push the PCMCIA card firmly into place, and close the door.
- Page 43 ......NOTES: For earlier supported versions of Photoshop, choose the driver from the A CQUIRE For other supported TWAIN applications on the PC, access the TWAIN driver...
- Page 44 ......window. Scroll through images, select one or more, adjust color using the balance controls, crop, and acquire the image into your applica- tion by clicking the A button.
-
Page 45: Preparing The Camera And The Computer
............ - Page 46 ......© Load and/or update camera firmware. © Format a PCMCIA card for use with the camera. IMPORTANT: We assume that you are familiar with the operation of your computer.
-
Page 47: Using The Ac Battery Charger/Adapter
......Using the AC Battery Charger/ Adapter Keep the following battery considerations in mind as you use the camera. ©... -
Page 48: Charging The Battery
......Charging the Battery You should charge the battery for two hours before using the camera for the first time, and thereafter on a regular basis as needed. - Page 49 ......3. Plug the other end of the power cord into a wall outlet. 4.
- Page 50 5. The first time the camera is used, allow the battery to charge for two hours. IMPORTANT: An LCD at the top left corner of the camera back displays a battery icon. LCD GRAPHICS KODAK camera back LCD Battery indicator DELETE SCSI ID CARD BUSY While the battery is charging, the three segments of this icon light repeat- edly in turn from bottom to top;...
- Page 51 ......6. (Optional) Use the supplied accessory adapter cable as shown in the following illustration.
-
Page 52: Setting The Scsi Id On The Camera
......Setting the SCSI ID on the Camera In this section you will set the SCSI identification (ID) number for the camera. - Page 53 ......3. Turn on the camera as shown below. 4. Wake the camera by lightly pressing the shutter release button. NOTES: The camera turns off after several seconds of inactivity;...
- Page 54 ......5. Locate the indented button on the back of the camera labeled “SCSI ID.”...
- Page 55 ......6. Press the SCSI ID button once with your fingertip or a blunt object; this action wakes SCSI mode.
- Page 56 SCSI setting is active. “PP” SETTING: The “PP” setting, although it appears, is not currently sup- ported and should not be selected for use with the Kodak driver. © 4-12...
-
Page 57: Installing A Scsi Host Adapter (Twain Pc Only)
......Installing a SCSI Host Adapter (TWAIN PC Only) The camera connects to your PC at a SCSI port provided by installing one of the supported SCSI host adapter cards. -
Page 58: Making The Scsi Connection
......Making the SCSI Connection The camera is a non-terminated SCSI device that connects to your Macintosh computer or PC with one of the included SCSI cables. - Page 59 ......3. Connect the AC battery charger/adapter to the camera as described earlier in this chapter.
- Page 60 ......5. Follow the appropriate part of this step for either a Macintosh or a PC. MACINTOSH: Attach one 25-pin connector to the SCSI port on the back of the Macintosh computer.
- Page 61 ......6. Attach the appropriate end of the supplied 25-pin SCSI terminator to the other end of the SCSI cable you just attached to your computer.
-
Page 62: Ii. Camera Used With Other Scsi Devices
......8. (Optional) Later, to disconnect the camera from the computer, shut down the computer and then power off the camera. - Page 63 ......A. Follow these steps if none of the connected devices are terminated or if one of the devices is terminated externally.
- Page 64 ......B. If there is an external SCSI terminator between the end of a cable and a SCSI connector on a device, remove the terminator, and then reconnect the cable.
- Page 65 ......7. Attach the supplied 25-pin terminator to the other end of the SCSI cable and then to the camera.
- Page 66 ......2. Place the camera in a convenient position next to the last device in the SCSI chain of devices connected to your computer.
- Page 67 ......6. Attach the other end of the SCSI cable to the SCSI connector on the camera.
-
Page 68: Camera Used With A Macintosh Powerbook Or A Pc Laptop
......III. Camera Used with a Macintosh PowerBook or a PC Laptop Follow the steps below to match your computer system, either a Macintosh PowerBook (part A) or a PC Laptop (part B). - Page 69 ......1. Turn off the Macintosh PowerBook computer. IMPORTANT: Later when you connect and disconnect the Macintosh PowerBook computer and the camera on a regular basis, make sure the computer is off.
-
Page 70: Pc (For Twain Driver)
......B. PC (for TWAIN driver) The camera can be used with an IBM or compatible laptop computer if you use a PCMCIA-to-SCSI II adapter (such as the Adaptec SlimSCSI used with EZ-SCSI 4.0 or the New Media Bus Toaster). -
Page 71: Inserting And Removing A Pcmcia Card
......Inserting and Removing a PCMCIA Card This section describes how to insert and remove a PCMCIA card. PCMCIA cards are not supplied with the camera, but are available as optional equipment. - Page 72 ......1. Be certain that the red “Card Busy” light is not blinking before you continue.
- Page 73 ......2. While looking at the back of the camera, open the door on the left edge of the camera back by inserting a thumb or finger into the opening and swinging the door away from you.
- Page 74 ......Insert your PCMCIA card (not supplied with the camera), by sliding it —...
-
Page 75: Removing A Pcmcia Card
......4. Swing the door closed over the PCMCIA card. NOTE: The camera back LCD (see figure above at the start of step 3) may show “E6,”... - Page 76 ......3. CAUTION: As you complete this step, the PCMCIA card is ejected from the camera;...
-
Page 77: Installing The Kodak Driver
1. If your computer is not on, turn it on now 2. Locate the Kodak-supplied driver diskettes for the computer system you will use — either Macintosh or PC. 3. Place the first diskette into the internal drive of your computer. - Page 78 With an ASPI compliant SCSI host adapter card, you must install the Win- dows ASPI files that accompany it. The KODAK Driver for use with ASPI compliant host adapter cards will not work properly unless these files have been installed.
- Page 79 ......B. Make a backup of the calibration diskette; you cannot obtain images from the camera without the CAL file.
-
Page 80: Accessing The Camera From The Driver
......Accessing the Camera from the Driver Repeat the steps below each time you want to access the KODAK Driver for Adobe Photoshop software or for supported TWAIN-compliant PC applications. - Page 81 ......If you use other supported software, refer to its documentation to deter- mine if it is TWAIN-compliant, and if it is, how it provides access to TWAIN drivers.
-
Page 82: Final Steps To The Driver Window
......Final Steps to the Driver Window 1. Follow the appropriate step below. MACINTOSH: Pull down the Adobe Photoshop 4.0 File menu and choose K DCS 400/EOS•DCS/NC2000 from the I... - Page 83 ......2. Wait as the driver image window appears. NOTES: Instead of the driver image window above you may see a message that the camera was not found.
-
Page 84: Updating Camera Firmware
(Refer to the appendix “Updating Your KODAK Software Driver,” for additional information.) You can also perform some troubleshooting without sending the camera to a service center, as described in the camera troubleshooting section of this manual. - Page 85 ......1. Click the camera control icon of the driver image window. You see the dialog box below.
-
Page 86: Formatting A Pcmcia Card
......Formatting a PCMCIA Card This section describes how to format a PCMCIA card, an action you may need to take now as you start to use the camera, and may need to repeat later on an occasional basis when you want to format another card, or to reformat a card you have been using with the camera. - Page 87 ......1. Click the camera control icon of the driver image window. You see the C AMERA 2.
- Page 88 ......5. Click D 6. Click D 7. Quit the application. © 4-44 Preparing the Camera and the Computer to close the dialog box.
-
Page 89: Quitting - Disconnecting The Camera From The Computer
......Quitting — Disconnecting the Camera from the Computer Complete these steps when you have completed your work with the camera and the computer. -
Page 91: Using The Camera
............ -
Page 92: Readying The Nikon N90S Camera
......Readying the Nikon N90s Camera 1. If a formatted PCMCIA card is not in the camera, insert one now. NOTE: Refer to Chapter 4 for information on formatting, inserting, and removing PCMCIA cards. - Page 93 ......B. In the field without the AC battery charger/adapter. Before you go into the field, you should charge the battery fully as described in Chapter 4.
- Page 94 ......4. Select any of the three automatic film advance modes — single frame shooting (S), continuous low-speed shooting (L), or high-speed shoot- ing (H).
- Page 95 ......If this occurs, choose another focus mode, or take some other action —...
- Page 96 ......7. Notice that the camera back LCD displays several graphics. (If the AC battery charger/adapter is not attached, you need to lightly press the shutter release to wake the camera and see these data on that LCD.) The graphics display:...
-
Page 97: Index
......© Without the AC battery charger/adapter, if the indicator shows that the battery is low, recharge it or operate the camera from the AC battery charger/adapter. -
Page 98: Turning Off The Camera
......Turning Off the Camera You turn off the camera by sliding the Nikon N90s camera power switch to OFF. -
Page 99: Reading The Frames Remaining Indicator And The Frame Counter
......5. Set the film advance mode for continuous shooting (either L or H mode), and take additional pictures by keeping the shutter release depressed. -
Page 100: Frame Counter
......The oval at the right of the LCD indicates the amount of the PCMCIA card filled with images. -
Page 101: Deleting Pictures (Optional)
......Deleting Pictures (Optional) This section describes how you can delete one or more of the most recent pictures from the PCMCIA card. - Page 102 ......3. Locate the indented button on the back of the camera labeled “DELETE.”...
- Page 103 ......4. Press this DELETE button once with your fingertip or other blunt object;...
-
Page 104: Recording Sound (Optional)
......Recording Sound (Optional) You can record sound on the PCMCIA card via a microphone built into the camera by following these steps. -
Page 105: Turning Off The Camera
......and back, serving as a level meter (similar to the levels commonly dis- played on audio equipment like tape decks). -
Page 106: Operating Differences With The Nikon N90S Camera
© You use the camera back incorporating a Kodak imager instead of the Nikon N90s camera back for film. The camera back comes attached to the Nikon camera body, and should not be separated except to clean a dirty imager as described in Chapter 7. - Page 107 ......© The Nikon Data Link System is not supported. The camera provides access to similar data through the image information window pro- vided on the driver image window.
-
Page 109: Tutorial - Accessing Camera Images
Tutorial — Accessing Camera Images This chapter is a tutorial that describes how to use the KODAK driver with your camera connected to your computer. When the camera is connected to your computer, you can work with images you have taken earlier with the camera while not connected to the computer, or you can take new pictures. - Page 110 Delete image and sound files. © Play recorded sound files. NOTES: This chapter assumes that you have installed the KODAK driver and that you know how to connect the camera to your computer. Refer to chapter 4 for information if needed.
-
Page 111: Working With Images Already On A Pcmcia Card
......Working with Images Already on a PCMCIA Card This section is a tutorial on how you might work at the computer with images you have previously taken with the camera. - Page 112 “Messages” section of chapter 8. The driver can display images from a variety of supported Kodak camera types. This means that you can use the same PCMCIA card with different supported Kodak cameras and view all of the images with the same driver.
-
Page 113: Viewing/Selecting An Image From The Camera With The Driver
......Driver Image Window (Macintosh and TWAIN): Edit Viewing/Selecting an Image from the Camera with the Driver In this section we start by assuming that you want to select a single image to acquire into Photoshop. - Page 114 ......1. If it is not already selected, choose C work with images from a connected camera. and C OLDER have previously copied from the camera to a folder (sub-directory) on...
- Page 115 ......3. If it is not already selected, choose P This specifies that, when you acquire images into Photoshop, each image will be acquired into a separate window.
-
Page 116: Acquiring One Image From The Camera
......Acquiring One Image from the Camera You are now ready to acquire an image into Photoshop. Acquiring an image copies its image data from the PCMCIA card into Photoshop, where the acquired image opens into a Photoshop window. -
Page 117: Acquiring Multiple Images Or A Contact Sheet
......Acquiring Multiple Images or a Contact Sheet In the previous section you acquired a single image into Photoshop. In this section you will acquire multiple images (or a contact sheet of those images) simultaneously. - Page 118 ......nails of the subset of selected images, as illustrated below after printing the file;...
-
Page 119: Rotate, Rename, And Annotate Images
......Rotate, Rename, and Annotate Images 1. Suppose that one or more images is not displayed in the proper rotation. - Page 120 ......named based on the data in the text boxes. Note that the “.TIF” suffix is automatically added to the file name: do not type the period or “TIF”...
- Page 121 ......When an image is acquired, text from both areas is also acquired, and is placed in the Photoshop caption area.
-
Page 122: Navigating Through Images
......Navigating Through Images As described earlier in the chapter, you can scroll through images by using the scroll bar at the right of the image area. -
Page 123: More Than One Image Selected
......4. Click the “previous” icon several times; the selected image changes, moving consecutively to the “previous”... -
Page 124: Applying Color Balance To Images
......The screen changes, and a single enlargement of the selected image fills the image area on the screen. -
Page 125: Applying Color Balance To A Single Image
......Color balance choices are contained in two separate features — the lighting menu and the click-balance tool —... -
Page 126: Method A: Lighting Menu
......5. Color balance the image using either method A (lighting menu) or method B (click-balance Tool) that follows. - Page 127 ......2. Move the cursor over the image, the cursor changes to a special click- balance eyedropper cursor.
-
Page 128: Applying Color Balance To Multiple Selected Images
......Applying Color Balance to Multiple Selected Images 1. If you are not in the driver image window, return there now. 2. -
Page 129: Saving Color Balance Changes
7. (Optional) If you want to use click-balance, but there is no white or light gray area in the image, take a photograph of a neutral gray or white card (for example KODAK Gray Cards, Publication No. R-27) under the same lighting conditions that existed when the image was taken. - Page 130 2. Select the image or images that you want to crop. NOTE: You can not simultaneously crop multiple images from different camera types. The DCS 410, DCS 420, and EOS•DCS 5 are the same camera type; the NC2000e and EOS•DCS 3 are the same camera type; and the DCS 460, DCS 465, and EOS•DCS 1 are the same camera type.
- Page 131 ......4. Wait as the C were selected that they appear in a stack in the box. In this step you will set some of the options of this dialog box to crop images.
- Page 132 ......you know beforehand the exact output dimensions desired for the image. Make one of these choices: ©...
-
Page 133: Close The Driver Image Window Saving Changes)
......you step through them, resize or reposition cropping rectangle as desired; the change affects the cropping rectangle on all selected images. -
Page 134: Working With Images In The Studio
......Working with Images in the Studio This section is a tutorial on using the camera in a studio setting to take new images. - Page 135 ......4. As prompted by a message that appears in the driver image window, click the Take Picture icon (or use the shutter release to take a picture).
- Page 136 ......choose C from the Photoshop F menu or quit Photoshop, the window LOSE will close without asking you if you want to save it.
-
Page 137: Playing Recorded Sound Files
......Playing Recorded Sound Files Sound files recorded with the camera are saved to the PCMCIA card and are associated with the image taken just before the sound was recorded. -
Page 138: Archive And Delete Images
......Archive and Delete Images The driver provides a variety of additional features that allow you to work with image and sound files. - Page 139 ......4. Later, to work with these archive files, enter the driver, and use from the S menu (Macintosh), or click the icon HOOSE...
-
Page 140: Delete Files
......Delete Files 1. Select images you want to delete. 2. Click the Delete button. IMPORTANT: When clicked, the D including those selected images that may have temporarily scrolled out of view. - Page 141 ......1. Click the D you have made in this work session are saved. 2.
-
Page 143: Reference - Camera
....... . Reference — Camera This section of the manual explains and describes the following: © KODAK camera back and Imager. © Camera back controls. ©... -
Page 144: Kodak Camera Back And Imager
Just after you take a picture, the Nikon N90s camera transmits data such as the ISO, aperture, and shutter speed to the KODAK camera back through the connector cable. After the shutter closes, the camera back uses this information to process the image data. -
Page 145: Timing Considerations
This is a key feature since this design means it is possible for you to update camera firmware yourself as it may be released by Kodak instead of returning the camera for firmware updates. A self-test of camera performance is available to you through a button on the Camera Control panel of the software drivers. -
Page 146: Kodak Camera Back Controls
......KODAK Camera Back Controls Liquid Crystal Display (LCD) A liquid crystal display (LCD) on the KODAK camera back provides status information for the camera. ©... - Page 147 ......LCD CAMERA-OFF GRAPHICS LCD FULL GRAPHICS (For this illustration all items are shown simultaneously, although at no time do all of these items appear together on the LCD.) ISO warning...
-
Page 148: Battery Indicator
......Battery Indicator When the camera is awake, the battery indicator displays the amount of battery life —... -
Page 149: Frames Remaining Indicator - Kodak Camera Back
......Frames Remaining Indicator — KODAK Camera Back The frames remaining indicator displays the number of additional pictures that can be stored on the PCMCIA card currently in the camera. - Page 150 ......seconds while image data are moved from memory in the camera system to the PCMCIA card.
-
Page 151: Iso Warning
......the next picture you take will be numbered 1, then 2, then 3, and so on, even if those numbers are already in use. -
Page 152: Disk Indicator
......Disk Indicator The disk indicator, shown in each of its stages below, appears when you wake the camera. -
Page 153: Control Buttons
Control Buttons Two control buttons — DELETE and SCSI ID — are provided on the KODAK camera back. Both are recessed in the housing and are opera- tional when pressed with a fingertip or other blunt object. SCSI ID button... -
Page 154: Delete Button And Delete Indicator
......DELETE Button and Delete Indicator You use the DELETE button to delete the most recent image on the PCMCIA card. - Page 155 ......Several seconds after you stop deleting images, delete mode turns off; reactivate it, if needed, as described above, and press the DELETE button again.
- Page 156 ......The DELETE button is for emergencies, not for routine operation. As an example of its use, suppose you are beginning to shoot and realize that the PCMCIA card is full, and that you do not have another PCMCIA card.
-
Page 157: Scsi Id Button And Scsi Indicator
......SCSI ID Button and SCSI Indicator You use the SCSI ID button to set the camera SCSI ID. The setting is important when the camera is connected to your computer. - Page 158 ......To set the SCSI ID, first make sure the camera is not connected to your computer .
-
Page 159: Scsi Connector (Kodak Camera Back)
......SCSI Connector (KODAK Camera Back) A single 25-pin, female, subminiature D, SCSI connector appears on the KODAK camera back. -
Page 160: Multipurpose Connector (Kodak Camera Back)
A 7-pin mini-DIN connector on the camera back serves several purposes. © You plug the AC battery charger/adapter directly into this connector. © You connect the Kodak remote shutter release accessory into this connector. Refer to the appendix “Optional Equipment & Spare Parts List” for additional information. ©... -
Page 161: Pcmcia Cards
The camera incorporates a PCMCIA-ATA Type III slot. The camera saves images to the PCMCIA card currently plugged into the KODAK camera back. You can fill one card, remove it, insert another card, and continue shooting. These removable, miniaturized media provide great flexibility since you can carry a significant amount of image storage capability with you into the field or the studio. -
Page 162: Card Busy Light
......Consult the specifications for your cards to determine if their operating limits (for temperature, humidity, etc.), are more restrictive than those for the camera, and if they are, adhere to those limits. - Page 163 ......associated with that single PCMCIA card, or with another part of the camera system.
-
Page 164: Camera Operating Configurations
......Camera Operating Configurations You can use the camera in the following equipment configurations. IMPORTANT: Refer to Chapter 4 for specific cabling and termination details. -
Page 165: Taking Pictures While Connected To The Computer
......Taking Pictures While Connected to the Computer You can take pictures while the camera is connected to the computer (for example in a studio). -
Page 166: Using The Camera Without A Pcmcia Card While Connected To A Computer
......Images are stored on the PCMCIA card as you take them. The camera will not operate once the PCMCIA card is full. -
Page 167: Battery And Ac Battery Charger/Adapter
......Battery and AC Battery Charger/ Adapter Battery Charging for Optimal Capacity IMPORTANT: Do not attempt to remove the battery;... -
Page 168: Ac Battery Charger/Adapter
You can use the supplied AC battery charger/adapter to operate the camera and to charge the battery in the KODAK camera back. You can operate the camera while connected to the supplied AC battery charger/adapter, or you can recharge the battery with the adapter and then use the camera in the field without the adapter. -
Page 169: External Battery Adapter
......The adapter is a universal unit, with a range of 95–250 volts, 47–63 Hz, without a switch. -
Page 170: Recorded Sound
......Recorded Sound The camera can record sound via a built-in microphone positioned in the camera back. -
Page 171: How To Record Sound
......PCMCIA card where it is saved as a sound file. As a result, the card may contain an intermingling of image and sound files. -
Page 172: Recording "Lengthy" Audio Segments
......As sound is being recorded, segments of the disk icon bounce up and back, serving as a level meter (similar to the levels commonly displayed on audio equipment like tape decks). -
Page 173: Sound File Size
......© During the interruption between each 25 second segment, the red Card Busy light on the camera back blinks, and the dot in the disk icon goes off. -
Page 174: On/Off State Of The Kodak Camera Back
As described in this section, it is possible for the camera back to be on when the camera is off. The on/off state of the KODAK camera back depends on the mode of camera operation as follows. ©... -
Page 175: Troubleshooting The Camera
There is no power at Have the power source repaired the power source. and/or try another power source. The AC battery Replace the cable. charger/adapter power cable is faulty. The AC battery Contact Kodak. charger/adapter is faulty. © Reference — Camera 7-33... - Page 176 ......Trouble There are unexpected delays when reading from or writing to a PCMCIA card.
- Page 177 ......Trouble Pressing the camera shutter release button does not release the shutter.
- Page 178 ......Trouble continued from previous page Pressing the camera shutter release button does not release the shutter.
- Page 179 Camera Control panel (this will erase all images and sound files from the card). If the problem persists, contact Kodak; report the number of the error condition. E2 – failure of the PCMCIA card to start.
- Page 180 (This will erase all existing images from the card.) If the problem persists, contact Kodak. Use only the supplied SCSI cables (or other cables as specified in Chapter 4 to attach the camera or other peripherals to the computer.
- Page 181 Blinks when battery is exhausted If the unusual behavior Contact Kodak. continues for over five minutes the battery may need to be replaced by Kodak. The firmware in the Update camera firmware, as camera has become described in Chapter 8.
- Page 182 ......Trouble When the camera is connected to a computer, and/or the camera is being operated with the AC battery charger/ adapter, a connected studio flash will...
-
Page 183: Cleaning The Imager
......Cleaning the Imager The imager is the component of the camera that records light when you take a picture. - Page 184 ......2. Turn off the camera. 3. Remove the lens from the camera. 4.
-
Page 185: Cleaning A Dirty Imager
As you complete these steps, be certain that you do not touch the inside of the camera back (except as instructed). Separating the Camera from the KODAK Camera Back 1. Locate or order cleaning materials for the camera. Cleaning materials are not supplied with all camera models, but can be ordered from ©... - Page 186 ......Kodak. These include an electrostatic discharge (ESD) wrist strap, low- lint web cleaner pads, and a cleaning solution. The wrist strap is used to provide protection against damaging electronic components of the camera back.
- Page 187 ......3. Attach the strap to your hand. 4. Turn off the camera. 5.
- Page 188 ......7. Unscrew the coupling nut at the top of the connector cable and pull straight out to remove the connector cable from the Nikon N90s camera.
- Page 189 ......10. CAUTION: Use extreme caution as you complete this step because the Nikon N90s and the KODAK camera back are connected by two thin wires.
- Page 190 ......11. Push the head of the mounting screw until it is flush against the bottom of the camera back.
-
Page 191: Wiping The Imager
......Wiping the Imager 1. Examine the imager visually. If there is lint on the imager (but not grease, fingerprints, or other dirt), continue at step 9;... - Page 192 ......6. Wipe off residue on the imager surface by wiping repeatedly straight across the imager with a dry corner of the cleaning pad.
-
Page 193: Reassembling The Camera
3. CAUTION: As you complete this step be certain that the thin wires recede into their openings in the Nikon N90s camera and KODAK camera back. Hold down the camera back with one hand while you use the other hand to push the camera body into place against the camera back. - Page 194 ......5. Push the connector cable coupling firmly back into place into the Nikon N90s camera and tighten the coupling nut.
-
Page 195: Using A Flash
......Using a Flash WARNING: Do not connect a non-dedicated electronic flash unit to the camera (hot shoe or PC terminal) without verification from a Nikon authorized service facility that the flash unit is compatible with the camera body. -
Page 196: Calibration (Cal) Files - Dcs 460 Only
......Calibration (CAL) Files — DCS 460 Only In order to use any images taken with your DCS 460 Camera, a “calibra- tion”... -
Page 197: Reference - Kodak Driver Software
© Driver troubleshooting. © IMPORTANT: Throughout this chapter we refer to “Photoshop.” This single reference refers to both the Macintosh and PC versions of Photoshop, and also to other supported PC TWAIN-compliant image-editing software. Reference — Kodak Driver Software ©... -
Page 198: General Features
The driver can display images from a variety of supported Kodak camera types. This means that you can use the same PCMCIA card with different supported Kodak cameras and view all of the images with the same driver. The letters shown on the illustration below correspond to the sections of this chapter in which the labeled items are described. - Page 199 (or a contact sheet of images), immediately into Photoshop. The driver is also designed to allow you to work with your camera in a studio setting. Reference — Kodak Driver Software ©...
- Page 200 To use the driver, you must first install it by following the series of one- time steps described in the chapter “Preparing the Camera and the Com- puter.” Then each time you want to use the driver, you access it as described in those chapters. Reference — Kodak Driver Software ©...
-
Page 201: Defaults - Driver Image Window
In addition, many settings for choices on dialog boxes are also maintained in a preferences file from work session to work session. ONTACT HEET HOTO AYLIGHT Reference — Kodak Driver Software © is the... -
Page 202: Commands
Allows you to work with images from a camera connected to your com- puter or from image archive files that you have previously copied to a folder on your computer hard disk. Reference — Kodak Driver Software © , you can only work with one... -
Page 203: Camera
AMERA option to select a folder containing images you OLDER button) to your computer hard from the S popup menu. OLDER OURCE displays multiple image thumbnails, ONTACT HEET Reference — Kodak Driver Software © AMERA... -
Page 204: Contact Sheet
© color balance them, the revised color balancing applies to all selected images . Using the navigation tool as described just below allows you Reference — Kodak Driver Software © to view all image files from the camera or an... - Page 205 REVIEW REVIEW view. If you click any of REVIEW view. If you click any of the navigation REVIEW Reference — Kodak Driver Software © , the first , that REVIEW...
-
Page 206: Test Shot
If the “test” picture is one that you want to keep, click the K the image is saved to the PCMCIA card in the camera. (The C 8-10 Reference — Kodak Driver Software © REVIEW , if you type an image number into the text area of the... - Page 207 CQUIRE button to save the image to the PCMCIA card in the from the V menu. Subsequent images you take are Reference — Kodak Driver Software © .) If you do not want to , a message warns you that...
-
Page 208: Photoshop Menus
Deselects all selected images. (This choice deselects all images, but does not deselect text when you are within the annotation window.) 8-12 Reference — Kodak Driver Software © and S — are active when you are in... -
Page 209: Acquire As Menu
A ), or whether selected images are each ONTACT HEET is the simpler choice, it is described HOTO is chosen, the driver generates one or more Photoshop Reference — Kodak Driver Software © button, CQUIRE ). These HOTO ONTACT... - Page 210 ......If all selected images do not fit on a single contact sheet, multiple © contact sheets are created. 8-14 Reference — Kodak Driver Software ©...
- Page 211 Friday’s shoot , then the documents would be named Friday’s shoot- 1 , Friday’s shoot-2 , and Friday’s shoot-3 . Additionally, the caption field of the Photoshop file information for the document contains the same text. Reference — Kodak Driver Software 8-15 ©...
-
Page 212: Output Resolution
Exits the dialog box, saving any changes you have made to options in the box (the current settings are saved from one work session to the next), and generates the contact sheets as Photoshop pages. 8-16 Reference — Kodak Driver Software © HUMBNAILS and H... -
Page 213: Take Picture Icon
This icon is active only when a camera is attached to the computer; otherwise, it is dim. must be C , and the camera must be on. OURCE AMERA Menu, C in this chapter for an explanation of these AMERA Reference — Kodak Driver Software © 8-17... - Page 214 The data in this dialog box pertains to the camera currently connected to your computer, and not necessarily to the camera used to take the images you are viewing in the driver image window. 8-18 Reference — Kodak Driver Software ©...
-
Page 215: Load Camera Firmware
For example, if an up- grade to the firmware becomes available and you obtain that upgrade (refer to the appendix “Upgrading Your KODAK Software Driver”), you can copy that new firmware into the camera with this command. It also... -
Page 216: Set Clock
Existing images (and all other data) on the card are permanently removed and cannot be recovered. 8-20 Reference — Kodak Driver Software © button, the current date and time are LOCK... -
Page 217: Recover
The picture you deleted that was overwritten with a new image cannot be recovered. button in the software driver image window. dialog box of the software AMERA ONTROL button. ORMAT button, every image location on the card is ECOVER Reference — Kodak Driver Software © 8-21... -
Page 218: Self Test
Click this button to perform a diagnostic self-test of the camera. Messages inform you of the outcome of the self-test. These data can be helpful for identifying problems before you call Kodak for service. Click this button to close the C 8-22 Reference —... -
Page 219: Preferences Icon
ESOLUTION MAGE dialog box of the Photoshop I menu). MAGE NOTE: If you choose the F option in the C dialog box, a IXED different resolution is established and overrides the setting here. Reference — Kodak Driver Software 8-23 ©... -
Page 220: 12-Bit Acquire
These provide help in understanding the purpose of each item in the window. When off the tags do not appear. NITS NCHES ENTIMETERS Select the desired units — used at several places throughout the software. 8-24 Reference — Kodak Driver Software ©... -
Page 221: Acquired Contact Sheet Layout
The new names are only ONTACT HEET AYOUT ), and T caption colors of acquired contact sheets OUNT dialog box appears that allows you to ENAME Reference — Kodak Driver Software © , slide ACKGROUND or T LIDE OUNT 8-25... -
Page 222: Name
EQUENCE UMBER IGITS TARTING The values you place in the S area determine characters EQUENCE UMBER that are appended to the end of the name you type in the N area of this 8-26 Reference — Kodak Driver Software ©... -
Page 223: Example
ANCEL names of selected images. field, a value from 0 to 99. If you have selected only one button, the driver renames all selected images. ENAME Reference — Kodak Driver Software © field, a value IGITS and S IGITS... -
Page 224: Rotate Clockwise/Counterclockwise Icons
8-28 Reference — Kodak Driver Software © dialog box is explained in detail in the next section. - Page 225 NOTE: You can not simultaneously crop multiple images from different camera types. The DCS 410, DCS 420, and EOS•DCS 5 are the same camera type; the NC2000e and EOS•DCS 3 are the same camera type; and the DCS 460, DCS 465, and EOS•DCS 1 are the same camera type.
-
Page 226: The Crop Dialog Box
Move and reshape the crop rectangle as described next. 8-30 Reference — Kodak Driver Software © dialog box that Stack indicates that multiple images will be cropped. -
Page 227: Method: Freeform And Fixed Size
IXED to reshape the crop rectangle by dragging any edge of , and establish a fixed size for the crop rectangle in the ETHOD Reference — Kodak Driver Software © is the correct choice for is F . Enter the... -
Page 228: Left, Top, Width, And Height
A graphic of a small link appears to the right of the W fields when the option is on. NOTE: When F 8-32 Reference — Kodak Driver Software © dialog box. If this calculation yields a INAL UTPUT... -
Page 229: Final Output
This allows you to determine if the cropping rectangle you have created provides the desired cropping HUTTER ELEASE Reference — Kodak Driver Software © 8-33... -
Page 230: Lighting Menu
Choices are D , and F . The AYLIGHT UNGSTEN LUORESCENT LASH option you select is stored with the images on the PCMCIA card in the 8-34 Reference — Kodak Driver Software ©... -
Page 231: Click-Balance Tool
The ‘checkbox’ appears on the left of the tool, and the ‘eyedropper’ is on the right. © Reference — Kodak Driver Software 8-35... - Page 232 REVIEW therefore allows you to find a click point more easily. With the image you want displayed in P view, move the cursor to a white or light gray REVIEW 8-36 Reference — Kodak Driver Software ©...
- Page 233 If there is no white or light gray area in the image, take a photograph of a neutral gray or white card (for example KODAK Gray Cards, Publication No. R-27) under the same lighting conditions that existed when the image was taken. Then select the image of the card as well as all other images taken under the same lighting conditions.
-
Page 234: Sound Menu
On a PC, sound files are recorded as “.WAV” files. © 8-38 Reference — Kodak Driver Software Sound 1 Sound 2 • •... -
Page 235: Acquire Button
(or the view is T HOTO menu is set to C ONTACT Menu” in this chapter for complete details. menu or quit Photoshop, the window will close Reference — Kodak Driver Software © ), then , then one or more HEET CQUIRE... -
Page 236: Copy To Button
OPY TO driver provided by Kodak. (See the IMPORTANT paragraph below). In addition to complete image data, an image archive file includes: a thumbnail, all text you have typed in the annotation area, camera settings 8-40 Reference —... -
Page 237: Delete Button
— one choice of the S menu as described in this chapter; OLDER OURCE button to delete selected images from their source — ELETE ELETE Reference — Kodak Driver Software © button) with Photoshop or button on the software driver 8-41... -
Page 238: Done Button
When you select a single thumbnail while in contact sheet view, or when you view a preview image or a test shot image, the annotation area and image information window display information about the image. 8-42 Reference — Kodak Driver Software © to close the driver image window and return to... - Page 239 (to select the entire line), and pressing the keyboard delete key. This works to delete all lines except: Camera; Serial #; Width; Height; Date; and Time. dialog box as described in this AMERA ONTROL Reference — Kodak Driver Software © 8-43...
-
Page 240: Navigation Bar
REVIEW In P view when color balancing images, or in the C REVIEW the navigation controls to move through only the subset of selected 8-44 Reference — Kodak Driver Software © First Previous Go To Next view and in P... -
Page 241: Select All Icon
W. The X-Y Cursor Location These values indicate the current X and Y pixel location (in the full image) of the cursor as it moves over the image. menu. ELECT Reference — Kodak Driver Software © 8-45... -
Page 242: Rgb Values At The Cursor Location
You can choose a small size when navigating through images, and then a large size to view the detail of an image or to perform color balancing. Small sizes load faster than larger sizes. 8-46 Reference — Kodak Driver Software ©... -
Page 243: Using Photoshop "Actions" (Macintosh Only)
Example-1: You want a script to acquire all images from a PCMCIA card in the connected camera. 1. Start recording a new action script. 2. Select the driver; you enter the driver image window. view. Reference — Kodak Driver Software © ONTACT HEET 8-47... - Page 244 4. Click the Select All icon. 5. Select C ONTACT 6. Click the A 7. Make choices on the A 8. Click D 8-48 Reference — Kodak Driver Software © from the A menu. CQUIRE button. CQUIRE button; you leave the driver image window.
-
Page 245: Supported Commands
C or F . If you have several different AMERA OLDER selects whichever camera is AMERA OLDER AYLIGHT UNGSTEN Reference — Kodak Driver Software © choice records the , or F LUORESCENT LASH 8-49... -
Page 246: Driver Commands Not Supported
Play all sound files or sound files by number. © A shutter release is not recorded, although clicking T © recorded. 8-50 Reference — Kodak Driver Software © or a C HOTO ONTACT HEET records the settings from this dialog box. -
Page 247: Troubleshooting — Kodak Driver Software
“Cleaning the Imager” in Chapter 7. Some lenses may have a Use a different lens or stop down hot spot, especially less (use a larger aperture). noticeable when you stop down. Reference — Kodak Driver Software © 8-51... - Page 248 The computer crashes when the camera is attached. The computer crashes as the camera is disconnected. 8-52 Reference — Kodak Driver Software © Possible Cause Suggested Solution The image has been Under expose for proper color overexposed. saturation.
- Page 249 The camera is off. Turn on the camera. The camera is not Wake the camera and try again. awake. The camera is off. Turn on the camera. Reference — Kodak Driver Software © 8-53...
-
Page 250: Messages — Kodak Driver Software
......Messages — KODAK Driver Software The software driver designed by Kodak adds new messages to Photoshop. An explanation of those messages — listed in alphabetical order —... - Page 251 Verify that all SCSI connections are camera hardware has correct (if necessary turn off all been detected. equipment to alter the connections), make sure the camera has a unique SCSI ID, and try again. Reference — Kodak Driver Software © 8-55...
- Page 252 Verify that SCSI cables are connected properly, and that the camera has a unique SCSI ID, and then try again.” 8-56 Reference — Kodak Driver Software © Possible Cause Suggested Solution A problem with the Verify that all SCSI connections are...
- Page 253 Install, or reinstall, the ASPI with your software ASPI manager for Windows. This manager for Windows. software, which is not available from Kodak, should be provided with your ASPI Windows host adapter card. Reference — Kodak Driver Software © 8-57...
- Page 254 “Camera ‘Self Test’ failed. Click the ‘Load Camera Firmware’ button and then try the 'Self Test' button again.” 8-58 Reference — Kodak Driver Software © Possible Cause Suggested Solution The battery needs If you are operating without the AC charging.
- Page 255 (CAL) when trying to acquire file is missing, you must obtain the images. file (it was supplied by Kodak with the camera used for the picture) For example you might and place it in the folder with the see this message when a image file.
- Page 256 “Can not open image ‘imageid.’ ” “Can not play sound file.” 8-60 Reference — Kodak Driver Software © Possible Cause Suggested Solution An unusual condition is Try again; if the problem persists, detected when trying to...
- Page 257 Or, if a second PCMCIA card that is known to be DOS formatted is available, replace the current PCMCIA card with the second card. Work with an archive folder instead of this problem PCMCIA card. Reference — Kodak Driver Software © 8-61...
- Page 258 ‘write privileges’ to the disk.” 8-62 Reference — Kodak Driver Software © Possible Cause Suggested Solution The card is not inserted Remove and reinsert the PCMCIA properly in the camera.
- Page 259 An monochrome image When click balancing, work only is selected for color with color images. balancing; color balancing can not be applied to monochrome images. Reference — Kodak Driver Software © 8-63...
- Page 260 WINASPI.DLL. Install or reinstall the WINDOWS ASPI software, and remove other ASPI software if possible.” 8-64 Reference — Kodak Driver Software © Possible Cause Suggested Solution A problem has occurred Restart your computer and try with Windows. again.
- Page 261 Install, or reinstall, the ASPI with your software ASPI manager for Windows. This manager for Windows. software, which is not available from Kodak, should be provided with your ASPI Windows host adapter card. While working within an Click OK to replace the archive archive folder, you have files with the selected files;...
- Page 262 “The camera body is off. Turn it on and try again.” 8-66 Reference — Kodak Driver Software © Possible Cause Suggested Solution When the action is run, You will not be able to use the the driver was unable to script with these images.
- Page 263 Restart. resulting in a SCSI ID (With a Macintosh computer the conflict. CD-ROM drive is often SCSI ID number 3; be certain that you avoid its number.) (Continued on next page.) Reference — Kodak Driver Software © 8-67...
- Page 264 SCSI connectors. Verify that SCSI cables are connected properly.” 8-68 Reference — Kodak Driver Software © Possible Cause Suggested Solution The battery in the camera Operate from the AC battery is dead.
- Page 265 The BIN file is supplied by Kodak on the diskette with the product. The value in the ‘Digits’ Increase the value in the ‘Digits’...
- Page 266 Install or reinstall the WINDOWS ASPI software, and remove other ASPI software if possible.” 8-70 Reference — Kodak Driver Software © Possible Cause Suggested Solution The PCMCIA card in the Since the PCMCIA card is full, you camera is full, and...
- Page 267 A problem has occurred Try the operation again. If with the software driver. necessary, reinstall the TWAIN driver and try again. If the problem continues, contact Kodak. Reference — Kodak Driver Software © 8-71...
- Page 268 The destination folder or disk may be locked, or you do not have ‘write privileges’ to the folder.” 8-72 Reference — Kodak Driver Software © Possible Cause Suggested Solution A TWAIN-compliant Reinstall the TWAIN driver as KODAK Driver has not...
- Page 269 Copy To, and tried to archive folder. save the images into the same folder as the opened archive folder. This is not allowed. Reference — Kodak Driver Software © 8-73...
- Page 270 Select images only from the same simultaneously crop camera type before cropping. multiple images from different camera types. The DCS 410, DCS 420, and EOS•DCS 5 are the same camera types; the NC 2000, NC 2000e, and EOS•DCS 3 are the same camera type;...
-
Page 271: Appendice
Appendices This section includes the following appendices. A — Specifications B — Glossary C — Updating Your KODAK Software Driver D — Repacking Instructions E — Problem Report Form F — Using an Infrared Camera (DCS 420IR Only) G — Technical and Telephone Assistance H —... -
Page 273: Appendix A — Specifications Dcs 410, Dcs 420, Dcs 460, Nc2000E
......Appendix A — Specifications DCS 410, DCS 420, DCS 460, NC2000e KODAK Camera Back ©... - Page 274 NC2000e — Width 20.5 mm x 16.4 mm, 1268 x 1012-pixels. © Image file sizes: DCS 410 — Unacquired image file size: approximately 1.5 megabytes (MB) for each image. Acquired image file size: approximately 4.5 MB for each color image acquired normally at 8-bit acquire (and 9 MB when 12-Bit Acquire is on).
- Page 275 © Twelve bits/color. © Supports ISO settings as follows: DCS 410 — 100 DCS 420c — 100 to 400 DCS 420m — 200 to 800 (You can also shoot at 1600 with possible degraded performance.) DCS 420IR — 200 to 800 (You can also shoot at 1600 with possible degraded performance.)
- Page 276 PCMCIA card being used, and on the camera model as below. DCS 410 — If you continue to press the shutter after the first image, subsequent images are taken approximately every several sec- onds, with the exact time dependent on the type of PCMCIA card being used.
- Page 277 Third-party, optional, PCMCIA hard disk cards, with storage capacity as indicated below for one card size: DCS 410 — A 340 megabyte PCMCIA card stores up to 203 images. DCS 420 (all models) — A 340 megabyte PCMCIA card stores up to 203 images.
- Page 278 DCS 410 — battery provides power for shooting up to 1,000 frames. DCS 420 (all models) — battery provides power for shooting up to 1,000 frames.
- Page 279 35 mm film. DCS 410 and DCS 420 (all models) — The imager produces a field of view equal to using a lens with 2.6 times the focal length of the lens in use as indicated in the representative lenses listed in the following figure.
- Page 280 ......DCS 460 (all models) — The imager produces a field of view equal to using a lens with 1.3 times the focal length of the lens in use as indicated in the representative lenses listed in the following figure.
- Page 281 ......NC2000e — The imager produces a field of view equal to using a lens with 1.5 times the focal length of the lens in use as indicated in the representative lenses listed in the following figure.
-
Page 282: Software Drivers
DCS 410 and DCS 420 (all models) modified focusing screen: DCS 460 (all models) modified focusing screen: NC2000e modified focusing screen: ©... - Page 283 Universal AC battery charger/adapter, 95-250 V AC, 47-63 Hz. Safety: UL, CSA, TUV. © Dimensions. Nikon N90s camera body with KODAK camera back attached: 7.1 in. (18.0 cm) high x 6.7 in. (17.0 cm) wide x 4.5 in. (11.4 cm) deep.
-
Page 285: Appendix B — Glossary
......Appendix B — Glossary This section provides brief explanations of terms used in conjunction with the camera. - Page 286 Card Busy light. A red light labeled C the KODAK Camera Back when data are being read from or written to the PCMCIA card, for example just after you take a picture, or when you move data from a PCMCIA card in the camera to a computer.
- Page 287 The light sensitive object positioned within the camera back that collects light striking it when the shutter is released. KODAK Camera Back. A sealed, one-piece unit produced by Kodak, to which the camera is attached. The camera back includes the hardware features of the product.
- Page 288 Photoshop driver. The software provided by Kodak as part of the camera that allows you to access the camera from your Macintosh computer. It also allows you to acquire images, to set...
- Page 289 ......TWAIN driver. The software provided by Kodak as part of the camera that allows you to access the camera from your PC.
-
Page 291: Appendix C — Updating Your Kodak Software Driver
NOTE: The availability of software downloading service described in this section may vary from area to area. When Kodak prepares updated versions of the software drivers for the camera, it makes those updates available electronically on a public ftp server. Downloading an update from this network is the quickest way to obtain the most current driver. - Page 292 You can order diskettes containing current versions of the KODAK Driver for Adobe Photoshop Software (Macintosh) and/or the KODAK Driver for TWAIN-Compliant Software. If you obtain software directly from Kodak, install it as described in the next section. © Updating Your KODAK Software Driver...
-
Page 293: Installing The Software Driver
The section assumes that you have obtained driver files as described earlier in this appendix. 1. Complete all the steps in “Installing the KODAK Driver” in Chapter 4, except that if the files have been downloaded from a network —... -
Page 295: Appendix D — Repacking Instructions
Warranty Registration card or dated proof of purchase. Please follow these instructions if you need to repack your camera to ship it to Kodak for repair. Be sure to use the original shipping carton and packing materials. (If the original packaging has been discarded or is not available, packing will be at the owner’s expense.) - Page 296 ......7. Place the completed Problem Report Form on the top of (inside) the shipping carton. 8. Close and seal the shipping carton with tape. 9. Ship as instructed by your Kodak representative. © Repacking Instructions...
-
Page 297: Appendix E — Problem Report Form
......Appendix E — Problem Report Form Customer Return Address Name _______________________________________________________________ Company ____________________________________________________________ Address _____________________________________________________________ ____________________________________________________________________... -
Page 299: Appendix F — Using An Infrared Camera (Dcs 420Ir Only)
Appendix F — Using an Infrared Camera (DCS 420IR Only) This appendix provides information for customers who have purchased the KODAK Professional DCS 420IR Digital Camera, the infrared (IR) version of the camera. This appendix assumes that you are familiar with infrared photography, and provides only the following introductory material specific to the DCS 420IR. - Page 300 Many publications contain information about IR photography and IR filters. For example, the “KODAK Photographic Filters Handbook,” CAT No E 152 8108, includes a variety of data on Kodak filters, including filters intended for use in IR photography. These filters can be used with the DCS 420IR.
-
Page 301: Appendix G — Technical And Telephone Assistance
Refer to the messages section of this manual in Chapter 8. Perform the self-test and update the camera firmware. Refer to Chapter 7. Contents and index in this manual. Contact your dealer, then call Kodak at 1-800-23-KODAK (1-800-235-6325). © Technical and Telephone Assistance... - Page 302 Technical and Telephone Assistance Source of Assistance In Canada contact your dealer, then call 1-800-GO-KODAK (1-800-465-6325); elsewhere contact your local Kodak service representative. Contact your dealer, then call Kodak at 1-800-23-KODAK (1-800-235-6325). Contact your dealer, then call Kodak at 1-800-23-KODAK (1-800-235-6325).
-
Page 303: Appendix H — Optional Equipment & Spare Parts List
United States call 1-800-23-KODAK (1-800-235-6325), in Canada call 1-800-GO-KODAK (1-800-465-6325), and elsewhere contact your local Kodak representa- tive, except as noted below. NOTE: None of the items described in this section is supplied with the camera. - Page 304 Description Prints 300 pixels per inch, 24-bit color or eight-bit gray scale images up to 8.5 x 12-inches (21.6 x 30.5-cm) to KODAK EKTATHERM XLS print paper or transparencies. Print time for reflective prints is 1.7 minutes or less at maximum image area including EKTATHERM XTRALIFE (1.2 minutes without...
- Page 305 To order items in this category, contact the individual vendors listed below. NOTES: None of these items is supplied with the camera. Kodak assumes no responsibility for your use of optional equipment from other vendors. Information about additional third party products is placed in a file on your computer when the software driver is installed;...
- Page 306 ......Ordering Spare Parts from Kodak To order any of the following spare parts for your camera, call Kodak Parts Services at 1-800-431-7278 (fax 1-716-588-3051).
- Page 307 ......Part Name Tiffen Hot Mirror Filter Ordering New Manuals from Kodak To order an additional user’s manual, call Kodak Advertising Distribution 8:00 a.m. to 5:00 p.m. (eastern time zone), Monday through Friday, at 1-800-233-1650 (fax 1-716-588-4807). Part Name User’s Manual...
- Page 309 ............
- Page 310 Acquire Contact Sheet dialog 6-9, 8-15 to 8-16 Illustrated 6-9 Acquired Contact Sheet layout (Preferences) 8-25 to 8-30 Acquired image file size DCS 410 A-2 DCS 420 A-2 DCS 460 A-3 NC2000e A-3 Actions (Photoshop) 8-47 to 8-50 Commands not supported 8-50...
- Page 311 Control buttons (KODAK camera back) 7-11 to 7-16 Control programming. See Firmware Control-click 6-9, 8-4 Controls on KODAK camera back 2-5 Copy (Photoshop Edit menu) 8-12 Copy To (Without a PCMCIA card) 7-24 Copy To button 3-6, 6-31, 8-7, 8-26,...
- Page 312 Image information window 6-12, 8-43 Daylight (Lighting popup menu) 8-34 to 8-35, 8-35 DCS 400/EOS•DCS Plug-in 6-4 DCS 410 6-22, 8-29, A-1 to A-11 DCS 410c A-1 DCS 420 6-22, 8-29, A-1 to A-11 DCS 420c A-1 DCS 420IR A-1, F-1...
- Page 313 Compensation (Use with flash) 7-53 Indexes 2-4 Mode 5-5, 5-17 Number (Annotation window) 8-43 External battery adapter 7-27 Ordering from Kodak H-1 Eyedropper cursor 8-36 to 8-37 Illustrated 6-19, 8-36 EZ-SCSI 1-5, 4-12, 4-13, 4-26, 4-34, 7-16 Factory Settings (General prefer-...
- Page 314 © 10-6 Index Keep button 8-10 to 8-11 Test Shot 6-26, 6-27 Without a PCMCIA card 7-24 KODAK camera back 2-3, 7-2 to 7-3 Connector 4-5 Controls 7-4 to 7-18 Defined B-3 LCD "E" errors 8-21 On/Off state 7-32 Sleeps 5-5 KODAK charge coupled device imager.
- Page 315 Mounting screw 2-4 Multiple images (Crop) 8-33 Multiple-exposure mode 5-4 Not supported 5-16 Multipurpose connector 7-pin mini-DIN A-6 KODAK camera back 7-18 Name area (Rename dialog box) 6-11, 8-26 to 8-30 Naming images. See Rename icon Native image data. See Uninterpolated data...
- Page 316 Random access memory. See RAM Raw image data. See Uninterpolated data Read-me file 1-2, 1-4, 1-6, 3-2 Recalibrate the imager (After firmware update) 8-20 Record button (KODAK camera back) 5-14, 7-29 Record sound. See Sound Recover Button 7-21 Camera Control icon 8-21 to 8-22...
- Page 317 Spare parts H-1 to H-5 Specifications A-1 to A-11 SRAM cards 7-19 Starting From (Rename dialog box) 8-26 to 8-30 Status of battery (KODAK camera back) 7-6 Studio flash 7-53 Studio setting 6-26 to 6-28 Crop image 8-29 Systems software...
- Page 318 Units: Inches/Centimeters (General preferences) 8-24 Update camera firmware 3-4, 4-40 to 4-41, 7-3, 8-19 to 8-20 Defined B-5 Update KODAK driver 8-19, C-1 to C-3 User Manual (Ordering) H-5 Utility programs (Recover PCMCIA cards) 5-13, 7-21 VGA or compatible display 1-4...
- Page 320 The information contained herein is based on the experience and knowledge relating to the subject matter gained by Kodak prior to publication, but Kodak makes no warranty, express or implied, with respect to this information. Kodak shall not be liable for any loss or damage, including consequential or special damages, resulting from the use of this information, even if loss or damage is caused by Kodak’s negligence or other fault.
- Page 321 ......Use of the accompanying software is subject to Kodak’s Software License Agreement, which contains Kodak’s limitation of liability terms.
- Page 322 EASTMAN KODAK COMPANY • ROCHESTER, NY 14650 KODAK Professional DCS 410, DCS 420, DCS 460 Digital Cameras Revised 6-97 Part No. 1H6359 Kodak and Kodak Professional are trademarks. Printed in U.S.A.
Need help?
Do you have a question about the DCS 460 and is the answer not in the manual?
Questions and answers