Table of Contents
Advertisement
Advertisement
Table of Contents

Related Manuals for TP-Link TL-WPS510U


Summary of Contents for TP-Link TL-WPS510U
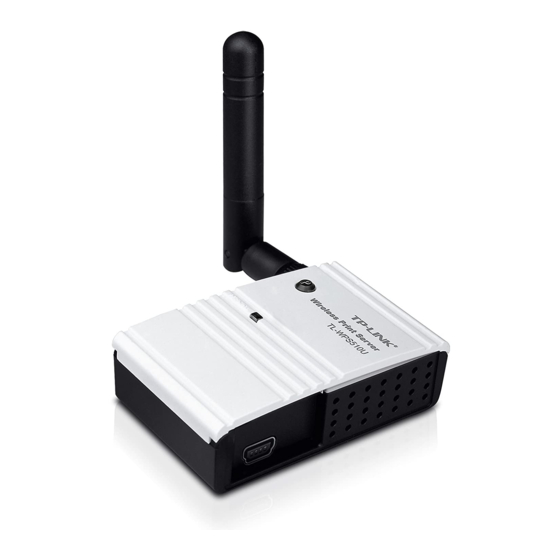
- Page 1 TL-WPS510U Pocket-sized Wireless Print Server Rev: 1.0.0 1910010006...
-
Page 2: Fcc Statement
COPYRIGHT & TRADEMARKS Specifications are subject to change without notice. is a registered trademark of TP-LINK TECHNOLOGIES CO., LTD. Other brands and product names are trademarks or registered trademarks of their respective holders. No part of the specifications may be reproduced in any form or by any means or used to make any derivative such as translation, transformation, or adaptation without permission from TP-LINK TECHNOLOGIES CO., LTD. -
Page 3: Fcc Radiation Exposure Statement
Trademarks NetWare is a registered trademark of Novell Inc and Windows 95/98/Me and Windows NT/2000/XP/2003/Vista are registered trademarks of Microsoft Corp. All other brands and product names are trademarks or registered trademarks of their respective owners. Copyright No part of this publication may be reproduced in any form or by any means or used to make any derivative (such as translation, transformation or adaptation) without the express written consent of the manufacturer as stipulated by the United States Copyright Act of 1976. -
Page 4: Declaration Of Conformity
DECLARATION OF CONFORMITY For the following equipment: Product Description: Wireless Print Server Model No.: TL-WPS510U Trademark: TP-LINK We declare under our own responsibility that the above products satisfy all the technical regulations applicable to the product within the scope of Council Directives:... -
Page 5: Table Of Contents
CONTENTS Chapter 1. Introduction....................1 Product Overview............................1 Network configuration ..........................1 Components and Features........................1 LED Indicators............................1 Chapter 2. Installation....................2 Hardware Installation..........................2 Network Environment ..........................2 2.2.1 Wireless Network with Print Server: ....................2 2.2.2 Wireless Network with Print Server: ....................3 Chapter 3. - Page 6 5.3.1 System Status..........................24 5.3.2 Wireless Status..........................25 5.3.3 Printer Status ........................... 25 5.3.4 TCP/IP Status ..........................26 Setup Menu ............................. 27 5.4.1 System Setup........................... 28 5.4.2 Wireless Setup:..........................28 5.4.3 TCP/IP Setup: ..........................30 Misc................................31 Restart ..............................32 Chapter 6.
-
Page 7: Chapter 1. Introduction
Chapter 1. Introduction 1.1 Product Overview The external print servers enhance capability by letting you place your printers at convenient locations directly on the Ethernet network, and by increasing network printer performance and management. Please note that the print server does not support printing with host-based printers, e.g. CAPT, GDI, PPA. 1.2 Network configuration The print servers provide an embedded web server that can be accessed via a proper web browser. -
Page 8: Chapter 2. Installation
Chapter 2. Installation Before you start, you should prepare the following items: One Windows-based computer with print server setup CD One printer One printer cable One 802.11b/g Access Point (optional) 2.1 Hardware Installation To install the print servers, you need to complete these steps: Confirm that your printer parallel port or USB Port works well. -
Page 9: Wireless Network With Print Server
Infrastructure (Access Point) Mode: Print Server Access Point Printer Laptop Laptop Computer Computer Computer 2.2.2 Wireless Network with Print Server: Username: admin Password: 0000 Wireless Mode: Ad-Hoc (Peer-to-Peer) Channel: 1 SSID: WLAN-PS IP Address: 192.168.0.10 Subnet Mask: 255.255.255.0... -
Page 10: Chapter 3. Print Server Installation
Chapter 3. Print Server Installation 3.1 Preparation The print server supports Standard TCP/IP Port printing protocol – LPR/LPD. This means that the print server supports most popular network operating systems today, including Windows 2000/XP/2003/Vista, Linux and Mac OS 10.2 or above. 3.2 Configuration Solution Table Setup Operating System Function... -
Page 11: Chapter 4. Software Installation
Chapter 4. Software Installation The PSAdmin is a proprietary Windows-based management program that can assist you in configuring and managing your print server. The program can be installed from the setup CD of print server. 4.1 Prepare Your Computer Prepare Your Computerto Connect Wireless Print Server first (Wireless Ad-Hoc Mode): Please specify a proper IP address for your wireless adapter, e.g.192.168.0.101. -
Page 12: Installing The Psadmin And Setup Wizard
4.2 Installing the PSAdmin and Setup Wizard To enable network communication with print server, your computer must have a proper IP address, e.g. 192.168.0.100 (the print server’s default IP is 192.168.0.10) Insert the setup CD into your CD-drive. The autorun program will be started. Choose Installation to install the print server and configure the connected printer. - Page 13 Click Next, the wizard will automatically discover the print server. From the Select A Print Server screen, select the print server port that you want to configure and click Next.
- Page 14 On the Change Settings screen, select No or Yes:...
- Page 15 Click No if you want the print server to keep using the default IP address and the default settings: Username: admin Password: 0000 Ad-Hoc mode Channel: 1 SSID: WLAN-PS Encryption: none DHCP client: Off IP address: 192.168.0.10 Subnet Mask: 255.255.255.0 Or click Yes if you want change wireless settings or assign a static IP address to the print server:...
- Page 16 On the Basic Wireless Settings screen, select Communication Type according to your network: - Infrastructure - Ad-Hoc Enter the proper SSID of your wireless network. - Channel: optional - Data Transmit Rates: select Auto or others - Transmit Mode: select Auto or others On the Wireless Security screen, enable or disable WEP/WPA encryption, configure according to your wireless network and click Next.
- Page 17 Click Add New Printer to launch Windows Add Printer Wizard.
- Page 18 Click Next and select Local Printer, make sure the Automatically detect and install my Plug and Play printer check box is NOT checked. Then click Next. 10) Make sure the Use the following port radio-button is clicked and select LPT1: (Recommended Printer Port) from the pull-down list.
- Page 19 11) Select Manufacturer and Printer from the lists of printer’s driver. Then click Next. 12) If you already have the printer’s driver installed, you will be asked whether to keep it or to replace it. Click Next. Supply a name for the printer and choose whether you want to make it your default printer. Then click Next.
- Page 20 13) Then, choose whether you want to share the printer with other network users, print a test page (please select No.), etc. Select the appropriate radio-button and click Next and Finish. 14) In the setup wizard, finish the installation by highlighting the installed printer in the Select a Printer list and click Next, Next ->...
- Page 21 16) Right-click, select Properties -> Ports and verify that the print server’s port appears.
-
Page 22: How To Create Print Server Port Manually
17) Go to General; click Print Test Page to verify the configuration. 18) Done. Note: If you wish to install more print servers, start setup wizard from your Windows Start menu: start -> All Programs -> Network Print Server -> PSWzard and repeat the installation procedure. 4.3 How to create print server port manually? From your Windows Start menu: start ->... -
Page 23: Using Psadmin
Select Custom, and click Settings. Choose LPR, and input the queue name as lp1. Click OK -> Next -> Finish, to complete the wizard. Click Close -> Apply. Now, the print server port has been created. 4.4 Using PSAdmin After the software of setup CD is successfully installed, starts PSAdmin utility from your Windows Start menu: start ->... - Page 24 Click Wizard button just like a picture < >.and select TCP/IP Wizard. Select “Obtain an IP address from DHCP server”. If there is a DHCP server on your network. This option allows the print server to obtain IP-related settings automatically from your DHCP server. This setting, by default, is disabled.
-
Page 25: Manual Setup
(Optional) In the Subnet Mask option, type the Subnet Mask your LAN or network segment is currently configured to use. (Optional) In the Gateway field, type the IP address of gateway. When done, click OK button. The program will save the above settings into the print server. Done Manual Setup Manual Setup is a configuration program designed for more experienced users. -
Page 26: Wireless
4.6.2 Wireless: User can change the print server’s wireless settings and security to match his current wireless network. -
Page 27: Tcp/Ip
4.6.3 TCP/IP: User can change the print server’s IP address. Default is 192.168.0.10/255.255.255.0. We highly recommend specifying a fixed IP address for the print server 4.7 Upgrade Upgrade allows the user to upgrade the print server device. In order to upgrade the unit please perform the steps as follows: Click Upgrade button just like a picture <... -
Page 28: Reset
Select General Upgrade. Make sure that the upgrade file(mps43.bin) is located in the same directory as PSAdmin. 4.8 Reset Click Reset button just like a picture < >. Reset allows the user to reset the print server device in order to establish a new connection or for new settings to take effect. -
Page 29: Using Embedded Web Server
The embedded web server provides access to configuration and management pages for the print server and the connected peripheral device. 5.2 Using Embedded Web Server Before you can use the embedded web server, the print server must be configured with an proper IP address. -
Page 30: Status Menu
5.3 Status Menu Once you have finished the IP address configuration with print server. You should be use web browser to view and manage the print server. Preparation Enter the print server’s IP address in the Address field of your Web browser. Press Enter. Then the print server page will appear. -
Page 31: Wireless Status
Firmware Version: This option allows you to view firmware version of the print server. To verify the print server’s firmware version is newer in this time. MAC Address: This option allows you to view Node ID of the print server. The Node ID is unique from any print server. -
Page 32: Tcp/Ip Status
Manufacturer: This option allows you to view manufacturer of the printer. When the printer connected with the print server, it will be show in the manufacture box. Model Number: This option allows you to view model of the printer. When the printer connected with the print server, it will be show in the model box. -
Page 33: Setup Menu
Use DHCP/BOOTP: This option allows you to view DHCP/ BOOTP status. If there is a DHCP/BOOTP server on your network, this option allows the print server to obtain IP-related settings automatically from your DHCP server. IP Address: This option allows you to view IP address from the print server. The IP address must meet the IP addressing requirements of the network segment. -
Page 34: System Setup
5.4.1 System Setup Click Setup, it then appears the sub-menu. Click System, it then as shown in the following picture. Print Server Name: This option allows you to input device name of the print server. To correct the print server’s device name. Password: This option allows you to change password of the print server. - Page 35 Basic Settings: Network Type: To change the WLAN type to Ad-Hoc(default) or Infrastructure. SSID: To change the SSID to connect an existing wireless network.(default: WLAN-PS) Channel: Indicates the channel setting for this print server. Transmission Rate: Select the basic transfer rates based on the speed of wireless network. Wireless Mode: Select the WLAN mode based on the existing wireless network Advanced Settings: Security Type: To change the wireless security settings based on the existing wireless network.
-
Page 36: Tcp/Ip Setup
The print server provides three kind of security settings: WEP (64/128bit), WPA (TKIP/AES (CCMP)) and WPA2 (TKIP/AES (CCMP)) to fit an existing security setting of wireless network. WPA-PSK and WPA2-PSK support Infrastructure mode only. And the following site survey table will provide a list of existing wireless network. You can choose one to join. -
Page 37: Misc
Subnet Mask: This option allows you to input subnet mask from the print server. The IP address must meet the IP addressing requirements of the network segment. Default Router: This option allows you to input gateway from the print server. This IP address of gateway must meet the router or gateway to go across of the network segment. -
Page 38: Restart
Firmware Upgrade: To upgrade your print server with the up-to-date firmware. 5.6 Restart Click OK to reboot the print server. -
Page 40: Chapter 6. Tcp/Ip Lpr Port Printing Installation
Chapter 6. TCP/IP LPR Port Printing Installation DHCP The print server supports DHCP feature, allowing the print server to obtain an IP address and related TCP/IP settings automatically from a DHCP server. While the print server supports DHCP, we strongly recommend you manually specify a fixed IP address to the print server. - Page 41 In the Add Standard TCP/IP Printer Port Wizard box as shown in the following picture, Select Custom, Click Settings button, and click Next.
-
Page 42: Mac Os 10.4 And Linux Lpr/Lpd Installation
In the Configure Standard TCP/IP Port Monitor box as shown in the following picture, select LPR form Protocol, type in a queue name: lp1. Click OK, and Next. Click Finish. 10) Select the appropriate printer manufacturer and printer type list and click Next. 11) Type in a new Printer name or leave it in default, and click Next button. -
Page 43: Redhat Linux 9/Fedora Core
From the Printer Setup Utility, click Add. Click IP Printer and select Line Printer Daemon – LPD. Input the IP address of print server and the Queue name: lp1. Choose a proper printer model from the Print Using. Then click Add. 6.3 Redhat Linux 9/Fedora Core The Print Server can work under any Linux-based systems, including Slackware, RedHat, etc, without any problems. - Page 44 Basically, the Linux's printing system is based on BSD system. Although many commercial Linux systems are available in the market and their commands will vary slightly, depending upon which version is used, the functionality of the Linux-based variants is exactly the same. Following are the outlined procedures (recommended for all users) on Red Hat Linux or later with X-Window system installed.
- Page 45 In the Name field, type a user-defined name, click Forward. In the Queue Type field, choose Networked UNIX. In the Server field, type the IP address of print server 10) In the Queue field, type a print server’s port name, which connect to the printer. For example: lp1. 11) Click Forward button.
- Page 46 13) Choose the model of printer and click Forward. 14) Done.
-
Page 47: Chapter 7. Upgrading Print Server
Chapter 7. Upgrading Print Server 7.1 Overview Upgrading print server will allow you to upgrade its firmware inside the print server while the newer software version of the print server is available from your local dealer. Depending on the different systems users might use, this chapter is divided into several Sections;... -
Page 48: Chapter 8. Troubleshooting
Chapter 8. Troubleshooting General Troubleshooting Overview The most common problems, which cause the print server to perform improperly, are covered in this chapter. If a problem still exists after reading this chapter, please contact your dealer for technical support. LED Light Indicators The print server is equipped with LED lights to assist in diagnosing problems that are the result of the network and/or the print server hardware itself. -
Page 49: Appendix A: Reset Button
Reset Button Appendix A: Perform a Factory Default: 1. Disconnect the external power adapter. 2. Hold down the reset button. 3. Reconnect the external power adapter. Wait about 15 seconds. 4. Release the reset button. 5. The print server will restart, the POST time needs 40 seconds. WARNING: This will erase all settings of print server to default and should be performed with caution! After performing a factory default, the default settings will be:... -
Page 50: Appendix B: Frequently Asked Questions
Frequently Asked Questions Appendix B: Question A: Print jobs are sent to the print queue successfully, but fail to be sent to the printer. Possible explanations: The Print server Name/Print Queue configuration is incorrect. The Print server name specified and stored in the print server memory doesn’t match the same one. -
Page 51: Appendix C: Additional Installation Instructions
Appendix C: Additional Installation Instructions Panasonic KX-P6100/6300/6500 If you are using a Panasonic KX-P6100/6300/6500 laser printer with the print server through the Network Print Port under Windows 95/98, please redirect the printer named “Panasonic KX-P6100 PCL” or “Panasonic KX-P6300 PCL”, or “Panasonic KX-P6500 PCL” to the print server through the Network Print Port.
Need help?
Do you have a question about the TL-WPS510U and is the answer not in the manual?
Questions and answers