Table of Contents
Advertisement
Available languages
Available languages
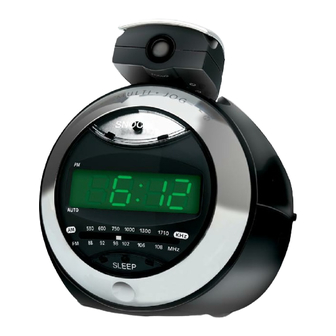
Projection AM/FM Clock Radio
EN
Instruction Manual ..........................................Page 2
Radio AM/FM de Proyección con Reloj
ES
Manual de Instrucciones ............................. Página 18
Radio Réveil AM/FM à Projection
FR
Mode d'emploi ...............................................Page 34
Please read carefully before use • Léa el manual antes de usar •
CRA79
Veuillez lire ce livret avant utilisation
Advertisement
Table of Contents

Related Manuals for Coby CRA79 - Digital Projection AM/FM Alarm Clock


Summary of Contents for Coby CRA79 - Digital Projection AM/FM Alarm Clock
- Page 1 CRA79 Projection AM/FM Clock Radio Instruction Manual ..........Page 2 Radio AM/FM de Proyección con Reloj Manual de Instrucciones ......Página 18 Radio Réveil AM/FM à Projection Mode d’emploi ..........Page 34 Please read carefully before use • Léa el manual antes de usar • Veuillez lire ce livret avant utilisation...
- Page 2 Controls Page 2 Coby Electronics Corporation...
- Page 3 Controls AC POWER CORD FM ANTENNA WIRE SNOOZE BUTTON BATTERY COMPARTMENT SETTING SWITCH (RUN/ALM/TIME) POWER SWITCH (ON/AUTO/OFF) LED DISPLAY ROTARY SET DIAL SLEEP BUTTON TUNING CONTROL DIAL AM/FM BAND SELECTION SWITCH VOLUME/BUZZ DIAL PROJECTOR PROJECTION SWITCH (ON/OFF) PROJECTION MINUTE SETTING PROJECTION HOUR SETTING FOCUS PROJECTION TIME SET BUTTON...
- Page 4 AC connection. If the AC connection is interrupted, the clock will continue to mark the correct time internally. The time will not be displayed until AC power is recon- nected. Page 4 Coby Electronics Corporation...
-
Page 5: Radio Operation
Radio Operation Set the POWER SWITCH (6) to the ON position. Set the AM/FM BAND SELECTION SWITCH (11) to the desired bandwicth. Use the TUNING CONTROL (10) to select the desired station. Adjust the volume level using the VOLUME CONTROL DIAL (12). -
Page 6: Clock Operation
H (hour) button until the desired hour is displayed. To set the minute, hold down the T (time) button while simultaneously pressing the M (minute) button until the desired minute is displayed. Page 6 Coby Electronics Corporation... - Page 7 Clock Operation Adjusting the focus will cause the lens to extend from the projector unit. If you do not wish to use the projector feature, you must fully retract the lens before folding the projector back into its port. Maximum projection distance is 3 – 9 feet. www.cobyusa.com Page 7...
-
Page 8: Alarm Functions
Wake to buzzer Once the alarm time is set, rotate the VOLUME dial to the right until it clicks into place at BUZZ position. Set the POWER switch to the AUTO position to set the alarm. Page 8 Coby Electronics Corporation... -
Page 9: Snooze Function
Alarm Functions Snooze Function When alarm sounds, you may temporarily stop it by press- ing the SNOOZE button on the top of the clock face. The alarm will go off again after 9 minutes. Switching Off the Alarm To switch off the alarm, set the POWER switch to the OFF position. - Page 10 Alarm Functions You may both fall asleep and wake to the radio by setting the Alarm and Sleep functions as indi- cated above. Page 10 Coby Electronics Corporation...
- Page 11 Specifcations Frequency range: AM 530 – 1710 kHz FM 88 – 108 MHz Speaker impedance: 8 ohm Battery backup: 9V battery (not included) Power source: 120V ~ 60 Hz WARNING: To reduce the risk of fire or electric shock, do not expose this appliance to moisture.
-
Page 12: Troubleshooting
If you have a problem with this device, please check our website at www.cobyusa.com for Frequently Asked Questions (FAQs) and firmware updates. If these resources do not resolve the problem, please contact Technical Support. Address Coby Electronics Technical Support 56-65 Rust Street Maspeth, NY 11378 Email techsupport@cobyusa.com www.cobyusa.com Phone 800-727-3592: Mon–Fri, 8:00AM–11:00PM EST... -
Page 13: Safety Notices
Safety Notices The lightning flash with arrowhead symbol within an equilateral triangle is intended to alert the user to the presence of uninsu- lated “dangerous voltage” within the product’s enclosure that may be of sufficient magnitude to constitute a risk of electric shock. The exclamation point within an equilateral triangle is intended to alert the user to the presence of important operation and servic- ing instructions in the literature accompanying the appliance. -
Page 14: Fcc Statement
FCC rules. Do not make any changes or modifications to the equipment unless otherwise specified in the manual. If such changes or modifications should be made, you could be required to stop operation of the equipment. Page 14 Coby Electronics Corporation... -
Page 15: Important Safety Instructions
Safety Notices Important Safety Instructions Read Instructions: All the safety and operating instructions should be read before the product is operated. Retain Instructions: The safety and operating instructions should be retained for future reference. Heed Warnings: All warnings on the product and in the operating instructions should be adhered to. - Page 16 Heat: The product should be situated away from heat sources such as radiators, heat registers, stoves, or other products (including am- plifiers) that produce heat. Page 16 Coby Electronics Corporation...
- Page 17 www.cobyusa.com Page 17...
- Page 18 Controles Page 18 Coby Electronics Corporation...
- Page 19 Controles CABLE DE ALIMENTACIÓN CA CABLE DE ANTENA FM BOTÓN DE REPETICIÓN DE ALARMA COMPARTIMIENTO DE BATERÍAS INTERRUPTOR DE CONFIGURACIÓN (FUNCIONA- MIENTO / ALARMA / HORA) INTERRUPTOR DE ENCENDIDO (ENCENDIDO / AUTOMÁTICO / APAGADO) PANTALLA LCD SELECTOR DE FUNCIÓN ROTANTE BOTÓN SLEEP (APAGADO) DIAL DE CONTROL DE SINTONIZACIÓN INTERRUPTOR DE SELECCIÓN DE BANDA AM / FM...
-
Page 20: Conexión De Alimentación
CA. Si la conexión de CA se interrumpe, el reloj contin- uará manteniendo la hora correcta internamente. La hora no se mostrará hasta que la conexión de CA esté reestablecida. Page 20 Coby Electronics Corporation... -
Page 21: Funcionamiento De La Radio
Funcionamiento de la Radio Coloque el INTERRUPTOR DE ENCENDIDO (6) en la posición “ON” (encendido). Coloque el INTERRUPTOR DE SELECCIÓN DE BANDA AM / FM (11) en la banda deseada. Sintonice la estación deseada con el CONTROL DE SINTONIZACIÓN (10). Ajuste el nivel de volumen utilizando el DIAL DE CONTROL DE VOLUMEN (12). -
Page 22: Modo Reloj
Ajuste la perilla “FOCUS” (foco) hasta que la proyección de la pantalla aparezca en foco. Puede necesitar atenuar las luces a fin de poder ver la proyección claramente. Page 22 Coby Electronics Corporation... - Page 23 Modo Reloj Para ajustar la hora, mantenga presionado el botón “T” (tiempo) al mismo tiempo que presiona el botón “H” (hora) hasta que se muestre la hora deseada. Para ajustar los minutos, mantenga presionado el botón “T” (tiempo) al mismo tiempo que presiona el botón “M”...
-
Page 24: Modo De Alarma
Una vez configurada la hora de alarma, asegúrese de que la radio esté sintonizada en la estación correcta, y en un nivel de volumen deseado. Configure el interruptor de encendido en la posición AUTO (automático) para configurar la alarma. Page 24 Coby Electronics Corporation... -
Page 25: Alarm Functions
Alarm Functions Despertador a zumbador Una vez configurada la hora de alarma, gire el dial de VOLUMEN hacia la derecha hasta que haga clic en la posición “BUZZ” (zumbador). Configure el interruptor de encendido en la posición AUTO (automático) para configurar la alarma. - Page 26 Para apagar la radio antes de que finalice la cuenta regresiva, presione el botón SNOOZE. Puede tanto dormirse como despertarse con la radio, configurando las funciones de alarma y de espera como se indica anteriormente. Page 26 Coby Electronics Corporation...
-
Page 27: Especificaciones
Especificaciones Rango de frecuencias: AM 530 – 1710 kHz FM 88 – 108 MHz Impedancia del altavoz: 8 ohm Batería de respaldo: Bateria de 9 volt (no incluida) Alimentación: 120V ~60 Hz Para reducir el riesgo de incendio o descarga eléc- trica, no exponga este artefacto a la humedad. -
Page 28: Solución De Problemas
Preguntas Frecuentes (FAQ) en nuestro sitio Internet www.cobyusa.com y las actualizaciones de firmware. Si estos recursos no le solucionan el problema, comu- níquese con Soporte Técnico. Domicilio Coby Electronics Technical Support 56-65 Rust Street Maspeth, NY 11378 Email techsupport@cobyusa.com La Red www.cobyusa.com... -
Page 29: Avisos De La Seguridad
Avisos de la Seguridad El relámpago con el símbolo de flecha dentro de un triángulo equilátero tiene el propósito de advertir al usuario de la presencia de voltaje peli- groso no aislado dentro del gabinete del producto que puede ser de sufi- ciente magnitud como para constituir un riesgo de descarga eléctrica. -
Page 30: Declaración De La Fcc
No efectúe cambios ni modificaciones al equipo, excepto en caso de que así lo espe- cifique el manual. Si se deben efectuar tales cambios o modificaciones, se le solicitará que detenga el funcionamiento del equipo. Page 30 Coby Electronics Corporation... -
Page 31: Consignes De Sécurité Importantes
Avisos de la Seguridad Consignes de Sécurité Importantes Lea las instrucciones: Deberá leer todas las instrucciones de seguridad y funcionamiento, antes de poner en funcionamiento este producto. Conserve las instrucciones: Deberá conservar las instrucciones de seguridad y funcionamiento para referencia futura. Preste atención a las advertencias: Deberá... - Page 32 Calor: El producto debe ubicarse lejos de fuentes de calor tales como radiadores, rejillas de aire caliente, estufas u otros productos (incluidos amplificadores) que produzcan calor. Page 32 Coby Electronics Corporation...
- Page 33 www.cobyusa.com Page 33...
- Page 34 Contrôles Page 34 Coby Electronics Corporation...
- Page 35 Contrôles CORDON D’ALIMENTATION SECTEUR FIL D’ANTENNE FM BOUTON DE RAPPEL D’ALARME COMPARTIMENT A PILES REGLAGE D’INTERRUPTEUR (MARCHE/ALM/HEURE) INTERRUPTEUR MARCHE/ARRÊT (MARCHE/AUTO/ ARRÊT) AFFICHEUR LED CADRAN REGLE ROTATIF BOUTON DE VEILLE AJUSTEMENT DU CADRAN DE COMMANDE INTERRUPTEUR DE SELECTION DE BANDE AM/FM CADRAN DE VOLUME/AVERTISSEUR SONORE PROJECTEUR INTERRUPTEUR DE PROJECTION (MARCHE/ARRÊT)
- Page 36 CA. Si la connexion CA est interrompue, le réveil continuera à marquer l’heure exacte en in- terne. L’heure ne sera pas affichée jusqu’à ce que l’alimentation CA soit reconnectée. Page 36 Coby Electronics Corporation...
-
Page 37: Mode Radio
Mode Radio Positionnez le BOUTON MARCHE/ARRÊT (6) sur « ON ». Réglez l’INTERRUPTEUR DE SELECTION DE BANDE AM/FM (11) à la bande passante désirée. Utilisez la COMMANDE DE SYNTONISATION (10) pour sélectionner la station désirée. Ajustez le niveau de volume en utilisant le CADRAN DE COMMANDE DE VOLUME (12). -
Page 38: Mode Horloge
Etendez l’unité de projecteur et dirigez la lentille avant vers un mur ou une autre surface. Ajustez le sélecteur de FOCUS jusqu’à ce que l’affichage projeté apparaîsse bien. Vous pouvez avoir besoin de baisser les lumières afin de voir clairement l’affichage. Page 38 Coby Electronics Corporation... - Page 39 Mode Horloge Pour régler l’heure, maintenez le bouton T (temps) enfoncé tout en appuyant sur le bouton H (heures) jusqu’à ce que l’heure désirée soit affichée. Pour régler les minutes, maintenez le bouton T (temps) enfoncé tout en appuyant sur le bouton M (minutes) jusqu’à...
- Page 40 ARRÊT sur « AUTO » pour mettre l’alarme en marche. Réveil au son de l’avertisseur sonore Une fois que l’heure de l’alarme est réglée, faites tourner le cadran de VOLUME vers la droite jusqu’à ce qu’il Page 40 Coby Electronics Corporation...
-
Page 41: Arrêt De L'alarme
Mode d’Alarme s’enclenche en place sur la position « BUZZ » (AVERTISSEUR SONORE). Positionnez le bouton MARCHE/ARRÊT sur « AUTO » pour mettre l’alarme en marche. Fonction Rappel D’alarme (Snooze) Lorsque l’alarme sonne, vous pouvez l’arrêter temporai- rement en appuyant sur le bouton RAPPEL D’ALARME (SNOOZE) sur le haut du réveil. - Page 42 Pour éteindre la radio avant que le compte à rebours ne soit terminé, appuyez sur le bouton de RAPPEL D’ALARME (SNOOZE). Vous pouvez vous endormir et vous réveiller au son de la radio en réglant les fonctions d’Alarme et de Veille comme indiquées ci-dessus. Page 42 Coby Electronics Corporation...
- Page 43 Specificites Plage de fréquence : AM 530 – 1710 kHz FM 88 – 108 MHz Impédance de Haut-Parleur : 8 ohm Pile de secours : Pile de 9V (non incluse) Source d’alimentation : 120V ~60 Hz AVERTISSEMENT : Afin d’éviter tout risque d’incendie ou de choc électrique, n’exposez pas cet appareil à...
-
Page 44: Dépannage
(Foire aux questions) et vérifier la disponibilité des mises à jour des micrologiciels. Si ces ressources ne vous aident pas à résoudre le problème, veuillez communiquer avec le service d’assistance technique. Adresse Coby Electronics Technical Support 56-65 Rust Street Maspeth, NY 11378 Email techsupport@cobyusa.com Site Web www.cobyusa.com... -
Page 45: Notices De Sûreté
Notices de Sûreté Le symbole en forme d’éclair fléché placé dans un triangle équi- latéral informe l’utilisateur de la présence de “tensions dangere- uses” non isolées au sein du boîtier du produit dont l’amplitude peut constituer un risque de décharge électrique. Le point d’exclamation placé... -
Page 46: Déclaration Fcc
Ne pas effectuer de changements ou de modifications a cet appareil, à moins que cela ne soit indiqué dans ce manuel. Si de telles modifications devaient être faites, il faudra peut-être que vous arrêtiez d’utiliser cet appareil. Page 46 Coby Electronics Corporation... - Page 47 Notices de Sûreté Consignes de Sécurité Importantes Lisez les instructions : Toutes les instructions de sécurité et de fonc- tionnement devraient être lues avant utilisation. Gardez ces instructions : Vous devriez conserver ce manuel pour référence future. Mises en garde : Vous devriez respecter tous les avertissements et toutes les instructions pour ce produit.
- Page 48 Chaleur : Ce produit devrait être placé loin de sources de chaleur comme des radiateurs, des indicateurs de chaleur, de cuisinières ou autres produits (y compris des amplificateurs) étant source de chaleur. Page 48 Coby Electronics Corporation...
- Page 49 www.cobyusa.com Page 49...
- Page 50 Page 50 Coby Electronics Corporation...
- Page 51 www.cobyusa.com Page 51...
- Page 52 Coby is a registered trademark of Coby Electronics Corporation. Printed in China. COBY es la marca registrada de COBY Electronics Corporation. Imprimido en China. Coby est une marque de fabrique de Coby Elec- tronics Corporation. Imprimé en Chine. [CODE]...
Need help?
Do you have a question about the CRA79 - Digital Projection AM/FM Alarm Clock and is the answer not in the manual?
Questions and answers