Samsung HW-S50A Manual
- Full manual (96 pages) ,
- Full manual (47 pages) ,
- Full manual (182 pages)
Advertisement
- 1 CHECKING THE COMPONENTS
- 2 PRODUCT OVERVIEW
- 3 USING THE REMOTE CONTROL
- 4 CONNECTING THE SOUNDBAR
- 5 USING A WIRED CONNECTION TO THE TV
- 6 USING A WIRELESS CONNECTION TO THE TV
- 7 CONNECTING AN EXTERNAL DEVICE
- 8 CONNECTING A USB STORAGE DEVICE
- 9 CONNECTING A MOBILE DEVICE
- 10 INSTALLING THE WALL MOUNT
- 11 INSTALLING THE SOUNDBAR IN FRONT OF TV
- 12 SOFTWARE UPDATE
-
13
TROUBLESHOOTING
- 13.1 Soundbar does not turn on
- 13.2 Soundbar works erratically
- 13.3 In case the remote control does not work
- 13.4 Soundbar does not output any sound
- 13.5 Soundbar does not connect via Bluetooth
- 13.6 Sound drops out when connected via Bluetooth
- 13.7 Bluetooth multi connection does not work
- 13.8 Soundbar does not turn on automatically with the TV
- 14 IMPORTANT NOTES ABOUT SERVICE
- 15 SPECIFICATIONS AND GUIDE
- 16 SAFETY INFORMATION
- 17 PRECAUTIONS
- 18 Documents / Resources
CHECKING THE COMPONENTS

- For more information about the power supply and power consumption, refer to the label attached to the product. (Label: Bottom of the Soundbar Main Unit)
- To purchase additional components or optional cables, contact a Samsung Service Centre or Samsung Customer Care.
- For more information about the wallmoun.
- Design, specifications are subject to change without prior notice.
- The appearance of the accessories may differ slightly from the illustrations above.
Inserting Batteries before using the Remote Control (AA batteries X 2)
Slide the back cover in the direction of the arrow until it is completely removed. Insert 2 AA batteries (1.5V) oriented so that their polarity is correct. Slide the back cover back into position.

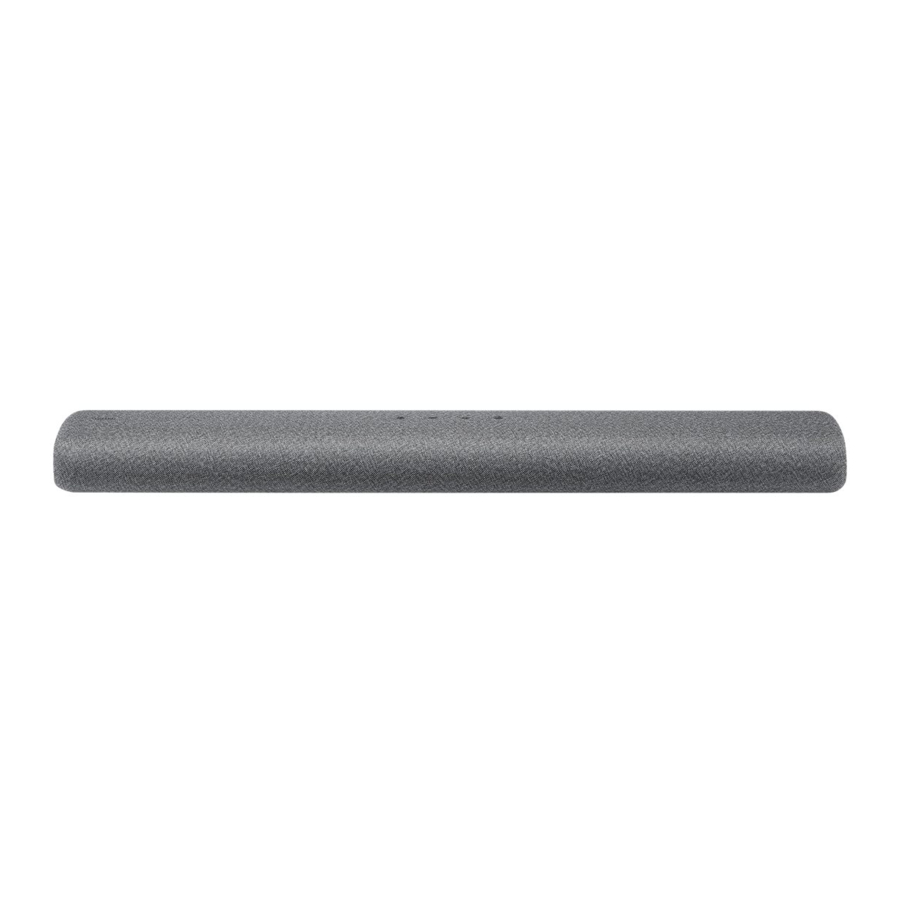
PRODUCT OVERVIEW
Top Panel of the Soundbar

| 1 | LED indicator | The LED Indicator flashes, glows, or changes colour depending on the Soundbar's current mode or status. The colour of the LED indicator and the number of lights indicate the active mode as described below.
| ||||||||||||
| 2 | Power | Turns the power on and off. | ||||||||||||
| 3 | Volume | Adjusts the volume. | ||||||||||||
| 4 | Source |
| ||||||||||||


- When you plug in the AC cord, the power button will begin working in 4 to 6 seconds.
- When you turn on this unit, there will be a 4 to 5 second delay before it produces sound.
- If you hear sounds from both the TV and Soundbar, go to theSettings menu for the TV audio and change the TV speaker to External Speaker.
Bottom Panel of the Soundbar

| 1 | USB (5V 0.5A) Connect a USB device here to play music files stored on the USB device through the Soundbar. |
| 2 | DC 24V (Power Supply In) Connect the AC/DC power adapter. |
| 3 | DIGITAL AUDIO IN (OPTICAL) Connect to the digital (optical) output of an external device. |
| 4 | HDMI (ARC) Connect to the HDMI (ARC) port on a TV. |
- When disconnecting the power cable of the AC/DC power adapter from a wall outlet, pull the plug. Do not pull the cable.
- Do not connect this unit or other components to an AC outlet until all connections between components are complete.
USING THE REMOTE CONTROL
How to Use the Remote Control

| 1 | Power Turns the Soundbar on and off.
| ||||||||||||||||
| 2 |  (Source) (Source)Press to select a source connected to the Soundbar. | ||||||||||||||||
| 3 |  (Mute) (Mute)Press the (Mute) button to mute the sound. Press it again to unmute the sound.
| ||||||||||||||||
| 4 | SOUND MODE
| ||||||||||||||||
| 5 |
| ||||||||||||||||
| 6 |  (Play / Pause) (Play / Pause)You can also play or pause music by pressing the button in "USB" mode. | ||||||||||||||||
| 7 | Up/Down/Left/Right Press Up/Down/Left/Right on the button to select or set functions.
| ||||||||||||||||
| 8 |  (Sound Control) (Sound Control) By pressing the button, you can select the desired audio mode. The desired settings can be adjusted using the Up/Down buttons. Each time the mode changes, the Multicolour LED blinks in white.
7 Band EQ
| ||||||||||||||||
| 9 | WOOFER (BASS) LEVEL When subwoofer is connected, push the button up or down to adjust the woofer level to -12 or between -6 to +6. When subwoofer is disconnected, push the button up or down to adjust the bass level between -6 to +6. To set the woofer (bass) volume level to 0 (Default), press the button. (If Soundbar connected to wireless subwoofer (sold separately)). | ||||||||||||||||
| 10 | VOLUME Push the button up or down to adjust the volume.
| ||||||||||||||||


Using the Hidden Buttons (Buttons with more than one function)
| Hidden Button | |
| Remote Control Button | Function |
| WOOFER (Up) | TV remote control On/Off |
| Left | TV Auto connect On/Off |
| Up | ID SET |
 (Sound Control) (Sound Control) | 7 Band EQ |
| SOUND MODE | DRC On/Off |
| Bluetooth Power On/Off | |
 PAIR PAIR | Bluetooth Multi connection On/Off |
Output specifications for the different sound effect modes
| Effect | Input | Output | ||
| With Soundbar only | With Subwoofer Only | With Subwoofer & Wireless Rear Speaker Kit | ||
| Adaptive Sound | 2.0 ch | 3.0 ch | 3.1 ch | 5.1 ch |
| 5.1 ch | 3.0 ch | 3.1 ch | 5.1 ch | |
| Music | 2.0 ch | 3.0 ch | 3.1 ch | 5.1 ch |
| 5.1 ch | 3.0 ch | 3.1 ch | 5.1 ch | |
| DTS Virtual: X | 2.0 ch | 3.0 ch | 3.1 ch | 5.1 ch |
| 5.1 ch | 3.0 ch | 3.1 ch | 5.1 ch | |
| Standard | 2.0 ch | 2.0 ch | 2.1 ch | 2.1 ch |
| 5.1 ch | 3.0 ch | 3.1 ch | 5.1 ch | |
- The Samsung Wireless Rear Speaker Kit, and Subwoofer can be purchased separately. To purchase a Kit or the Subwoofer, contact the vendor you purchased the Soundbar from.
Adjusting the Soundbar volume with a TV remote control
Adjust the Soundbar volume using the TV's remote control.
|
TV remote control On/Off
- Turn Off the Soundbar.
- Push up and hold the WOOFER button for 5 seconds.
Each time you push the WOOFER button up and hold it for 5 seconds, the mode switches in the following order: "Off-TV Remote" (Default mode), "Samsung-TV Remote", "All-TV Remote".
The LED indicator status changes each time the mode is changed, as shown below.
| Remote Control Button | LED Indicator | Status |
 |  | Disable the TV remote control. |
 |  | Enable a Samsung TV's IR remote control. |
 |  | Enable a third-party TV's IR remote control. |
CONNECTING THE SOUNDBAR
Connecting Electrical Power
Use the power components to connect the Soundbar to an electrical outlet in the following order:
Connecting an SWA-W500 (Sold Separately)
- For more information about the required electrical power and power consumption, refer to the label attached to the product. (Label: Bottom of the Soundbar Main Unit)
- First connect the power cable to the AC/DC adapter.
Connect the AC/DC adapter (with the power cable) to the Soundbar. - Connect the power cord to a wall socket.
NOTES
- If you unplug and reconnect the power cord when the product is turned on, the Soundbar turns on automatically.
- Make sure to rest the AC/DC Adapter flat on a table or the floor. If you place the AC/DC Adapter so that it is hanging with the AC cord input facing upwards, water or other foreign substances could enter the Adapter and cause the Adapter to malfunction.
Connecting an SWA-9100S (Sold Separately)
Expand to true wireless surround sound by connecting the Samsung Wireless Rear Speaker Kit (SWA-9100S, sold separately) to your Soundbar.
- Connect the Wireless Receiver Module to 2 Surround Speakers.
- When connecting the speaker cable, connect the core wire to the speaker.

- The speaker cables are colour coded.

- When connecting the speaker cable, connect the core wire to the speaker.
- Check the standby status of the Wireless Receiver Module after plugging it into an electrical outlet.
- The LINK LED indicator (blue LED) on the Wireless Receiver Module blinks. If the LED does not blink, press the ID SET button on the back of the Wireless Receiver Module with a pen tip for 5~6 seconds until the LINK LED indicator blinks (in Blue). For more about the LED, please refer to the SWA-9100S user manual.

- The LINK LED indicator (blue LED) on the Wireless Receiver Module blinks. If the LED does not blink, press the ID SET button on the back of the Wireless Receiver Module with a pen tip for 5~6 seconds until the LINK LED indicator blinks (in Blue). For more about the LED, please refer to the SWA-9100S user manual.
- ID SET
Press the Up button on the remote control for 5 seconds.- Until pairing is complete, the Multicolour LED changes as Red → Green → Blue in turn.
Remote Control Button LED Indicator ![]()
![]()
![]()
- If your Soundbar was playing music when it connects to the SWA-9100S, you may hear some stuttering from the woofer as the connection finalizes.
- Until pairing is complete, the Multicolour LED changes as Red → Green → Blue in turn.
- Check if the LINK LED is solid blue (connection complete).
The LINK LED indicator stops blinking and glows a solid blue when a connection is established between the Soundbar and the Wireless Receiver Module.

- If the SWA-9100S is not connected, repeat the procedure from Step 2 through 4.


Connecting an SWA-W500 (Sold Separately)
- Turn off the Soundbar by pressing the
![]() (Power) button on the remote control.
(Power) button on the remote control.

- Plug in the Wireless Subwoofer, and then check its standby status.
- Plug the Wireless Subwoofer power cord into an electrical outlet and into the Wireless Subwoofer to turn on the Wireless Subwoofer. The LINK LED indicator (blue LED) on the Wireless Subwoofer blinks. If the LED does not blink, press theID SET button on the rear of the Wireless Subwoofer with a pen tip for 5~6 seconds until the LINK LED indicator blinks (in Blue). For more about the LED, please refer to the SWA-W500 user manual.
![]()
- The main unit is heavy. Be careful not to pinch your fingers when pressing theID SET button or connecting the power cord to the rear of the unit.
- The upper part of the subwoofer is prone to scratches. Handle it carefully.
- Do not press on or strike theSpeaker Unit on the bottom of the body. You can deform or damage the speaker.

- Plug the Wireless Subwoofer power cord into an electrical outlet and into the Wireless Subwoofer to turn on the Wireless Subwoofer. The LINK LED indicator (blue LED) on the Wireless Subwoofer blinks. If the LED does not blink, press theID SET button on the rear of the Wireless Subwoofer with a pen tip for 5~6 seconds until the LINK LED indicator blinks (in Blue). For more about the LED, please refer to the SWA-W500 user manual.
- ID SET
Press the Up button on the remote control for 5 seconds.- Until pairing is complete, the Multicolour LED changes as Red → Green → Blue in turn.
Remote Control Button LED Indicator ![]()
![]()
- Until pairing is complete, the Multicolour LED changes as Red → Green → Blue in turn.
- Check if the LINK LED is solid blue (connection complete).
The LINK LED indicator stops blinking and glows a solid blue when a connection is established between the Soundbar and the Wireless Subwoofer.

- If the SWA-W500 is not connected, repeat the procedure from Step 2 through 4.


NOTES
- Do not connect the power cord of this product or your TV to a wall outlet until all connections between components are complete.
- Before moving or installing this product, be sure to turn off the power and disconnect the power cord.
- The maximum transmission distance of the wireless signal of the main unit is about 10 m, but may vary depending on your operating environment. If a steel-concrete or metallic wall is between the main unit and the wireless subwoofer, the system may not operate at all, because the wireless signal cannot penetrate metal.
PRECAUTIONS
- Wireless receiving antennas are built into the wireless subwoofer. Keep the units away from water and moisture.
- For optimal listening performance, make sure that the area around the wireless subwoofer and Wireless Receiver Module (Sold separately) is clear of any obstructions.
USING A WIRED CONNECTION TO THE TV
Method 1. Connecting with HDMI

|
Connecting the TV that supports HDMI ARC (Audio Return Channel)

- With the Soundbar and TV turned off, connect the HDMI cable as shown in the figure.
- Turn on the Soundbar and TV.
- TV sound is output from the Soundbar.
- When the TV sound is not output, press the top panel of the Soundbar or the
![]() (Source) button on the remote control to select the "Digital Audio In" mode.
(Source) button on the remote control to select the "Digital Audio In" mode. - When the sound is not output, check the HDMI Cable connection again.
- Use the volume buttons on the TV's remote control to change the volume on the Soundbar.
- When the TV sound is not output, press the top panel of the Soundbar or the
NOTES
- When you connect the TV that supports the HDMI ARC (Audio Return Channel) to the Soundbar with an HDMI cable, you can transmit the digital video and audio data without connecting a separate optical cable.
- We recommend you use a coreless HDMI cable if possible. If you use a cored HDMI cable, use one whose diameter is less than 14 mm.
- This function is not available if the HDMI cable does not support ARC.
- When the audio in a broadcast is encoded in Dolby Digital and the "Digital Output Audio Format" on your TV is set to PCM, we recommend that you change the setting to Dolby Digital. When the setting on the TV is changed, you will experience better sound quality. (The TV menu may use different words for Dolby Digital and PCM depending on the TV manufacturer.)
Method 2. Connecting using an Optical Cable
Pre-connection Checklist
|


- With the TV and Soundbar turned off, connect the DIGITAL AUDIO IN (OPTICAL) port on the Soundbar and the OPTICAL output port on the TV with the optical cable (not supplied), as shown in the figure.
- Turn on the Soundbar and TV.
- Press the
![]() (Source) button on the top panel or remote control, and then select the "Digital Audio In" mode.
(Source) button on the top panel or remote control, and then select the "Digital Audio In" mode. - The TV sound is output from the Soundbar.
Using the Q-Symphony Function
For Q-Symphony, the Soundbar syncs with a Samsung TV to output sound through two devices for optimum surround effect. When the Soundbar is connected, the option, "TV+Soundbar" appears under the Sound Output menu of the TV. Select the corresponding menu.
 |  | ||
|

 "Digital Audio In"
 - TV menu example: TV + [AV] Soundbar series name [HDMI]
NOTES
- It can operate according to the Codec supported by TV.
- This function is supported only when the HDMI Cable or Optical Cable (not supplied) is connected.
- This function is available in Samsung TVs released in or after 2020 and some Soundbar models.
USING A WIRELESS CONNECTION TO THE TV
Connecting via Bluetooth
When a Samsung TV is connected using Bluetooth, you can hear stereo sound without the hassle of cables.

- Only one Samsung TV can be connected at a time.
- Samsung TV that supports Bluetooth can be connected.
Check the specifications of your TV.
The initial connection
- Press the
![]() PAIR button on the Soundbar remote control or press
PAIR button on the Soundbar remote control or press ![]() (Source) button on the Soundbar top panel to enter the "Bluetooth" mode.
(Source) button on the Soundbar top panel to enter the "Bluetooth" mode. Bluetooth Pairing button LED Indicator ![]()
OR
When in "Bluetooth" mode
![]()
![]()
- Until pairing is complete, the Multicolour LED changes as Red → Green → Blue in turn.
![]()
"Ready to connect via Bluetooth." - Select Bluetooth mode on the Samsung TV. (e.g. Home (
![]() )
) ![]() Settings (
Settings ( ![]() )
) ![]() Sound
Sound ![]() Sound Output
Sound Output ![]() Bluetooth Speaker List
Bluetooth Speaker List ![]() [AV] Samsung Soundbar S5A-Series (Bluetooth))
[AV] Samsung Soundbar S5A-Series (Bluetooth)) - Select "[AV] Samsung Soundbar S5A-Series" from the list on TV's screen.
An available Soundbar is indicated with "Need Pairing" or "Paired" on the TV's Bluetooth device list. To connect the Samsung TV to the Soundbar, select the message, and then establish a connection. - You can now hear Samsung TV sound from the Soundbar.
- If there is a connection log between the Soundbar and Samsung TV, the Soundbar is automatically connected by changing its mode to "Bluetooth".


If the device fails to connect
- If you have an existing Soundbar (e.g.,[AV] Samsung Soundbar S5A-Series) on the list of speakers on the Samsung TV, delete it.
- Then repeat steps 1 through 3.
Disconnecting the Soundbar from the Samsung TV
Press the ![]() (Source) button on the top panel or on the remote control to select the mode other than "Bluetooth".
(Source) button on the top panel or on the remote control to select the mode other than "Bluetooth".
- Disconnecting takes time because the Samsung TV must receive a response from the Soundbar. (The time required may differ, depending on the Samsung TV model.)
TV Auto connect On/Off
To cancel the automatic Bluetooth connection between the Soundbar and TV, press the Left button on the remote control for 5 seconds with the Soundbar in "Bluetooth Ready" status. (Toggle On → Off)
| Left button | LED Indicator | |
 |  |  |
| Bluetooth Ready | Toggle On  Off Off | |
Notes on Bluetooth connection
- Locate a new device within 1 m to connect via Bluetooth communication.
- If asked for a PIN code when connecting a Bluetooth device, enter <0000>.
- The Soundbar automatically turns off after 20 minutes in the Ready state.
- The Soundbar may not perform Bluetooth search or connection correctly under the following circumstances:
- If there is a strong electrical field around the Soundbar.
- If several Bluetooth devices are simultaneously paired with the Soundbar.
- If the Bluetooth device is turned off, not in place, or malfunctions.
- Electronic devices may cause radio interference. Devices that generate electromagnetic waves must be kept away from the Soundbar main unit - e.g., microwaves, wireless LAN devices, etc.
CONNECTING AN EXTERNAL DEVICE
Connecting using an Optical Cable

- With the external device and Soundbar turned off, connect the DIGITAL AUDIO IN (OPTICAL) port on the Soundbar and the OPTICAL output port on the external device with the optical cable (not supplied), as shown in the figure.
- Turn on the Soundbar and external device.
- Press the
![]() (Source) button on the top panel or remote control, and then select the "Digital Audio In" mode.
(Source) button on the top panel or remote control, and then select the "Digital Audio In" mode. - The external device sound is output from the Soundbar.
CONNECTING A USB STORAGE DEVICE
You can play music files located on USB storage devices through the Soundbar.

- Connect the Soundbar with the USB stick by the USB adapter cable above.
- The Micro USB to USB adapter cable is sold separately. To purchase, contact a Samsung Service Centre or Samsung Customer Care.
- Press the
![]() (Source) button on the top panel or remote control, and then select the "USB" mode.
(Source) button on the top panel or remote control, and then select the "USB" mode. - Play music files from the USB storage device through the Soundbar.
- The Soundbar automatically turns off (Auto Power Down) if no USB device has been connected for more than 20 minutes.
File Format Type Compatibility list
| Extension | Codec | Sampling Rate | Bitrate |
| *.mp3 | MPEG 1 Layer2 | 16kHz ~ 48kHz | 80kbps~320kbps |
| MPEG 1 Layer3 | 16kHz ~ 48kHz | 80kbps~320kbps | |
| MPEG 2 Layer3 | 16kHz ~ 48kHz | 80kbps~320kbps | |
| MPEG 2.5 Layer3 | 16kHz ~ 48kHz | 80kbps~320kbps | |
| *.wma | Wave_Format_MSAudio1 | 16kHz ~ 48kHz | 56kbps~128kbps |
| Wave_Format_MSAudio2 | 16kHz ~ 48kHz | 56kbps~128kbps | |
| *.aac | AAC | 16kHz ~ 96kHz | 48kbps~320kbps |
| AAC-LC | 16kHz ~ 96kHz | 128kbps~192kbps 5.1ch 320kbps | |
| HE-AAC | 24kHz ~ 96kHz | 48kbps~64kbps 5.1ch 160kbps | |
| *.wav | - | 16kHz ~ 48kHz | up to 3000kbps |
| *.flac | FLAC | 32kHz ~ 192kHz | 162kbps ~ 8,100kbps |
| *.aiff | AIFF | 32kHz ~ 192kHz | 1,024kbps ~ 9,216kbps |
| *.ogg | OGG 1.1.0 | 16kHz ~ 48kHz | 50kbps~500kbps |
- If there are too many folders (about 200) and files (about 2000) stored on the USB device, it may take the Soundbar some time to access and play files.
CONNECTING A MOBILE DEVICE
Connecting via Bluetooth
When a mobile device is connected using Bluetooth, you can hear stereo sound without the hassle of cables.

- When you connect a paired Bluetooth device with the Soundbar off, the Soundbar automatically turns on.
The initial connection
- When connecting to a new Bluetooth device, make sure the device is within 1 m distance.
- Press the
![]() PAIR button on the Soundbar remote control or press
PAIR button on the Soundbar remote control or press ![]() (Source) button on the Soundbar top panel to enter the "Bluetooth" mode.
(Source) button on the Soundbar top panel to enter the "Bluetooth" mode.
| Bluetooth Pairing button | LED Indicator | |
 OR When in "Bluetooth" mode  | 
| |
 | "Ready to connect via Bluetooth." | |
- On your device, select "[AV] Samsung Soundbar S5A-Series" from the list that appears.
- Play music files from the device connected via Bluetooth through the Soundbar.
If the device fails to connect
- If you have an existing Soundbar (e.g.,[AV] Samsung Soundbar S5A-Series) on the list of speakers on the Mobile device, delete it.
- Then repeat steps 1 and 2.
Notes on Bluetooth connection
- Locate a new device within 1 m to connect via Bluetooth communication.
- If asked for a PIN code when connecting a Bluetooth device, enter <0000>.
- The Soundbar automatically turns off after 20 minutes in the Ready state.
- The Soundbar may not perform Bluetooth search or connection correctly under the following circumstances:
- If there is a strong electrical field around the Soundbar.
- If several Bluetooth devices are simultaneously paired with the Soundbar.
- If the Bluetooth device is turned off, not in place, or malfunctions.
- Electronic devices may cause radio interference. Devices that generate electromagnetic waves must be kept away from the Soundbar main unit - e.g., microwaves, wireless LAN devices, etc.
- The Soundbar supports SBC data (44.1kHz, 48kHz).
- Connect only to a Bluetooth device that supports the A2DP (AV) function.
- You cannot connect the Soundbar to a Bluetooth device that supports only the HF (Hands Free) function.
- When connecting the Soundbar to a Bluetooth device, place them as close to each other as possible.
- The farther the Soundbar and Bluetooth device are from each other, the lower the sound quality will become.
The Bluetooth connection may break when the devices are out of the effective range. - The Bluetooth connection may not function as intended in areas with poor reception.
- A Bluetooth device may experience noise or malfunction under in the following conditions:
- When the body is in contact with the signal transceiver on the Bluetooth device or Soundbar
- In corners or when there is an obstacle in proximity, such as a wall or partition, where electrical changes may occur.
- When exposed to radio interferences by other products operating on the same frequency ranges, such as medical equipment, microwave ovens, and wireless LAN devices.
- Obstacles such as doors and walls may still impact the sound quality even when the devices are within the effective range.
- Note that your Soundbar cannot be paired with other Bluetooth devices while using the Bluetooth option.
- This wireless device may cause electrical interference during operation.
Bluetooth Power On/Off
If a previously paired Bluetooth device tries to pair with the Soundbar when the Bluetooth Power On function is on and the Soundbar is turned off, the Soundbar turns on automatically.
- Press and hold the SOUND MODE button for more than 5 seconds on the remote while the Soundbar is turned on.
- Multicolour LED indicator on the Soundbar blinks "Cyan".
SOUND MODE button LED Indicator ![]()
![]()
![]()
Bluetooth Power On/Off Toggle On ![]() Off
Off


Disconnecting the Bluetooth device from a Soundbar
You can disconnect a Bluetooth device from the Soundbar. For instructions, see the Bluetooth device's user manual.
- The Soundbar will be disconnected.
- If the Soundbar is disconnected from the Bluetooth device, the multicolour LED indicator on the Soundbar blinks "Red" three times.
Disconnecting the Soundbar from the Bluetooth device
Press the ![]() (Source) button on the top panel or on the remote control to select the mode other than "Bluetooth".
(Source) button on the top panel or on the remote control to select the mode other than "Bluetooth".
- Disconnecting takes time because the Bluetooth device must receive a response from the Soundbar. (Disconnection time may differ, depending on the Bluetooth device)
- If the Soundbar is disconnected from the Bluetooth device, the multicolour LED indicator on the Soundbar blinks "Red" three times.
Bluetooth Multi connection
The Soundbar can be connected to 2 Bluetooth devices at the same time.

TV Auto connect On/Off
- Press and hold the
![]() PAIR button for more than 5 seconds on the remote while the Soundbar is turned off.
PAIR button for more than 5 seconds on the remote while the Soundbar is turned off. - Multicolour LED indicator on the Soundbar blinks "Cyan".
Bluetooth Pairing button LED Indicator When in standby mode
![]()
![]()
![]()
- Connect the Soundbar to up to two Bluetooth devices.
- Play music from one of the connected Bluetooth devices while two devices are connected.
- If music is played from the Bluetooth device "B" while playing from the device "A", the music is started playing on the device "B" and automatically being stopped/paused playback on the device "A".
- In versions prior to AVRCP V1.4, the switching time of the device playing music may be delayed.


Bluetooth Multi Pairing
How to pair multiple devices to the Soundbar
- Turn on the Soundbar.
- Only in "Bluetooth" mode, press and hold the
![]() (Source) button on the top of the Soundbar for more than 5 seconds for the Soundbar to go into "Bluetooth Pairing" mode, then on the Bluetooth device side, switch Bluetooth on, and select the Soundbar from the list of available devices, the Soundbar will automatically connect to the Bluetooth device.
(Source) button on the top of the Soundbar for more than 5 seconds for the Soundbar to go into "Bluetooth Pairing" mode, then on the Bluetooth device side, switch Bluetooth on, and select the Soundbar from the list of available devices, the Soundbar will automatically connect to the Bluetooth device. - A 2nd Bluetooth device can be paired and connected to the Soundbar using the same method. If you attempt to connect a 3rd device, a connected device that is not playing audio will lose its Bluetooth connection, but will still be paired with the Soundbar.
- Using the same method, you can pair up to 8 Bluetooth devices, but only the last 2 will stay connected to the Soundbar at the same time.
NOTES
- Connect the Soundbar to up to two Bluetooth devices.
- Play music from one of the connected Bluetooth devices while two devices are connected.
- If music is played from the Bluetooth device "B" while playing from the device "A", the music is started playing on the device "B" and automatically being stopped/paused playback on the device A".
- In versions prior to AVRCP V1.4, the switching time of the device playing music may be delayed.
- The device can be switched by notification or alarm on some devices.
- Some devices do not support Bluetooth multi connection.
- "Bluetooth Pairing" mode stops when no device is paired within 3 minutes.
- Switching devices may take about 7 seconds on some apps.
- If you attempt to connect a 3rd Bluetooth device, the A or B devices will be disconnected. (A device that is not currently playing will be disconnected.)
- Only 1 Samsung TV, or 2 Bluetooth devices can be connected to the Soundbar at one time.
- The Soundbar will be disconnected from Bluetooth devices when it receives a connection request from a Samsung TV.
Using Tap Sound
Tap the Soundbar with your mobile device to play audio from the mobile device through the Soundbar.
- This function may not be supported, depending on the mobile device.
- This function is only compatible on Samsung mobile devices with Android 8.1 or later.

- Turn on the Tap Sound function on your mobile device.
- For details on how to turn on the function, refer to "Enable the Tap Sound function" below.
- Tap the Soundbar with the mobile device. Select "Start now" in the displayed message window.
A connection is established between the mobile device and Soundbar via Bluetooth. - Play audio from the mobile device through the Soundbar.
- This function connects a mobile device to the Soundbar via Bluetooth by detecting vibration that occurs when the device touches the Soundbar.
- Make sure the mobile device does not tap a sharp corner of the Soundbar. The Soundbar or mobile device may become scratched or damaged.
- It is recommended that the mobile device be covered with a case. Lightly tap the wide area in the upper portion of the Soundbar, without using excessive force.
- To use this function, update theSmartThings app to the latest version.
The function may not be supported, depending on the app version.
Enable the Tap Sound function
Use the SmartThings app to turn on the Tap View, Tap Sound function.
- On the mobile device, run the SmartThings app.
- Select (
![]() ) in the SmartThings app screen displayed on the mobile device.
) in the SmartThings app screen displayed on the mobile device. - Set "Tap View, Tap Sound" to On to allow the function to work when a mobile device moves close to the Soundbar.
 ) in the SmartThings app screen displayed on the mobile device.
NOTES
- When the mobile device is in power-saving mode, theTap Sound function does not work.
- TheTap Sound function may not work if there are devices near the Soundbar that cause radio interference such as electric devices. Make sure devices that may cause radio interference are placed at a sufficient distance away from the Soundbar.
INSTALLING THE WALL MOUNT
Installation Precautions
- Install on a vertical wall only.
- Do not install in a place with high temperature or humidity.
- Verify whether the wall is strong enough to support the product's weight. If not, reinforce the wall or choose another installation point.
- Purchase and use the fixing screws or anchors appropriate for the kind of wall you have (plaster board, iron board, wood, etc.). If possible, fix the support screws into wall studs.
- Purchase wall mounting screws according to the type and thickness of the wall you want to mount the Soundbar on.
- Diameter: M5
- Length: 35 mm or longer recommended.
- Connect cables from the unit to external devices before you install the Soundbar on the wall.
- Make sure the unit is turned off and unplugged from the power source before you install it. Otherwise, it may cause an electric shock.
Wallmount Components

- Place the Wall Mount Guide against the wall surface.
- The Wall Mount Guide must be level.
- If your TV is mounted on the wall, install the Soundbar at least 5 cm below the TV.

- Align the Wall Mount Guide's Centre Line with the centre of your TV (if you are mounting the Soundbar below your TV), and then fix the Wall Mount Guide to the wall using tape.
- If you are not mounting below a TV, place the Centre Line in the centre of the installation area.

- If you are not mounting below a TV, place the Centre Line in the centre of the installation area.
- Use a pen to mark the positions of the holes and remove the Wall Mount Guide.

- Using an appropriately sized drill bit, drill a hole in the wall at each marking.
- If the markings do not correspond to the positions of studs, make sure you insert appropriate anchors into the holes before you insert the support screws. If you use anchors, make sure the holes you drill are large enough for the anchors you use.
- Push a screw (not supplied) through each Holder-Screw, and then screw each screw firmly into a support screw hole.

- Install the 2 Bracket-Wall Mounts in the correct orientation on the bottom of the Soundbar using 2 Screws.
![]()
- When assembling, make sure the hanger part of the Bracket-Wall Mounts are located behind the rear of the Soundbar.
![]()
- When assembling, make sure the hanger part of the Bracket-Wall Mounts are located behind the rear of the Soundbar.
- Install the Soundbar with the attached Bracket-Wall Mounts by hanging the Bracket-Wall Mounts on the Holder-Screws on the wall.

- Slide the Soundbar down as shown below so that the Bracket-Wall Mounts rest securely on the Holder-Screws.
- Insert the Holder-Screws into the wide (bottom) part of the Bracket-Wall Mounts, and then slide the Bracket-Wall Mounts down so that the Bracket-Wall Mounts rest securely on the Holder-Screws.

- Insert the Holder-Screws into the wide (bottom) part of the Bracket-Wall Mounts, and then slide the Bracket-Wall Mounts down so that the Bracket-Wall Mounts rest securely on the Holder-Screws.


INSTALLING THE SOUNDBAR IN FRONT OF TV

Align the centre of the Soundbar to the centre of the TV as illustrated in the image.
Place the Soundbar at least 3cm away from the TV.
NOTES
- Make sure the Soundbar is placed on a flat and solid surface.
- Insufficient gap from the TV may cause acoustic problems.
SOFTWARE UPDATE

After upgrading, keep the original Settings.

- Connect a USB memory stick to the USB port on your computer.
![]()
Make sure there are no music files on the USB memory stick drive. This may cause the firmware update to fail. - Go to (samsung.com) " select Enter Model Number and enter the model of your Soundbar. Select manuals and downloads and download the latest software file.
- Save the downloaded software to a USB memory stick and select "Extract Here" to unzip the folder.
- Turn on the Soundbar and connect the USB memory stick containing the software update to the female port on a Micro USB adapter cable. Connect the cable to the USB port on the Soundbar.
- Plug USB into Soudbar and switch to USB source, the software will update automatically and will complete update within 2 minutes. During the update process, the 5 LEDs will start flashing in a loop, and then the 5 LEDs will all be bright white, and then the 5 LEDs will flash in a loop again. When the update is complete, the cyan indicator blinks 3 times, and the soundbar automatically restarts.
| LED Indicator |  "Start the software update." "Start the software update." |
 | |
 Software Update Finish  "The software update is complete." "The software update is complete." | |
 Software Update Failed  "The software update failed." "The software update failed." |
- This product has a DUAL BOOT function. If the firmware fails to update, you can update the firmware again.
If LED sequence flashing is not displayed
- Turn off the Soundbar, disconnect and then reconnect the USB storage device that contains the update files to the Soundbar's USB port.
- Disconnect the Soundbar's power cord, reconnect it, and then turn on the Soundbar.
NOTES
- The firmware update may not work properly if audio files supported by the Soundbar are stored in the USB storage device.
- Do not disconnect the power or remove the USB device while updates are being applied. The main unit will turn off automatically after completing the firmware update.
- After upgrading, keep the original Settings. (include Volume, sound field, etc.)
- When the firmware update is complete, the soundbar automatically turns on, and the Voice UI comes out. If the software update fails, check if the USB stick is defective.
- Mac OS users should use MS-DOS (FAT) as the USB format.
- Updating via USB may not be available, depending on the USB storage device manufacturer.
Reset

With the Soundbar on, press the  (Volume) buttons on the body at the same time for at least 5 seconds. The LED display changes as shown below and then the Soundbar is reset.
| LED Indicator |  "Start the factory reset." "Start the factory reset." |
 |
- All the settings of the Soundbar are reset. Be sure to perform this only when a reset is required.
TROUBLESHOOTING
Before seeking assistance, check the following.
Soundbar does not turn on
 Check whether the power cord of the Soundbar is correctly inserted into the outlet.
Soundbar works erratically
After removing the power cord, insert it again.
Remote the power cord from the external device and try again.
If there is no signal, the Soundbar automatically turns off after a certain period of time. Turn on the power.
In case the remote control does not work
Point the remote directly at the Soundbar.
Replace the batteries with new ones.
Soundbar does not output any sound
The volume of the Soundbar is too low or muted. Adjust the volume.
When any external device (STB, Bluetooth device, mobile device, etc.) is connected, adjust the volume of the external device.
For sound output of the TV, select Soundbar. (Samsung TV: Home ( ![]() ) → Settings (
) → Settings ( ![]() ) → Sound → Sound Output → Select Soundbar)
) → Sound → Sound Output → Select Soundbar)
The cable connection to the Soundbar may not be loose. Remove the cable and connect again.
Remove the power cord completely, reconnect, and turn the power on.
Reset the product and try again.
In case the TV is not connected via HDMI (ARC)
Check whether the HDMI cable is correctly connected to the ARC terminal.
Connection may not be possible due to the connected external device (set-top box, game machine, etc.). Directly connect the Soundbar.
HDMI-CEC may not be activated on the TV. Turn on the CEC on the TV menu. (Samsung TV: Home ( ![]() ) → Settings (
) → Settings ( ![]() ) → General → External Device Manager → Anynet+ (HDMI-CEC) ON)
) → General → External Device Manager → Anynet+ (HDMI-CEC) ON)
Soundbar does not connect via Bluetooth
When connecting a new device, switch to Bluetooth Pairing for connection. (Press the ![]() PAIR button on the remote control or press the
PAIR button on the remote control or press the ![]() (Source) button on the body for at least 5 seconds.)
(Source) button on the body for at least 5 seconds.)
If the Soundbar is connected to another device, disconnect that device first to switch the device.
Reconnect it after removing the Bluetooth speaker list on the device to connect. (Samsung TV: Home ( ![]() ) → Settings (
) → Settings ( ![]() ) → Sound → Sound Output → Bluetooth Speaker List)
) → Sound → Sound Output → Bluetooth Speaker List)
Remove and reconnect the power plug, then try again.
Reset the product and try again.
Sound drops out when connected via Bluetooth
If your device that is connected via Bluetooth moves too far away from the Soundbar, it may cause the sound to drop out. Move the device closer to the Soundbar.
If a part of your body is in contact with the Bluetooth transceiver or the product is installed on metal furniture, sound may drop out. Check the installation environment and conditions for use.
Bluetooth multi connection does not work
When the TV is connected to the soundbar, Bluetooth multi connection may not operate. Disconnect the Soundbar from the TV and try again.
Check whether the Bluetooth Multi connection setting is turned on. (Refer to the "Soundbar does not connect via Bluetooth." section.)
Disconnect the device currently playing, pair with the device that you want to connect, and reconnect the previous device.
If the sound is inaudible even after connecting properly, refer to the "Sound drops out when connected via Bluetooth." section.
Soundbar does not turn on automatically with the TV
When you turn off the Soundbar while watching TV, power synchronization with the TV is disabled. First turn off the TV.
IMPORTANT NOTES ABOUT SERVICE
- Figures and illustrations in this User Manual are provided for reference only and may differ from actual product appearance.
- An administration fee may be charged if either
- an engineer is called out at your request and there is no defect with the product (i.e. where the user manual has not been read).
- you bring the unit to a repair centre and there is no defect with the product (i.e. where the user manual has not been read).
- You will be informed of the administration fee amount before a technician visits.
SPECIFICATIONS AND GUIDE
Specifications
| Model Name | HW-S50A | |
| USB | 5V/0.5A | |
| Weight | 2.7 kg | |
| Dimensions (W x H x D) | 764.0 x 68.0 x 125.0 mm | |
| Operating Temperature Range | +5°C to +35°C | |
| Operating Humidity Range | 10% ~ 75% | |
| AMPLIFIER Rated Output power | (30W x 2) + (30W x 2) + 20W | |
| Supported play formats DTS, Dolby® Digital (DTS Virtual Surround is played in DTS format.) | PCM 2ch, Dolby Audio™ (supporting Dolby® Digital), DTS, DTS Virtual: X | |
| WIRELESS DEVICE OUTPUT POWER | The transmitting power is 9 dBm. | |
| Overall Standby Power Consumption (W) | 0.5W | |
| Bluetooth Port deactivation method | Press and hold the SOUND MODE button for more than 5 seconds to turn off Bluetooth Power function. | |
NOTES
- Samsung Electronics Co., Ltd reserves the right to change the specifications without notice.
- Weight and dimensions are approximate.
SAFETY INFORMATION
SAFETY WARNINGS
TO REDUCE THE RISK OF ELECTRIC SHOCK, DO NOT REMOVE THE COVER (OR BACK).
NO USER-SERVICEABLE PARTS ARE INSIDE.
REFER SERVICING TO QUALIFIED SERVICE PERSONNEL.
Refer to the table below for an explanation of symbols which may be on your Samsung product.
 RISK OF ELECTRIC SHOCK. DO NOT OPEN. | |
 | This symbol indicates that high voltage is present inside. It is dangerous to make any kind of contact with any internal part of this product. |
 | This symbol indicates that this product has included important literature concerning operation and maintenance. |
 | Class II product: This symbol indicates that it does not require a safety connection to electrical earth (ground). If this symbol is not present on a product with a power cord, the product MUST have a reliable connection to protective earth (ground). |
 | AC voltage: This symbol indicates that the rated voltage marked with the symbol is AC voltage. |
 | DC voltage: This symbol indicates that the rated voltage marked with the symbol is DC voltage. |
 | Consult instructions for use: This symbol instructs the user to consult the user manual for further safety related information. |

- To reduce the risk of fire or electric shock, do not expose this appliance to rain or moisture.
- TO PREVENT ELECTRIC SHOCK, MATCH WIDE BLADE OF PLUG TO WIDE SLOT, FULLY INSERT.
- This apparatus shall always be connected to a AC outlet with a protective grounding connection.
- To disconnect the apparatus from the mains, the plug must be pulled out from the mains socket, therefore the mains plug shall be readily operable.
- Do not expose this apparatus to dripping or splashing. Do not put objects filled with liquids, such as vases on the apparatus.
- To turn this apparatus off completely, you must pull the power plug out of the wall socket. Consequently, the power plug must be easily and readily accessible at all times.
PRECAUTIONS
- Ensure that the AC power supply in your house complies with the power requirements listed on the identification sticker located on the bottom of your product. Install your product horizontally, on a suitable base (furniture), with enough space around it for ventilation (7~10 cm). Make sure the ventilation slots are not covered. Do not place the unit on amplifiers or other equipment which may become hot. This unit is designed for continuous use. To fully turn off the unit, disconnect the AC plug from the wall outlet. Unplug the unit if you intend to leave it unused for a long period of time.
- During thunderstorms, disconnect the AC plug from the wall outlet. Voltage peaks due to lightning could damage the unit.
- Do not expose the unit to direct sunlight or other heat sources. This could lead to overheating and cause the unit to malfunction.
- Protect the product from moisture (i.e. vases), and excess heat (e.g. a fireplace) or equipment creating strong magnetic or electric fields. Unplug the power cable from the AC wall socket if the unit malfunctions. Your product is not intended for industrial use. It is for personal use only. Condensation may occur if your product has been stored in cold temperatures. If transporting the unit during the winter, wait approximately 2 hours until the unit has reached room temperature before using.
- The battery used with this product contains chemicals that are harmful to the environment. Do not dispose of the battery in the general household trash. Do not expose the battery to excess heat, direct sunlight, or fire. Do not short circuit, disassemble, or overheat the battery.
![]()
Danger of explosion if the battery is replaced incorrectly. Replace only with the same or equivalent type.
Fabric cleaning
Remove any dirt or stain on the product surface immediately.
Removing and cleaning can be less effective for some substances or if left for a prolonged time.
- Use a vacuum cleaner or an adhesive lint roller to remove dust, handprints, and the likes.
- Some cleaning brushes may damage the product, depending on the materials they contain.
- Towels and cleaning clothes may leave lint or dirt on the product.
- Do not use a nail or other tools to scratch the dirt off. It may damage the fabric.
- To remove oil or liquid stains, use a clean white cloth moist with water. If the stain persists, wipe it with a mixture of water and neutral detergent (such as dishwashing soaps) and a cloth.
- A non-neutral detergent or cleaner may cause discolouration or fabric damage.
- After cleaning, use a dry cloth or hairdryer to dry the area.
- Do not use excessive force to avoid discolouration or fabric damage.
Documents / ResourcesDownload manual
Here you can download full pdf version of manual, it may contain additional safety instructions, warranty information, FCC rules, etc.
Advertisement


Need help?
Do you have a question about the HW-S50A and is the answer not in the manual?
Questions and answers