Zavor LUX Manual
- Quick start manual ,
- User manual (67 pages) ,
- User manual (124 pages)
Advertisement
- 1 Introduction
- 2 Features and Functions
- 3 Getting Started: Before First Use
- 4 Operating Functions: Panel Programs and Functions
- 5 Pressure Cooking Function
- 6 Pressure Cooking Charts
- 7 Rice Cooking Programs
- 8 Slow Cooking Function
- 9 Yogurt Function
- 10 Greek Yogurt
- 11 Brown Function
- 12 Sauté Function
- 13 Simmer Function
- 14 Steam/Rice Function
- 15 Keep Warm Function
- 16 Time Delay Function
- 17 Cleaning and Maintenance
- 18 Troubleshooting
- 19 IMPORTANT SAFEGUARDS
- 20 Documents / Resources
Scan here to download a free recipe book with more than 120 delicious recipes to use in your ZAVOR LUX™ Multi-Cooker.

Introduction
Thank you for purchasing this state of the art ZAVOR LUX™ MultiCooker! The ZAVOR LUX™ can be used to steam, simmer, brown, sauté, cook white rice, brown rice, risotto, yogurt, pressure cook, and slow cook foods to perfection. The user friendly electronic controls are simple and straightforward, allowing you to set recipe times with ease. Plus, the convenient TIME DELAY and KEEP WARM settings provide you with cooking flexibility that meets your busy schedule.
This ZAVOR LUX™ Multi-Cooker user's manual contains information on the use and care of this product. Please read this manual carefully before operating the ZAVOR LUX™ Multi-Cooker to ensure proper usage and maintenance of the unit. Carefully following the directions in this manual enables you to optimize the performance and lifespan of the cooker.
 Note: This manual applies to all colors and sizes of the LUX™ MultiCooker.
Features and Functions

- Pressure Regulator Knob: Turn the regulating knob to the "Pressure" position when cooking under pressure or when using any of the rice cooking functions. Turn the knob to the "Steam" position to release the pressure after pressure cooking or rice cooking and when using the STEAM/RICE function. When using the SLOW COOKER or KEEP WARM functions, be sure to turn the pressure regulating knob to the "Steam" position and not to the "Pressure" position.
- Self-Locking Pin: The lid automatically locks when it is correctly aligned and closed. While cooking under the pressure function, you cannot open the lid until all of the pressure is released.
- Cool-Touch Handles: The cool to the touch handles of the multi-cooker allows for safe handling and opening of the lid.
- Floating Valve: The floating valve controls the amount of pressure inside the cooker by allowing excess pressure to be released.
- Y-Shaped Gasket Attachment: Sits on the underside of the lid and creates an airtight seal needed for the cooker to build up pressure. Check the silicone gasket for any tears or cracks before using any of the pressure cooking functions. To remove the attachment, hold the center of the Y (not just the silicone nub) and pull. The ring detaches making for more accessible gasket removable and replacement. To reattach, place the silicone centerpiece back on the steel tip and push down until correctly replaced. To order a new gasket, please contact a ZAVOR Representative at 1-855-928-6748 or purchase it directly on the ZAVOR website at www.zavoramerica.com. ;
- Safety Pressure Valve: The safety pressure valve allows excess pressure to escape from the cooker when being used for pressure cooking. It works independently of the floating valve.
- Anti-Blocking Case: Pull it towards yourself to release the pressure regulator knob for cleaning.
- Condensation Reservoir: Collects excess condensation during cooking. If there is some liquid in the reservoir after cooking, empty it.
- Heating Element and Temperature Sensor: Both elements regulate the cooking temperature inside the pot.
- Removable Cooking Pot: Stainless steel pot is dishwasher safe, but hand washing is always recommended.
- Stationary Pot: This pot cannot be removed from the electric multi-cooker and should NEVER be used for cooking. Before cooking, make sure to place the removable cooking pot into the stationary pot first. All ingredients should be put into the removable cooking pot ONLY.
- Stainless Steel Rack: Used to keep food off the floor of the inner pot to prevent them from sitting in their juices/fats. Allows for better steam flow/ distribution when pressure cooking or steaming foods. The handles make for easy transporting of the rack. Dimensions for the stainless steel rack are: Diameter: 7.5" Height: 1.4" Handle: 4"
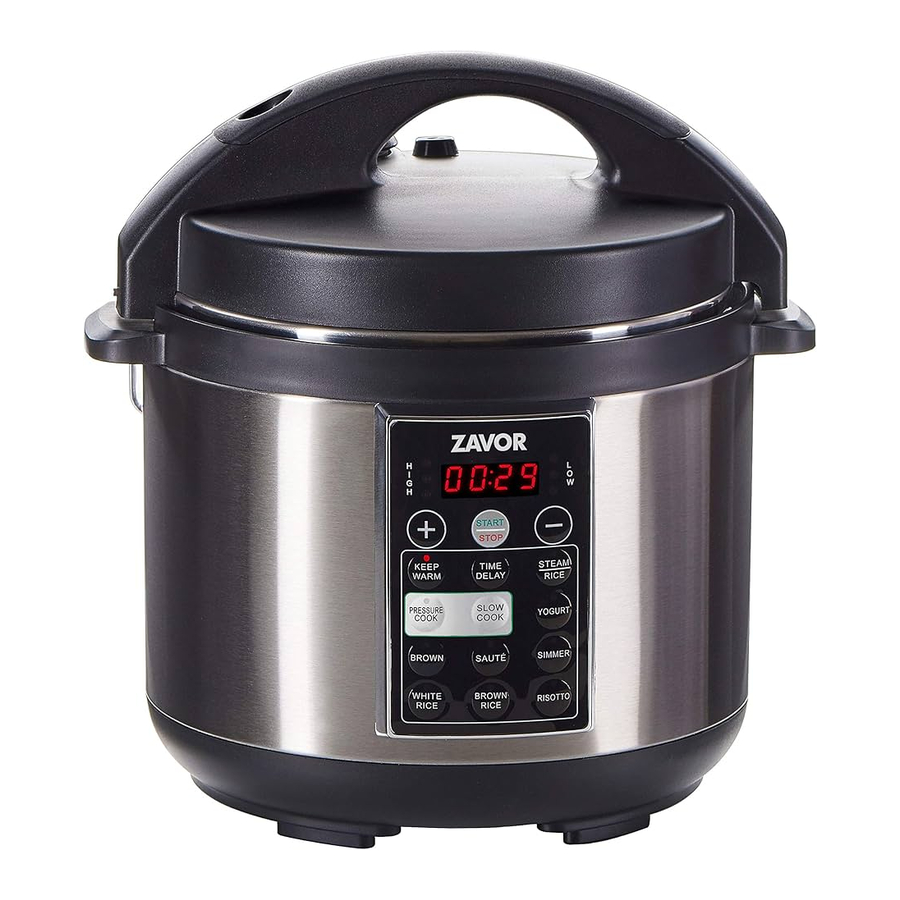
- Control Panel: The easy to use controls allow you to select the different programs available with the touch of a finger. Available for selection are: two pressure cooking settings, two slow cooking settings, white rice, brown rice, risotto, brown, sauté, simmer, steam/rice, yogurt, keep warm, time delay, start/stop, and a plus and minus button to adjust cooking time and time delay. Also, on the control panel, you can see the HIGH and LOW indicator lights which blink while pressure or temperature is building. These three lights turn solid once the unit has reached proper pressure or temperature.
Getting Started: Before First Use
Read the safety instructions found in this manual before plugging in and operating the unit. Before using the multi-cooker for the first time, follow these steps:
- Remove all packing materials and literature from within the ZAVOR LUX™ Multi-Cooker. Lift out the removable cooking pot and remove any pieces of paper from under it. Remove the plastic protection from the control panel and any stickers from the lid or stainless steel housing.
- Wash all the removable parts in warm soapy water, rinse, and dry all parts thoroughly. Wipe the stainless steel outer housing with a clean damp cloth. NEVER submerge the stainless steel outer housing in water or any other liquid. Only the removable cooking pot is dishwasher safe.
- To clean the pressure regulator knob, gently push the pressure regulator knob down and at the same time turn the pressure regulator knob counterclockwise past STEAM to CLEAN setting. Once the white dot on CLEAN is aligned with the white dot on the base of the pressure regulator, you can lift the pressure regulator up and off the lid. Look through the holes of the pressure regulator to make sure nothing is obstructing, and then clean the pressure regulator knob with warm soapy water, allowing the water to run through the pressure regulator to remove all particles.
- To put the pressure regulator back onto the lid, align the CLEAN setting with the white dot on the base, gently push down on the pressure regulator and turn the knob clockwise until it slides back into place.
- Make sure the silicone gasket is seated correctly inside the lid or else the cooker cannot function properly.
- After thorough drying, place the removable cooking pot back into the Multicooker before cooking.
Operating Functions: Panel Programs and Functions

- Keep Warm: Used to reheat or keep cooked food warm until ready to serve.
- Steam/Rice: This function is used to steam meals such as vegetables and fish or to steam rice like in a traditional rice cooker. To steam foods add at least a half a cup of water into the bottom of your removable cooking pot and insert the ZAVOR Stainless Steel Steamer Basket and Trivet. Make sure that the steamer basket is positioned above the water. The ZAVOR Stainless Steel Steamer Basket and Trivet can be purchased separately on the ZAVOR website at www.zavoramerica.com.
- Brown: Use this function to seal in flavor and juice by giving the food a golden brown exterior.
- Sauté: Use this function when cooking small pieces of food by preparing them with very little oil on high heat before using the pressure cooking or slow cooking function.
- Simmer: This function is used to make soup, stew, sauce or other entrees that need to be cooked at a lower heat setting. This function is much gentler than the boiling point of water and makes meat and vegetables very tender.
- Pressure Cooking: HIGH-Use this function to cook at high pressure, 10-13 PSI (pounds per square inch). This pressure setting is more suitable to cook more tough meats and vegetables or other foods that are not so delicate. LOW- Use this function to cook at low pressure, 4-7 PSI. This pressure setting is more suitable to cook delicate foods such as tender vegetables and certain types of fish.
- Slow Cooking: This function cooks food slower than other cooking methods for up to 24 hours at temperatures of 190°F (LOW) or 212°F (HIGH). Slow cooking helps food retain maximum flavor and tenderness.
- Yogurt: This function is perfect for making traditional homemade yogurt and Greek yogurt.
- White Rice: This function uses low pressure and gives you a preset time of 10 minutes to cook different types of white rice.
- Brown Rice: This function uses high pressure and gives you a preset time of 20 minutes to cook a variety of different rices.
- Risotto: This function uses high pressure and gives you a preset time of 6 minutes to create a gourmet risotto dish.
- Start/Stop: To be used after a cooking selection has been made to begin the cooking process or if you would like to cancel the cooking function.
- Time Delay: Allows you to delay cooking time up to 6 hours. Push the time delay button, which increases by 30-minute increments until you reach the 6-hour maximum time.
- Mute Function: Allows the unit to operate without any sound. This function can be only turned on or off on the standby mode. To mute the sound, press + and - buttons simultaneously for 3 seconds. The screen displays "MUTE" and the sound is disabled. To turn the sound back on, press + and - buttons for 3 seconds again. The screen will display "BEEP" and the unit beeps twice.
Temperature/Timer Chart
| Cooking Function: | Temperature: | Preset Time: | Timer: |
| Keep Warm | 165°F | 30 minutes | Up to 24 hours, 30-minute increments |
| Steam/Rice | 212°F | 5 minutes | 1-99 minutes, 1-minute increments |
| Brown | 302°F-356°F | 30 minutes | 1-30 minutes, 1-minute increments |
| Sauté | 266°F-300°F | 30 minutes | 1-30 minutes, 1-minute increments |
| Simmer | 200°F | 30 minutes | 1-120 minutes, 1-minute increments |
| High Pressure | 240°F-248°F | 1 minute | 1 minute - 6 hours 1-minute increments |
| Low Pressure | 226°F-230°F | 1 minute | 1 minute - 6 hours 1-minute increments |
| High Slow Cooker | 212°F | 2 hours | 30 minutes - 24 hours, 30-minute increments |
| Low Slow Cooker | 190°F | 2 hours | 30 minutes - 24 hours, 30-minute increments |
| Yogurt | 104°F-109°F | 8 hours | Up to 24 hours, 30-minute increments |
| White Rice | 226°F-230°F | 10 minutes | 1 minute - 6 hours 1-minute increments |
| Brown Rice | 240°F-248°F | 20 minutes | 1 minute - 6 hours 1-minute increments |
| Risotto | 240°F-248°F | 6 minutes | 1 minute - 6 hours 1-minute increments |
Pressure Cooking Function
This function allows food to cook faster under pressure by reducing cooking time up to 70% compared to traditional cooking methods. Pressure cooking is fast, easy, safe, and healthy!
- Before every use, make sure the silicone gasket and the pressure regulating valves are clean and are placed correctly within the cooker.
- Plug the cord into a wall outlet. Also, make sure that the cord is properly and tightly plugged to the unit.
- Place the removable cooking pot into the cooker, and add the ingredients following the recipe. When cooking foods under pressure, a minimum of 1 cup (8 oz.) of liquid is required.
NOTE: Do not fill the pot more than 2/3 full food and liquid. Do not fill the unit more than ½ full when cooking foods that expand during cooking.
NOTE: The following foods tend to foam, froth and/or sputter: applesauce, cranberries, pearl barley, oatmeal, split peas, noodles/pasta, or rhubarb. These items may block the pressure valve if filled too high in the removable cooking pot. Please be sure when pressure cooking these items not to fill the removable cooking pot more than halfway.
- Place the lid on the cooker; aligning the protruding pin on the handle with the unlocked symbol, and turn your lid counterclockwise until it locks into place. You know when this unit is locked once you hear the pin click into place.
- Turn the pressure regulator knob to PRESSURE.
- Choose the desired cooking mode by pressing the PRESSURE COOK button once for HIGH pressure and twice for LOW pressure.
- Set the desired cooking time by pressing the + or - buttons once for each additional minute or to fast advance, hold the button down until you reach the desired time. The maximum pressure cooking time is 6 hours.
- To set the delay timer, select the TIME DELAY button and use the + or – buttons to adjust when cooking should begin. The delay time goes up in 1/2 hour increments.
- Press the START/STOP button to begin cooking. The indicator light on the PRESSURE COOK button flashes when the unit has begun to build pressure. If you forget to select the desired cooking time or forget to press the START/ STOP button, the unit beeps twice and the digital display reads --:-- after 30 seconds.
- As the pressure is building, the three circles next to the chosen pressure setting lights up one at a time. The PRESSURE COOK button flashes until the pressure has built entirely. Once pressure has reached, all three circles turns solid red, the pressure cooker button indicator light turns solid red, and then the unit beeps. Then, your cooking time begins.
NOTE: You may adjust the time when the unit is building the pressure or once the cooking process has started. To change the cooking time, press the + or - buttons once for each additional minute or to fast advance, hold the button down until you reach the desired time.
- The unit then begins to count down in minutes once the appropriate pressure has reached. The floating valve which is located in the lid rises, when the pressure has reached.

NEVER TRY TO FORCE THE LID OPEN WHILE YOU ARE COOKING UNDER PRESSURE. CAN RESULT IN A SERIOUS ACCIDENT.
NEVER DEEP FRY OR PRESSURE FRY IN THE MULTI-COOKER. IT IS DANGEROUS AND MAY CAUSE A FIRE AND SERIOUS DAMAGE.
- 12. The cooker beeps once the cooking time ends. It turns the automatic KEEP WARM function on, and this function blinks until you press the START/STOP button to cancel the function. After pressing the START/STOP button, release the pressure. You have two options for releasing the pressure:
- Quick Release Method: Release the pressure immediately by turning the pressure regulator knob to STEAM.
![]()
THE STEAM COMING OUT OF THE COOKER IS HOT, AND MIGHT CONTAIN DROPLETS OF HOT LIQUID. ALWAYS TURN THE JET OF STEAM AWAY FROM YOUR FACE AND HANDS. BE SURE TO USE POT HOLDERS WHEN RELEASING PRESSURE. - Natural Release Method: Allows the pressure to drop naturally without turning the pressure regulator knob to STEAM. Natural Release Method takes several minutes, during which the food inside continues cooking. Some recipes (such as risotto) benefit from this extra cooking time. You know when the pressure has released because the floating valve drops, and then you can open the lid.
- Quick Release Method: Release the pressure immediately by turning the pressure regulator knob to STEAM.
NOTE: If you do not press the START/STOP button at the end of the cooking time, the multi-cooker switches to KEEP WARM and beeps periodically to remind you that cooking has ended.
- Once all the pressure is released, remove the lid by turning it clockwise, lifting and tilting the lid away from you to avoid being scalded by some remaining steam or hot water condensation dripping from the inner portion of the lid.
AFTER COOKING, THE REMOVABLE COOKING POT IS HOT. USE POT HOLDERS TO HANDLE IT OR LET IT COOL DOWN BEFORE REMOVING.
Pressure Cooking Charts
Pressure cooking times are approximate times. Use these cooking times as a general guideline. Size and variety most likely alters cooking times.
Pressure Cooking Vegetables (Fresh & Frozen): To achieve the best results when pressure cooking fresh or frozen vegetables, please refer to the below tips and hints:
- Use the STEAM function when making steamed vegetable dishes.
- Use the quick release method when pressure cooking vegetables, so they do not overcook.
- Use a minimum of 1 cup of liquid when cooking vegetables.
- When steaming vegetables, use the ZAVOR Stainless Steel Steamer Basket and Trivet, which can be purchased at the ZAVOR website at www.zavoramerica.com or by calling a ZAVOR Representative at 1-855-928-6748.
Vegetable Pressure Cooking Chart:
| Vegetable | Pressure Setting | Fresh (Cooking Time) | Frozen (Cooking Time) |
| Acorn Squash, chunks | High | 6-7 minutes | 8-9 minutes |
| Artichoke, 4 medium – large | High | 8-10 minutes | 10-12 minutes |
| Asparagus | High | 1-2 minutes | 2-3 minutes |
| Whole Beets, medium – large | High | 20-25 minutes | 25-30 minutes |
| Broccoli, Florets | High | 2-3 minutes | 3-4 minutes |
| Brussel Sprouts | High | 3-4 minutes | 4-5 minutes |
| Butternut Squash, chunks | High | 8-10 minutes | 10-13 minutes |
| Cabbage, Quartered | High | 3-4 minutes | 4-5 minutes |
| Carrots, whole or chunk | High | 2-3 minutes | 3-4 minutes |
| Cauliflower, florets | High | 2-4 minutes | 3-5 minutes |
| Celery, chunks | High | 2 minutes | 3 minutes |
| Collard Greens | High | 4-5 minutes | 5-6 minutes |
| Corn on the Cob | High | 3-5 minutes | 4-6 minutes |
| Edamame, in pod | High | 4-5 minutes | 5-6 minutes |
| Eggplant | High | 2 minutes | 3 minutes |
| Endive | High | 1-2 minutes | 2-3 minutes |
| Kale, coarsely chopped | High | 1-2 minutes | 2-3 minutes |
| Leeks | High | 2-4 minutes | 3-5 minutes |
| Onions, sliced | High | 2 minutes | 3 minutes |
| Potatoes, whole, small | High | 5-8 minutes | 6-9 minutes |
| Potatoes, whole, large | High | 10-12 minutes | 11-13 minutes |
| Potatoes, sliced or cubed | High | 5-8 minutes | 6-9 minutes |
| Pumpkin, chunks | High | 4-8 minutes | 6-12 minutes |
| Spinach | High | 1-2 minutes | 3-5 minutes |
| Sweet Potatoes, cubed | High | 7-9 minutes | 9-11 minutes |
| Sweet Potatoes, whole | High | 10-15 minutes | 12-19 minutes |
| Tomatoes, quartered | High | 2 minutes | 4 minutes |
| Zucchini | High | 2 minutes | 3 minutes |
Pressure Cooking Fresh or Dried Fruits: To achieve the best results when pressure cooking dried or fresh fruit, please refer to the below tips and hints:
- Quick release method is recommended when pressure cooking fruit to prevent from overcooking.
- One-half cup of water is sufficient for cooking any quantity of fruit because the cooking time is extra short.
- Add sugar to fruit only after being cooked, not before.
Fruit Pressure Cooking Chart:
| Fruit | Pressure Setting | Fresh (Cooking Time) | Dried (Cooking Time) |
| Apples (Slices or Chunks) | High | 2 minutes | 3 minutes |
| Apples (Whole) | High | 3 minutes | 4 minutes |
| Apricots, whole or halved | High | 2-3 minutes | 3-4 minutes |
| Peaches | High | 2-3 minutes | 4-5 minutes |
| Pears | High | 2-4 minutes | 3-5 minutes |
| Plums/Prunes | High | 2-4 minutes | 3-5 minutes |
| Grapes/Raisins | High | 1-2 minutes | 4-5 minutes |
Pressure Cooking Beans/Legumes (Dry & Soaked): To achieve the best results when cooking with dried or soaked beans/legumes, please refer to the below tips and hints:
- Rinse dried beans/legumes under cold water and drain; discard any pebbles or other debris in batch.
- Do not fill the cooker more than half full to allow for beans/legumes to expand in size.
- Use enough liquid to cover the beans/legumes
- Do not salt beans/legumes. Using salt while cooking the beans/legumes prevents them from cooking correctly.
- Add 1-2 tablespoons of oil to beans/legumes to minimize frothing.
- Release pressure when cooking dried beans/legumes by using the natural release method for best results.
Beans/Legumes Pressure Cooking Chart:
| Beans/Legumes | Pressure Setting | Cooking Time (Dried 180ml Cups) | Cooking Time (Soaked Overnight) |
| Adzuki Beans | High | 20-25 minutes | 10-15 minutes |
| Black Beans | High | 20-25 minutes | 10-15 minutes |
| Black-Eyed Peas | High | 20-25 minutes | 10-15 minutes |
| Cannellini Beans | High | 35-40 minutes | 20-25 minutes |
| Chestnuts, pierced | High | 7-10 minutes | 5-7 minutes |
| Chickpeas (Garbanzo Beans) | High | 34-40 minutes | 20-25 minutes |
| Great Northern Beans | High | 28-30 minutes | 23-25 minutes |
| Kidney Beans | High | 25-30 minutes | 20-25 minutes |
| Lentils (Brown) | High | 15-20 minutes | N/A |
| Lentils (Green) | High | 15-20 minutes | N/A |
| Lentils (Red) | High | 15-17 minutes | N/A |
| Lima Beans | High | 20-24 minutes | 10-15 minutes |
| Navy Beans | High | 25-30 minutes | 20-25 minutes |
| Pinto Beans | High | 25-30 minutes | 20-25 minutes |
| Red Beans | High | 25-30 minutes | 20-25 minutes |
| Soybeans | High | 25-30 minutes | 20-25 minutes |
| Split Peas (Green) | High | 15-20 minutes | 10-15 minutes |
| Split Peas (Yellow) | High | 15-20 minutes | 10-15 minutes |
Pressure Cooking Rice/Grains: To achieve the best results when pressure cooking rice/grains, please refer to the below tips and hints:
- Add 1-2 tablespoons of oil to the dried grains to minimize frothing.
- Do not fill the removable cooking pot more than halfway to allow rice/grain to expand in size.
- Do not use the quick release method to release pressure; Use the natural release method instead to release pressure from the cooker.
- Pearl Barley tends to froth, foam, and sputter, which may block the pressure valve if filled too high in the removable cooking pot. Please be sure not to fill the removable cooking pot more than halfway.
Rice/Grain Pressure Cooking Chart:
| Rice/Grain | Grain: Water Ratio (180ml Cups) | Cooking Function & Cooking Times |
| Arborio | 1:3 | Risotto, 6 minutes |
| Barley | 1:3 – 1:4 | Brown Rice, 25-30 minutes |
| Basmati | 1:1½ | White Rice, 6-9 minutes |
| Brown | 1:1¼ | Brown Rice, 25-30 minutes |
| Couscous | 1:2 | Brown Rice, 5-8 minutes |
| Jasmine | 1:1 | White Rice, 8-9 minutes |
| Long Grain | 1:1½ | White Rice, 10 minutes |
| Millet | 2:3 | Brown Rice, 10-12 minutes |
| Pearl Barley | 1:4 | Risotto, 25-30 minutes |
| Quick Cooking Oats | 1:1 2⁄3 | Risotto, 5-6 minutes |
| Quinoa | 1:2 | Brown Rice, 8-10 minutes |
| Short Grain Rice | 1:1½ | White Rice, 8-9 minutes |
| Steel Cut Oats | 1:1 2⁄3 | Risotto, 10 minutes |
| Sushi Rice | 1:1½ | White Rice, 9 minutes |
| Wheat Berries | 1:3 | Brown Rice, 25-30 minutes |
| Wild Rice | 1:3 | Brown Rice, 25-30 minutes |
Pressure Cooking Meat/Poultry: To achieve the best results when cooking meat/poultry, please refer to the below tips and hints:
- Cut meat/poultry into pieces of uniform size for even cooking.
- When mixing meats, cut those that cook more quickly into larger pieces and those that cook more slowly into smaller pieces.
- Brown meat in small batches – overcrowding the cooker can result in the meat becoming tough and flavorless.
Meat/Poultry Pressure Cooking Chart:
| Meat/Poultry | Pressure Setting | Cooking Time |
| Beef Brisket, whole | High | 40-50 minutes |
| Oxtail | High | 40-50 minutes |
| Beef Short Ribs | High | 35-40 minutes |
| Boneless Chicken Strips | High | 10-12 minutes |
| Chicken Breast | High | 8-10 minutes |
| Chicken Legs | High | 10-12 minutes |
| Chicken Wings | High | 10-12 minutes |
| Chicken (Whole) | High | 20-25 minutes |
| Cornish Hen | High | 10-15 minutes |
| Duck (Whole) | High | 25-30 minutes |
| Ham (Uncooked) | High | 26-30 minutes |
| Lamb, Cubes | High | 10-13 minutes |
| Pork Spareribs | High | 20-25 minutes |
| Pork Chops | High | 8-10 minutes |
| Pork (Baby Back Ribs) | High | 19-24 minutes |
| Pork Loin | High | 45-50 minutes |
| Pork Shoulder | High | 45-50 minutes |
| Turkey (Drumsticks) | High | 15-20 minutes |
| Veal Chops | High | 5-8 minutes |
| Beef Cubes | High | 18-23 minutes |
| Chicken Cubes | High | 10-12 minutes |
Pressure Cooking Seafood: To achieve the best results when cooking seafood, please refer to the below tips and hints:
- Always leave at least 2 inches from the top rim to prevent overflowing.
- Smaller types of seafood, such as clams and shrimp, do not take long to cook. Therefore, it's best to add these types of seafood to a dish during the last few minutes of cooking.
Seafood Pressure Cooking Chart:
| Fish/ShellFish | Pressure Setting | Cooking Time (Fresh) | Cooking Time (Frozen) |
| Fish, whole | Low | 5-6 minutes | 7-10 minutes |
| Fish Filet | Low | 2-3 minutes | 3-4 minutes |
| Fish Steak | Low | 3-4 minutes | 4-6 minutes |
| Crab Legs | Low | 3-4 minutes | 5-6 minutes |
| Lobster Tail | Low | 2-3 minutes | 3-4 minutes |
| Lobster (Whole) | Low | 3-4 minutes | 4-6 minutes |
| Mussels | Low | 2-3 minutes | 4-5 minutes |
| Scallops (Small) | Low | 1 minute | 2 minutes |
| Scallops (Large) | Low | 2 minutes | 3 minutes |
| Shrimp, shell | Low | 2-3 minutes | 3-4 minutes |
| Shrimp (Med/Large) | Low | 1-2 minutes | 2-3 minutes |
| Shrimp (Jumbo) | Low | 2-3 minutes | 3-4 minutes |
Rice Cooking Programs
White Rice: Cook rice to perfection every time with the WHITE RICE function. This function is programmable to ensure rice is soft and composed of just the right cooking temperatures. Leaving rice fluffy and delicious while eliminating any cooking hassle.
NOTE: For information on how to steam rice like in a traditional rice cooker, please refer to the Steam/Rice Function section of this manual.
- Place the removable cooking pot into the multi-cooker.
- Place about 1-2 tablespoons of oil into the removable cooking pot.
- Add the water and rice ratios needed and any other desired ingredients into the removable cooking pot.
- Close and lock the lid of the multi-cooker by properly aligning the handles and turning the lid counterclockwise. Set pressure regulator knob to PRESSURE.
- Press the WHITE RICE function, which, shows a preset time of 10 minutes. If you need to adjust the time, press the + or – buttons to adjust timing and then press the START/STOP button once to begin cooking.
- As the pressure is building, the WHITE RICE function blinks. Once pressure has reached, the light turns solid red and the unit beeps. Then, your cooking time begins and the multi-cooker starts counting down by minutes on the cookers digital screen.
- Once cook time is over, the multi-cooker automatically goes to KEEP WARM function until you press the START/STOP button to cancel the function.
Brown Rice: The BROWN RICE function ensures your rice is cooked entirely while maintaining all of its richness and nutrients. This function transforms your rice flawlessly by utilizing a specialized cooking cycle.
- Place the removable cooking pot into the multi-cooker.
- Place about 1-2 tablespoons of oil into the removable cooking pot.
- Add the water and rice ratios needed and any other desired ingredients into the removable cooking pot.
- Close and lock the lid of the multi-cooker by properly aligning the handles and turning the lid counterclockwise. Set pressure regulator knob to PRESSURE.
- Press the BROWN RICE function, which shows a preset time of 20 minutes. If you need to adjust the time, press the + or – buttons to adjust timing and then press the START/STOP button once to begin building pressure.
- As the pressure is building, the BROWN RICE function blinks. Once pressure has reached, the indicator light turns solid red and the unit beeps. Then, your cooking time begins and the multi-cooker starts counting down by minutes on the multi-cookers digital screen.
- Once cook time is over, the multi-cooker automatically goes to KEEP WARM function until you press the START/STOP button to cancel the function.
Risotto: The RISOTTO function ensures the temperature is perfectly precise. Create Risotto that has the perfect blend of timing, temperature and taste!
- Place the removable cooking pot into the multi-cooker.
- Place about 1 tablespoon of vegetable or olive oil into the removable cooking pot and choose SAUTÉ function to sauté the Arborio rice and other ingredients with the lid off first for about 1-2 minutes.
- Add water or stock and any seasoning or ingredients needed. Once the liquid comes to a rapid boil, properly close and lock the pressure cooker lid.
- Choose the RISOTTO function, which is preset to 6 minutes. If you need to adjust the time for the recipe, press the + or – buttons to do so.
- Press the START/STOP button once to begin building pressure. The RISOTTO function blinks as its building pressure.
- Once pressure has been built, the red blinking light on the RISOTTO function goes solid red, the unit beeps and that's when your cooking time begins, and the unit counts down by minutes.
- After your cooking time over, the multi-cooker automatically switches to the KEEP WARM function.
Slow Cooking Function
Prepare slow cooker classics such as pot roasts, soups, and stews in up to 24 hours with this function. Load your ingredients in the morning and dinner is waiting for you in the evening.
- Place the removable cooking pot into the multi-cooker.
- Place all ingredients as needed into the removable cooking pot.
- Place the lid on the cooker; align the protruding pin on the handle with the condensation collector (open lock symbol), and turn it counterclockwise until the locking pin clicks into place. Turn the pressure regulator knob to STEAM when using the slow cooking function.
- Choose the desired cooking mode by pressing the SLOW COOK button on the control panel once for HIGH slow cooking or twice for LOW slow cooking.
- Set the desired cooking time by pressing the + or – buttons or to fast advance, hold the + or - button down till you reach the desired cooking time. The longest cooking time, when slow cooking, is 24 hours at either 190°F (LOW) or 212°F (HIGH).
- To set the delay timer, select the TIME DELAY button and use the + or – buttons to adjust when it should begin cooking.
- Press the START/STOP button to set the multi-cooker. The circles on either the HIGH or LOW option, whichever has been chosen on the panel, begins to light up one at a time, indicating that heat is beginning to form. When the indicator light on the slow cook button goes solid red and all three circles go solid red, this means proper temperature has reached, and cook time begins. If you forget to select the desired cooking time or forget to press the START/ STOP button, the unit beeps twice and the digital display reads --:-- after 30 seconds.
NOTE: You can adjust the cooking mode (Slow Cook HIGH or LOW) or time when the unit is building the temperature or once the cooking process has started. To adjust the cooking mode, press SLOW COOK button once to switch from HIGH to LOW or from LOW to HIGH. To change the cooking time, press the + or - buttons once for each additional minute or to fast advance, hold the button down until you reach the desired time.
- The unit begins to count down in one-minute increments after the temperature reaches either 190°F (LOW) or 212°F (HIGH).
- When the cooking time is up, the unit beeps and automatically goes into KEEP WARM mode until you press the START/STOP button to cancel the function.
Yogurt Function
You only need two ingredients to make yogurt at home: any type of milk and plain store-bought yogurt (with live active cultures) or starter yogurt.
Choosing the Milk:
The following types of milk may be used:
- Pasteurized milk of any fat content (full, 2%, 1% or skim milk)
- Powdered milk
- Long-life UHT sterilized milk
- Soy Milk. Be sure to use UHT soy milk, which contains one of the following ingredients: fructose, honey, or malt. These ingredients are necessary for fermentation, and you cannot be succeed if none are available in the milk.
Live Active Cultures-Unflavored Yogurt:
All you need is a small amount of plain, unflavored yogurt with live active cultures, often called probiotics. The plain yogurt can either be purchased from a store or used from a previous batch of homemade yogurt. Homemade yogurt can only be used a maximum of 2 times as starter yogurt. If you use the store bought yogurt and prefer a particular brand, try using that one as a starter.
The Live & Active Culture seal, from the National Yogurt Association (NYA), helps you recognize those products containing significant amounts of live and active cultures. The seal is a voluntary identification available to all manufacturers of yogurt whose products contain at least 100 million cultures per gram at the time of manufacture. Since the seal program is voluntary, some yogurt products may have some live cultures but not carry the seal.

NOTE: For 5 cups of milk use a ½ cup of plain yogurt or 1 packet starter culture; for 1 cup of milk use about one tablespoon of plain yogurt.
NOTE: You can make yogurt either directly in the removable cooking pot or using glass jars in the removable cooking pot by placing them on a steamer.
Yogurt Making Process:
- Take the starter yogurt from the refrigerator so that it has time to get closer to room temperature while you heat the milk.
- Place the amount of milk desired in the removable cooking pot. Place the lid on the cooker, turn the pressure regulator knob to STEAM and heat the milk to 180°F-185°F by pressing the YOGURT function ONCE. The display reads HEAT, and once the milk reaches the proper temperature of 180°F-185°F, the unit beeps and goes to standby mode. Use a thermometer to make sure that proper temperature has reached.
NOTE: The unit only detects the proper temperature of 180°F-185°F when a half gallon (8 cups) of milk is in use. If using a different amount of milk, please use a thermometer to make sure that proper temperature has reached. If needed, rerun the HEAT function to get to the proper temperature.
- Remove the removable cooking pot from heat and allow the milk to cool to anywhere between (100°F-110°F). To accelerate the cooling down process, place the removable cooking pot in cold water. Do not let it cool below 90°F. Use a thermometer to make sure that proper temperature has reached.
- Stir in the plain yogurt or starter culture packet and use a silicone whisk to mix it with the milk until the consistency is smooth with no lumps remaining.
- Place the lid on the multi-cooker; align the handle with the open lock symbol, and turn it counterclockwise until the locking pin clicks into place. Turn the pressure regulator knob to STEAM when using the yogurt function. Press the YOGURT function TWICE. The preset cooking time is 8 hours. Depending on the flavor of yogurt you like best, you can choose how long to cook the yogurt for by pressing the + or - button once for each additional half hour or to decrease the time by a half hour. To fast advance, hold the button down until you reach the desired cooking time. The longest cooking time is 24 hours. The preparation time impacts the yogurt taste. With longer cooking time, the yogurt could have a tarter flavor. With shorter time, the yogurt could have a milder flavor.
- Press the START/STOP button to begin the yogurt function. The display shows: YGRT and cooking time alternatively. The unit begins to count down in 1 minute increments once the correct temperature has reached. When the cooking time is up, the unit beeps and it turns to standby mode.
- When the yogurt is ready, remove the lid. There may be some yellowish liquid, whey, on top of the yogurt. Don't worry, this is normal, whey contains nutrients and protein. Mix it back into the yogurt.
- If you prefer regular yogurt, cover and place in the refrigerator for 2 to 3 hours before serving, or until yogurt cools down.
NOTE: THE Multi-cooker SHOULD REMAIN PERFECTLY STILL DURING THE COOKING PROCESS. DO NOT MOVE THE APPLIANCE; DO NOT REMOVE THE REMOVABLE COOKING POT OR THE LID AS THIS AFFECTS THE FIRMNESS OF THE YOGURT. DO NOT ADD ANY FLAVORING BEFORE COMPLETING THE YOGURT MAKING PROCESS.
Yogurt Making in Glass Jars:
- Take the starter yogurt from the refrigerator so that it has time to get closer to room temperature while you heat the milk.
- When you heat the milk in glass jars, add 1 cup of water into the removable cooking pot, then insert a yogurt making rack, and place your glass jars on top of the rack. Place the lid on the multi-cooker; align the protruding pin on the handle with the condensation collector (open lock symbol), and turn it counterclockwise until the locking pin clicks into place. Turn the pressure regulator knob to STEAM. Heat the milk to 180°F-185°F by pressing the YOGURT function ONCE. Once the process is over, use the Natural Release Method to release the steam. Always use a thermometer to make sure that proper temperature has been reached.
- The second step after heating the milk is allowing the milk to cool to lukewarm (100-110°F). To accelerate the cooling down process, take out the jars with the help of a jar lifter. Do not let it cool below 90°F. Use a thermometer to make sure that proper temperature has reached.
- Stir in the plain yogurt with live active culture and use a spoon to mix it with the milk until the consistency is smooth with no lumps remaining.
- Place the lid on the multi-cooker; align the protruding pin on the handle with the condensation collector (open lock symbol), and turn it counterclockwise until the locking pin clicks into place. Turn the pressure regulator knob to STEAM. Press the YOGURT function TWICE. The preset cooking time is 8 hours. Depending on the flavor of yogurt you like best, you can choose how long to cook the yogurt for by pressing the + or – button once for each additional half hour or to decrease the time by a half hour. To fast advance, hold the button down until you reach the desired cooking time. The longest cooking time is 24 hours. The preparation time impacts the yogurt taste. With longer cooking time, the yogurt could have a tarter flavor. With a shorter time, the yogurt could have a milder flavor.
- Press the START/STOP button to begin the yogurt function. The display shows: YGRT and cooking time alternatively. The unit begins to count down in minutes once the correct temperature has reached. When the cooking time is up, the unit beeps and it turns to standby mode.
- When the yogurt is ready, remove the lid. There may be some yellowish liquid, whey, on top of the yogurt. Don't worry, this is normal, whey contains nutrients and protein. Mix it back into the yogurt.
- If you prefer regular yogurt, cover, and place in the refrigerator for 2 to 3 hours before serving, or until yogurt cools.
Helpful Hints and Tips:
- The probiotics and live active cultures are at its best when the yogurt is fresh. For the best results, only repeat the same starter yogurt 2 times max. After a few days, the probiotics in the previous batch can weaken, and the yogurt may result in a liquid consistency.
- You may choose to make flavored yogurt and add sugar, honey, flavorings, fruit, or other ingredients to taste test just before eating.
- For best results and ease of preparation, use whole or semi-skimmed UHT milk or reconstituted milk powder. They don't need to be heated or cooled down.
- The best before-date for natural yogurts is the date the yogurts were made plus 7 days, depending on the freshness of the milk. When in doubt, use the expiration date on your milk as a guideline.
Greek Yogurt
- Place the strainer or a cheesecloth inside a container, so the strainer doesn't touch the bottom of the container to allow for better drainage.
- Pour the homemade yogurt into the strainer or cheesecloth and cover with the lid. Put it in the refrigerator to strain and chill for at least 2 hours. The longer the time, the thicker the yogurt becomes.
- Gently remove yogurt from strainer or cheesecloth by turning the strainer or cheesecloth upside down on a plate or container.
- Put it back in the refrigerator to chill for another few hours before serving.
Brown Function
This function allows you to brown food such as meat or poultry, to help bring forth the best flavor and texture before cooking.
Pat the food dry with a paper towel before browning. For the best results, make sure the oil is hot before adding your meat or poultry. Brown the food in batches to keep the correct oil temperature for even browning.
- Place the removable cooking pot into the multi-cooker.
- Add the appropriate amount of oil into the removable cooking pot as indicated in the recipe. The lid should remain off when browning.
- Press the BROWN button. The light on the BROWN button flashes and the display reads 356°F. You may adjust the temperature with + or - buttons (it ranges from 302°F-356°F).
- Next, press the BROWN function again. The display reads 00:30. You may adjust the time with + or - buttons.
- Press the START/STOP button. When the BROWN button light goes solid, that means that the cooker has reached the proper temperature and the cooker begins heating the oil.
- After about one minute of heating the oil, add food, and begin browning in batches.
NOTE: You can adjust the temperature and time when cooking is in process. To adjust time, press the + or - button. To adjust the temperature, press the BROWN function - the display shows the current temperature. Adjust it by pressing the + or - button.
NOTE: When switching from Browning to any of the main cooking functions, the unit will require some additional time to come down to the proper temperature. Once the proper temperature has been reached, the unit can begin running the main cooking function.
- Once browning is complete, press the START/STOP button to cancel the BROWN function. You can now use any of the cooking programs to continue preparing the recipe. Follow the instructions for each function.
![information]() NOTE: When using the BROWN function do not place the lid on the multi-cooker. The multi-cooker beeps every 10 seconds if the lid is on to alert you that it should be removed when using the BROWN function.
NOTE: When using the BROWN function do not place the lid on the multi-cooker. The multi-cooker beeps every 10 seconds if the lid is on to alert you that it should be removed when using the BROWN function.
Sauté Function
This function allows you to sauté food before cooking. Sauté small amounts of food on high heat with very little oil before cooking.
Pat the food dry with a paper towel before sautéing. For best results, make sure the oil is hot before adding your food. Sauté the food in batches to keep the correct oil temperature for even sautéing.
- Place the removable cooking pot into the multi-cooker.
- Add the appropriate amount of oil into the removable cooking pot as indicated in the recipe. The lid should remain off when sautéing.
- Press the SAUTÉ function. The light on the SAUTÉ button flashes and the display reads 284°F. You may adjust the temperature with + or - buttons (it ranges from 266°F-300°F).
- Next, press the SAUTÉ function again. The display reads 00:30. You may adjust the time with + or - buttons.
- Press the START/STOP button. Once the cooker reaches the appropriate temperature, the indicator light stops flashing, and the cooker starts heating the oil.
- After about one minute of heating the oil, add food, and begin sautéing.
NOTE: You may adjust the temperature and time when cooking is in process. To adjust time, press the + or - button. To adjust the temperature, press the function SAUTÉ - the display shows the current temperature. Adjust it by pressing the + or - button.
- Once sautéing is complete, press the START/STOP button to cancel the SAUTÉ function. You can now use any of the cooking programs to continue preparing the recipe. Follow the instructions for each function.
NOTE: When switching from Sautéing to any of the main cooking functions, the unit will require some additional time to come down to the proper temperature. Once the proper temperature has been reached, the unit can begin running the main cooking function.
Simmer Function
Prepare your foods with this fantastic technique used to make soups, stocks, sauces, and other wonderful creations. The SIMMER function ensures your food stays just below the boiling point while still being heated.
- Place the removable cooking pot into the multi-cooker and add the ingredients.
- With the lid off, press the SIMMER function once and then press the + or – buttons to adjust the cooking time. Press the START/STOP button to begin cooking.
NOTE: You may adjust time when cooking is in process by pressing the + or - button.
- When done simmering, press the START/STOP button to cancel the function.
Steam/Rice Function
This function allows you to steam delicate foods such as fish and vegetables or to steam rice like in a traditional rice cooker.
TO STEAM FOODS:
- Place the removable cooking pot into the multi-cooker.
- Place about 1-2 cups of water into the bottom of the removable cooking pot. Then add the steamer basket*, or a rack making sure that the water sits a little bit below it.
- Place ingredients into the steamer basket or on the rack and close the lid of the cooker.
- Turn the pressure regulating knob to STEAM.
- Press the STEAM/RICE function ONCE and then press the + or – buttons to adjust the cooking time. Press the START/STOP button to begin cooking.
- When done steaming, press the START/STOP button to cancel the function.
*Please note that the ZAVOR Stainless Steel Steamer Basket and Trivet can be purchased separately. To purchase this item, please go to the ZAVOR website at www.zavoramerica.com or contact a ZAVOR Representative at 1-855-928-6748.
NOTE: If the STEAM/RICE function is selected, but the regulator valve is turned to PRESSURE the unit beeps every 10 seconds to alert you that you are either using the wrong function or the regulator knob is not turned to the correct position. When using the STEAM/RICE function the regulator knob must be turned to STEAM.
NOTE: If using the STEAM/RICE function but there isn't enough liquid in the removable cooking pot, the multi-cooker beeps every 5 seconds to alert you that more liquid needs to be put in.
TO COOK RICE:
- Place the removable cooking pot into the multi-cooker and add the ingredients.
- Place the lid on the cooker; align the protruding pin on the handle with the condensation collector (open lock symbol), and turn it counterclockwise until the locking pin clicks into place. Turn the pressure regulator knob to STEAM.
- Press the STEAM/RICE function TWICE. The display shows
![]() . Press the START/STOP to begin cooking. The display shows rotating lights for the entire process of cooking.
. Press the START/STOP to begin cooking. The display shows rotating lights for the entire process of cooking.
NOTE: There is no need to adjust time since the unit does it automatically.
Keep Warm Function
The KEEP WARM function allows for reheating of food or can keep cooked food warm for up to 24 hours.
- Place the removable cooking pot into the multi-cooker. Then place the food into the removable cooking pot to reheat.
- Place the lid on the multi-cooker; align the pin on the handle with the condensation collector, and turn it counterclockwise until it locks into place. The locking pin clicks when it's in place.
- Turn the pressure regulator knob to STEAM.
- Press the KEEP WARM button. The light on the keep warm button flashes and the digital display reads WARM and alternate to show 24:00. You may adjust time by pressing + and - buttons.
- Press the START/STOP button to begin the function. The display reads WARM and alternates to show the time. The indicator light stops flashing once the proper temperature has reached.
- Since pressure is not building when warming food, you can open the lid to check on your food as needed. To turn the function off, press the START/ STOP button once.
NOTE: When using the pressure cooking, rice cooking or slow cooking programs, the KEEP WARM setting automatically starts after the cooking time ends. The selected program's light turns off, and the KEEP WARM function light turns on. The food stays warm until you press the START/STOP button to cancel the function.
Time Delay Function
This function allows you to delay the cooking process for up to 6 hours. You can use the delay time setting after choosing a cooking function: Pressure Cook HIGH and LOW, Slow Cook HIGH and LOW, White Rice, Brown Rice, and Risotto functions.

DO NOT LEAVE PERISHABLE FOODS SUCH AS MEAT, POULTRY, FISH, CHEESE AND DAIRY PRODUCTS AT ROOM TEMPERATURE FOR MORE THAN 2 HOURS (OR MORE THAN 1 HOUR WHEN THE ROOM TEMPERATURE IS ABOVE 90°F). WHEN COOKING WITH THESE FOODS, DO NOT SET THE DELAY FUNCTION FOR MORE THAN 1-2 HOURS.
- Select the desired cooking function by choosing the correct function button (Pressure Cook, Slow Cook, White Rice, Brown Rice, and Risotto) and adjusting the time as needed.
- Press the TIME DELAY button. The button blinks and the panel reads "00:30" meaning half an hour of delay. Press the + or – buttons to adjust the desired delay time needed.
- Press the START/STOP button. The multi-cooker begins cooking after the delay time has elapsed.
FOR EXAMPLE: It is 11:30 a.m. and you want your dinner to be ready by 6 P.M. Your recipe calls for 12 minutes of high pressure cooking. You can program your delay time for 6 hours and then the pressure cooking function for 12 minutes. You do this by pressing the pressure cook function once and then adjusting the time with the + or – buttons until it reads 00:12 minutes and then pressing the TIME DELAY button once and then the + or – buttons until the panel reads 06:00 hours. Next, you press the START/STOP button, and you're all set! The cooker starts cooking at 5:30 p.m. and your dinner is ready at 5:42 p.m. The automatic warm function ensures that it doesn't get cold.
Cleaning and Maintenance
Do not wash any parts of the multi-cooker in the dishwasher except for the removable cooking pot. Always wash the removable cooking pot thoroughly after every use, or if it has not been in use for an extended time.
- Unplug the multi-cooker and let the unit cool before cleaning.
- Remove the removable cooking pot and wash with warm soapy water or in the dishwasher. However, hand washing is always recommended. Rinse and dry thoroughly.
- Wipe the outer housing with a clean damp cloth and rinse the lid with warm water and soap. Do not submerge the multi-cooker or the lid in water.
NOTE: To remove an odor from the inside part of the lid, clean it with water and vinegar (1:1 ratio).
- Remove the condensation reservoir by pulling it down. Wash with warm, soapy water. Rinse and dry thoroughly. Replace by pushing it back into place.
- Carefully remove the y-shaped silicone gasket attachment by grasping the center of the metal "Y" and pulling. Remove the silicone gasket from the metal ring. Clean the silicone gasket, wash with warm soapy water. Rinse and dry thoroughly. Place the gasket back on the metal ring and then place the Y-shaped attachment back onto the lid by placing the silicone centerpiece back on the steel tip and pushing down.
NOTE: The silicone gasket must always be positioned correctly on the underside of the lid; otherwise, the unit cannot work. Check periodically to make sure that it is clean, flexible, and not cracked or torn (See "Getting Started" section in this manual).
- If the silicone gasket appears damaged, cracked or torn, do not use the unit and contact ZAVOR Customer Service Department at 1-855-928-6748 or visit the ZAVOR website to purchase a new silicone gasket atwww.zavoramerica. com.
- For optimal performance, the bottom of the cooker, in the area under the removable cooking pot where the temperature sensor and heating pad are located must be cleaned every time after each use. Wipe with a soft damp cloth and be sure to dry thoroughly.
- Never use abrasive cleaners or scouring pads to clean any of the parts.
Cleaning the Pressure Regular Knob
ALWAYS check that the pressure regulator knob and the pressure safety valves are in good working order before each use.
1. After the unit has cooled, remove the lid from the multi-cooker.

- Press down and at the same time turn the pressure regulator knob counterclockwise past STEAM to CLEAN setting and carefully lift to remove. Look through the holes to make sure there is no particle build-up, and put it under running water to clean.
- Turn the lid over and place it on a table top. Pull out the anti-locking case. Using a brush or toothpick, check and remove any food or foreign particles that could be in the floating valve. Replace the anti-locking case by pressing down.
- Replace the pressure regulator knob by lining the CLEAN dot with the dot on the lid of the unit and turning clockwise until it goes into place. The white dot on the base of the pressure regulator should line up with the PRESSURE or STEAM setting on the pressure regulator knob. If it doesn't, remove the knob again and try realigning the dots the other way around.
Troubleshooting
If the LUX™ detects an internal error or a wrong connection, it displays an error message with a code on the display panel and stops functioning. These codes allow you to identify the cause of the error and help you find the solution to the problem. If the error persists, please call our customer service department for assistance at 1-855-928-6748.
| E1: | Internal circuits have disconnected. |
| Self-help: | Call our customer service department for assistance. |
| E2: | The internal sensor has short-circuited and the current is insufficient or the unit is overheating. |
| Self-help: | Try to cool the unit by turning it off and unplugging as well as removing the cooking pot. |
| E3: | Unit is overheating. |
| Self-help: | Try to cool the unit by turning it off and unplugging as well as removing the cooking pot. If the E3 message persists, the cooking pot or heating plate may be deformed. You need to contact our customer service department. |
| E4: | Pressure switch has malfunctioned. |
| Self-help: | Check the cooking pot for warping. Check the heating plate for any food residue. |
IMPORTANT SAFEGUARDS
The product you have purchased is a state of the art appliance. It adheres to all of the latest safety and technology standards; however, as with any electric appliance, there are some potential risks. Only operate this cooker following the instructions provided and only for its intended household use.
PLEASE READ THE INSTRUCTIONS BELOW BEFORE USING THE APPLIANCE FOR THE FIRST TIME.
- Read all of the instructions contained in this manual before using the appliance.
- This product is not intended for commercial or outdoor use; it is only for household and indoor use.
- Do not operate the unit if the electric cord or plug is damaged. If the appliance is not working correctly, has been dropped or damaged, left outdoors or submerged in water, discontinue use immediately and contact our customer service department at 1-855-928-6748.
- The multi-cooker has a NEMA 5-15P, 3 pins plug, and a 47.24 inch power cord.
- Attach the plug to the multi-cooker base first, then insert the power plug into a power outlet. Always ensure that the power cord is completely dry.
- Do not let the electric cord hang over the edge of the table or counter.
- Do not let the electric cord touch hot surfaces.
- If using an extension cord to connect the multi-cooker, please note that a damaged extension cord can cause the unit to malfunction. Always check your extension cord for damage and be sure it is compliant with the required voltage. For safety, be sure to arrange the cord so that it can't be pulled on by children or tripped over unintentionally.
- Do not place the multi-cooker near heat-emitting devices such as heaters, gas cooktops, or electric burners. Do not place the cooker in a heated oven.
- Always use the multi-cooker in a well-ventilated area.
- Using accessories or replacement parts that are not recommended or sold by the manufacturer may cause damage to the multi-cooker or personal injury.
- Children need close adult supervision at all times when they are in or around the kitchen. Keep this appliance out of the reach of children.
- This appliance is not intended for use by persons (including children) with reduced physical, sensory or mental capabilities, or lack of experience and knowledge unless they have been given supervision or instruction concerning use of the appliance by a person responsible for their safety.
- While in operation, do not cover the appliance or position it near flammable materials including curtains, draperies, walls, and fabric upholstered furniture.
- Do not open the pressure cooker until the unit has cooled, and all internal pressure has released. If the handles are difficult to push apart, this indicates that the cooker is still pressurized – do not force it open. Any pressure in the cooker can be hazardous.
- Always cook in the removable cooking pot of the multi-cooker. Cooking without the removable cooking pot may cause an electric shock or damage to the unit.
- Never deep fry or pressure fry in the cooker. It is dangerous and may cause a fire and severe damage.
- Never cover or block the pressure valve with anything. This blocking may cause over pressurizing and lead to severe accidents.
- While you're cooking, the lid and the outer stainless steel surface of the cooker might get hot. Handle with care and carry or move the cooker using only the side handles. Be very cautious when moving an appliance containing hot food or liquids.
- Keep hands and face away from the pressure regulator knob when releasing pressure from the cooker to avoid being scalded by hot steam.
- After cooking, use extreme caution when removing the lid. Severe burns can result from residual steam escaping from inside the unit. Lift the lid facing away from you and allow the drops of water to trickle back from the lid into the cooker.
- Always unplug and let cool before cleaning and removing parts. Never attempt to unplug the unit by pulling on the power cable. Keep unplugged when not in use.
- To reduce the risk of an electric shock, never immerse the plug, power cable or housing in water or any other liquid. Only the removable cooking pot can be in the dishwasher.
- Only qualified experts may repair and perform maintenance work on the electric multi-cooker using authentic ZAVOR replacement and accessory parts. Never attempt to disassemble and repair the multi-cooker yourself.
- This appliance cooks under pressure. Improper use may result in scalding injury. Make sure the unit was closed correctly before operating. See "Pressure Cooker Function."
- Do not fill the unit over 2/3 full. When cooking with foods that expand such as rice or dried vegetables, do not fill the removable cooking pot more than 1/2 full. Overfilling may cause a risk of clogging the vent pipe and cannot allowenough room for the proper building of pressure. See "Operating Functions."
- The following foods tend to foam, froth, and/or sputter: applesauce, cranberries, pearl barley, oatmeal, split peas, noodles/pasta, or rhubarb. These items may block the pressure valve if filled too high in the removable cooking pot. Please be sure when pressure cooking these items not to fill the removable cooking pot more than halfway.
- Always check the pressure release devices for clogging before use.
SAVE THESE INSTRUCTIONS
Documents / Resources
References
Download manual
Here you can download full pdf version of manual, it may contain additional safety instructions, warranty information, FCC rules, etc.
Advertisement


Need help?
Do you have a question about the LUX and is the answer not in the manual?
Questions and answers