
Related Manuals for Russell Hobbs RHCBLDL3IN1


Summary of Contents for Russell Hobbs RHCBLDL3IN1
- Page 1 Bladeless Fan & Heater Operating Manual RHCBLDL3IN1 (B) REGISTER TODAY FOR YOUR FREE ADDITIONALYEAR GUARANTEE...
- Page 2 GUARANTEE At Russell Hobbs, we take all our customer feedback seriously. Feel free to contact our Customer Services Team who will be more than happy to assist you. This product is guaranteed for 12 months from the date of the original purchase. If any defect arises due to faulty materials or workmanship, the faulty product must be returned to the place of purchase.
-
Page 3: Important Safety Instructions
IMPORTANT SAFETY INSTRUCTIONS It is hazardous for anyone other than a competent • person to carry out any service or repair operation that involves the removal of a cover which gives protection against exposure to electrical parts. Do not use with a damaged cord or plug. If the supply •... - Page 4 IMPORTANT SAFETY INSTRUCTIONS Keep the appliance away from water and do not allow • it to get wet. If the unit is wet, do not plug unit into the wall socket or turn the unit on. Do not handle the appliance with wet hands. •...
- Page 5 IMPORTANT SAFETY INSTRUCTIONS Do not let the cord hang over the edge of a worktop, • table etc. or touch hot surfaces. The use of accessory attachments not recommended • by the appliance manufacturer may cause fire, electric shock or injury. Never remove parts from the appliance, such as the •...
- Page 6 IMPORTANT SAFETY INSTRUCTIONS Caution: Some parts of this product can become very • hot and cause burns. Particular attention must be given when children or vulnerable people are present. Do not insert any foreign objects into the grill. • Keep all grills clear of any draped fabric or curtains. •...
- Page 7 IMPORTANT SAFETY INSTRUCTIONS...
- Page 8 Battery Warnings This appliance comes with a CR2025 battery which is fitted into the remote. Please remove the insulation sheet before use. Incorrect use of batteries may result in fire, explosion, leakage of dangerous substances, or other hazards. - Do not throw batteries into the fire and do not expose them to high temperatures.
- Page 9 Battery Warnings - Do not allow children to replace batteries without supervision by an adult. - Always choose the right size and the right battery type for the intended use. - Clean the battery contacts and also equipment contacts before installing the batteries. - Remove used-up batteries immediately.
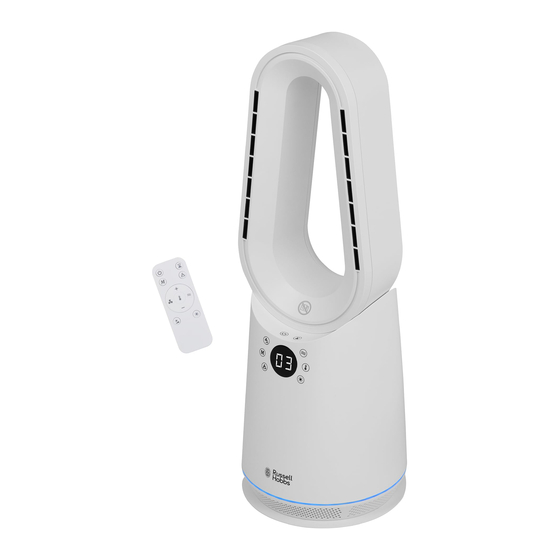
- Page 10 PARTS On/off button Timer button Cooling speed level button Heating level button Mode button Temperature button Oscillation button Brightness level button Display LED light Remote control Power cord & plug...
-
Page 11: Product Setup
PRODUCT SETUP Remove all packaging material and all transport bracing from the device. For a safe and trouble-free running of the device, choose the installation location which meets the following requirements: The floor should be firm, flat and horizontal. • Keep the following minimum clearances from the device housing: •... -
Page 12: Control And Display
CONTROL AND DISPLAY Press to turn the machine on and off. Power Press to circulate between the fan speeds of 1 to 9. Fan Speed When the power is on you can schedule to turn off the fan. Timer To set the timer, press the timer button and the display will show 1h. - Page 13 CONTROL AND DISPLAY Natural air speed mode, switches between speed settings Natural 3 - 5 – 7 continuously. ECO mode (Only active in heating mode) If the room temperature is below 18 °C, the appliance • operates at high speed if the room temperature is between 18-22 °C, the •...
- Page 14 CONTROL AND DISPLAY Press to set the desired temperature, 25⁰C is the preset Temperature level temperature. The temperature range is between 5⁰C - 35⁰C. Note: The heating is only activated if the set temperature is above the current room temperature. As soon as the room temperature falls below the set temperature, the appliance switches on automatically until the set temperature is reached again.
-
Page 15: Remote Control Remote Control
REMOTE CONTROL REMOTE CONTROL NOTE: The remote should be used within 4m of the front face of the fan. • Remove the insulation sheet before use. • n/off button Timer button Mode button Oscillation button Plus button button Temperature level Fan speed button Heat function Minus button... - Page 16 REMOTE CONTROL REMOTE CONTROL To replace the battery, follow the below instructions: 1. Hold down the buckle to open the slot 2. Load the batteries while paying attention to the direction of the battery 3. Insert the slot back into the remote control NOTE: Do not charge this battery, if it is not used for a long time, please take out the battery.
-
Page 17: Cleaning And Maintenance
CLEANINGAND MAINTENANCE The fan requires little maintenance. Do not try to fix it by yourself. Refer to a qualified service personnel if a service is needed. Ensure the unit is unplugged before assembly,and before cleaning. During maintenance, please do not soak or splash water on the fan, it may cause the machine to get wet and damage it. -
Page 18: Problem Solving
PROBLEM SOLVING The appliance Check the appliance is plugged in. doesn’t switch Check the socket is switched on. Check another appliance in the socket. Unplug and check for any obvious signs of damage to the cord or plug. ... - Page 19 PROBLEM SOL VING ERROR CODE CODE PROBLEM POSSIBLE REASON • Induced by voltage too Low Voltage Protection • 220V fan connected to 110V voltage High Voltage Protection • Induced by voltage too high Blocked Rotor • Poor connection between rotor terminal block and electronic board •...
- Page 20 PROBLEM SOL VING ERROR CODE CODE PROBLEM POSSIBLE REASON • Poor communication Communication Error between display board and mother board, poor cable connection, PCB malfunction Machine Tilting • Machine placed at an angle of ≥30 degrees against the surface Temp.sensor •...
- Page 21 Model number RHCBLDL3IN1 (B) Item Symbol Value Unit Item Unit Type of heat input, for electric storage local space h Heat output eaters only manual heat charge control, with integrated t Nominal heat output Pnom hermostat Minimum heatoutput manual heat charge control with room and/or...
- Page 22 NOTES...
-
Page 23: Connection To The Mains Supply
CONNECTION TO THE MAINS SUPPLY CONNECTION TO THE MAINS SUPPLY WARNING This appliance is designed to operate from a mains supply of AC220V - 240V; 50Hz/60Hz. Check that the voltage marked on the product corresponds with your supply voltage. For UK use only – Plug fitting details (where applicable): As the colours of the wires in the mains lead of this appliance may not correspond with the coloured markings identifying the terminals in your plug, proceed as follows:... - Page 24 Made by Product Care Trading Limited under license from Spectrum Brands (UK) Limited. Product Care Trading Ltd, Unit 1, Green Bank Business Park, Swan Lane, Hindley Green, Wigan, WN2 4AY , United Kingdom Product Care (Ireland) Ltd, Unit 3D North Point House, North Point Business Park, New Mallow Road, Cork, T23 AT2P , Ireland.
Need help?
Do you have a question about the RHCBLDL3IN1 and is the answer not in the manual?
Questions and answers