PRODIM PROLINER Manual
- Quick start manual (16 pages) ,
- Quick start manual (6 pages)
Advertisement
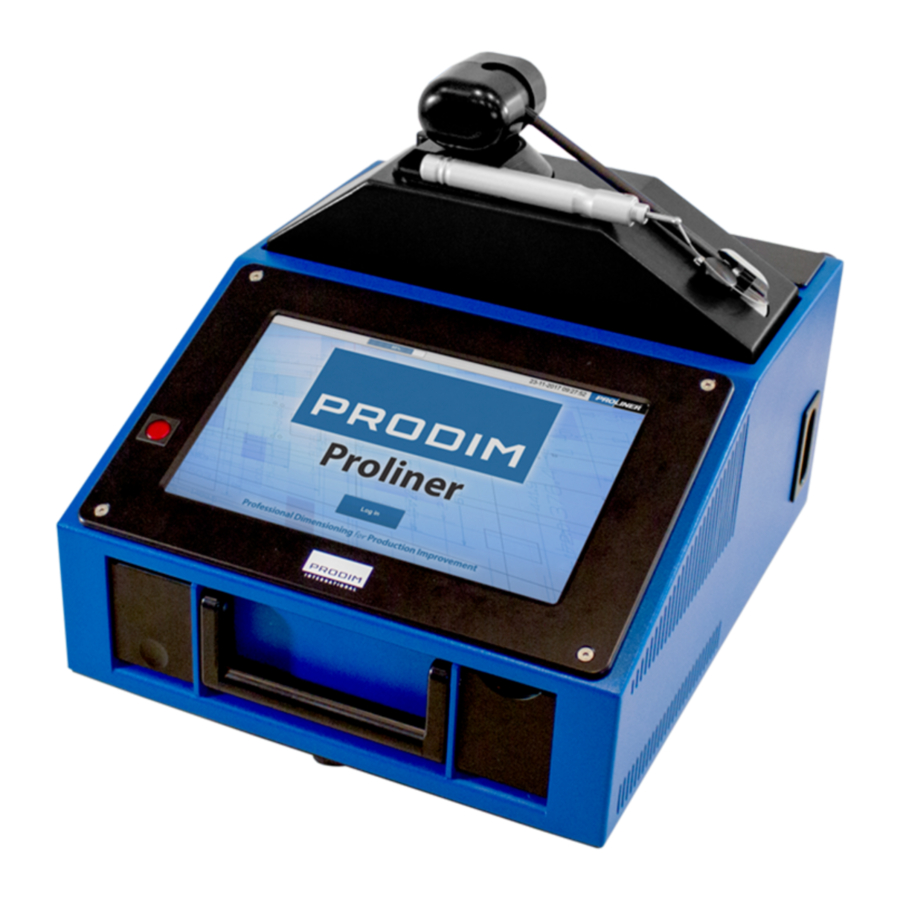
Package Contents
Standard parts of the Proliner package:


ATTENTION!
Check your packing list for the exact content of your order / package. The content may differ from what is shown here. Contact Prodim if the supplied content deviates from packing list.
NOTE: Save the shipping box and its contents for safe transport in the event of a return.
Hardware Overview

TIP: Mount the Proliner on a tripod for a better reach!
Screw mounts can be used to attach the Proliner on a tripod.
They are positioned at the bottom and back side of the Proliner.
The remote control

The remote control is used to capture measuring points.
The remote control has four buttons
- Point mode
Press once to capture a single point. When the next point is captured, the Proliner will automatically draw a line between the measured points. - Continuous mode
Once pressed, the Proliner will register a number of points until the button is pressed again. Continuous mode records straight lines and / or radii depending on the shape of the object. - End of a contour
This button ends a measured contour.
After closing a contour, you add a new contour by continuing to measure. You can also create a new layer by holding button 3. This layer can be named as well. - Delete the last point or contour
Press button 4 to delete the last measured point.
Holding the button will remove the last measured contour.
| DEFINITIONS: | ||
| Point: |  | |
| Line: |  | |
| Contour: |  | |
TIP: Work with layers
A layer is a collection of points, lines and contours. Hold button 3 to close a layer and create a new layer. Working with layers can be very useful for the processing of your drawing.
Proliner software
Login screen
After starting up the Proliner you will first see the initial loading screen followed by the login screen.

Press the login to proceed to the app screen.
App screen
SHOWN CONTENT
Depending on your specific Proliner configuration, apps, functions and options might be different from the content shown or discussed in this manual.
The app screen displays main Proliner functions and industry-specific apps that are available to you.
Start an app by clicking the icon and continue to the home screen.

 | Manager Advanced machine settings, diagnostic and manual software upgrades of the Proliner can be found here. Access it only under Prodim supervision. |
 | Update* This function enables you to automatically update the Proliner software and licenses via internet. Update procedure:
|
 | Logout Press to return to the login screen and select a different industry. |
 | Shut down Press to switch o the Proliner. Recommended to use this button to shut down the Proliner. |
*From Proliner 4.1 onwards there is also the possibility to update via Bluetooth.
Menu structure:
Main menu

| The Proliner menu bar: | |
| Battery Status |
|
| Settings |
|
| Date / Time |
|
| Proliner Logo |
|
Measurement menu

Create and manage projects, files and customer data
Open

Open, rename or delete projects
Transfer

Import and export projects and files to and from USB, an external data storage device or a computer over the network.
Settings
In this menu you can configure all Proliner measurement settings before starting a measurement.

ATTENTION!
The Proliner is equipped with customer-specific software and licenses. Menus may differ between different Proliner types.
Projection
The Proliner always measures in 3D.
To create a 2D template, the measured 3D points have to be projected on a projection plane.

The drawing above is an excessive example to help explain what the Proliner software actually does.
Below is a picture of a kitchen countertop. This top looks fairly flat, but is uneven in practice, thus 3D.
Therefore, you will always need to determine the 2D projection plane first.
The determined 2D projection plane used for measuring the countertop is shown in light blue.

Compensation
The measuring pen captures points from the absolute center of the pen tip.
During a measurement, the object is touched with the outside of the pen tip.
Due to the thickness of the pen tip, there is a difference of 2.5mm between the object that you are measuring and what the Proliner pen captures. This can be corrected using the compensation settings beforehand or during editing afterwards.

Depending on the choice of either left or right compensation, you have to measure in a specific direction. When choosing none, the measurement results will not be compensated and if needed have to be corrected afterwards using a CAD progam.
ATTENTION!
If you use a different measuring pen type, you have to adjust the compensation values as well!
TIP: Check our website for other measuring pen solutions
There are several measuring pens and add-ons available for different applications.
Positioning
When measuring, it is important to choose the ideal position for your Proliner.
Leveling is not necessary if you determine the projection plane yourself.
Stability:
Make sure the Proliner is placed in a stable position, it should not be able to move during the measurement. The same is applicable to the object that needs be measured.
Range:
Determine if you can reach all points to be measured. Pick a place where you can make the most of the Proliner range. Try to avoid obstacles, so that you can keep the wire in a straight line during measurement.

TIP: Position the Proliner significantly higher than the measurement object!
If possible, try to place the Proliner clearly above the projection plane.
This way you get a drawing projected on the top of your projection plane.
If the projection plane is positioned higher than the Proliner, you are likely to mirror your measurement.
Leap function
The Proliner leap function has been developed to give users an unlimited reach for measuring large objects and surfaces as well as for measurements that cannot be done from a single Proliner position. Special leap-pods are used to serve as reference points and to be able to connect measurements.


Start the first part of your measurement. When done, you can place the 4 leap-pods and start the leap. The Proliner will ask you to capture the position of the 4 pods.

After the 4 pods have been registered, you can move the Proliner to its new position. At the new position, the Proliner will ask you to capture the position of the pods again to accurately determine its own new position.
You can now continue with the measurement. These steps can be repeated as often as necessary. There is no limit to the number of times you can leap.
Ensure that the pods are placed in a stable position and that:
- Pods are not placed close to each other;
- Pods are not placed in a single line;
- Pods are not placed in a symmetrical shape.
TIP: Markings instead of pods!
If it is not possible to place pods (on a wall for example) you can make your own markings used in combination with the leap-function.
TIP: Also check our Proliner IPT!
The solution for measuring hard-to-reach spots.
Measuring in 5 steps
Now that the basics are explained, measurement can begin. We take a kitchen countertop to serve as an example:
- POSITIONING
Ensure that the Proliner is placed in a fixed and stable position and all measuring points can be reached.
![]()
- PROJECTION PLANE
Determine the projection plane by measuring three or more points.
![]()
- MEASURE THE OUTSIDE CONTOUR
Measure the wall and the outer rim of the kitchen block. Measure the situation outside the countertop to determine how far the countertop can stick out. Measure the front of the kitchen block and measure the kitchen block supports for the countertop, not the doors.
![]()
- MEASURE THE INNER CONTOUR
Measure cabinets, cut-outs, sinks, taps and all other data required.
![]()
- THE FILE
Edit the drawing, make notes and export your measurement as DXF.
![]()


ATTENTION!
If you measure with compensation, do not measure too tight. Think about the margin you need for installation.
TIP: Expand the Proliner with CT Software!
This special kitchen top solution offers many additional functionalities.
Proliner CT
Proliner CT software provides additional functionalities for finishing digital templates of countertops and backsplashes on-site and preparing them for production. These are the main functionalities: *
- Edit digital templates on-site
Extra (CAD) features to easily edit Proliner measurements, such as:- Automatically offset lines with custom offset
- Easily draw lines, straight and rounded shapes
- Add linear, horizontal, vertical, radial and angle dimensions
- Placing cutting lines
- The ability to add notes
- Ready for CNC - Instant tangential
Proliner CT automatically creates fluent lines between measured points; various "radii" are made between the measured points to prepare the digital templates for quick processing by a CNC. - Add cut-outs, sinks, production profiles and materials from a library
Import DXF-files (measured with the Proliner) to separate Proliner CT libraries for: cut-outs, sinks, production profiles and materials. These objects can then be selected and added directly to the digital templates. - Create elements and add them to a virtual slab
Create a selection within digital templates and save it to create an element. Elements can be placed in a dimensioned work sheet (virtual slab) so that the amount of required material can be determined. - Add detailed project information
Create projects and add detailed project information. Add notes and briefings to digital template to describe how they should be interpreted and processed. - Get an on-site agreement from the customer
Allow the customer to check the digital template and project information on-site and let him sign for approval directly on the Proliner. - Export drawings and reports for the customer and production
Create complete reports (with your own company logo) that can be customized for the customer or production. Send a report with a drawing overview and project data to the customers and expand it with detailed drawings of elements and instructions to be used for production. Files can be exported as DXF and PDF.
* Proliner CT is an addition to the standard integrated
Proliner software and an optional purchase.
Maintenance
General care
We advise to regularly clean the Proliner and to keep it dust free, also in storage.
If possible, make use of the official Proliner backpack and / or flight case.
The measuring wire should also be cleaned on a regular basis (weekly) using the supplied dust-free cloth.
Do not use lubricants, detergents or chemicals!
Always start a measurement first before cleaning the wire.
This ensures that you hear the signal alarm when the wire is stretched out too far.
We advise to clean the entire wire with two persons.
One person takes the measuring pen and stretches the wire until the alarm starts to beep at the end of the wire. The other person cleans the wire with the cloth.

If you are alone and you still want to clean the entire wire, make sure that the wire is lying on a clean surface and cannot get entangled. Never let go of the wire!
For questions, feedback or support, please contact Prodim.
Check our website for more information:
www.prodim-systems.com
Prodim International BV - Phone: +31 492 579050
Lagedijk 26, 5705 BZ Helmond, The Netherlands
Prodim USA - Phone: +1 772 465 4000
7454 Commercial Cir. Fort Pierce, FL 3495, USA
Documents / Resources
References

Download manual
Here you can download full pdf version of manual, it may contain additional safety instructions, warranty information, FCC rules, etc.
Advertisement


Need help?
Do you have a question about the PROLINER and is the answer not in the manual?
Questions and answers