Advertisement
Table of Contents
24259
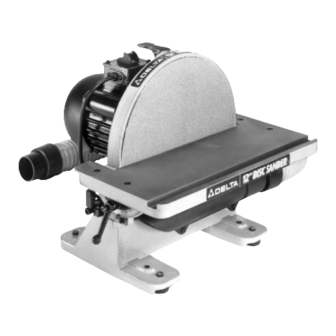
12" Disc Sander with
Integral Dust Collection
(Model 31-120)
PART NO. 900657 (011)
Copyright © 2001 Delta Machinery
RTD10000119AA
To learn more about DELTA MACHINERY
visit our website at: www.deltamachinery.com.
For Parts, Service, Warranty or other Assistance,
1-800-223-7278 (
1-800-463-3582).
please call
In Canada call
Advertisement
Table of Contents

Subscribe to Our Youtube Channel
Related Manuals for Delta 31-120


Summary of Contents for Delta 31-120
- Page 1 12" Disc Sander with Integral Dust Collection (Model 31-120) PART NO. 900657 (011) Copyright © 2001 Delta Machinery RTD10000119AA To learn more about DELTA MACHINERY visit our website at: www.deltamachinery.com. For Parts, Service, Warranty or other Assistance, 1-800-223-7278 ( 1-800-463-3582). please call...
-
Page 2: Safety Rules
If you have any questions rela- tive to a particular application, DO NOT use the machine until you have first contacted Delta to determine if it can or should be performed on the product. -
Page 3: Specifications
22. THE USE of attachments and accessories not rec- ommended by Delta may result in the risk of injuries. 23. ADDITIONAL INFORMATION regarding the safe and proper operation of this product is available from the... -
Page 4: Unpacking And Cleaning
UNPACKING AND CLEANING Your new Disc Sander is shipped complete in one container. Carefully unpack the sander and all loose items from the shipping container. Fig. 2, illustrates the sander and all loose items. Remove the protective coating from machined sur- faces of the machine. -
Page 5: Power Connections
Running on low voltage will damage the motor. Your disc sander is wired for 110-120 volt, 60 HZ alternating current. Before connecting the disc sander to the power source, make sure the switch is in the “OFF” position. The motor provides a no-load speed of 1725 RPM. -
Page 6: Operating Controls And Adjustments
The switch (A) Fig. 8, is located on the top of the motor. To turn sander “ON” move switch (A) toward rear of sander. To turn the sander “OFF” move switch (A) to the front position as shown. LOCKING SWITCH IN THE “OFF”... - Page 7 WITH THE ABRASIVE DISC MAKE CERTAIN MACHINE IS DISCONNECTED FROM POWER SOURCE BEFORE MAKING ADJUSTMENTS. 1. Check to see if the miter gage slot (G) Fig. 10, is par- allel with the disc by placing a combination square in the miter gage slot with one end of the square against the disc as shown.
-
Page 8: Positive Stops
TILTING THE TABLE AND ADJUSTING THE 45 DEGREE POSITIVE STOPS MAKE CERTAIN MACHINE IS DISCONNECTED FROM POWER SOURCE BEFORE MAKING ADJUST- MENTS. The table can be tilted up to 45 degrees up or down. To tilt the table down as shown in Fig. 14, loosen table lock handles (A) Fig. - Page 9 APPLY BRAKE WHILE SWITCH IS IN THE “ON” POSI- TION, FOR DAMAGE MAY OCCUR TO MACHINE. This 12" Disc Sander is equipped with a manual disc brake which can be applied by pressing down on brake lever (A) Fig. 20, after the switch has been turned off.
-
Page 10: Maintenance
The majority of work performed on the disc sander is usually accomplished using the table as a support as shown in Fig. 20, but a 3/8" x 3/4" slot (A) Fig. 22, is machined into the table of the sander to facilitate miter gauge applications as shown in Fig. - Page 11 NOTES...
-
Page 12: Parts, Service Or Warranty Assistance
PARTS, SERVICE OR WARRANTY ASSISTANCE All Delta Machines and accessories are manufactured to high quality standards and are serviced by a network of Porter- Cable•Delta Factory Service Centers and Delta Authorized Service Stations. To obtain additional information regarding your Delta quality product or to obtain parts, service, warranty assistance, or the location of the nearest service outlet, please call 1-800-223-7278, (In Canada call 1-800-463-3582).
Need help?
Do you have a question about the 31-120 and is the answer not in the manual?
Questions and answers