Sony PlayStation SCPH-9001 / SCPH-94010 Manual
- User manual (24 pages) ,
- Service manual (28 pages)
Advertisement
- 1 Introduction
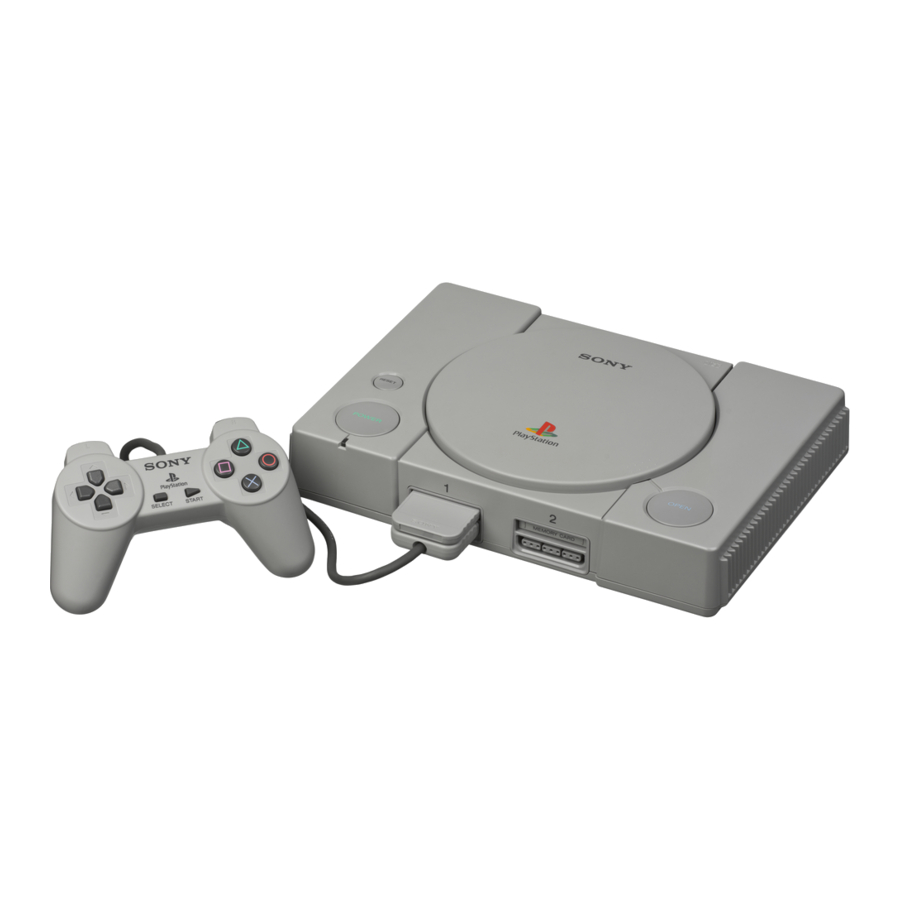
- 2 Overview
- 3 Unpacking
- 4 Connecting your "PlayStation" to a TV set
- 5 Playing a game
- 6 DUALSHOCK analog controller usage
- 7 Using the Memory Card
- 8 Playing an audio CD
- 9 Enjoying SoundScope
- 10 Troubleshooting
- 11 Specifications
- 12 WARNING
- 13 Important Safeguards
- 14 Precautions
- 15 Documents / Resources
Introduction
You can play CD-ROM discs which have both the "PlayStation" logo and  designation, as well as audio CDs with this unit. Before operating the unit, please read this manual and retain it for future reference.
Overview

Unpacking
Check to make sure that you have the following items:

Connecting your "PlayStation" to a TV set

A few TVs or monitors may experience a bouncing effect in their pictures when using the "PlayStation" game console. There is nothing wrong with the "PlayStation" or the way it is manufactured. The problem technically lies within the television. If you encounter such a problem with your television/monitor, please contact Consumer Services Technical Support at 1-800-345- SONY.

- Connecting to a TV with audio/ video input
Connect your "PlayStation" to the TV using the supplied AV Cable (integrated audio/video) matching the plug colors. If your TV is monaural, do not connect the red plugs. If you want to hear both left and right sounds from a monaural TV, use a commercially available 3-phono to 2-phono (stereo to monaural) type audio/video cable. If your TV has an S VIDEO INPUT connector, you can connect it by using the SCPH-1100 S Video Cable (sold separately).
After connecting
Set your TV to the appropriate video input mode. (Refer to the instruction manual for your TV.) - Connecting to a VCR
Connect your "PlayStation" to the VCR using the supplied AV Cable (integrated audio/video) matching the plug colors. If your VCR is monaural, do not connect the red plugs.
After connecting
Set your TV and VCR operation appropriately. (Refer to the instruction manuals for your TV and VCR.
- Connecting to a TV with audio/ video input
- Connecting to a TV with an antenna input Connect your "PlayStation" to the antenna input on the TV using the optional SCPH-10071 RFU Adaptor (sold separately). In this case, the sound will be monaural.
After connecting
Set the channel switch on the RFU Adaptor and the channel selector of your TV to VHF channel CH 3 or CH 4, whichever is not active in your area.


Playing a game

- Press the OPEN button. The disc cover opens.
- Insert a disc in the disc holder with the label side up.
- Close the disc cover.
- Press the POWER button. The POWER indicator lights up. After the start-up screen, screen
![]() appears and the game starts.
appears and the game starts.
 appears and the game starts.
 Set the supplied DUALSHOCK analog controller to the appropriate mode for the software.
Tips
- You can also start the game by inserting a "PlayStation" format CD-ROM disc after screen
![]() appears.
appears. - If screen
![]() appears, the disc that was inserted may not be a "PlayStation" format disc. Check to ensure that it has both the "PlayStation" logo and
appears, the disc that was inserted may not be a "PlayStation" format disc. Check to ensure that it has both the "PlayStation" logo and ![]() designation on it.
designation on it. - You can also play a game using the optional Mouse (SCPH-1090).
Note
You do not have to turn off your "PlayStation" when changing discs.

Before removing a disc, press the OPEN button and make sure that the disc completely stops. Never touch the disc while it is moving. Otherwise, you may injure yourself and may cause damage to the disc and/or the "PlayStation".
- To restart the game
Press the RESET button. Be careful not to press the RESET button while playing the game, or the game will end.
![]()
- To remove the disc
Press the OPEN button. While pressing the pivot gently, pick up the disc holding the edges.
![]()
- Screens that appear after the start-up screen
When you turn on your "PlayStation", one of the following screens will appear:


- A CD-ROM with both the "PlayStation" logo and
![]() designation is inserted.
designation is inserted. - No disc is inserted.
- A disc that cannot be played with the "PlayStation" is inserted.
 designation is inserted.
 DUALSHOCK analog controller usage
- Mode switching and LED display
This DUALSHOCK analog controller can be switched between two modes by pressing the ANALOG mode switch. Each time the ANALOG mode switch is pressed, the mode changes as follows:
Digital mode (LED display: Off)
![]()
Analog mode (LED display: Red)
Note
After verifying that the "![]() " icons are present on the software package, switch to the appropriate mode for use. Note however, that some software makes this adjustment automatically. In such cases, the ANALOG mode switch is overridden by the software. For details, refer to the software manual.
" icons are present on the software package, switch to the appropriate mode for use. Note however, that some software makes this adjustment automatically. In such cases, the ANALOG mode switch is overridden by the software. For details, refer to the software manual.
![]()
- Digital mode (LED display: Off)
You can operate this controller in the same manner as the SCPH-1080 Controller.

- Analog mode (LED display: Red)
Supports software with the "![]() " icon.
" icon.
Before using the controller, rotate the sticks once with your thumbs as if drawing a circle, as shown in the diagram at left. Do not twist the sticks (D).

![]()

 " icons are present on the software package, switch to the appropriate mode for use. Note however, that some software makes this adjustment automatically. In such cases, the ANALOG mode switch is overridden by the software. For details, refer to the software manual.

 " icon.

Vibration function
This DUALSHOCK analog controller is a touch sensitive controller with a vibration function. The vibration function can be set to ON or OFF on the monitor with the software. The function of each button may vary depending on the software used. Refer to individual software manuals for further details.
Notes
- When the DUALSHOCK analog controller is not being used, turn the "PlayStation" off or unplug the controller from the "PlayStation".
- Before using the vibration function of this controller, please read the following notes on safety.
For safety
- Stop using this unit immediately if you begin to feel tired or if you experience an unpleasant sensation or pain in your hands and/or arms while operating the controller. If the condition persists, consult a doctor.
- Do not attempt to operate the controller in any way except with your hands. Do not bring the controller into close contact with your head, face or near the bones of any other part of your body.
- Do not use the vibration function of the DUALSHOCK analog controller if you have any ailment in the bones or joints of your hands or arms.
- Do not use the vibration function of the DUALSHOCK analog controller when your fingers, hands, wrists, or arms are broken, dislocated, or sprained; or if you have a pulled muscle. These ailments may become worse due to the vibration of the controller.
- Avoid prolonged use of the DUALSHOCK analog controller. Take a break at about 30 minute intervals.
Using the Memory Card
You can save and load game data using the optional SCPH-1020 Memory Card (sold separately). You can also copy data from one Memory Card to another or delete unnecessary data. Each Memory Card has 15 memory blocks, and you cannot save game data which requires more blocks than there are empty blocks on your Memory Card. Before you begin playing, check how many memory blocks the game requires. Refer to the software manual of the individual game for the required number of memory blocks.
Set the supplied DUALSHOCK analog controller to digital mode (LED display: Off).
To start Memory Card operation
- ...... Turn on the power without inserting a disc.
- .... Insert the Memory Card.
- .... Select "MEMORY CARD" with the directional buttons and press the
![]() button.
button.
To cancel the Memory Card operation
Select "EXIT " on the screen with the directional buttons and press the  button.
- Memory Card screen

- Contents of card 1. The game data is displayed as icons.
- Icons. The number of icons shows the number of used memory blocks.
- Move with the directional buttons to select icons.
- Copy the game data onto the card.
- Copy entire game data onto the card.
- Delete unnecessary game data.
- Exit from the Memory Card operation.
- Contents of card 2.
- Name of the game data.
- Memory Card operation
How to use the Controller for the Memory Card screen


- To move the arrow: Press the directional buttons.
- To select the items: Press the ® button.
- You can also operate the Memory Card screen with the optional SCPH-1090 Mouse.
To copy game data
- ... Check that the card has enough memory blocks, then select "COPY".
- ... Select the card that has the data to be copied.
- ... Select the icon of the data to be copied.
- ... When the message "Are you sure?" appears, select "YES". To cancel copying, select "NO".
Notes
- You cannot copy the data to a card that does not have enough empty memory blocks. You may need to delete unnecessary data.
- Do not remove the card until the icons stop moving.
To copy all the game data
- ... Check that the card has enough memory blocks, then select "COPY ALL".
- ... Select the card to be copied.
- ... When the message "Are you sure?" appears, select "YES". To cancel copying, select "NO".
Notes
- Do not remove the card until the icons stop moving.
- If the data you are trying to copy already exists on the card, the data will not be copied.
To delete the game data
- ... Select "DELETE".
- ... Select the card that has the data you want to delete.
- ... Select the icon of the game data you want to delete.
- ... When the message "Are you sure?" appears, select "YES". To cancel deleting, select "NO".
Playing an audio CD
You can also listen to audio CDs with your "PlayStation". There are two ways to play CDs:
- Selecting the buttons on the screen (
![]() )
) - Pressing the buttons on the controller (direct key operation,
![]() )
)
 )
)  )
) Set the supplied DUALSHOCK analog controller to digital mode (LED display: Off).
Note
Both of the methods above function simultaneously, so be sure not to confuse them.
To start audio CD operation
Insert an audio CD and turn the power on. You can also insert an audio CD after turning on the power. (You do not have to turn the unit off when changing CDs.)
To cancel the CD operation
Select "EXIT " on the screen with the directional buttons and press the  button.
- CD operation screen

- Find the beginning of the next track.
- Fast Forward.
- Start playing.
- Stop playing.
- Pause.
- Rewind.
- Find the beginning of the current or previous track.
- Displays the selected playback mode.
- Play a track or all the tracks repeatedly.
- Play all tracks on the disc in order.
- Change the playback time display.
- Play the tracks in random order.
- Play the desired tracks in a specified order.
- Displays the elapsed or remaining playback time. Press the "TIME" button to switch the display.
- Move with the directional buttons to select the button.
- Select the track number you want to play.
- Select a track number higher than 20. (Appears only when there are more than 20 tracks on a CD.)
- Cancel the audio CD operation.
- Various playback modes
How to use the controller for the CD operation screen
![]()


- To move the arrow: Press the directional buttons.
- To select the items: Press the
![]() button.
button. - You can also operate with the optional SCPH-1090 Mouse.
To play a CD until the end once
Select " ".
".
To play tracks repeatedly
- To repeat the current track, select "REPEAT" until "REPEAT 1" appears.
- To repeat all the tracks, select "REPEAT" until "REPEAT ALL" appears.
To resume normal play, select "REPEAT" until the "REPEAT" indication disappears.
To play specific tracks
- .... Select "PROGRAM".
- .... Select the number of the specific track you want to play. Repeat this step until you have selected all the tracks you want to play.
- .... Start playing the CD. To resume normal play, select "CONTINUE".
To play the tracks in random order
- .... Select "SHUFFLE".
- .... Start playing the disc. To resume normal play, select "CONTINUE".
- To operate the CD using the controller
Using the buttons on the controller, you can control basic CD operations without looking at the screen.


Enjoying SoundScope
Playing Audio CDs on your "PlayStation" will activate the SoundScope feature, a graphical representation of the music you are playing ( ). Using the buttons on the controller, you can choose your favorite image from 24 patterns, change the color of the image or add the effect of an afterimage. You can also save and load your SoundScope settings using the Memory Card. When enjoying SoundScope, set the supplied DUALSHOCK analog controller to digital mode and operate the CD directly with the controller (LED display: Off).

To start SoundScope operation
Press the SELECT button when the CD operation screen is displayed.
To return to the CD operation screen
Press the SELECT button.
- SoundScope operation
*: Press these buttons while holding down the ✕ button to save the operation or change the size of the image. For details, see "![]() Additional operations".
Additional operations".

1 - 5 Audio CD operation:- Find the beginning of the current or previous track.
- Rewind.
- Play / Pause.
- Fast Forward.
- Find the beginning of the next track.
 Additional operations".
- Decrease length of time image is displayed.
- Change the pattern of the image.
- Increase length of time image is displayed.
- Return to the CD operation screen.
- Add the effect of an afterimage effect to the image.
- Select the pattern of the image in random order.
- Use this button with others for additional operations.
- Change the color of the image.
- Operation with the Mouse
You can also operate SoundScope using the Mouse (SCPH-1090: sold separately). Refer to![]() for the operation.
for the operation.
![]()
For the CD operation screen- To move the mouse pointer(+): Move the Mouse.
- To select the items: Press the left button.
- Additional operations
To change the size of the image
Press the directional buttons (up or down) while holding down the ✕ button.
![]()
 for the operation.

To change and store the settings
- .... During playback, press the R1 button while holding down the ✕ button. A round mark flashes on the lower right of the screen (
![]() ).
). - .... Operate the controller. While the round mark is displayed, any changes you make to the SoundScope operation with the controller are stored.
- .... When you are finished, press the R1 button while holding down the ✕ button. The round mark disappears and the procedure is completed.
Note
Do not unplug the controller during these procedures.
To switch to stored settings
- ... During playback, press the L1 button while holding down the ✕ button. A round mark appears on the lower left of the screen (
![]() ), and the SoundScope image is transformed by the stored operation.
), and the SoundScope image is transformed by the stored operation. - ... Press the L1 button while holding down the ✕ button. The round mark disappears and the procedure is cancelled.
Tip
Your stored setting is lost when you turn off the "PlayStation". If you want to keep the data, you can save and load it using a Memory Card with one memory block.
To save the stored operation on a Memory Card
Press the R2 button while holding down the ✕ button. A round mark appears on the upper right of the screen (![]() ).
).
Note
You can store only one custom SoundScope operation setting. If the data already exists, it is erased. To load the data onto a Memory Card Press the L2 button while holding down the ✕ button. A round mark appears on the upper left of the screen (![]() ). To use the loaded data, follow the procedure above.
). To use the loaded data, follow the procedure above.
Troubleshooting
Please check again.
- Check the unit again before being sending it in for repair.
- Check that the TV, the console and the accessories are connected properly.
Symptoms
If the problem you are experiencing matches one of the symptoms described below, read the instructions indicated in "Checks" and "Diagnostics".
There is no sound
 Check 1
The screen and sound are distorted
Check 1
The game (or CD) does not start
Check 3
The screen and sound skip
Check 4
The screen and sound freeze or the game (or CD) stops during operation.
Check 4
The vibration function of the DUALSHOCK analog controller does not work.
Check 5
The controller connected with the console does not work
Check 6
You cannot save game data using the Memory Card inserted into the console.
Check 7
Checks
- Is the AV cable properly connected to the TV or VCR?
If not, connect it properly. If the problem persists,![]() Check 2
Check 2 - Is the channel position or input selector on the TV set correctly?
If not, set it to the correct position. If the problem persists,![]() Check 3
Check 3 - Is the inserted disc a CD-ROM with both the "PlayStation" logo and designation or an audio CD disc?
If not, insert a CD-ROM disc that can be used with the unit.
If the problem persists,![]() Check 4
Check 4
- Check to see if another game (or CD) will work or a game (or CD) you played before will work.
If "Yes",![]() Diagnosis A
Diagnosis A
If "No",![]() Diagnosis B/C
Diagnosis B/C - Check the software package to see if it has a vibration function icon on it.
If it does not have the icon, the vibration function will not work with this software.
If it does have the icon,![]() Check 8
Check 8 - Check to see if another controller will work.
If "Yes",![]() Diagnosis D
Diagnosis D
If "No",![]() Diagnosis C
Diagnosis C - Follow the "save and load" instructions from the game (or CD).
If the problem persists,![]() Diagnosis E
Diagnosis E - Check onscreen to make sure that the vibration function has been enabled in the on screen options.
If it has not been enabled, turn on the vibration function. If it has been enabled,![]() Diagnosis D
Diagnosis D
Diagnostics
- There may be a problem with the disc. Clean the underside of the disc with a CD cleaner and try to play it again. To clean the disc, refer to the CD cleaner usage manual. If the problem persists, the disc may be defective or there may be a problem with the unit. Please call 1-800-345-SONY for technical assistance.
- There may be a problem with the cable. If the screen and the sound are still distorted, the plugs may be dirty or there may be a short inside the cable. If the problem persists even after trying another cable, there may be a problem with the unit. Screen distortion may occur with certain types of TVs. Consult the instructions for further information.
- There may be a problem with the unit. Please call 1-800-345-SONY for technical assistance.
- There may be a problem with the controller. Please call 1-800-345-SONY for technical assistance.
- There may be a problem with the Memory Card. Please call 1-800-345-SONY for technical assistance.
Specifications
General
Power requirements 120 V AC, 60 Hz
Power consumption 10W
Dimensions 270 × 60 × 188 mm (w/h/d)
(10 3 /4 × 2 3/4 × 7 1/2 inches)
Mass 1.2 kg (2 lb 14 oz)
Operating Temperature 41˚F-95˚F (5˚C-35˚C)
Laser diode properties
- Material: GaAlAs
- Wavelength: l=780 nm
- Emission duration: Continuous
- Laser output: Less than 44.6 µW (measured at a distance of 200 mm from the lens surface on the optical pick-up block)
Inputs/outputs on the front
Controller ports (2) MEMORY CARD slots (2)
Inputs/outputs on the rear
SERIAL I/O port (1)
Output on the rear
AV MULTI OUT connector (1)
Supplied accessories
AC Power Cord (1)
AV Cable (integrated audio/video) (1)
Analog Controller (DUALSHOCK) (1)
Instruction Manual (1)
Optional accessories
SCPH-1020 U MEMORY CARD
SCPH-1040 U /94043 Link Cable
SCPH-1070 U /94042 Multi Tap
SCPH-1080 U Controller
SCPH-1090 U /94047 Mouse
SCPH-1100 U /94050 S Video Cable
SCPH-1140 U /94055 AV Cable (integrated audio/video)
SCPH-1160 U /94057 AV Adaptor
SCPH-1180 U /94054 Analog Controller
SCPH-1200 U Analog Controller (DUALSHOCK)
SCPH-10071/94093 RFU Adaptor
For additional parts, please call 1-800-345-SONY. 94044 AC Power Cord
Design and specifications are subject to change without notice.
WARNING

To prevent fire or shock hazard, do not expose the unit to rain or moisture.
To avoid electrical shock, do not disassemble. Refer servicing to qualified personnel only.

The use of optical instruments with this product will increase eye hazard.

TO PREVENT ELECTRIC SHOCK, MATCH WIDE BLADE OF PLUG TO WIDE SLOT, FULLY INSERT.

This graphical symbol with supplemental marking is located on the bottom of the "PlayStation".
 This symbol is intended to alert the user to the presence of uninsulated "dangerous voltage" within the product's enclosure that may be of sufficient magnitude to constitute a risk of electric shock to persons.
 This symbol is intended to alert the user to the presence of important operating and maintenance (servicing) instructions in the literature accompanying the appliance.
Read before operating your "PlayStation"
A few people may experience epileptic seizures when viewing flashing lights or patterns in our daily environment. These persons may experience seizures while watching TV pictures or playing video games, including games played on the "PlayStation". Players who have not had any seizures may nonetheless have an undetected epileptic condition. Consult your physician before playing video games if you have an epileptic condition or experience any of the following symptoms while playing video games: altered vision, muscle twitching, other involuntary movements, loss of awareness of your surroundings, mental confusion, and/or convulsions.
Owner's Record
The model and serial numbers are located on the bottom of the "PlayStation". Record the appropriate number in the space provided below. Refer to them whenever you call for technical assistance at 1-800-345-SONY.
Model No. SCPH-9001
Serial No. ___
Important Safeguards
For your protection, please read these safety instructions completely before operating the appliance, and keep this manual for future reference. Carefully observe all warnings, precautions and instructions on the appliance, or the one described in the Instruction Manual and adhere to them.
USE
Power Sources
This set should be operated only from the type of power source indicated on the marking label. If you are not sure of the type of electrical power supplied to your home, consult your dealer or local power company. For those sets designed to operate from battery power, or other sources, refer to the operating instructions.

Grounding or Polarization
The set is equipped with a polarized AC power cord plug (a plug having one blade wider than the other). This plug will fit into the power outlet only one way. This is safety feature. If you are unable to insert the plug fully into the outlet, try reversing the plug. If the plug should still fail to fit, contact your electrician to have a suitable outlet installed. Do not defeat the safety purpose of the polarized plug by forcing it in.

Overloading
Do not overload wall outlets, extension cords or convenience receptacles beyond their capacity, since this can result in fire or electric shock.

Object and Liquid Entry
Never push objects of any kind into the set through openings as they may touch dangerous voltage points or short out parts that could result in a fire or electric shock. Never spill liquid of any kind on the set.

Attachments
Do not use attachments not recommended by the manufacturer, as they may cause hazards.
Cleaning
Unplug the set from the wall outlet before cleaning or polishing it. Do not use liquid cleaners or aerosol cleaners. Use a cloth lightly dampened with water for cleaning the exterior of the set.

INSTALLATION
Water and Moisture
Do not use powerline operated sets near water – for example, near a bathtub, washbowl, kitchen sink, or laundry tub, in a wet basement, or near a swimming pool, etc.

Power-Cord Protection
Route the power cord so that it is not likely to be walked on or pinched by items placed upon or against them, paying particular attention to the plugs, receptacles, and the point where the cord exits from the appliance.

Ventilation
The slots and openings in the cabinet are provided for necessary ventilation. To ensure reliable operation of the set, and to protect it from overheating, these slots and openings must never be blocked or covered.

- Never cover the slots and openings with a cloth or other materials.
- Never block the slots and openings by placing the set on a bed, sofa, rug or other similar surface.
Accessories
Do not place the set on an unstable cart, stand, tripod, bracket, or table. The set may fall, causing serious injury to a child or an adult, and serious damage to the set. Use only a cart stand tripod, bracket, or table recommended by the manufacturer.
An appliance and cart combination should be moved with care. Quick stops, excessive force, and uneven surfaces may cause the appliance and cart combination to overturn.

- Never place the set in a confined space, such as a bookcase, or built-in cabinet, unless proper ventilation is provided.
![]()
- Do not place the set near or over a radiator or heat register, or where it is exposed to direct sunlight.
![]()


ANTENNAS
Outdoor Antenna Grounding – If an outdoor antenna or cable system is installed, follow the precautions below.
An outdoor antenna system should not be located in the vicinity of overhead power lines or other electric light or power circuits, or where it can come in contact with such power lines or circuits. WHEN INSTALLING AN OUTDOOR ANTENNA SYSTEM, EXTREME CARE SHOULD BE TAKEN TO KEEP FROM CONTACTING SUCH POWER LINES OR CIRCUITS AS CONTACT WITH THEM IS ALMOST INVARIABLY FATAL.
Be sure the antenna system is grounded so as to provide some protection against voltage surges and built-up static charges. Section 810 of the National Electrical Code provides information with respect to proper grounding of the mast and supporting structure, grounding of the lead-in wire to an antenna discharge unit, size of grounding conductors, location of antennadischarge unit, connection to grounding electrodes, and requirements for the grounding electrode.

Lightning
For added protection for this set during a lightning storm, or when it is left unattended and unused for long periods of time, unplug it from the wall outlet and disconnect the antenna or cable system. This will prevent damage to the set due to lightning and power-line surges.
SERVICE
Damage Requiring Service
Unplug the set from the wall outlet and refer servicing to qualified service personnel under the following conditions: – When the power cord or plug is damaged or frayed.

- If liquid has been spilled or objects have fallen into the set.
![]()
- If the set has been exposed to rain or water.
![]()
- If the set has been subject to excessive shock by being dropped, or the cabinet has been damaged.
![]()
- If the set does not operate normally when following the Instruction Manual. Adjust only those controls that are specified in the Instruction Manual. Improper adjustment of other controls may result in damage and will often require extensive work by a qualified technician to restore the set to normal operation.
![]()
- When the set exhibits a distinct change in performance – this indicates a need for service.


Servicing
Do not attempt to service the set yourself as opening or removing covers may expose you to dangerous voltage or other hazards. Refer all servicing to qualified service personnel.

Replacement parts
When replacement parts are required, be sure the service technician has used replacement parts specified by the manufacturer that have the same characteristics as the original parts. Unauthorized substitutions may result in fire, electric shock, or other hazards.
Safety Check
Upon completion of any service or repairs to the set, ask the service technician to perform routine safety checks (as specified by the manufacturer) to determine that the set is in safe operating condition.
Precautions
On safety
- As the laser beam emitted from the lens of this unitmay be harmful to the eyes, do not attempt to disassemble the casing. Refer for technical assistance. Call 1-800-345-SONY.
- Should any solid objects or liquid fall into the unit, unplug it and call 1-800-345-SONY.
- Unplug the unit from the wall outlet if you do notintend to use it for any length of time. When disconnecting the power cord from a wall outlet, pull it out by grasping the plug. Never pull the cord itself.
For your health
To prevent eye strain:
- Be sure to take a break of about 15 minutes duringevery hour of play.
- Do not play a game when you are very tired orshort of sleep.
- Play in a well-lit room and keep a safe distancefrom the TV screen.
On operation
- Operate the unit only on 120V AC, 60 Hz.
- Do not block the air vents or wrap up the unit sinceheat may build up internally.
- Do not handle the unit roughly, subject it to anymechanical shock, or place any heavy objects on top of it. Doing so may damage the unit and the disc.
- Do not leave your "PlayStation" near heat sources, or in a place subject to direct sunlight (operating temperature: 41˚F-95˚F(5˚C-35˚C)), excessive dust or sand, moisture, rain, on an uneven surface, or in a car with its windows closed.
- If the unit causes interference to radio or televisionreception, turn off the unit or move it away from the radio or television.
- Do not touch the lens inside the disc cover. Toprotect the lens from dust, keep the disc cover closed except when inserting and removing discs. If the lens is not clean, the unit may not operate properly.
- Even if the unit is turned off, do not disconnect theAC power cord from the unit while the other end of the cord is connected to the wall outlet.
- Sony Computer Entertainment Inc. does notwarrant damages caused by the use of products unlicensed by Sony Computer Entertainment Inc.
About the discs
- You can use two kinds of discs with this unit: CD-ROM discs with both the "PlayStation" logo and
![]() designation, and audio CD discs.
designation, and audio CD discs. - Some discs sold in foreign countries cannot be usedwith this unit.
 designation, and audio CD discs.
On handling discs
- Do not leave the discs near heat sources or exposethem to direct sunlight or excessive moisture.
- Store the discs in their cases when not using them.
- Do not touch the surface when handling the discs.
- Do not stick paper or tape on the discs.
- Do not write on the discs with a marker.
On moisture condensation
If the unit is taken directly from a cold to a warm location, or is placed in a very damp room, moisture may condense on the lens inside the unit. Should this occur, the unit may not operate properly. If this happens, remove the disc for several hours until the moisture evaporates. If the unit still does not operate properly, please call 1-800-345-SONY for technical assistance.
Do not connect your "PlayStation" to a projection TV
Unless your projection TV is an LCD type, do not connect your "PlayStation" to it without first referring to the user manual for the TV. Failure to do so may cause permanent damage to the TV screen.
Never analyze or modify your "PlayStation"
To use your "PlayStation" always follow the instructions provided in this manual. Sony Computer Entertainment Inc. expressly prohibits the analysis or modification of the "PlayStation", and also prohibits the analysis or use of its circuit configurations without the express written permission of Sony Computer Entertainment Inc., to the extent allowable by law.
Older model TVs
The "PlayStation" game console may not be compatible with some older model televisions and/or monitors. There is nothing wrong with your "PlayStation" or the way in which it was manufactured. The problem technically lies within the TV model. Contact Customer Services at 1-800-345 SONY for clarification and assistance.
Documents / ResourcesDownload manual
Here you can download full pdf version of manual, it may contain additional safety instructions, warranty information, FCC rules, etc.
Advertisement


Need help?
Do you have a question about the PlayStation SCPH-9001 and is the answer not in the manual?
Questions and answers