Advertisement
NEED HELP? CONTACT US!
Have product questions? Need technical support? Please feel free to contact us:
Technical Support and E-Warranty Certificate www.vevor.com/support
This is the original instruction, please read all manual instructions carefully before operating. VEVOR reserves a clear interpretation of our user manual. The appearance of the product shall be subject to the product you received. Please forgive us that we won't inform you again if there are any technology or software updates on our product.

- Read carefully and understand all ASSEMBLY AND OPERATION INSTRUCTIONS before operating.
- Failure to follow the safety rules and other basic safety precautions may result in serious personal injury.
MODEL AND PARAMETERS
| Model | MT-30 |
| Applicable Bottles of Diameter | 20-120mm |
| Label Width | 10-130mm |
| Label Length | 10-300mm |
| Label Roll I.D | ≥25mm |
| Label Roll O.D |
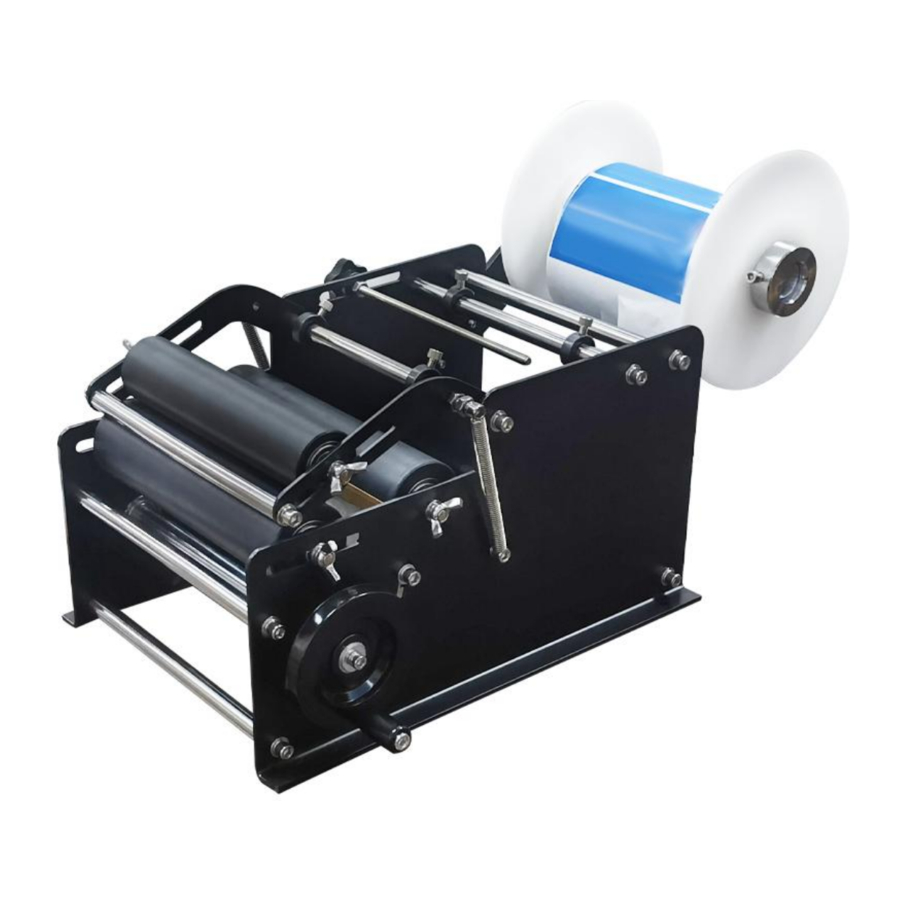
STRUCTURE DIAGRAM

- Label Baffle
- Fixed Axis and Stop Collar
- Label Indicator Lever
- Press Roll
- Bottle Holder Roller
- S tripper Plate
- Hand-wheel and Scroll
COMPONENTS
| Parts\Model | MT-30 |
| Label Baffle | ×2 |
| Stop Collar | ×2 |
| Fixed Axis | ×1 |
| Handle | ×1 |
| Hex Wrench(4#,5#,6#) | ×3 |
| Bolt(M6×14mm) | ×2 |
| Flat Washer (Ф6) | ×2 |
| Spring Washer(Ф6) | ×2 |
| Long Bolt(M6*40mm) | ×1 |
| Bolt(M8×20mm) | ×1 |
| Flat Washer (Ф8) | ×1 |
| Spring Washer(Ф8) | ×1 |
| User Manual | ×1 |
OPERATING INSTRUCTIONS
| |
| |
|
|


|
|
|


The operating instructions
- Turn the handle clockwise to straighten the label and smooth the label.
- Adjust the pairs of limit rings on rollers B and C so that they guide the label as shown.
 Note:
Note:
- Leave a little gap between the limit rings and the label roll.
- When installing a label roll, the label paper must face outward.

- Set label indicator lever(G)
- Turn the handle clockwise to peel the label out. Stop turning when the label is out 2-3mm as shown.
- Adjust the label indicator lever(G) so that it is between two adjacent labels.


 Tips:When the indicator lever points between two adjacent labels, It indicates that the bottle labeling is just complete.
- Setting of different bottle sizes
- Place the bottle between two black rollers; Adjust the roller( H) back and forth so that the bottle can be attached to the label. Adjust the screw (J )length so that the bottle is in the desired position as shown.

- Position the press roll (K) so that it is just above the bottle.

- Place the bottle between two black rollers; Adjust the roller( H) back and forth so that the bottle can be attached to the label. Adjust the screw (J )length so that the bottle is in the desired position as shown.


Note:Make sure the bottles are the same diameter, Having multiple bottles with different diameters can cause poor labeling.
MAINTENANCE
- Inspect periodically all parts and accessories and replace them if damaged.
- Have damaged parts replaced by an authorized service center.
- Check the nuts periodically and tighten them if they are loose.
- Please use a soft, clean cloth when cleaning the machine. Do not flush the machine with water or liquid.
- Please store the product in a dry and ventilated place
TROUBLESHOOTING
| Problem | Possible Cause | Possible Solution |
The label didn't come out | The label is not wrapped around the scroll. | The label finally needs to be wound around the scroll. |
| The label is slipping on the scroll. | The label is rewound on the scroll. | |
Labels are not evenly attached | The reserved label is too long. | Shorten the reserved label length. |
| There are chips on the surface of the bottle. | Clean bottle surface. | |
| The roller did not press down on the bottle. | Press the roller properly. | |
The label is slanted | The label roll wobbles. | Readjust the label baffle and lock it. |
| The stripper plate is not locked. | Lock the stripper plate. | |
| The surface of the bottle is dirty or wet. | Clean the bottle or replace the clean bottle. |
- -
Address:Baoshanqu Shuangchenglu 803long 11hao 1602A-1609shi Shanghai
Imported to AUS: SIHAO PTY LTD, 1 ROKEVA STREETEASTWOOD NSW 2122 Australia
Imported to USA: Sanven Technology Ltd, Suite 250, 9166 Anaheim Place, Rancho Cucamonga, CA 91730
GENERAL SAFETY RULES
Important reminder
- Before use, please carefully read the product manual and ensure that you understand and comply with all safety warnings and usage precautions.
- Do not use this product for other non-designated purposes to avoid unexpected risks.
- This product is only applicable to users within the specified age group and scope of application. Please strictly comply with relevant age restrictions and warnings.
- If there are any abnormalities in the product, please stop using it immediately and contact the after-sales service center for consultation or to arrange for repair.
Environmental requirements for use
- Please use in a dry and well-ventilated environment to avoid extreme environmental conditions such as water activation, high temperature, high humidity, and extremely low temperature.
- Avoid direct sunlight or contact with fire sources to prevent product damage or fire.
- Please ensure a stable usage environment and prevent the product from being hit or dropped to avoid damage.
Safety Operation Guidelines
- When foreign objects are found on the surface of the product, please immediately stop using and remove the foreign objects before continuing to use.
- When using this product continuously for a long time, please rest in good time to avoid excessive fatigue.
Maintenance and upkeep
- Regularly maintain and clean the product. Be careful not to use alcohol, acid or alkali solutions, etc
- Do not disassemble the product or replace components on your own. If you encounter any malfunctions, please contact the after-sales service center.
Emergency handling measures
- When there are abnormal situations or accidents with the product, please stop using it as soon as possible.
- If the product involves an emergency situation that may harm personal safety, please call the emergency rescue number in a timely manner.
Disclaimers
We attach great importance to the safety and quality of our products, but cannot assume responsibility for safety accidents caused by improper use or operation.
SAVE THESE INSTRUCTIONS
Documents / Resources
References
Download manual
Here you can download full pdf version of manual, it may contain additional safety instructions, warranty information, FCC rules, etc.
Advertisement

Need help?
Do you have a question about the MT-30 and is the answer not in the manual?
Questions and answers