Table of Contents
Advertisement
Quick Links
Advertisement
Table of Contents

Related Manuals for Nokia 002Q944


Summary of Contents for Nokia 002Q944
- Page 1 Nokia 5230 User Guide Issue 1.0...
- Page 3 Reproduction, transfer, distribution, or storage of part or all of the contents in this document in any form without the prior written permission of Nokia is prohibited. Nokia operates a policy of continuous development. Nokia reserves the right to make changes and improvements to any of the products described in this document without prior notice.
- Page 4 OR CONTENTS OF THIS DOCUMENT. NOKIA RESERVES THE RIGHT TO REVISE THIS DOCUMENT OR WITHDRAW IT AT ANY TIME WITHOUT PRIOR NOTICE. Reverse engineering of software in the device is prohibited to the extent permitted by applicable law. Insofar as this user guide contains any limitations on Nokia's representations, warranties, damages and liabilities, such limitations shall likewise limit any representations, warranties, damages and liabilities of Nokia's licensors.
-
Page 5: Table Of Contents
Lock the keys and touch screen..22 Voice dialling........40 Home screen.........23 Video sharing........41 Access the menu........24 Log ............44 Touch screen actions......24 Media key..........26 Write text.......47 Change the ringing tone.....26 Virtual keyboard........47 Nokia support........26 Handwriting.........48 Your device......28 Alphanumeric keypad......49 Touch input settings......51 Phone setup..........28 Transfer content........28... - Page 6 Messaging.......56 Manage your accounts......84 Create a post.........85 Messaging main view......56 Post files from Gallery ......85 Write and send messages....56 Messaging inbox........58 Nokia Video Centre....86 Set up e-mail........59 View and download video clips..86 Mailbox..........59 Video feeds...........87 Mail for Exchange.........61 My videos..........88 View messages on a SIM card.....62...
- Page 7 About GPS..........96 Synchronisation.........114 Assisted GPS (A-GPS)......96 Bluetooth connectivity......114 Hold your device correctly....97 USB............119 Tips on creating a GPS connection..97 PC connections........119 Position requests.........98 Administrative settings.....119 Landmarks..........98 Search........121 GPS data..........99 Positioning settings......99 About Search........121 Start a search........121 Maps........101 Download!......122 About Maps.........101 Network positioning......101 About Download!.......122 Move on a map........102...
- Page 8 Save paper..........145 Learn more.........146 Accessories......147 Battery........149 Battery and charger information..149 Nokia battery authentication guidelines...........150 Taking care of your device. . .152 Recycle..........153 Additional safety information......154 Small children........154 Operating environment....154 Medical devices........154 Vehicles..........155 Potentially explosive environments........156 Emergency calls........156 Certification information (SAR)..157...
-
Page 9: Safety
QUALIFIED SERVICE Only qualified personnel may install or repair this product. ACCESSORIES AND BATTERIES Use only approved accessories and batteries. Do not connect incompatible products. WATER-RESISTANCE Your device is not water-resistant. Keep it dry. © 2009 Nokia. All rights reserved. -
Page 10: About Your Device
Your device may have preinstalled bookmarks and links for third-party internet sites and may allow you to access third-party sites. These are not affiliated with Nokia, and Nokia does not endorse or assume liability for them. If you access such sites, take precautions for security or content. -
Page 11: Network Services
Your service provider may have requested that certain features be disabled or not activated in your device. If so, these features will not appear on your device menu. Your device may also have customized items such as menu names, menu order, and icons. © 2009 Nokia. All rights reserved. -
Page 12: Find Help
Support When you want to learn more about how to use your product or you are unsure how your device should function, see the support pages at www.nokia.com/ support or your local Nokia website, www.nokia.mobi/support (with a mobile device), the Help application in the device, or the user guide. -
Page 13: Software Updates Over The Air
If your issue remains unsolved, contact Nokia for repair options. See www.nokia- asia.com/repair. Before sending your device for repair, always back up the data in your device. Software updates over the air Select Menu > Applications > SW update. With Software update (network service), you can check if there are updates available for your device software or applications, and download them to your device. -
Page 14: Software Updates Using Your Pc
To update the device software, do the following: 1. Download and install the Nokia Software Updater application to your PC. 2. Connect your device to the PC using a USB data cable, and open the Nokia Software Updater application. The Nokia Software Updater application guides you to back up your files, update the software, and restore your files. -
Page 15: Prolong Battery Life
For more information, contact a Nokia Care point or your device dealer. ● Personal Unblocking Key (PUK) code and PUK2 code — These codes (8 digits) are required to change a blocked PIN code or PIN2 code, respectively. -
Page 16: Free Memory
● Installation files (.sis or .sisx) of applications you have installed. Transfer the installation files to a compatible computer. ● Images and video clips in Gallery. Back up the files to a compatible computer. © 2009 Nokia. All rights reserved. -
Page 17: Get Started
2. Insert a SIM card in the SIM card slot. Ensure that the contact area on the card is facing down and the bevelled corner is facing toward the device. Push the card in. © 2009 Nokia. All rights reserved. -
Page 18: Insert The Battery
If the SIM card is not properly in place, the device can only be used in the offline profile. Insert the battery Always switch the device off and disconnect the charger before removing the battery. 1. Remove the back cover. 2. Insert the battery. © 2009 Nokia. All rights reserved. -
Page 19: Insert The Memory Card
Insert the memory card Use only compatible microSD and microSDHC cards approved by Nokia for use with this device. Nokia uses approved industry standards for memory cards, but some brands may not be fully compatible with this device. Incompatible cards may damage the card and the device and corrupt data stored on the card. -
Page 20: Charge The Battery
Your battery has been partially charged at the factory. If the device indicates a low charge, do the following: 1. Connect the charger to a wall outlet. 2. Connect the charger to the device. © 2009 Nokia. All rights reserved. -
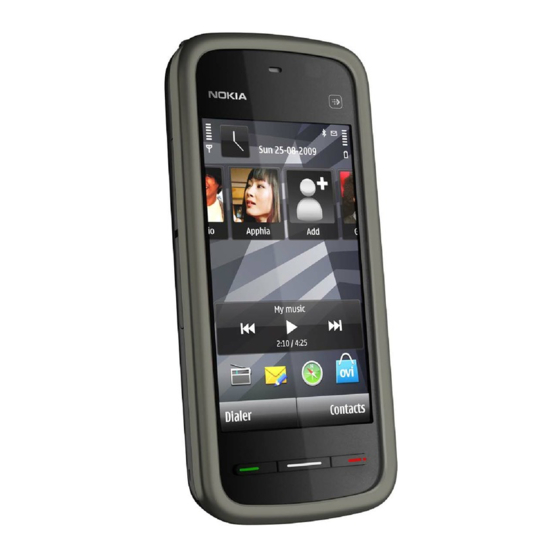
Page 21: Keys And Parts
Tip: Disconnect the charger from the wall outlet when the charger is not in use. A charger that is connected to the outlet consumes power even when it is not connected to the device. Keys and parts © 2009 Nokia. All rights reserved. - Page 22 1 — Micro USB connector 2 — Nokia AV connector (3.5mm) 3 — Charger connector 4 — Power key 5 — Earpiece 6 — Touch screen 7 — Proximity detector 8 — Volume/Zoom key 9 — Media key 10 — Lock switch 11 —...
- Page 23 Your device also comes with a plectrum stylus that can be attached to the device with the wrist strap. Do not cover the area above the touch screen, for example, with protective film or tape. © 2009 Nokia. All rights reserved.
-
Page 24: Stylus
The pen stylus is located in the back cover of the device. Important: Use only a stylus approved by Nokia for use with this device. Using any other stylus may invalidate any warranty applying to the device and may damage the touch screen. Avoid scratching the touch screen. -
Page 25: Home Screen
Menu > Settings and Personal > Home screen. Music keys When music or the radio is playing in the background, music keys (play/pause, skip backward, and skip forward) are displayed in the home screen. © 2009 Nokia. All rights reserved. -
Page 26: Access The Menu
However, to open the following items, you must tap them twice. Important: Use only a stylus approved by Nokia for use with this device. Using any other stylus may invalidate any warranty applying to the device and may damage the touch screen. - Page 27 The touch screen backlight is turned off after a period of inactivity. To turn the screen backlight on, tap the screen. If the touch screen and keys are locked, tapping the screen does not turn the screen backlight on. © 2009 Nokia. All rights reserved.
-
Page 28: Media Key
Options > Personalise. Nokia support To find the latest version of this guide, additional information, downloads, and services related to your Nokia product, see www.nokia.com/support or your local Nokia website. Configuration settings service To download configuration settings such as MMS, GPRS, e-mail, and other services for your phone model, see www.nokia-asia.com/setup. - Page 29 Nokia Care services If you need to contact Nokia Care services, check the list of local Nokia Care contact centres at www.nokia-asia.com/contactus. Maintenance For maintenance services, find your nearest Nokia Care point at www.nokia- asia.com/repair. © 2009 Nokia. All rights reserved.
-
Page 30: Your Device
To access the Phone setup application later, select Menu > Applications > Phone setup. To set up the device connections, select Sett. wizard. To transfer data to your device from a compatible Nokia device, select Switch. The available options may vary. Transfer content... -
Page 31: Display Indicators
OK. Enter the same code on the other device, and select OK. The devices are now paired. Some earlier Nokia devices may not have the Switch application. In this case, the Switch application is sent to the other device as a message. To install the Switch application on the other device, open the message, and follow the instructions on the display. -
Page 32: Contacts Bar
> Options > New contact, and follow the instructions. To communicate with your contact, select the contact and from the following: — Make a phone call. ● — Send a message. ● — Modify contact information. ● © 2009 Nokia. All rights reserved. -
Page 33: Antenna Locations
RF signals to and from the device are prevented. If you try to send messages, they are placed in the Outbox folder to be sent later. When the Offline profile is active, you can use your device without a SIM card. © 2009 Nokia. All rights reserved. -
Page 34: Shortcuts
To use voice commands, in the home screen, press and hold the call key. Volume and loudspeaker control To adjust the volume level when you have an active call or are listening to a sound clip, use the volume key. © 2009 Nokia. All rights reserved. -
Page 35: Sensor Settings And Display Rotation
Menu > Settings and Phone > Phone mgmt. > Security > Phone and SIM card > Remote phone locking > Enabled. Tap the text input field to enter the text message content (5 to 20 characters), select , and verify the message. Enter the lock code. © 2009 Nokia. All rights reserved. -
Page 36: Headset
To use the headphones with a remote control unit, connect the unit to the Nokia AV Connector in the device, then connect the headphones to the unit. -
Page 37: Attach A Wrist Strap
Place the tip of the stylus in the opening under the battery, and push the SIM card sideways to slide it out of the slot. Pull the SIM card out. 4. Replace the battery and the back cover. © 2009 Nokia. All rights reserved. -
Page 38: Remove The Memory Card
When Remove memory card and press 'OK' is displayed, open the cover of the memory card slot. 4. Press the memory card to release it from the slot. 5. Pull out the memory card. If the device is switched on, select OK. © 2009 Nokia. All rights reserved. -
Page 39: Make Calls
During a call To mute or unmute the microphone, select To put a call on hold or activate the held call, select To switch back to the handset, select To end the call, select © 2009 Nokia. All rights reserved. -
Page 40: Voice Mailbox
If you do not want to answer a call, press the end key. If you activate the Call divert > Voice calls > If busy function in phone settings to divert calls, rejecting an incoming call also diverts the call. © 2009 Nokia. All rights reserved. -
Page 41: Make A Conference Call
1. To assign a phone number to one of the number keys, select Menu > Settings and Calling > Speed dialling. 2. Go to the key to which you want to assign the phone number, and select Options > Assign. 1 is reserved for the voice mailbox. © 2009 Nokia. All rights reserved. -
Page 42: Call Waiting
1. To start voice dialling, in the home screen, press and hold the call key. If a compatible headset with the headset key is attached, press and hold the headset key to start voice dialling. © 2009 Nokia. All rights reserved. -
Page 43: Video Sharing
● Both the sender and recipient are registered to the UMTS network. If you invite someone to a sharing session and the recipient’s device is not within UMTS network coverage or does not have video sharing installed or person-to-person © 2009 Nokia. All rights reserved. - Page 44 ● Contact your service provider to establish an agreement for you to use the UMTS network. ● Ensure that the UMTS access point connection settings for your device are configured properly. For more information about the settings, contact your service provider. © 2009 Nokia. All rights reserved.
-
Page 45: Accept An Invitation
Accept an invitation When someone sends you a video sharing invitation, the invitation message displays the sender’s name or SIP address. If your device is not set to silent, it rings when you receive an invitation. © 2009 Nokia. All rights reserved. -
Page 46: Log
On the toolbar, select from the following: Call — Call the desired contact. ● Create message — Send a message to the desired contact. ● Open Contacts — Open the contacts list. ● Select Options and from the following: © 2009 Nokia. All rights reserved. -
Page 47: Packet Data
Subevents, such as a text message sent in more than one part and packet data connections, are logged as one communication event. Connections to your mailbox, multimedia message centre, or web pages are shown as packet data connections. © 2009 Nokia. All rights reserved. - Page 48 To filter the log, select Options > Filter and a filter. To set the log duration, select Options > Settings > Log duration. If you select No log, all the log contents, recent calls register, and messaging delivery reports are permanently deleted. © 2009 Nokia. All rights reserved.
-
Page 49: Write Text
To activate the caps lock, select the key twice. A line under the key indicates that the caps lock is activated. 5 — Letters © 2009 Nokia. All rights reserved. -
Page 50: Handwriting
To enter special characters, write them as you would normally, or select and the desired character. To delete characters or move the cursor back, swipe backwards (see Figure 1). To insert a space, swipe forwards (see Figure 2). © 2009 Nokia. All rights reserved. -
Page 51: Alphanumeric Keypad
4 — Input mode - Opens a pop-up window, in which you can select from the available input modes. When you tap an item, the current input method view closes, and the selected one opens. © 2009 Nokia. All rights reserved. -
Page 52: Traditional Text Input
2. To write the desired word, use the keys 2-9. Select each key only once for one letter. For example, to write "Nokia" when the English dictionary is selected, select 6 for N, 6 for o, 5 for k, 4 for i, and 2 for a. -
Page 53: Touch Input Settings
● Pen trail width — Select the pen trail width for the text written with the stylus. ● Writing colour — Select the colour of the text written with the stylus. ● Adaptive search — Activate adaptive search. ● Touch screen calibration — Calibrate the touch screen. © 2009 Nokia. All rights reserved. -
Page 54: Contacts
Options > Delete. To listen to the voice tag assigned to a contact, select the contact and Options > Voice tag details > Options > Play voice tag. Before using voice tags, note the following: © 2009 Nokia. All rights reserved. -
Page 55: Default Numbers And Addresses
(if the caller’s phone number is sent with the call and your device recognises it). To define a ringing tone for a contact or a contact group, select the contact or contact group and Options > Ringing tone, and a ringing tone. © 2009 Nokia. All rights reserved. -
Page 56: Copy Contacts
The numbers you save in the contacts list may not be automatically saved to your SIM card. To save numbers to the SIM card, select a contact and Options > Copy > SIM memory. © 2009 Nokia. All rights reserved. -
Page 57: Fixed Dialling
● Add from Contacts — Copy a contact from the list of contacts to the fixed dialling list. To send text messages to the SIM contacts while the fixed dialling service is active, you need to add the text message centre number to the fixed dialling list. © 2009 Nokia. All rights reserved. -
Page 58: Messaging
Delivery reports — You can request the network to send you a delivery ● report of the text messages and multimedia messages you have sent (network service). Write and send messages Select Menu > Messaging. © 2009 Nokia. All rights reserved. - Page 59 4. To write the message, tap the message field. 5. To add an object to a message or e-mail, select and the relevant type of content. The message type may change to multimedia message based on the inserted content. © 2009 Nokia. All rights reserved.
-
Page 60: Messaging Inbox
To see the media objects that have been included in the multimedia message, select Options > Objects. If the message includes a multimedia presentation, is displayed. To play the presentation, select the indicator. © 2009 Nokia. All rights reserved. -
Page 61: Set Up E-Mail
To start creating the e-mail settings with the mailbox guide, select Start. When you create a new mailbox, the name you give to the mailbox replaces Mailbox in the Messaging main view. You can have up to six mailboxes. © 2009 Nokia. All rights reserved. -
Page 62: Retrieve E-Mail Messages
To view e-mail attachments, open the message, and select the attachment field indicated by . If the attachment has not been retrieved to the device, select Options > Retrieve. © 2009 Nokia. All rights reserved. -
Page 63: Mail For Exchange
With Mail for Exchange, you can receive your work e-mail to your device. You can read and reply to your e-mails, view and edit compatible attachments, view calendar information, receive and reply to meeting requests, schedule meetings, and view, add, and edit contact information. ActiveSync © 2009 Nokia. All rights reserved. -
Page 64: View Messages On A Sim Card
Use of the Mail for Exchange application is limited to over-the-air synchronisation of PIM information between the Nokia device and the authorised Microsoft Exchange server. Mail for Exchange can be set up only if your company has Microsoft Exchange Server. -
Page 65: Cell Broadcast Messages
Select from the following: ● Message centres — View a list of all text message centres that have been defined. ● Message centre in use — Select which message centre to use to deliver text messages. © 2009 Nokia. All rights reserved. -
Page 66: Multimedia Message Settings
Manual to retrieve multimedia messages from the message centre manually, or Off to prevent receipt of any multimedia messages. Automatic retrieval may not be supported in all regions. ● Allow anonymous msgs. — Reject messages from anonymous senders. © 2009 Nokia. All rights reserved. - Page 67 Mailbox in the Messaging main view. You can have up to six mailboxes. Select Mailboxes and a mailbox to change the connection settings, user settings, retrieval settings, and automatic retrieval settings. © 2009 Nokia. All rights reserved.
-
Page 68: Personalise Your Device
To change a profile, scroll to the profile, and select Options > Activate. To personalise a profile, scroll to the profile, and select Options > Personalise. Select the setting you want to change. © 2009 Nokia. All rights reserved. - Page 69 When the profile is timed, is displayed in the home screen. The Offline profile cannot be timed. To create a new profile, select Options > Create new. © 2009 Nokia. All rights reserved.
-
Page 70: Music Folder
To play a song or a podcast: 1. Select categories to navigate to the song or podcasts you want to hear. 2. To play an item, select the item from the list. To pause playback, tap ; to resume, tap © 2009 Nokia. All rights reserved. -
Page 71: Create A Playlist
Create a playlist 1. Select Options > New playlist. 2. Enter a name for the playlist, and select OK. 3. To add songs now, select Yes; or to add the songs later, select No. © 2009 Nokia. All rights reserved. -
Page 72: Transfer Music From A Computer
● To view your device on a computer as a mass memory device where you can transfer any data files, make the connection with a compatible USB data cable or Bluetooth connectivity. If you are using a USB data cable, select Mass © 2009 Nokia. All rights reserved. -
Page 73: Nokia Music Store
To manage your music in Nokia Music, do the following: 1. Open the Nokia Music software on your PC, and register or sign in to Nokia Music Store. 2. Connect your device to your PC with a compatible USB data cable. -
Page 74: Nokia Podcasting
Nokia Music Store. Select Default access point. In the Nokia Music Store, you may be able to edit the settings by selecting Options > Settings. Nokia Podcasting With the Nokia Podcasting application (network service), you can search, discover, subscribe to, and download podcasts over the air, and play, manage, and share audio and video podcasts with your device. -
Page 75: Radio
Automatic updates only occur if a specific default access point is selected and Nokia Podcasting is running. If Nokia Podcasting is not running, the automatic updates are not activated. ● Download limit (%) — Define the percentage of memory that is reserved for podcast downloads. -
Page 76: Manage Radio Stations
To remove or rename a station, select Options > Stations > Options > Delete or Rename. To set the desired frequency manually, select Options > Tune stations > Options > Manual tuning. © 2009 Nokia. All rights reserved. -
Page 77: Camera
8 — Memory in use. Depending on the setup of your device, there are the following options: device memory ( ) or memory card ( 9 — GPS signal indicator © 2009 Nokia. All rights reserved. - Page 78 Increasing the light sensitivity may also increase the image noise. — Adjust contrast (images only). Adjust the difference between the lightest and darkest parts of the image. — Adjust sharpness (images only). © 2009 Nokia. All rights reserved.
-
Page 79: Capture Images
— Send the image in a multimedia or e-mail message, or through connection ● methods such as Bluetooth connectivity. To send the image to the person you are talking to, select during a call. — Upload the image to a compatible online album. ● © 2009 Nokia. All rights reserved. -
Page 80: Location Information
It may take several minutes to obtain the coordinates of your location. The availability and quality of GPS signals may be affected by your location, buildings, natural obstacles, and weather conditions. If you share a file that includes location © 2009 Nokia. All rights reserved. -
Page 81: Capture Images In A Sequence
To switch off the self-timer, select > > Tip: Select 2 seconds to keep your hand steady when capturing an image. Capture images in a sequence Select Menu > Applications > Camera. © 2009 Nokia. All rights reserved. -
Page 82: Video Recording
Gallery. The maximum length of a video clip is approximately 30 seconds with sharing quality and 90 minutes with other quality settings. Video recording controls and indicators The video viewfinder displays the following: © 2009 Nokia. All rights reserved. -
Page 83: After Recording A Video Clip
Play — Play the video clip you just recorded. ● — Upload the image to a compatible online album. ● Delete — Delete the video clip. ● To return to the viewfinder to record a new video clip, press the capture key. © 2009 Nokia. All rights reserved. -
Page 84: Gallery
To browse the files one by one, swipe left or right. To browse files in groups, swipe up or down. To open a file, select a file from the list. To zoom in an image, use the volume key in your device. © 2009 Nokia. All rights reserved. -
Page 85: Organise Images And Videos
● Folder options — To move files to folders, select Move to folder. To create a new folder, select New folder. ● Organise — To copy files to folders, select Copy. To move files to folders, select Move. ● View by — View files by date, title, or size. © 2009 Nokia. All rights reserved. -
Page 86: Share Online
To subscribe to an online sharing service, go to the service provider's website, and check that your Nokia device is compatible with the service. Create an account as instructed on the website. You receive a user name and password needed to set up your device with the account. -
Page 87: Create A Post
1. Select Menu > Gallery and the files you want to post. 2. Select Options > Send > Upload and the desired account. 3. Edit your post as required. 4. Select Options > Upload. © 2009 Nokia. All rights reserved. -
Page 88: Nokia Video Centre
Nokia Video Centre With Nokia Video Centre (network service), you can download and stream video clips over the air from compatible internet video services using a packet data connection. You can also transfer video clips from a compatible PC to your device and view them in Video centre. -
Page 89: Video Feeds
● Manage account — Manage your account options for a particular feed, if available. ● Move — Move video clips to a desired location. To view the videos available in a feed, select a feed from the list. © 2009 Nokia. All rights reserved. -
Page 90: My Videos
4. Transfer the video clips to E:\My Videos in the memory card. The transferred video clips appear in the My videos folder in Video centre. Video files in other folders of your device are not displayed. © 2009 Nokia. All rights reserved. -
Page 91: Video Centre Settings
● Preferred memory — Select whether downloaded videos are saved in the device memory or on a compatible memory card. ● Thumbnails — Select whether to download and view thumbnail images in video feeds. © 2009 Nokia. All rights reserved. -
Page 92: Web Browser
If your device runs out of memory while loading such a web page, the graphics on the page are not shown. To browse web pages without graphics to save memory, select Options > Settings > Page > Load content > Text only. © 2009 Nokia. All rights reserved. -
Page 93: Browser Toolbar
Subsc. feeds — View a list of available web feeds on the current web page, ● and subscribe to a web feed. Settings — Edit the settings. ● Save bkmrk. — Save the current web page as a bookmark. ● © 2009 Nokia. All rights reserved. -
Page 94: Navigate Pages
Installed widgets appear as separate applications in the Applications folder. You can download widgets using the Download! application or from the web. © 2009 Nokia. All rights reserved. -
Page 95: Content Search
Symbian Signed or have passed the Java Verified testing. ™ To download an item: 1. Select the link. 2. Select the appropriate option to purchase the item (for example, Buy). 3. Carefully read all the information provided. © 2009 Nokia. All rights reserved. -
Page 96: Bookmarks
Web also keeps track of the web pages you visit during browsing. In the Recently visited pages folder, you can view the list of the visited web pages. Empty the cache The information or services you have accessed are stored in the cache memory of the device. © 2009 Nokia. All rights reserved. -
Page 97: Connection Security
Before changing any certificate settings, you must make sure that you really trust the owner of the certificate and that the certificate really belongs to the listed owner. © 2009 Nokia. All rights reserved. -
Page 98: Positioning (Gps)
A-GPS is a network service. Assisted GPS (A-GPS) is used to retrieve assistance data over a packet data connection, which assists in calculating the coordinates of your current location when your device is receiving signals from satellites. © 2009 Nokia. All rights reserved. -
Page 99: Hold Your Device Correctly
You must have an internet access point defined in the device to retrieve assistance data from the Nokia A-GPS service over a packet data connection. To define an access point for A-GPS, select Menu > Applications > Location and Positioning >... -
Page 100: Position Requests
When you receive a position request, the service that is making the request is displayed. Select Accept to allow your position information to be sent or Reject to deny the request. Landmarks Select Menu > Applications > Location and Landmarks. © 2009 Nokia. All rights reserved. -
Page 101: Gps Data
Select Menu > Applications > Location and GPS data. Positioning settings Select Menu > Applications > Location and Positioning. Positioning methods Select from the following: ● Integrated GPS — Use the integrated GPS receiver of your device. © 2009 Nokia. All rights reserved. - Page 102 To select which measurement system you want to use for speeds and distances, select Measurement system > Metric or Imperial. To define in which format the coordinate information is displayed in your device, select Coordinate format and the desired format. © 2009 Nokia. All rights reserved.
-
Page 103: Maps
Some maps may be available in your device or on a memory card. You can also use the Nokia Map Loader PC software to download maps. To install Nokia Map Loader to a compatible PC, see www.nokia.com/maps. -
Page 104: Move On A Map
Initially, your device must receive signals from at least four satellites to calculate your location. After the initial calculation, signals from three satellites may be enough. The data transfer indicator shows the internet connection used, and the amount of data transferred since the application started. © 2009 Nokia. All rights reserved. -
Page 105: Find Locations
To navigate to the destination by car or on foot, if you have purchased a licence for these services, select Show route > Options > Start driving or Start walking. To save the route, select Show route > Options > Save route. © 2009 Nokia. All rights reserved. -
Page 106: Save And Send Locations
To add the location to a route, tap the location, and select Add to route. Walk to your destination The walking route includes pedestrian zones and parks, prioritises walkways and smaller roads, and omits motorways. © 2009 Nokia. All rights reserved. -
Page 107: Drive To Your Destination
To start navigating by car, select a location, tap the information area above the map, and select Drive to. When you use car navigation for the first time, you are asked © 2009 Nokia. All rights reserved. -
Page 108: Traffic And Safety
(network service). Content such as satellite images, guides, weather and traffic information and related services are generated by third parties independent of Nokia. The content may be inaccurate and incomplete to some extent and is subject to availability. Never rely solely on the aforementioned content and related services. -
Page 109: Maps Settings
The location of speed cameras can be shown on your route during navigation and tracking, if this feature is enabled. Some jurisdictions prohibit or regulate the use of speed camera location data. Nokia is not responsible for the accuracy, or the consequences of use of speed camera location data. -
Page 110: Navigation Settings
● Safety spot warner — Set the device to notify you when you approach a speed camera, if such information is available for your route. ● Maps improvement — Let Nokia use information from your device to improve the Maps application. The information is collected periodically while you are travelling with typical car speeds, and it is anonymous and encrypted. -
Page 111: Maps Settings
2. If more than one device is connected to the computer, select your device from the list. 3. When Nokia Maps Updater has found updates, download them to your device. 4. Accept the download in your device when prompted on the device display. -
Page 112: Connectivity
This option is shown only if supported by the wireless service provider. A roaming agreement is an agreement between two or more service providers to enable the users of one service provider to use the services of other service providers. © 2009 Nokia. All rights reserved. -
Page 113: Access Points
Depending on the data connection you select, only certain setting fields are available. Fill in all fields marked with Must be defined or with a red *. Other fields can be left empty, unless your service provider has instructed otherwise. © 2009 Nokia. All rights reserved. -
Page 114: Create Access Point Groups
● Prompt password — If you must enter the password every time you log in to a server, or if you do not want to save your password in the device, select Yes. © 2009 Nokia. All rights reserved. -
Page 115: Active Data Connections
Note: The actual invoice for calls and services from your service provider may vary, depending on network features, rounding off for billing, taxes, and so forth. To end a connection, select Options > Disconnect. To end all open connections, select Options > Disconnect all. © 2009 Nokia. All rights reserved. -
Page 116: Synchronisation
(33 feet) of each other, although the connection may be subject to interference from obstructions such as walls or from other electronic devices. This device is compliant with Bluetooth Specification 2.0 + EDR supporting the following profiles: advanced audio distribution, audio/video remote control, basic © 2009 Nokia. All rights reserved. -
Page 117: Security Tips
SIM access, and stereo audio streaming. To ensure interoperability between other devices supporting Bluetooth technology, use Nokia approved accessories for this model. Check with the manufacturers of other devices to determine their compatibility with this device. -
Page 118: Send Data Using Bluetooth Connectivity
Tip: When searching for devices, some devices may show only the unique address (device address). To find the unique address of your device, enter *#2820#. Pair devices Select Menu > Settings and Connectivity > Bluetooth. © 2009 Nokia. All rights reserved. -
Page 119: Receive Data Using Bluetooth Connectivity
When you receive data through Bluetooth connectivity, a tone sounds, and you are asked if you want to accept the message. If you accept, is displayed, and the item is placed in the Inbox folder in Messaging. Messages received through Bluetooth connectivity are indicated by © 2009 Nokia. All rights reserved. -
Page 120: Block Devices
To make calls from your device, you must leave the remote SIM mode. If the device is locked, enter the lock code to unlock it. To leave the remote SIM mode, press the power key, and select Exit remote SIM mode. © 2009 Nokia. All rights reserved. -
Page 121: Usb
USB connection mode and from the following: ● PC Suite — Use Nokia PC applications such as Nokia Ovi Suite, and Nokia Software Updater. ● Mass storage — Transfer data between your device and a compatible PC. -
Page 122: Sip Settings
To turn the control service on or off, or to change the allowed access points, select Options and the corresponding option. To change the options, you need your PIN2 code. Contact your service provider for the code. © 2009 Nokia. All rights reserved. -
Page 123: Search
To change the default service provider, select Options > Select service. To change the country or region setting to find more search providers, select Options > Settings > Country or region. © 2009 Nokia. All rights reserved. -
Page 124: Download
Options > Buy. A submenu opens where you can select the version of the item and view price information. The available options depend on the service provider. To download an item that is free of charge, select Options > Get. © 2009 Nokia. All rights reserved. -
Page 125: Other Applications
To change the alarm tone, select Options > Settings > Clock alarm tone. World clock Select Menu > Applications > Clock. To view the current time in different locations, select World clock. To add locations to the list, select Options > Add location. © 2009 Nokia. All rights reserved. -
Page 126: Calendar
Select Menu > Applications > Office > File mgr.. With File manager, you can browse, manage, and open files on your device, memory card, or a compatible external drive. The available options depend on the memory you select. © 2009 Nokia. All rights reserved. -
Page 127: Application Manager
With Application manager, you can see the software packages installed in your device. You can view details of installed applications, remove applications, and define installation settings. You can install the following types of applications and software to your device: © 2009 Nokia. All rights reserved. -
Page 128: Install Applications
Bluetooth connectivity. You can use Nokia Application Installer in Nokia Ovi Suite to install an application to your device. Icons in Application manager indicate the following:... - Page 129 (.sis, .sisx) remain in the device memory. The files may use large amounts of memory and prevent you from storing other files. To maintain sufficient memory, use Nokia Ovi Suite to back up installation files to a compatible PC, then use the file manager...
-
Page 130: Realplayer
With RealPlayer, you can play video clips or stream media files over the air without saving them to the device first. RealPlayer does not necessarily support all file formats or all the variations of file formats. Select Menu > Applications > RealPlayer. © 2009 Nokia. All rights reserved. -
Page 131: Play Video Clips
Stream content over the air In RealPlayer, you can only open an RTSP link. However, RealPlayer plays a RAM file if you open an HTTP link to it in a browser. Select Menu > Applications > RealPlayer. © 2009 Nokia. All rights reserved. -
Page 132: Recorder
New note. Tap the note field to enter text, and select You can save plain text files (.txt file format) you receive to Notes. Calculator Select Menu > Applications > Office > Calculator. This calculator has limited accuracy and is designed for simple calculations. © 2009 Nokia. All rights reserved. -
Page 133: Converter
You cannot remove the English language from the dictionary. You can have two additional languages installed, besides English. ● Speech — Edit the voice feature settings. You can adjust the speed and volume of the voice. © 2009 Nokia. All rights reserved. -
Page 134: Settings
Select Menu > Settings and Phone > Language. To change the device language, select Phone language. To change the writing language, select Writing language. To turn predictive text input on or off, select Predictive text. © 2009 Nokia. All rights reserved. -
Page 135: Voice Commands
Some accessory connectors indicate which type of accessory is connected to the device. Select an accessory and from the following: ● Default profile — Set the profile that you want activated each time you connect a certain compatible accessory to your device. © 2009 Nokia. All rights reserved. -
Page 136: Application Settings
To create a server profile, select Options > Server profiles > Options > New server profile. To delete a server profile, select the profile and Options > Delete. To check for software updates, select Options > Check for updates. © 2009 Nokia. All rights reserved. -
Page 137: Security Settings
If you forget the PIN or PIN2 code, contact your service provider. If you forget the lock code, contact a Nokia Care point or your service provider. ● Lock code — The lock code is used to unlock the device. To avoid unauthorised use of your device, change the lock code. - Page 138 If "Expired certificate" or "Certificate not valid yet" is shown, even if the certificate should be valid, check that the current date and time in your device are correct. View certificate details — check authenticity © 2009 Nokia. All rights reserved.
- Page 139 To change the value, select Options > Change trust setting. Security module Select Menu > Settings and Phone > Phone mgmt. > Security > Security module. To view or edit a security module (if available), select it from the list. © 2009 Nokia. All rights reserved.
-
Page 140: Restore Original Settings
For more information, contact your service provider. Some activation keys may be connected to a specific SIM card, and the protected content can be accessed only if the SIM card is inserted in the device. © 2009 Nokia. All rights reserved. -
Page 141: Call Settings
Select which phone line you want to use for making calls and sending text messages. Calls on both lines can be answered irrespective of the selected line. If you select Line 2 and © 2009 Nokia. All rights reserved. -
Page 142: Call Divert
When security features that restrict calls are in use (such as call barring, closed user group, and fixed dialling), calls may be possible to the official emergency number programmed into your device. Call barring and call diverting cannot be active at the same time. © 2009 Nokia. All rights reserved. - Page 143 Voice call barring Select the desired barring option and Activate, Deactivate, or Check status. Call barring affects all calls, including data calls. © 2009 Nokia. All rights reserved.
-
Page 144: Troubleshooting
A: This is a characteristic of this type of display. Some displays may contain pixels or dots that remain on or off. This is normal, not a fault. Q: Why can't my Nokia device establish a GPS connection? A: Establishing a GPS connection may take from a couple of seconds to several minutes. - Page 145 > When needed. If this does not help, switch the device off and then on again. Q: Can I use my Nokia device as a fax modem with a compatible PC? A: You cannot use your device as a fax modem. However, with call diverting (network service), you can divert incoming fax calls to a fax number.
- Page 146 To resolve this, select Menu > Settings and Phone > Phone mgmt. > Factory settings. Restore the factory settings, and when the device restarts, set the correct date and time. © 2009 Nokia. All rights reserved.
-
Page 147: Green Tips
● Disable unnecessary sounds, such as keypad and ringing tones. Recycle Most of the materials in a Nokia phone are recyclable. Check how to recycle your Nokia products at www.nokia.com/werecycle, or with a mobile device, www.nokia.mobi/werecycle. -
Page 148: Learn More
Learn more For more information on the environmental attributes of your device, see www.nokia.com/ecodeclaration. © 2009 Nokia. All rights reserved. -
Page 149: Accessories
Accessories Nokia original accessories Warning: Use only batteries, chargers, and accessories approved by Nokia for use with this particular model. The use of any other types may invalidate any approval or warranty, and may be dangerous. For availability of approved accessories, check with your dealer. - Page 150 Likewise, the amount of time that the device is turned on and in the standby mode will affect its talk time. © 2009 Nokia. All rights reserved.
-
Page 151: Battery
Your device is powered by a rechargeable battery. The battery intended for use with this device is BL-5J. Nokia may make additional battery models available for this device. This device is intended for use when supplied with power from the following chargers: AC-8E. -
Page 152: Nokia Battery Authentication Guidelines
Keep your battery out of the reach of small children. Nokia battery authentication guidelines Always use original Nokia batteries for your safety. To check that you are getting an original Nokia battery, purchase it from a Nokia authorised service centre or... - Page 153 Successful completion of the steps is not a total assurance of the authenticity of the battery. If you cannot confirm authenticity or if you have any reason to believe that your Nokia battery with the hologram on the label is not an authentic Nokia battery, you should refrain from using it, and take it to the nearest Nokia authorised service centre or dealer for assistance.
-
Page 154: Taking Care Of Your Device
● Backup all data you want to keep, such as contacts and calendar notes. ● To reset the device from time to time for optimum performance, power off the device and remove the battery. These suggestions apply equally to your device, battery, charger, or any accessory. © 2009 Nokia. All rights reserved. -
Page 155: Recycle
Always return your used electronic products, batteries, and packaging materials to dedicated collection points. This way you help prevent uncontrolled waste disposal and promote the recycling of materials. Check product environmental information and how to recycle your Nokia products at www.nokia.com/werecycle, or nokia.mobi/werecycle. © 2009 Nokia. All rights reserved. -
Page 156: Additional Safety Information
RF energy. Switch off your device when regulations posted instruct you to do so. Hospitals or health care facilities may use equipment sensitive to external RF energy. © 2009 Nokia. All rights reserved. -
Page 157: Vehicles
Do not store or carry flammable liquids, gases, or explosive materials in the same compartment as the device, its parts, or accessories. Remember that air bags inflate with great force. Do not place your device or accessories in the air bag deployment area. © 2009 Nokia. All rights reserved. -
Page 158: Potentially Explosive Environments
Depending on your device, you may also need to complete the following: ● Insert a SIM card if your device uses one. ● Remove certain call restrictions you have activated in your device. ● Change your profile from offline profile mode to an active profile. © 2009 Nokia. All rights reserved. -
Page 159: Certification Information (Sar)
The highest SAR value under the ICNIRP guidelines for use of the device at the ear is 1.10 W/kg. Use of device accessories may result in different SAR values. SAR values may vary depending on national reporting and testing requirements and the network band. © 2009 Nokia. All rights reserved. - Page 160 Additional SAR information may be provided under product information at www.nokia.com. © 2009 Nokia. All rights reserved.
-
Page 161: Index
39 blogs 92 dialled 44 Bluetooth 115 duration of 45 Bluetooth connectivity missed 44 blocking devices 118 options during 37 device address 116 received 44 device visibility 115 redialling 139 pairing devices 116 © 2009 Nokia. All rights reserved. - Page 162 54 defaults 53 e-mail 61 deleting 52 e-mail messages 59 editing 52 end all calls option 40 images in 52 ringing tones 53 saving 52 factory settings sending 52 restoring 138 synchronising 114 © 2009 Nokia. All rights reserved.
- Page 163 126 favourites 104 internet connection 90 finding locations 103 browser See also history 104 internet settings 107 route settings 108 Java applications 125 routes 103 JME Java application support 125 saved items 104 © 2009 Nokia. All rights reserved.
- Page 164 56, 58, 64 camera music player 68 PIN code 12 playlists 69 PIN2 code 12 transferring music 70 podcasting music store 71 downloads 73 muting sound 38 settings 72 positioning information 96 © 2009 Nokia. All rights reserved.
- Page 165 78 creating posts 85 searching 121 posting 85 security subscribing 84 certificates 136 shared video 41 web browser 95 sharing media files online 84 security code 12 shooting modes security module 137 camera 78 © 2009 Nokia. All rights reserved.
- Page 166 66 voice commands 40, 133 time and date 123 voice dialling See also tones 66 voice control 133 touch screen 24, 51 voice dialling 40 transferring content 28 volume controls 32 troubleshooting 142 © 2009 Nokia. All rights reserved.
- Page 167 66 web connection 90 web logs 92 week settings 124 widgets 92 wrist strap 35 zooming 80 © 2009 Nokia. All rights reserved.
Need help?
Do you have a question about the 002Q944 and is the answer not in the manual?
Questions and answers