Advertisement
REVEAL APP DOWNLOAD
DOWNLOAD THE TACTACAM REVEAL APP
Visit your APPstore to download


INTRODUCTION
WHAT IS IN THE BOX?
(1) Trail Camera
(1) Instruction Manual
(1) Mounting Strap
(1) Antenna
(1) SIM Card (pre-installed)
WHAT YOU WILL NEED
- Full-size SD Card - Class 10, U3, 32GB
- Recommended Brands: Tactacam, Lexar, SanDisk
(Other brands of low-end SD cards are incompatible with the REVEAL and will yield unexpected results) - (12) AA batteries required - Lithium batteries recommended in colder temperatures
RECOMMENDED CAMERA ACCESSORIES (NOT INCLUDED)

VIEW AND PURCHASE ALL ACCESSORIES AT REVEALCELLCAM.COM
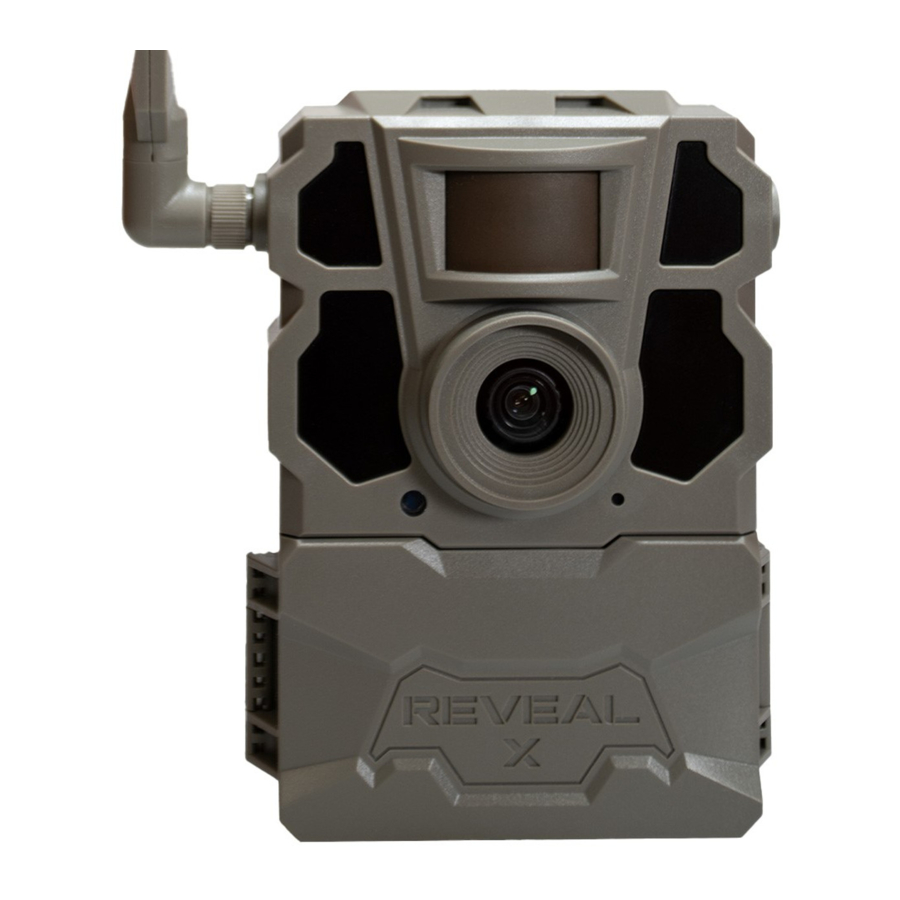
OVERVIEW

- Lens
- Antenna
- IR LEDs
- Camera Working Status Indicator
- Device Status Indicator Light (Green/Blue)
- SD Card Indicator (Red/Green)
- SIM Slot (do not install other SIMs)
- Power Switch (ON/SETUP/OFF)
- PIR Motion Sensor
- WiFi Indicator Light (Blue)
- Microphone
- Battery Level Indicator
- 4G Signal Indicator
- SD Card Slot
- Test Button
- Battery Eject Button
- Reset Button
- External Battery In/DC Port
- USB Port
- Tripod/Mount Attachment
- Cable Lock Holes
- 1/4-20 Accessory
- Strap Holes
- Solar Panel Attachment Rails
QUICK START GUIDE
SETTING UP THE CAMERA
- Install camera's antenna.
![information]() Note: Do not over tighten the antenna, once it is secure stop tightening to prevent
Note: Do not over tighten the antenna, once it is secure stop tightening to prevent
antenna port damage.
- Install a Class 10 U3 SD card (32GB).
- Recommended brands are: SanDisk, Lexar and Tactacam
- Install 12 AA batteries.
- To eject the battery tray, press the EJECT button on the REVEAL. When inserting AA batteries correctly orientate + and - on the front and back of the tray.
- See battery details under Best Practices.
SIM Card
For cameras with a single SIM, the card may or may not be pre-installed. Cameras packaged with two SIMs allow you to select a carrier that works strongest in the area of your camera's location. NOTE: SIM cards are exclusively paired to a camera at the time of manufacture, so please do not remove, swap, or replace with a different SIM card. Activation of your camera can be done conveniently through the REVEAL mobile app during setup.
Here is the link to our Data Plans
https://www.tactacam.com/reveal-data-plans
SETTING UP YOUR ACCOUNT
If this is your first REVEAL that you are activating, please visit the REVEAL Web Portal at https://account.revealcellcam.com/activation to set up your account. Android users can also access the Web Portal directly from your app, by clicking My REVEAL on the account page in the app.
If you already have a REVEAL account with ACTIVE cameras, you can simply log in to your app and add your camera following the instructions.
DOWNLOADING THE APP
In your Apple or Google Play Store, download the Tactacam REVEAL app and sign in using the same email and password you created on the website (https://account.revealcellcam.com).

ADD CAMERA TO THE APP


- Navigate to the REVEAL app on your device and login using your REVEAL account credentials. Click the home icon.
- Click the menu in the upper left corner.
- Select "+ Add a Camera"
- Select the plan you wish to have and the model of the camera.
- Follow the prompts, allow access to the camera of your phone, and then scan the QR code on the camera.
- Next, follow the prompts and insert your SIM card (if SIM is not pre-installed).
- Select Continue
- Next, name your camera and assign a location.
PAIRING YOUR CAMERA TO YOUR PHONE THROUGH WiFi

You can automatically change and apply the camera settings when your phone is connected to the camera's WiFi. This will not work unless you are next to the camera.
- Turn your REVEAL to SETUP mode.
- When the WiFi light is blinking blue, it is ready to pair to your phone or tablet.
- In the app go to the Account page and click Connect to REVEAL WiFi
- Follow the in-app instructions and turn ALL slides to the ON position. You can also manually connect in your phone's WiFi settings, select REVEAL and enter the password ( Reveal2021 )This WiFi password is case sensitive, no spaces.
- See preview on screen
- Red line on preview is point of focus
- To send test picture, press "Test" button on camera
Also available in the app while connected to WiFi:
- Instantly apply setting changes from the app
- Formatting SD Card
REMOTELY CHANGE THE CAMERA SETTINGS FROM THE APP
From the camera page click beside the camera name. Then choose "Camera Settings". Make sure to select "Apply Settings" when done to save your changes.

 Note: In cameras SETTINGS > Settings Check, Daily will check settings every 24 hours. Instant will Receive settings Instantly but will consume more battery.
SENDING A TEST PICTURE
- Allow the camera to connect to 4G signal. The LED signal indicator light will be constant green.
- After your camera is activated, you will see the signal status indicator searching, and then connect showing the signal strength.
- After the camera has connected, push the test button to send a photograph.
- You will see the status light blinking as the image is sending.
- When the test picture sends successfully, the status light will turn green.
- If the status light turns red there may have been an issue trying to send the test photo. This is usually caused by signal strength or the SD Card.
- Allow the camera to connect to 4G signal. The LED signal indicator light will be constant green.
- Refer to the app to be sure the picture has successfully sent.
- While your camera is connected to your phone with WiFi, you will be able to access a live preview to help with camera setup and proper placement.
- Allow the camera to connect to 4G signal. The LED signal indicator light will be constant green.
LEAVING YOUR CAMERA IN THE FIELD

- While your camera is connected to your phone with WiFi, you will be able to access a live preview to help with camera setup and proper placement.
- Ensure the antenna is securely tightened.
- Wipe down the seal, removing any dirt and/or debris.
- Turn the camera to the ON position.
- As long as your phone picks up a signal, be sure a motion detected picture is sent to your phone via the app. This may take a few minutes.
SETTINGS / SPECIFICATIONS
| Camera Mode | Photo; Photo+Video |
| Day/Night Mode | Daytime: Color, Nighttime: B+W |
| IR Range | 96+ Feet |
| PIR Angle | 45* |
| Flash | No Glow IR Technology effectively eliminates all visible flash |
| Operating Keys (2) | 1x Power button; Navigation arrows |
| Lens | F=6mm; F/No=2.0; FOV=60* Auto IR-Cut-Remove (at night) |
| SD Card | Class 10, U3, 32GB, minimum 90MB/Sec |
| Status Indicator | 1 LED |
| Picture Format | JPEG |
| Video | Optional |
| Trigger Speed | 0.5 seconds |
| SD Card Loop | Optional |
| Operation Power | 9-12V |
| Battery | X = 12xAA Cartridge Optional external power source (12V external battery pack or solar panel)
|
| External DC | 12V-2A |
| Transfer Picture via 4G | Thumbnail images sent to app (Additional data charges may apply) |
| Request HD Photo and Video via 4G | Only in supported locations (Additional data charges may apply) |
| Upload Frequency/Send Type | Instantly (Timely) 12 hours / 24 hours |
| 4G Communication | LTE wireless |
| 4G Antenna | 1 Antenna |
| Device Serial No. | Yes |
| Interface | LTE, USB, and SD Card |
| Mounting | Strap; Tripod (not included) |
| Operating Temperature | -25*C to 60*C -13F to 140*F |
| Operation Humidity | 5% to 90% |
| Waterproof rating | IP66 |
| Dimensions | 3.62"x4.13"x5.47" |
| Weight | About 0.95lb |
| Certification | FCC RoHs |
BEST PRACTICES
PROPER CAMERA PLACEMENT
- Location and placement is critical for optimal camera performance.
- Avoid hanging the camera on small trees that are prone to moving with the wind.
- Place the camera about waist high on the tree or post.
- We recommend having the camera pointing down about 7 to 15 degrees. We recommend using shims to achieve the desired angle.
- To achieve the best lighting conditions, face your camera north. Avoid facing your camera toward the sun.
- If the camera is placed too high on a tree and angled down, the field of view "window" becomes narrower, this is only a good idea if you plan to set your camera to watch a bait station or scrape.
- On a food plot:
- Camera height and angle is critical to get the widest field of view. Do not place camera too high.
- On a trail:
- For the best view, place your camera at an angle looking up or down the trail rather than perpendicular to the trail.
BATTERIES AND CELLULAR TRAIL CAMERA PERFORMANCE
- Use the recommended batteries for the REVEAL:
- Energizer Ultimate Lithium
- Duracell Max Alkaline batteries
- Rayovac UltraPro Alkaline batteries
* Do not mix old and new batteries
* Do not mix alkaline, lithium, standard, or rechargeable batteries
* Ensure the batteries are installed correctly with the regard to polarity (+ and -).
* Always remove batteries if consumed or if product is to be left unused for a long time.
- In cold weather, use lithium ion batteries for optimal camera speed and performance.
- Expected picture count with the proper batteries (in greater than freezing temps) are:
- Lithium: 4,000+ pictures
- Alkaline: 2,500+ pictures
- If connecting the External Solar Panel (sold separately), the lithium batteries would act as a backup power source.
TROUBLESHOOTING
CAMERA SENDS PICTURES OF NOTHING
Motion sensors (PIR sensors) are actually heat and motion sensors. This is why on a hot and windy day, people get false triggers. People and animals are not the only objects that will trigger your camera; vegetation and precipitation can act as a moving target as well.
- Be sure to clear any low hanging tree branches, brush, and weeds from the field of view, 5-10 yards in front of the camera.
- Motion sensitivity recommendations:
- Set to High to start, and decrease sensitivity if you're getting too many false triggers. (9 being the highest and 1 being the lowest).
NIGHT VISION FLASH RANGE DOESN'T MEET EXPECTATION
- Check to make sure that batteries are fully charged.
- "Max Range" offers better IR flash range. Given IR flash range values are based on max range setting; adjust Night Mode to Max Range for better night vision flash range.
- High quality 1.2V NiMH rechargeable AA batteries can also offer improved IR flash range.
![information]() Note: If your camera will be used in cold weather, we do recommend lithium batteries to deliver consistent results.
Note: If your camera will be used in cold weather, we do recommend lithium batteries to deliver consistent results. - Certain surroundings (like trees, walls, ground, etc.) within flash range can deliver you better night time images. To improve night images, do not aim camera in an open field where there is nothing to reflect the IR flash back.
TO HELP PREVENT THEFT OR DAMAGE
Use a protective security box such as the one listed at www.revealcellcam.com

CAMERA STOPS TAKING IMAGES OR WON'T TAKE IMAGES
- Make sure that the SD card is not full. If the SD card is full, the camera will stop taking images. Users can turn on SD Loop to avoid such problems. This will cause the SD card to overwrite older images.
- Make sure that alkaline or NiMH-AA batteries have enough power for the camera to work.
- Format the SD card with the camera before using or when the camera stops taking images.
INTERNAL CONDENSATION ON LENS
The REVEAL is IP66 rated waterproof. This means the camera is water resistant against powerful jets. The only way the REVEAL can get condensation in or behind the lens is if the antenna is not screwed in all the way, or if there is dirt or debris on the seal. Follow these at home instructions to alleviate this issue if need be:
- Pull the SD card out and let the camera sit for 3-4 days open, in an area where there is circulating air (fan or vent).
- You can also place in a sealed container with rice for 24 hours to draw out the moisture.
- Clean the seal well and tighten your antenna.
- Place back out in the field.
IF THE CAMERA HAS ACCIDENTALLY BEEN SUBMERGED IN WATER
- Do not open the camera right away.
- Be sure to dry the outer housing of the camera, preventing water from entering the inside of the camera and causing internal damage.
DO NOT RETURN THIS PRODUCT TO YOUR RETAILER
For any warranty issues or questions EMAIL SUPPORT_EU@TACTACAM.COM
110 N Sunset Blvd, Caledonia, MN 55921
eu.tactacam.com
Documents / Resources
References
![www.tactacam.com]() Cellular Game Camera App and Data Plan | Tactacam REVEAL
Cellular Game Camera App and Data Plan | Tactacam REVEAL![www.apple.com]() App Store - Apple
App Store - Apple![play.google.com]() Google Play
Google Play![revealcellcam.com]() Home - Tactacam
Home - TactacamTactacam Reveal
Tactacam Reveal
![www.revealcellcam.com]() Home - Tactacam
Home - Tactacam![eu.tactacam.com]() Home - EU
Home - EU
Download manual
Here you can download full pdf version of manual, it may contain additional safety instructions, warranty information, FCC rules, etc.
Advertisement


Need help?
Do you have a question about the REVEAL X 2.0 and is the answer not in the manual?
Questions and answers