Table of Contents
Advertisement
Quick Links
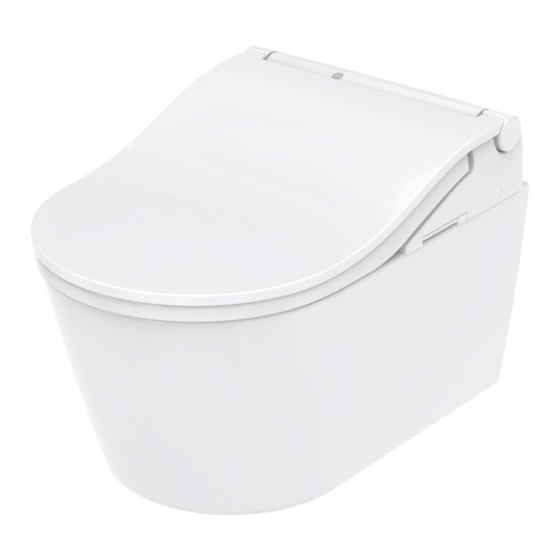
WASHLET
Before installation, be sure to read this installation manual. Mount parts properly according to the directions.
Lesen Sie vor der Installation unbedingt diese Installationsanleitung. Montieren Sie die Teile entsprechend den
Anweisungen.
Avant l'installation, veuillez bien lire ce manuel d'installation. Montez correctement les pièces conformément aux
instructions.
Prima dell'installazione, assicurarsi di leggere questo manuale di installazione. Montare le parti correttamente a
seconda delle direzioni.
2025.2.21
D07L99
Installation Guide
Installationsanleitung
Guide d'installation
Guida per l'installazione
Flow of installation
(See these instructions regarding
Installationsablauf
(Bitte beachten sie die Anleitung bzgl.
Flux d'installation
(Voir ces instructions concernant
Flusso di installazione
(consultare queste istruzioni relative alle parti
Page 14
Seite 14
Page 14
Pagina 14
parts.)
)
les pièces).
).
Pages 15 - 26
Seiten 15 bis 26
Pages 15 à 26
Pagine 15 a 26
Advertisement
Table of Contents

Related Manuals for Toto WASHLET TCF802EAG NW1


Summary of Contents for Toto WASHLET TCF802EAG NW1
- Page 1 Installation Guide Installationsanleitung WASHLET Guide d'installation Guida per l'installazione Before installation, be sure to read this installation manual. Mount parts properly according to the directions. Lesen Sie vor der Installation unbedingt diese Installationsanleitung. Montieren Sie die Teile entsprechend den Anweisungen. Avant l'installation, veuillez bien lire ce manuel d'installation.
-
Page 2: Table Of Contents
Table of contents / Inhaltsverzeichnis Table des matières / Indice Safety Precautions Safety Precautions / Precautions before installation .....................(EN) 3 Be sure to carefully read this "Safety Precautions" document before beginning installation. Please comply with all safety warnings and precautions. Sicherheitshinweise / Vorsichtsmaßnahmen vor der Installation ................(DE) 5 Mesures de sécurité... -
Page 3: Safety Precautions / Precautions Before Installation
Safety Precautions (Continued) Sicherheitshinweise Vor Beginn der Installation sollten Sie unbedingt diese Sicherheitshinweise lesen. CAUTION Beachten Sie bitte die Sicherheitswarnungen und halten Sie sich an die Sicherheitshinweise. Symbol Bedeutung Install the Washlet properly according to the Installa- Make sure the plus and minus signs on the batteries tion Guide. -
Page 4: Sicherheitshinweise / Vorsichtsmaßnahmen Vor Der Installation
Sicherheitshinweise (Fortsetzung) Mesures de sécurité Assurez-vous de lire soigneusement ce document "Mesures de sécurité" avant de procéder à l’installation. ACHTUNG Respectez tous les avertissements et toutes les précautions relatifs à la sécurité. Symbole Signification Wird das Elektrokabel beschädigt, vermeiden Sie Bei der Installation des Produktes und des elektrischen jedes Risiko! Lassen Sie es durch die technischen Anschlusses ist darauf zu achten, dass die Arbeiten... -
Page 5: Precauzioni Di Sicurezza / Precauzioni Prima Dell'installazione
Mesures de sécurité (suite) Precauzioni di sicurezza Assicurarsi di leggere attentamente questo documento delle Precauzioni di sicurezza prima di iniziare l'installazione. AVERTISSEMENT Attenersi a tutte le avvertenze e le precauzioni di sicurezza. Simbolo Significato Si le cordon électrique est endommagé, afin d'éviter Lors de l'installation de ce produit, respectez les tout danger, faites-le remplacer par le service de normes et codes régionaux sur les travaux d'instal-... -
Page 6: Included Parts / Mitgelieferte Teile Pièces Incluses / Parti Incluse
Included parts / Mitgelieferte Teile Pièces incluses / Parti incluse Precauzioni di sicurezza (Continua) PERICOLO Se il cavo elettrico è danneggiato, per evitare perico- Quando si installa il prodotto, osservare le normati- li, contattare il servizio riparazioni del produttore o ve e gli standard previsti nell'impianto elettrico e un tecnico equivalente per richiedere la sostituzione. -
Page 7: Included Parts (Bowl Unit) / Mitgelieferte Teile (Wc-Keramik) Pièces Incluses (Cuvette) / Parti Incluse (Tazza)
Ⅰ Ⅱ For products with remote control flush function, For products without remote control flush function, which will be installed on a TOTO frame for remote which will be installed on frame without remote control B-10 control flush function. flush function. - Page 8 Ⅰ Ⅱ Ⅰ Ⅱ Installing the bowl unit (see bowl unit installation guide). Installieren der WC-Keramik (siehe Installationsanleitung der WC-Keramik). Installation de la cuvette (voir le guide d'installation de la cuvette). Installazione della tazza (consultare la guida per l'installazione della tazza). 26 mm Ⅰ...
- Page 9 Ⅰ Ⅱ Ⅰ Ⅱ Insert C-1 into A-7 until a click sound is heard. (After C-1 is mounted, make sure that it can not be removed even if it is pulled.) Drücken Sie C-1 in A-7, bis er mit einem Klicken einrastet. (Stellen Sie nach der Anbringung sicher, dass sich C-1 nicht lösen lässt, selbst wenn Sie daran ziehen.) Ⅰ...
- Page 10 Ⅰ Ⅱ Ⅰ C-2-1 Ⅰ Ⅱ B-10 C-2-1 B-5-1 B-5-2 Close the main tap. Absperrventil schließen. B-5-1 Fermez le robinet principal. Chiudere il rubinetto principale. B-10 B-5-2 Open the main tap. Wasserzuleitung öffnen. Ouvrez le robinet principal. Open the main tap. Aprire il rubinetto principale.
- Page 11 Ⅰ Ⅱ Ⅰ Ⅱ Be sure to confirm D-4. Achten Sie darauf, D-4 zu bestätigen. Assurez-vous de confirmer D-4. Assicurarsi di verificare D-4. Ⅰ Ⅱ Press C-8 , C-5 and C-7 into the bowl unit so that they cannot be seen from the side, then anchor them Ⅰ...
-
Page 12: Montage De La Commande À Distance / Montaggio Del Telecomando
Remote control mounting / Montage der Fernbedienung Ⅰ Ⅱ Montage de la commande à distance / Montaggio del telecomando Ⅰ Ⅱ Ⅰ Ⅱ Temporarily place the remote control in the position Switch the breaker on the distribution board to ON. determined in and confirm the signal reception of A-1. -
Page 13: Trial Run / Probelauf Mise En Service / Funzionamento Di Prova
Trial run / Probelauf How to remove A-6 Mise en service / Funzionamento di prova So entfernen Sie A-6 Enlever A-6 Come rimuovere A-6 Ⅰ Ⅱ Open the main tap. Wasserzuleitung öffnen. Ouvrez le robinet principal. Aprire il rubinetto principale. Anchored by magnet. -
Page 14: Aux Entrepreneurs En Installation / Informazioni Per L'installatore
Information for the installer / Informationen für den Installateur Ⅰ Aux entrepreneurs en installation / Informazioni per l'installatore Fill in the necessary information on the warranty card and be sure to hand it to the customer. Füllen Sie die erforderlichen Informationen in die Garantiekarte ein und übergeben Sie diese dem Kunden. Inscrivez les renseignements nécessaires sur la carte de garantie et veillez à...
Need help?
Do you have a question about the WASHLET TCF802EAG NW1 and is the answer not in the manual?
Questions and answers