Akai Ewi4000s Reference Manual
Electric wind instrument
Hide thumbs
Also See for Ewi4000s:
- Specifications (1 page) ,
- Quick start manual (44 pages) ,
- Operator's manual (62 pages)
Table of Contents
Advertisement
Advertisement
Table of Contents

Related Manuals for Akai Ewi4000s


Summary of Contents for Akai Ewi4000s
- Page 1 REFERENCE MANUAL...
-
Page 3: Important Safety Instructions
IMPORTANT SAFETY INSTRUCTIONS Before you operate the EWI4000s, read these instructions. Keep these instructions. Heed all warnings. Follow all instructions. Do not use this apparatus near water. Clean only with a dry cloth. Do not block any ventilation openings. Install in accordance with the manufacturer’s instructions. -
Page 4: Fcc Warning
WARNING: The EWI4000s is designed to be used in a standard household environment. Power requirements for electrical equipment vary from area to area. requirements in your area. If in doubt, consult a qualified electrician or AKAI Professional dealer. FCC WARNING: This equipment has been tested and found to comply with the limits for a Class B digital device pursuant to Part 15 of the FCC rules. -
Page 5: Table Of Contents
ADJUSTING THE KEY DELAY ...27 TRANSPOSE FUNCTION (TRANS BUTTON)...28 TUNING ...28 EDITING THE INTERNAL SOUND WITH YOUR COMPUTER ...28 CHAPTER 4: USING THE EWI4000s AS A MIDI CONTROLLER ...29 ABOUT MIDI...29 USING THE EWI4000s AS A MIDI CONTROLLER (APPLICATION)...30 RESTORING THE FACTORY PRESETS...33 CHAPTER 5: MISCELLANEOUS NOTES ...34... -
Page 6: Chapter 1: Introduction
CHAPTER 1: INTRODUCTION We greatly appreciate your purchase of the Akai Professional Electric Wind Instrument EWI4000s. EWI4000s is an electric wind controller-equipped sound module. This manual includes detailed explanations of its functions, features, and operations and will show you how to use them to their fullest extent. -
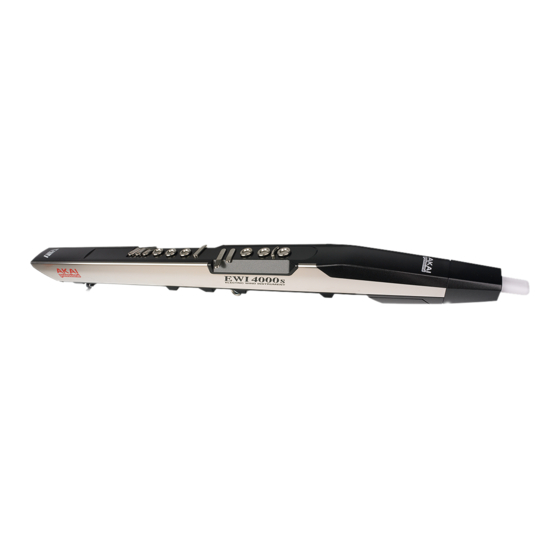
Page 7: Parts & Functions
NOTE KEYS – Press these keys in different combinations blowing into the MOUTHPIECE to change the note of the EWI4000s. The position of the three low keys can be adjusted by loosening their screws. woodwind You can produce a... - Page 8 SIDE / REAR PANEL PROGRAM / DATA DISPLAY SECTION SENSOR ADJUSTMENT KNOBS PROGRAM / DATA DISPLAY TRANS BUTTON SETUP BUTTON GLIDE PLATE SECTION GLIDE PLATE OCTAVE SHIFT ROLLERS GROUNDING PLATE BEND PLATE SECTION NECK STRAP MOUNT PROGRAM KEY PITCH BEND UP PLATE PITCH BEND DOWN PLATE GROUNDING PLATE FX BUTTON...
- Page 9 Program / Data Display Section SENSOR ADJUSTMENT KNOBS – These seven knobs adjust the sensors for breath, glide, bend, and vibrato. adjustment section for more information.) PROGRAM / DATA DISPLAY – Shows the Program number or the setting value. TRANS (Transpose) BUTTON – Turns the Transpose function on or off.
- Page 10 MIDI OUT – Plug a standard 5-pin MIDI cable from the MIDI IN of the external sound module to this jack to use the EWI4000s as a MIDI controller. You can also plug a MIDI cable from the MIDI IN of your computer to this jack to edit the EWI4000s’s internal...
-
Page 11: Power
Don’t use different types of batteries at the same time. AC adapter You can use an AC adapter (MP-9) instead of batteries. Connect adapter to the DC IN jack of the EWI4000s and select DC on the Power Switch. batteries... -
Page 12: Connections
CONNECTIONS Connection from Line Out of the EWI4000s to a mixer or keyboard amplifier Connection from Headphone Out of the EWI4000s to the Headphones Removing the Cable Clutch The CABLE CLUTCH can be removed (as shown here) if it interferes with using a wireless system. -
Page 13: Chapter 2: Basic Operation
The EWI4000s has two modes: Play Mode and Adjust Mode. When you turn the EWI4000s on, it will be in Play Mode. If you wish to adjust the sensors’ sensitivity or MIDI settings, you can change to the Adjust Mode by pressing the SETUP BUTTON. -
Page 14: Using The Mouthpiece
Mouthpiece Hold the mouthpiece gently in your mouth with your teeth, and exhale so the breath is passed through both ends of your mouth. The EWI4000s detects this wind pressure with the breath sensor and expresses the change in sound volume and character. The EWI4000s unique breathing structure is designed so that very little breath is required to pass through the instrument. -
Page 15: Adjusting The Sensitivity Of The Sensors
Hold Button and Octave Button Pressing the HOLD BUTTON will engage or disengage the EWI4000s’s Hold Mode (see the HOLD MODE section) or serve as a Program Up button while in Play Mode. While in Adjust Mode, the HOLD BUTTON serves as a “+” (Increase) button. - Page 16 PROGRAM / DATA DISPLAY. If you turn the “A” (Adjust) knob counterclockwise, it should go off. Note: If the “Breath” indicator is lit, the EWI4000s will produce sound. Be careful of the volume settings on any connected equipment while adjusting the breath sensor.
- Page 17 This section explains how to adjust the vibrato sensor. Set the “A” (Adjust) knob in the “VB” (Vibrato) section to the center position. While playing a long tone on the EWI4000s, bite the MOUTHPIECE lightly. The sensor is properly adjusted the vibrato MOUTHPIECE.
- Page 18 In this case, simply adjust the sensors again. If you are just beginning with the EWI4000s, you may want to set the breath sensor lightly (by turning the “S” (Sense) knob in the clockwise direction) for easier blowing. With practice, you can set this control at a “heavier”...
-
Page 19: Fingering Modes
FINGERING MODES The EWI4000s offers several different fingering modes to accommodate different styles of playing. The following steps explain how to set or change the fingering mode of the EWI4000s to suit your needs. Press and hold the SETUP BUTTON. -
Page 20: Chapter 3: Internal Sound
CHAPTER 3: INTERNAL SOUND PROGRAM KEY FUNCTIONS Selecting the Internal Sounds (Program Key) The EWI4000s has 100 internal preset sounds called Programs. You can switch between Programs by selecting Program numbers. Without touching any NOTE KEYS, press and hold the PROGRAM KEY. -
Page 21: Setting Program Change Preferences
Setting Program Change Preferences This section explains how to set the EWI4000s to access your program changes in various ways. Press and hold the SETUP BUTTON. Press the HOLD BUTTON or OCTAVE BUTTON to scroll through the options until “PC” (Program Change) is shown in the PROGRAM DATA / DISPLAY. -
Page 22: Alternate Way Of Selecting The Program Number
Select “UP” by pressing the HOLD BUTTON or OCTAVE BUTTON. While “UP” is selected, pressing the HOLD BUTTON will increase the Program number. Press the SETUP BUTTON. The EWI4000s will return to Play Mode. Program Down with the Octave Button Note: While going through these steps, you cannot enter Octave Mode. -
Page 23: Adjusting The Volumes
Press the SETUP BUTTON. The EWI4000s will return to Play Mode, and your settings will be stored internally. ADJUSTING THE EFFECTS VOLUMES In addition to adjusting the normal volume of he EWI4000s, you can also adjust the volume levels of its effects, including Reverb, Delay, and Chorus. The controls involved in these procedures are shown here. -
Page 24: Adjusting The Reverb Effect Volume Of Each Program
This procedure adjusts the volume of the Reverb effect for each Program individually, as opposed to the overall Reverb effect volume. The Reverb effect volume of each program is stored in the EWI4000s. Select the program whose Reverb effect volume you want to adjust. -
Page 25: Octave Button Functions
BUTTON will function as a toggle or momentary button. BUTTON’s Continuous Controller Preferences” section.) Press the SETUP BUTTON. The EWI4000s will return to Play Mode. Press the OCTAVE BUTTON. The assigned function is on when the OCTAVE LED is lit. Press the OCTAVE BUTTON again. -
Page 26: Setting The Octave Button's Continuous Controller Preferences
The note will hold as long as you are playing a legato phrase. The EWI4000s will sustain the first note you play then allow you to play a melody over it. When you end the phrase or articulate a new phrase, the held note will end and the new note will become the held note. -
Page 27: Assigning Functions To The Hold Button
“dA” (Data): The value that will be transmitted via the Controller number when the OCTAVE BUTTON is pressed while playing. The EWI4000s can transmit standard MIDI values 00-127. (Values over 99 will be shown as the last two digits with a dot between them on the PROGRAM / DATA DISPLAY.) -
Page 28: Pitch Bend Plate Functions
PITCH BEND PLATE FUNCTIONS When you press either of the PITCH BEND PLATES, the EWI4000s will bend the pitch of the note you are playing, allowing you to be more expressive with your performance. Alternately, you can set the PITCH BEND PLATES to transmit data for individual MIDI Continuous Controllers. -
Page 29: Setting The Glide Effect Time & Rate
Press the SETUP BUTTON. The EWI4000s will return to Play Mode. ADJUSTING THE KEY DELAY The Key Delay function adjusts the response of the keys. The EWI4000s’s key response is preset to accommodate rather quick fingering. As a result, you may occasionally produce unexpected sounds. In this case, you may find that you can play more smoothly by adjusting the Key Delay. -
Page 30: Transpose Function (Trans Button)
The lowest possible transposition is E. The highest possible transposition is Eb. TUNING This section explains how to adjust the tuning of the EWI4000s. This is useful if you ever need to tune to match the EWI4000s’s pitch to other musicians’ instruments. -
Page 31: Chapter 4: Using The Ewi4000S As A Midi Controller
CHAPTER 4: USING THE EWI4000s AS A MIDI CONTROLLER Because the EWI4000s has internal sounds and effects, you can play it on its own, but you can also it as MIDI controller for an external MIDI sound module/synth. ABOUT MIDI MIDI is a standard for transferring the performance data between electronic instruments regardless of the manufacturer. -
Page 32: Using The Ewi4000S As A Midi Controller (Application)
MIDI channel setting will be ignored and return to the original setting. Changing the Breath Sensor Output This section explains how to change the EWI4000s’s Breath Sensor output to transmit MIDI Control Change data. You can select several MIDI Control Changes at the same time. - Page 33 Setting the MIDI Velocity Value If “vE” is selected as the Breath Sensor output, the EWI4000s will transmit the MIDI Velocity data, which is controlled by your breath strength. If “vE” is not selected, the EWI4000s will a fixed MIDI Velocity value. You can set a fixed MIDI Velocity as follows: Press and hold the SETUP BUTTON.
- Page 34 Setting the Hold Function (Hold Button) on MIDI Transmit The Hold function is available while the EWI4000s is being used as MIDI controller. The Hold function on MIDI Transmit is a little different than using the internal sound module. The Hold function is transmitted via MIDI in one of two ways, which you can select in the Adjust Mode: Press and hold the SETUP BUTTON.
-
Page 35: Restoring The Factory Presets
RESTORING THE FACTORY PRESETS By turning the EWI4000s on while holding the LEVEL, FX, SETUP, and TRANS BUTTONS, the EWI4000s, you can restore the EWI4000s’s factory preset configuration. The following global settings are stored in the EWI4000s: dL: Key delay: 07... -
Page 36: Chapter 5: Miscellaneous Notes
The left hand controls the octave, half octave, and second Trill Key. The left hand thumb also controls the GLIDE PLATE. Grip the EWI4000s with the left hand and keep your fingers on Keys 3 and 4. This should provide a firm, comfortable grip. -
Page 37: Software Updating
When the file is finished transmitting, the EWI will update its software. When it is finished, the number of the new software version (“XY”) will flash on the PROGRAM / DATA DISPLAY. Turn the EWI4000s off. When you turn it on again, you will be ready to play the EWI4000s with the latest software! If the PROGRAM / DATA DISPLAY flashes “Er”... -
Page 38: Troubleshooting
Check that the EWI4000s is powered on, and that the instrument’s batteries are correctly inserted, or that the AC adapter is properly connected to the wall outlet and the EWI4000s. Refer to the POWER section of this manual for more information. -
Page 39: Chapter 6: Fingering Charts
MIDI OUT terminal within the following ranges (in the table) depending on the combination of pressed NOTE KEYS and the position of the OCTAVE SHIFT ROLLERS. You can play other MIDI compatible instruments through the EWI4000s with the lowest note being A# (Note #22) and the highest being D# (Note #111). -
Page 40: Ewi Fingerings
EWI FINGERINGS alt. - Page 41 SAXOPHONE FINGERINGS alt. alt. alt. alt. alt.
- Page 42 FLUTE FINGERINGS alt. alt. alt. alt. alt. alt. If any 1 or more of the K7, K8, or K9 keys are pressed, the note should stay This is the only non-flute fingering that flute players will need to get used to.
- Page 43 OBOE FINGERINGS alt. alt. alt. alt. alt. alt.
- Page 44 EVI FINGERINGS...
-
Page 45: Midi Implementation Chart
MIDI IMPLEMENTATION CHART Manufacturer: Akai Professional 1. Basic Information MIDI channels Note numbers Program change Bank Select response? (Yes/No) If yes, list banks utilized in remarks column Modes supported: Mode 1: Omni-On, Poly (Yes/No) Mode 2: Omni-On, Mono (Yes/No) Mode 3: Omni-Off, Poly (Yes/No) -
Page 46: Menu Structure
MENU STRUCTURE Below is the structure of menus and submenus that can be accessed on the EWI4000s and viewed in the PROGRAM / DATA DISPLAY. This “map” of the menus may help you familiarize yourself with navigating the EWI4000s’s various controls. - Page 47 PARAMETER HOLD LEGATO NON-LEGATO SUSTAIN PRESET UP/INCREMENT CONTINUOUS CONTROLLER CONTROLLER NUMBER MIDI VALUE LATCHING GLIDE RATE TIME PITCH BEND UP PITCH BEND ENABLE CONTINUOUS CONTROLLER PITCH BEND DOWN PITCH BEND ENABLE CONTINUOUS CONTROLLER KEY PROGRAM OCTAVE FINGERING SAXOPHONE FLUTE OBOE EVI REVERSED RANGE DEFAULTS...
- Page 48 PARAMETER UPDATE CONTROL PROTOCOL * * “CP” (Control Protocol) is set by default to “on,” which adds an extra check to the SysEx data. If you experience problems with SysEx communications, press and hold the SETUP BUTTON, press the HOLD BUTTON or OCTAVE BUTTON until “CP”...
-
Page 49: Specifications
Reverb, Delay, Chorus 100 (50 preset sounds x 2) 2 7-segment LEDs Transpose, Tune, Note Hold, Octave, Program Change, Key Delay Sound Editor software for EWI4000s is available from our Web site (http://www.akaipro.com) 8-22-768X-D touch sensors air pressure level sensor...
Need help?
Do you have a question about the Ewi4000s and is the answer not in the manual?
Questions and answers