LG LW6017R, LW6017R/00 Manual
- Owner's manual (52 pages) ,
- Owner's manual (44 pages) ,
- Owner's manual (44 pages)
Advertisement
Before Operation
Preparing for Operation
- Contact an installation specialist for installation.
- Plug in the power plug properly.
- Use a dedicated circuit.
- Do not use an extension cord.
- Do not start/stop operation by plugging/unplugging the power cord.
- If the cord/plug is damaged, replace it with only an authorized replacement part.
Usage
- Being exposed to direct airflow for an extended period of time could be hazardous to your health.
- No correlation between fan usage and oxygen depletion.
- Do not use this air conditioner for non-specified special purposes (e.g. preserving precision devices, food, pets, plants, and art objects). Such usage could damage the items.
Cleaning and Maintenance
- Do not touch the metal parts of the unit when removing the filter. Injuries can occur when handling sharp metal edges.
![shock hazard]() Do not use water to clean inside the air conditioner. Exposure to water can destroy the insulation, leading to possible electric shock.
Do not use water to clean inside the air conditioner. Exposure to water can destroy the insulation, leading to possible electric shock.- When cleaning the unit, first make sure that the power and breaker are turned off. The fan rotates at a very high speed during operation. There is a possibility of injury if the unit's power is accidentally triggered on while cleaning inner parts of the unit.
Service
For repair and maintenance, contact an Authorized Service Center, call (800) 243-0000. Have your model number and serial number available.
Introduction
Symbols Used in this Manual
 | This symbol alerts you to the risk of electric shock |
 | This symbol alerts you to hazards that could cause harm to the air conditioner. |
| NOTICE | This symbol indicates special notes. |
Features

This appliance should be installed in accordance with the National Electric Code.

Installation


Have the above tools available for installation:
Window Requirements
Size
This room air conditioner is designed for installation in standard double-hung windows with actual opening widths from 21" to 35". The upper and lower window sash must open sufficiently to allow a clear vertical opening of 12" from the bottom of the upper sash to the window stool.

This product is a WINDOW AIR CONDITIONER.
As such, a standard single-hung or double-hung window is required for proper installation. Non-window installations, including using
sleeves, holes in walls, and other installations are not recommended.
Clearance
Proper clearance enhances the cooling efficiency of the unit.

- If a storm window presents interference, fasten a 2" wide wood strip to the inner window sill across the full width of the sill. The wood strip should be thick enough to raise the height of the window sill so that the unit can be installed without interference by the storm window frame.
- See drawing. The top of the wood strip should be approximately 3/4" higher than the storm window frame or wood strip to help condensation to drain properly to the outside.
- Install a second wood strip (same thickness as first strip) in the center of the sill flush against the back off the inner sill.
This will raise the L bracket as shown in the drawing.
Preparation of Chassis
- Install the upper guide (Type H) with 3 screws (Type A) from the outside of the case.

- Insert the guide panels (Type G) into the upper and bottom guide Fasten the curtains to the unit with 4 screws (Type A) on each side.
TIP! Use a long screwdriver and installing the screws will be easier.

- Cut the adhesive-backed seal strip (Type E) to the window width.
Remove the backing from the seal strip and attach the seal strip to the underside of the bottom window.

- Open the window and mark center line on the center of the inner sill.

- Attach L bracket (Type D)

- Install the L brackets behind the inner window sill, with short side of bracket as shown. Use the 2 screws (Type A) provided.
- The bracket helps to hold unit securely in place. Be sure to place bracket edge flush against back of inner sill.


Unit Installation

During the following step, hold unit firmly until windows sash is lowered to top channel behind side panel frames. Personal injury or property damage may result if unit falls from window.
- Install the air conditioner in the window

- Set the air conditioner in the window so that is centered. Place the air conditioner so that front edge of the bottom guide is against the back edge of the sill.
- Bring the window down so that the front edge of the upper guide is in front of the window. Make sure that air conditioner is level or tilting slightly to the outside.
- Secure the guide panels (Type G)
Extend the guide panels (Type G) to fill the window opening using 4 screws (2 Type B and 2 Type C) to secure them.

- Install the sash seal and sash lock
- Cut the sash seal (Type F) to the window width. Stuff the sash seal between the glass and the window to prevent air and insects from getting into the room.
- Fasten the L bracket using a screw (Type A).


To prevent broken glass or damage to windows, on vinyl or other similarly constructed windows, attach the window locking bracket to the window side jamb with one Type A screw.

- Window installation of room air conditioner is now completed.
See ELECTRICAL SAFETY for attaching cord to electrical outlet
Operating Instructions
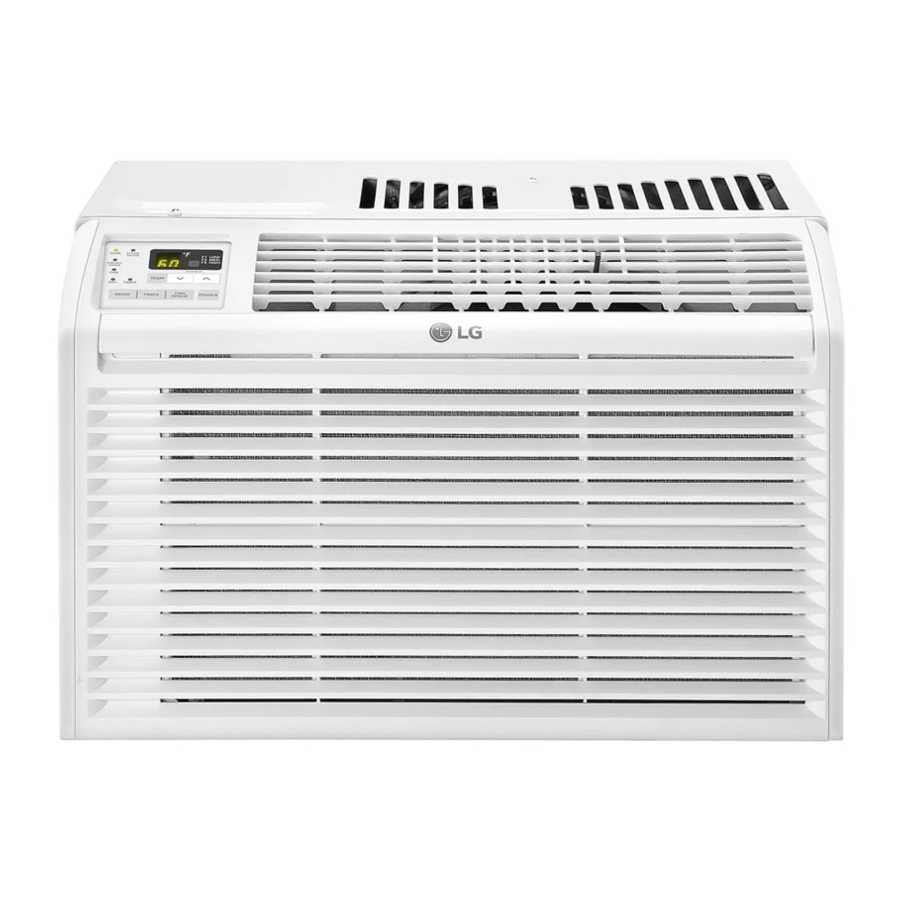
Location and Function of Controls

- POWER
Operation starts when this button is pressed and stops when you press the button again. - FAN SPEED SELECTOR
Use to set the fan speed to Low (F1), MED (F2), High (F3). - ON/OFF TIMER
Delay ON - when the air conditioner is off, it can be set to automatically turn on from 1 to 24 hours at its previous mode and fan settings.
Delay OFF - when the air conditioner is on, it can be set to automatically turn off from 1 to 24 hours. - OPERATION MODE SELECTOR
- Push the MODE button to rotate between Energy Saver / Cool / Fan / Dry.
Energy Saver - The fan stops when the compressor stops cooling.
Approximately every 3 minutes the fan will turn on and check the room air temperature if cooling is needed.
Cool - Compressor runs and cools the room. Use the![]() and FAN buttons to set the desired temperature and circulation fan speed
and FAN buttons to set the desired temperature and circulation fan speed
FAN - Fan circulates air but compressor dose not run. Use the FAN button to set the desired fan speed
Dry - Dry mode is used to remove humidity from the room without additional cooling. Once the set temperature is reached, the compressor and circulation fan turns off.
Fan speed is pre-set and cannot be adjusted.
- Push the MODE button to rotate between Energy Saver / Cool / Fan / Dry.
- TEMPERATURE CONTROL
The thermostat monitors room temperature to maintain the desired temperature.
The thermostat can be set between 60°F~86°F (16°C-30°C). - REMOTE CONTROL SENSOR
- CLEAN FILTER
'Clean Filter' LED will light up to notify you that your filter needs to be cleaned.
After cleaning the filter, press "Temp AV" together to turn off 'Clean Filter' light.
(Filter reset must be done from unit control panel not remote control).
 and FAN buttons to set the desired temperature and circulation fan speed
NOTICE
This feature is reminder to clean the Air Filter (See Maintenance) for more efficient operation. The LED (light) will illuminate after 250 hours of operation.
AUTO RESTART
During operation in failure of electric power, the unit runs as previous setting operation.
ENERGY SAVER
The unit defaults to Energy Saver mode each time the unit is switched on except restoration after an electrical power outage and fan mode.
The remote controller will not function properly if strong light strikes the sensor of the air conditioner or if there are obstacles between the remote controller and the air conditioner.
Inserting the Remote Control Battery
- Push out the cover on the back of the remote control with your thumb.
![]()
- Pay attention to polarity and insert new AAA 1.5V battery.
![]()
- Reattach the cover.


NOTICE
Do not use rechargeable battery. Make sure that the battery is new.
Do not mix alkaline, standard (Carbon-zinc) or rechargeable (Nickel-cadmium) battery.
In order to prevent discharge, remove the battery from the remote control if the air conditioner is not going to be used for an extended period of time.
Keep the remote control away from extremely hot or humid places.
To maintain optimal operation of the remote control, the remote sensor should not be exposed to direct sunlight.
Additional Features
Air Direction
Adjusting the air direction using the horizontal air deflector control.
Using the control tabs, the air flow can be directed to the left, right, straight ahead, or any combination of these directions.


Drain Pipe
In humid weather, excess water may cause the Base Pan to overflow. To drain the water, remove the Drain Cap and secure the Drain Pipe to the rear hole of the Base Pan.
Press the drain pipe into the hole by pushing down and away from the fins to avoid injury.
Slinger Fan
This air conditioner is equipped with a slinger fan. (See drawing, below.)
The fan has an outer ring that runs in the water that collects in the base pan if it gets deep. That condensate is then picked up by the fan and expelled through the condenser, making the air conditioner more efficient.

Be careful when inserting the drain pipe. Push away from the sharp fin area to avoid slipping injuring yourself.
Maintenance and Service
Air Filter
Check the air filter at least twice a month to see if cleaning is necessary. Trapped particles in the filter can build up and block the airflow, reducing cooling capacity and causing an accumulation of frost on the evaporator. To clean the air filter:
- Remove the air filter from the front grille by lifting the air filter up.
![]()
- Wash the filter using lukewarm water below 40°C (104°F).
![]()
- Gently shake the excess water from the filter and replace.


Cleaning The Unit
The front grille and Inlet grille may be wiped with a cloth dampened in a mild detergent solution.
The cabinet may be washed with mild soap or detergent and lukewarm water, then polished with liquid wax for Appliances.

To ensure continued peak efficiency, the condenser coils (outside of unit) should be checked periodically and cleaned if clogged with soot or dirt from the atmosphere.
Removal From Window
Turn the air conditioner off, disconnect the power cord, remove the L bracket, the screws and Support Bracket installed through the top and bottom of the guide panels, and save for reinstallation later. Close the guide panels. Keeping a firm grip on the air conditioner, raise the sash, and carefully tilt the air conditioner backward, draining any condensate. Lift the air conditioner from the window and remove the sash seal from between the windows.
Be sure to drain ALL condensate from the air conditioner. If you don't, it could run out while you carry the unit, making a mess and creating a slipping hazard. This simple step will save you much cleaning and make a safer work environment.
Common Problems and Solutions
Before Calling for Service
If you have problems with your air conditioner, read the following information and try to solve the problem. If you cannot find a solution, turn off the air conditioner and call 1-800-243-0000.
The unit does not operate
- Ensure that the air conditioner is plugged into an outlet of the proper voltage and amperage.
- Check the fuse or circuit breaker.
- Check whether the voltage is unusually high or low.
Air does not feel cold enough on the cooling setting
- Ensure that the temperature settings are correct.
- Check to see if the air filter is clogged with dust. If so, clean the filter.
- Ensure that the air flow from the outside is not obstructed and that there is a clearance of over 20" between the back of the air conditioner and the wall or fence behind it.
- Close all doors and windows and check for any source of heat in the room.
Water drip from the rear of the unit
You see water dripping from the rear of the unit. Water may be collected in the base pan in highly humid conditions or on rainy days. This water overflows and drips from the rear of the unit.
Normal Sound

Troubleshooting
The air conditioner may be operating abnormally when:
| Problem | Possible Causes | What To Do |
The unit does not start | The air conditioner is unplugged. | Make sure the air conditioner plug is pushed completely into the outlet. |
| The fuse is blown/circuit breaker is tripped. | Check the house fuse/circuit breaker box and replace the fuse or reset the breaker. | |
| Power failure. | If power failure occurs, turn the mode control to Off. When power is restored, wait 3 minutes to restart the air conditioner to prevent tripping of the compressor overload. | |
| The current interrupter device is tripped. | Press the RESET button located on the power cord plug. If the RESET button will not stay engaged, discontinue use of the air conditioner and contact a qualified service technician. | |
The unit does not cool as it should | Airflow is restricted. | Make sure there are no curtains, blinds, or furniture blocking the front of the air conditioner. |
| The temp control may not be set correctly. | In COOL model press the DECREASE  pad. pad. | |
| The air filter is dirty. | Clean the filter at least every 2 weeks. See the care and Maintenance section. | |
| The room may have been hot. | When the air conditioner is first turned on, you need to allow time for the room to cool down. | |
| Cold air is escaping. | Check for open furnace floor registers and cold air returns. | |
| Cooling coil have iced up. | See Air Conditioner Freezing Up below. | |
The unit freezing up | The cooling coils are iced over. | Ice may block the air flow and obstruct the air conditioner from properly cooling the room. Set the mode control at High Fan or High Cool with thermostat at 1or 2. |
Water drips outside | Hot, humid weather. | This is normal. |
Water drips indoors | The air conditioner is not tilted to the outside. | For proper water disposal, make sure the air conditioner slants slightly from the case front to the rear. |
Water collects in base pan | Moisture removed from air and drains into base pan. | This is normal for a short period in areas with little humidity; normal for a longer period in very humid areas. |
The unit turns on and off rapidly | Dirty air filter - air restricted. | Clean air filter. |
| Outside temperature extremely hot. | Set FAN speed to a faster setting to bring air through cooling coils more frequently. | |
Noise when unit is cooling | Air movement sound. | This is normal. If too loud, set to lower FAN setting. |
| Window vibration - poor installation. | Refer to installation instructions or check with installer. | |
Room too cold | Set temperature too low | Increase set temperature. |
Safety Precautions
To prevent injury to the user or other people and property damage, the following instructions must be followed.
- Incorrect operation due to ignoring instruction will cause harm or damage. The seriousness is classified by the following indications.
| This symbol indicates the possibility of death or serious injury |
| This symbol indicates the possibility of injury or damage to properties only. |
- Meanings of symbols used in this manual are as shown below.
 | Be sure not to do |
 | Be sure to follow the instruction |
- Contact the authorized service technician for repair or maintenance of this unit.
- The air conditioner is not intended for use by young children or invalids without supervision.
- Young children should be supervised to ensure that they do not play with the air conditioner.
- When the power cord is to be replaced, replacement work shall be performed by authorized personnel only using only genuine replacement parts.
- Installation work must be performed in accordance with the National Electric Code by qualified and authorized personnel only.
Installation

Don't use a power cord, a plug or a loose socket which is damaged.
![burn hazard]()
![shock hazard]()
Otherwise, it may cause a fire or electrical shock.

Always plug into a grounded outlet.
![burn hazard]()
![shock hazard]()
Otherwise, it may cause a fire or electrical shock.

Do not modify or extend the power cord length.
![burn hazard]()
![shock hazard]()
It will cause electric shock or fire due to heat generation.

Do not disassemble or modify products.
- It may cause failure and electric shock.
Be caution when unpacking and installing.
- Sharp edges may cause injury.

Do not store flammables like gasoline, benzene, thinner, etc. near the air conditioner.
![burn hazard]() It may cause explosion or fire.
It may cause explosion or fire.

Install the product so the exhaust and noise are not aimed directly at the neighbors.
- Be considerate.

Follow installation instructions exactly.
- Otherwise, it may cause vibration or water leakage.
Operation

Do not place heavy object on the power cord and take care so that the cord should not be pressed.
![burn hazard]()
![shock hazard]()
There is danger of fire or electric shock.

Do not share the outlet with other appliances
![burn hazard]()
![shock hazard]()
It will cause electric shock or fire due to heat generation.

Take the power plug out if necessary, holding the head of the plug and do not touch it with wet hands.
![burn hazard]()
![shock hazard]()
Otherwise, it may cause a fire or electrical shock.

Do not place the power cord near a heater.
![burn hazard]()
![shock hazard]()
It may cause fire and electric shock.

Do not allow water to run into electric parts.
![shock hazard]() It will cause failure of machine or electric shock.
It will cause failure of machine or electric shock.

Use a soft cloth to clean. Do not use wax, thinner, or a strong detergent.
- The appearance of the air conditioner may deteriorate, change color, or develop surface flaws.

Unplug the unit if strange sounds, odors, or smoke come from it.
![burn hazard]()
![shock hazard]()
Otherwise it may cause fire and electric shock accident.

Do not open the suction inlet grill of the product during operation.
![shock hazard]() Otherwise, it may electrical shock and failure.
Otherwise, it may electrical shock and failure.

If water enters the product, turn off the power switch of the main body of appliance. Contact service center after taking the power-plug out from the socket.

Not correlation between fan usage and oxygen depletion.
- An oxygen shortage may occur.

Turn off the power and breaker first when cleansing the unit.
- Since the fan rotates at high speed during operation, it may cause injury.

Unplug the unit when not using it for a long time.
- Prevent accidental startup and the possibility of injury.

Do not operate or stop the unit by inserting or pulling out the power plug.
![burn hazard]()
![shock hazard]()
It will cause electric shock or fire due to heat generation.

Do not damage or use an unspecified power cord.
![burn hazard]()
![shock hazard]()
It will cause electric shock or fire.

Do not operate with wet hands or in damp environment.
![shock hazard]() It will cause electric shock.
It will cause electric shock.

Hold the plug by the head not the cable when taking it out.
![shock hazard]() It may cause electric shock and damage.
It may cause electric shock and damage.

When gas leaks, open the window for ventilation before operating the unit.
![burn hazard]() Otherwise, it may cause explosion, and a fire.
Otherwise, it may cause explosion, and a fire.

Never touch the metal parts of the unit when removing the filter.
- They are sharp and may cause injury.
For inner cleaning, contact an Authorized Service Center or a dealer.
Do not use harsh detergent that causes corrosion or damage on the unit.

Harsh detergent may also cause failure of product, fire, or electric shock.

Do not use this appliance for special purposes such as cooling pets foods precision machinery or objects of art
- It is an air conditioner, not a precision refrigeration system.

Do not block the inlet or outlet of air flow.
- It may cause product failure.

Use a soft cloth to clean. Do not use wax, thinner, or a strong detergent.
- The appearance of the air conditioner may deteriorate, change color, or develop surface flaws.

Do not step on the indoor/outdoor unit and do not put anything on it.
- It may cause an injury through dropping of the unit or falling down.

Always insert the filter. Clean it every two weeks.
- Operation without filters will cause failure.

Do not drink water drained from air conditioner.
- It contains containments and will make you sick.

Be cautious not to touch the sharp edges when installing.
- It may cause injury.

Instead of running air conditioning constantly, open a window for fresh air occasionally.
- You will feel better.

Do not insert the hands or bars through the air inlet or outlet during operation.
- Otherwise, it may cause personal injury.
If the liquid from the battery gets onto your skin or clothers wash it well with clean water. Do not use the remote if the battery has leaked.


![]()
The chemicals in battery could cause burns or other health hazards.

If you eat the liquid from the battery, brush your teeth and see doctor. Do not use the remote if the battery has leaked.
![]()
The chemicals in battery could cause burns or other health hazards.
Electrical Safety
| 115~ | Power cord may include a current interrupter device. A test and reset button is provided on the plug case. The device should be tested on a periodic basis by first pressing the TEST button and then the RESET button. If the TEST button does not trip or if the RESET button will not stay engaged, discontinue use of the air conditioner and contact a qualified service technician. |
 |
NOTICE
Never push the test button during operation
Otherwise this plug can damaged.
Do not remove, modify, or immerse this plug.
If this device trips, the cause should be corrected before further use.
| Use Wall Receptacle | Power Supply |
 Standard 125V, 3-wire grounding receptacle rated 15A, 125V AC | Use 15 AMP. time delay fuse or 15 AMP. circuit breaker. |
USE OF EXTENSION CORDS
RISK OF FIRE could cause serious injury or death
DO NOT use an extension cord with this window air conditioner
DO NOT use surge protectors or multi-outlet adapters with this window air conditioner

The conductors inside this cord are surrounded by shields, which monitor leakage current.
These shields are not grounded.
Periodically examine the cord for any damage. Do not use this product in the event the shields become exposed.
Avoid shock hazard. This unit cannot be user-serviced. Do NOT open the tamper-resistant sealed portion.
All warranties and performance will be voided. This unit is not intended to be used as an ON/OFF switch.

(PLEASE READ CAREFULLY)
FOR THE USER'S PERSONAL SAFETY, THIS APPLIANCE MUST BE PROPERLY GROUNDED
The power cord of this appliance is equipped with a three-prong (grounding) plug. Use this with a standard three-slot (grounding) wall power outlet to minimize the hazard of electric shock. The customer should have the wall receptacle and circuit checked by a qualified electrician to make sure the receptacle is properly grounded.
DO NOT CUT OR REMOVE THE THIRD (GROUND) PRONG FROM THE POWER PLUG.
- SITUATIONS WHEN THE APPLIANCE WILL BE DISCONNECTED OCCASIONALLY
Because of potential safety hazards, we strongly discourage the use of an adapter plug. However, if you wish to use an adapter, a TEMPORARY CONNECTION may be made. Use UL-listed adapter, available from most local hardware stores.
The large slot in the adapter must be aligned with the large slot in the receptacle to assure a proper polarity connection.
Attaching the adapter ground terminal to the wall receptacle cover screw does not ground the appliance unless the cover screw is metal, and not insulated, and the wall receptacle is grounded through the house wiring. The customer should have the circuit checked by a qualified electrician to make sure the receptacle is properly grounded.
Disconnect the power cord from the adapter, using one hand on each. Otherwise, the adapter ground terminal might break. DO NOT USE the appliance with a broken adapter plug.
- SITUATIONS WHEN THE APPLIANCE WILL BE DISCONNECTED OFTEN.
Do not use an adapter plug in these situations. Unplugging the power cord frequently can lead to an eventual breakage of the ground terminal. The wall power outlet should be replaced by a three-slot (grounding) outlet instead.
This product contains chemicals known to the State of California to cause cancer and birth defects or other reproductive harm.
Wash hands after handling.
- Do not use means to accelerate the defrosting process or to clean, other than those recommended by the manufacturer
- The appliance shall be stored in a room without continuously operating ignition sources (for example: open flames, an operating gas appliance or an operating electric heater)
- Do not pierce or burn. Be aware that refrigerants may not contain an odor
This unit contains flammable refrigerant and has special safety precautions not normally associated with older units. Please follow all precautions and advisories.
- Use caution while handling and prevent damage to unit. Do not put any holes into product for any reason, this can cause damage to product prevent unit from cooling.
- Maintenance and cleaning of unit should be performed by trained personnel. Failure to properly clean unit can result in damage to the refrigeration system and or the electrical system.
- Make certain that all the air circulation/ventilation openings are free from obstruction.
- Service should only be performed by technicians properly trained and certified in the use of flammable refrigerants. Any service performed by unauthorized servicers/individuals will void all warranties.
- When storing the appliance, do not put in a room with any open flame appliances, such as gas water heaters or furnaces. Also keep away from electric heaters. Damaged units should be repaired before storage.
Documents / Resources
References
Download manual
Here you can download full pdf version of manual, it may contain additional safety instructions, warranty information, FCC rules, etc.
Advertisement


Need help?
Do you have a question about the LW6017R and is the answer not in the manual?
Questions and answers