Advertisement
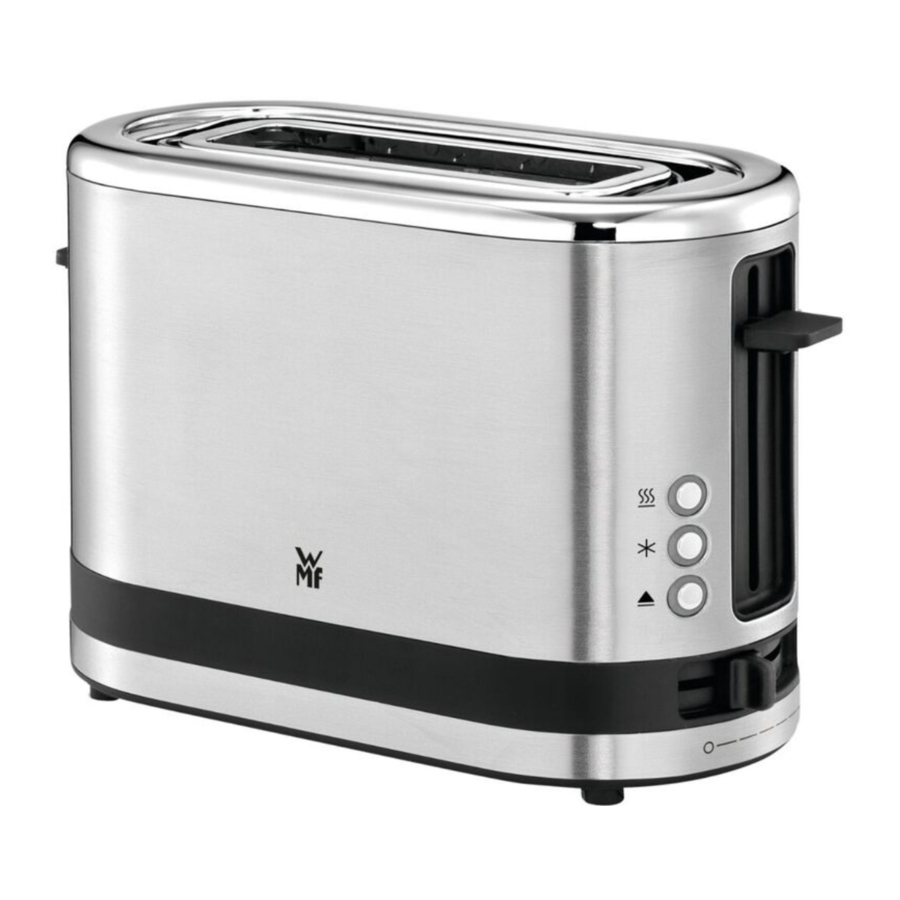
OVERVIEW OF COMPONENTS

- Lift button
- Warming button
![]()
- Defrost button
![]()
- Stop button
![]()
- Browning level adjustment
- Roll attachment button
- Crumb tray FR Grille-pain


Start-up
The section of the power cable not in use can be wound up and stored on the base of the appliance. Connect the power plug to a shockproof socket.
Prior to first use, carry out at least three toasting cycles without bread and at maximum power, to remove the surface protection on the heating elements. The smell released during this process is harmless, but you should ensure good ventilation nevertheless. Always allow the appliance to cool down a little before switching it on.
Insert the bread slice into the bread slot. To avoid the slice becoming jammed, it should not be thicker than 2.8 cm. Place small slices upright in the bread slot so that it is easier to take them out after toasting.
First set the slider (5) for the browning level to the middle setting. Press the lift button (1) down. The device switches on and the lift button (1) moves into the holding position for the duration of the toasting process. After the toasting time expires, the lift button (1) returns to the initial position, the device automatically switches off and the finished toast is raised for removal from the bread slot.
Notes on the browning level
If the toast is too light, select a higher control setting. If the toast is too dark, place the control (5) on a lower setting. The higher the setting, the darker the browning is. With the control (5), you can brown toast entirely to your taste from just slightly (min setting ![]() ) to strong, dark brown (max setting
) to strong, dark brown (max setting ![]() ). The toasting result may vary at the same setting depending on the type, size, moisture and thickness of the bread slices. Therefore, select a lower setting when toasting less moist bread and smaller slices.
). The toasting result may vary at the same setting depending on the type, size, moisture and thickness of the bread slices. Therefore, select a lower setting when toasting less moist bread and smaller slices.
Acrylamide is generated during excessive browning. Excessive browning of the toast should therefore be avoided.

Interrupting the toasting process
Press the illuminated button (4) ![]() to interrupt the toasting process.
to interrupt the toasting process.

Warming / retoasting
If the warming button (2)  is pressed immediately after switching on the appliance, cold but already toasted bread will be crisped up and too lightly toasted bread will be slightly retoasted.
![]()
Defrosting
If this button (3) ![]() is pressed directly after the appliance is switched on, the toasting cycle will be extended automatically to toast frozen bread.
is pressed directly after the appliance is switched on, the toasting cycle will be extended automatically to toast frozen bread.
Removing the toast
With the integrated automatic lift mechanism, small slices of bread can also be removed safely and easily.
Bread roll attachment
The toaster is fitted with an integrated roll attachment, which can be used by pressing the button (6) downwards.
One roll can be warmed up from either side on a medium setting in each case. Rolls which are too dry should be moistened slightly beforehand - it works better this way.


Crumb tray
Crumbs produced during toasting are collected in the crumb tray (7).
To empty, briefly press against the crumb tray (7). You can then pull the tray out of the appliance.

Cleaning and maintenance
Before cleaning, disconnect the appliance from the mains and allow the appliance to cool down. Use a hard brush to remove crumbs sticking to the grids and the heater. Do not tilt the appliance while you do this, or crumbs will spill from the crumb tray (7) into the inside of the toaster. Then pull out the crumb tray (7), clean it and reinsert.
Never immerse the toaster in water. Wipe the outside of the appliance only with a damp cloth and some washing-up liquid. Do not use harsh or abrasive cleaning agents.
Technical Data
Rated voltage: 220 – 240 V~ 50-60 Hz
Power consumption: 600 W
Protection class: I
Technical information on the operating modes pursuant to EU Regulation 2023/826:
| MODE | POWER CONSUMPTION (WATT) | PERIOD (MINUTES) |
| OFF | 0,0 | – |
| Standby | – | – |
| Standby with additional information | – | – |
| Networked standby | – | – |
For UK use only
- This product is supplied with a 13 A plug conforming to BS 1363 fitted to the mains lead. If the plug is unsuitable for your socket outlets or needs to be replaced, please note the following. If the plug is a non-rewireable one, cut it from the mains lead and immediately dispose of it. Never insert it into a socket outlet as there is a very great risk of an electric shock.
- The replacement of the plug at the mains lead has to be done according to the following instructions:
![]()
This appliance must be earthed
![]()
The wires in this mains lead are coloured in accordance with the following code:
green/yellow - Earth
blue - Neutral
brown - Live
As the colours of the wires in the mains lead of this appliance may not correspond with the coloured markings identifying the terminals in your plug, proceed as follows:- the wire which is coloured green and yellow must be connected to the terminal which is marked with the letter E or by the earth symbol
![]() , or coloured green or green and yellow,
, or coloured green or green and yellow, - the wire which is coloured blue must be connected to the terminal which is marked the letter N or coloured black,
- the wire which is coloured brown must be connected to the terminal which is marked with the letter L or coloured red.
- the wire which is coloured green and yellow must be connected to the terminal which is marked with the letter E or by the earth symbol
- If a 13 A (BS 1363) plug is used it must be fitted with a 13 A fuse conforming to BS 1362 and be ASTA approved. If any other type of plug is used, the appliance must be protected by a 10 A fuse either in the plug or adapter or at the distribution board.
If in doubt - consult a qualified electrician. - Never use the plug without closing the fuse cover.


Important safety instructions
- The device must not be operated via an external timer or remote control.
- These devices can be used by children older than eight years old as well as by persons with limited physical, sensory or mental capabilities, persons lacking experience and/or lacking knowledge if they are supervised or have received instructions regarding how the device is to be used safely and have understood the resulting risks.
- Children should be supervised in order to ensure that they do not play with the device.
- Cleaning and user maintenance shall not be made by children, unless they are older than 8 years old and supervised.
- Keep the device and its cable out of the reach of children under eight years old.
![warning]() Attention: Bread slices can burn in toasters. Therefore, do not use the device near or under flammable objects (e.g. curtains, wall cupboards) and always supervise.
Attention: Bread slices can burn in toasters. Therefore, do not use the device near or under flammable objects (e.g. curtains, wall cupboards) and always supervise.![]()
The temperature of tangible surfaces can become very hot.- If the appliance's connection cable is damaged then it must be replaced by the manufacturer's central customer service department or by a similarly qualified person. Improper repairs may constitute a serious threat for users.
- Do not immerse the toaster in water.
- For cleaning do not reach into the bread slots with your fingers or objects, such as forks, knives, etc.
- Falling crumbs are collected in the crumb tray during toasting. To empty, briefly press against the crumb tray. You will then be able to pull it out of the device.
- This device is intended to be used in household and similar applications such as:
- staff kitchen areas in shops, offices and other working environments;
- farm houses;
- by clients in hotels, motels and other residential type environments;
- bed and breakfast type environments.
 Attention: Bread slices can burn in toasters. Therefore, do not use the device near or under flammable objects (e.g. curtains, wall cupboards) and always supervise.
The appliance is not designed for sole commercial use.
Prior to use
Read the operating manual carefully. It contains important information about the use, safety and maintenance of the appliance.
It should be kept in a safe place and passed on to further users if appropriate.
The device may only be used for the intended purpose according to these operating instructions. Observe the safety instructions during use.
Additional safety instructions
- The mains plug is to be pulled:
- If malfunctions occur during use
- before cleaning and care
- after use.
- To prevent the toaster being mechanically switched on by mistake, the plug must always be disconnected prior to storage.
- Only connect the device to properly installed earthed sockets. The wire and plug must be dry.
- Never operate the toaster unattended.
- Do not pull the connecting cable over sharp edges or clamp it. Do not let it hang down and protect it from heat and oil.
- Do not place the device on hot surfaces, such as hot plates or similar, and do not operate near open flames.
- Do not operate the toaster without the crumb tray inserted.
- Never disconnect the mains plug from the socket by the cord or with wet hands.
- Stop using the appliance and/or connect it from the mains plug immediately if:
- The appliance or mains cable is damaged
- There is any suspicion of a fault after dropping the appliance or similar. In such cases, send the appliance to be repaired.
- When inserting the toast, ensure that the bread slices do not get jammed. However, should this happen, first pull the power plug and then remove the interference.
- Do not reach into the bread slots with your fingers or objects, such as forks, knives, etc.
- Only operate the toaster in the upright position away from other objects.
- Do not cover the bread slot during toasting. Do not lay any bread slices or rolls on the casing, as this causes the device to overheat.
- No liability is assumed for any damages in cases of misuse, improper operation or unprofessional repairs. Claims under warranty are likewise excluded in such cases.
Use
This toaster is suitable for standard slices of bread, XXL slices of bread (up to 11x11cm in size), plaited yeast buns and similar bakery products with a maximum thickness of 2.8 cm.
Only use bakery products without fillings and toppings such as butter and jam.

* Compared to WMF Lono toaster.
Confirmed by technikzuhause.de. Resource savings refer to material usage and transportation volume. Measurement of energy savings by toasting a XXL-slice of toast at the same browning level.
Documents / ResourcesDownload manual
Here you can download full pdf version of manual, it may contain additional safety instructions, warranty information, FCC rules, etc.
Advertisement


Need help?
Do you have a question about the KITCHENMINIS and is the answer not in the manual?
Questions and answers