Table of Contents

Related Manuals for Yamaha DV-C6480 - Progressive-Scan DVD Player


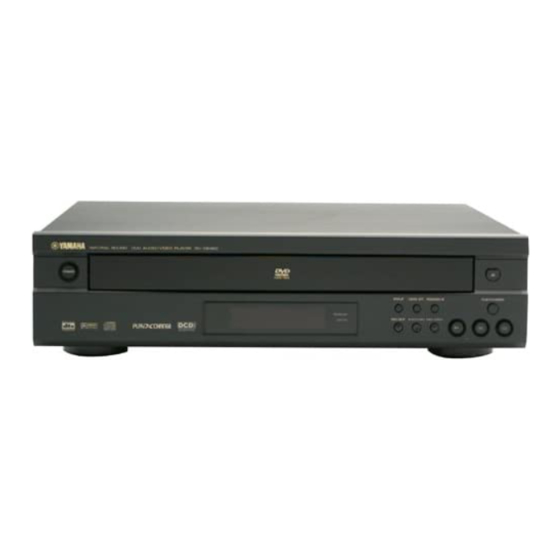
Summary of Contents for Yamaha DV-C6480 - Progressive-Scan DVD Player
- Page 1 DV-C6480 DVD AUDIO/VIDEO CHANGER DIGITAL VIDEO NATURAL SOUND DVD AUDIO/VIDEO PLAYER POWER GROUP VIDEO OFF PROGRESSIVE ON PLAYXCHANGE PROGRESSIVE DISC SKIP VIDEO OFF D I G I T A L DOLBY D I G I T A L DIGITAL VIDEO S U R R O U N D OWNER’S MANUAL...
-
Page 2: Important Safety Instructions
IMPORTANT SAFETY INSTRUCTIONS Read these instructions. CAUTION Keep these instructions. RISK OF ELECTRIC SHOCK Heed all warnings. DO NOT OPEN Follow all instructions. CAUTION: TO REDUCE THE RISK OF Do not use this apparatus near water. ELECTRIC SHOCK, DO NOT REMOVE COVER (OR BACK). - Page 3 “OFF” requirements. Modifications not expressly approved by and “ON”, please try to eliminate the problem by using Yamaha may void your authority, granted by the FCC, to one of the following measures: use the product.
- Page 4 Only voltage specified on this unit must be used. Using this unit with a higher voltage than specified is dangerous and may result in fire or other accidents. YAMAHA will not be held responsible for any damage resulting from the use of this unit with a voltage other than that specified.
-
Page 5: Table Of Contents
INTRODUCTION FEATURES G 5-Disc Auto-changer for playing DVD-Audio, DVD- G Dolby Digital and DTS decoders G Compatible with almost all features of DVD discs Video, audio CD and Video CD G CD-R and CD-RW play compatibility (Multi-angle, Multi-language, Parental control, etc.) G MP3 format supported G Easy operation through on-screen menu G PLAYXCHANGE;... -
Page 6: Getting Started
GETTING STARTED Checking the package contents Check that the following items are included in your package. Remote control OPEN/CLOSE OPEN/CLOSE PLAY MODE REPEAT A–B MARKER PLAY MODE REPEAT A–B MARKER Batteries (AA, R06, UM-3) RCA pin cable (audio/video) SUBTITLE AUDIO ANGLE SUBTITLE AUDIO... -
Page 7: Notes About Handling Discs
GETTING STARTED I Region management information DVD-V This DVD player is designed to meet DVD standard that supports region management system. Check the regional code number marked on the disc packages. If the number does not match this unit’s region number (see the below table or the back of this unit), this unit refuses to play that disc. -
Page 8: Control Reference Guide
CONTROL REFERENCE GUIDE Front panel/remote control Front Panel POWER GROUP VIDEO OFF PROGRESSIVE ON PLAYXCHANGE PROGRESSIVE DISC SKIP VIDEO OFF (U.S.A. model) Remote Control 1 POWER Press to turn the power on and off. 2 Disc tray OPEN/CLOSE Up to 5 discs can be loaded on this tray. A –... -
Page 9: Display Panel
CONTROL REFERENCE GUIDE w GROUP (p.15) d Cursor buttons, ENTER Use to select and determine an item on menu screen, etc. e Display panel f ON SCREEN (p.21) r PLAY MODE Press to turn the on-screen icons on and off on the video Press to switch among random play, program play, and monitor. -
Page 10: Display
CONTROL REFERENCE GUIDE Display 2 3 4 1 2 3 4 5 – PROG RND REP15DISC MPEG PCM VSS GROUP TITLE TRACK CHAP ANGLE DMIX PPCM MLTCH O O O O O O O O O O O O AUDIO VIDEO 8 9, 0, q 8 Disc type indicators... -
Page 11: Preparation
PREPARATION REMOTE CONTROL Installing batteries in the remote control Turn the remote control over and slide the battery compartment cover in the direction of the arrow. Insert the batteries (AA, R06, UM-3 type) according the polarity markings on the inside of the battery compartment. -
Page 12: Connections
CONNECTIONS CAUTION • Never connect this unit and other equipment to power supply until all connections have been completed. Be sure all connections are made correctly, observing the color-coding of terminals of both this unit and the equipment to be connected. -
Page 13: Video Connections
CONNECTIONS Video connections If your AV amplifier has video terminals, connect your (U.S.A. model) amplifier (and then to your video monitor) so that you can use one video monitor for several different video sources MAIN (LD, VCR etc.) by simply switching the input source selector of your amplifier. -
Page 14: Remote Control In/Out Terminals
CONNECTIONS Remote control in/out terminals These terminals are used for custom installation system that transmits remote control signals via cables. Connect this MAIN unit’s REMOTE CONTROL IN to the Remote control SORROUND output of the control unit of your system. CENTER WOOFER DISCRETE... -
Page 15: Playback
PLAYBACK BASIC OPERATION Before starting play To play a disc properly, you need to adjust the formats of audio and video signals output from this unit in accordance with the equipment connected to this unit. See p.25 to 27. CAUTION •... -
Page 16: To Stop Playback
BASIC OPERATION I To stop playback POWER DISC SKIP PLAYXCHANGE Press a (STOP). Resume function POWER GROUP VIDEO OFF PROGRESSIVE ON PLAYXCHANGE This unit memorizes where a (STOP) was pressed as long PROGRESSIVE DISC SKIP VIDEO OFF as this unit is turned on (W indicator flashes on the display). When you press w (PLAY) in this status, playback resumes from where it was stopped. -
Page 17: Multi-Speed Play
BASIC OPERATION Multi-speed play I To select a specific track PLAY PAUSE VCD CD Enter a desired track number using numeric buttons. To select a two-digit number, press > = 10 and then enter the upper figure and the last figure successively. GROUP VIDEO OFF PROGRESSIVE ON PLAYXCHANGE... -
Page 18: Using A Disc's Menu
BASIC OPERATION Using a disc’s menu Discs may contain multiple audio tracks, subtitles, index and bonus materials such as movie trailers and cast information, etc. And many of them have menu screens that enable you to control these features. This section gives you general instruction about how to operate these screens. -
Page 19: Dvd-Audio Features
BASIC OPERATION DVD-Audio features This section explains about some features particular to DVD-Audio. Though most of the content selection can be controlled using a disc’s menu like DVD-Video, there exists in a DVD-Audio the unit called ‘group’ that is something equivalent to DVD-Video’s ‘title’. -
Page 20: Switching Audio Tracks, Subtitles And Angles
BASIC OPERATION Switching audio tracks, subtitles and angles Some discs are encoded with several audio tracks, multilin- gual subtitles or multiple camera angles. Refer to disc jacket OPEN/CLOSE etc. to see which feature is supported. AUDIO A – B PLAY MODE REPEAT MARKER I Audio tracks... -
Page 21: Specifying The Play Sequence
SPECIFYING THE PLAY SEQUENCE Repeat play This function allows you to play your desired chapter, track or disc repeatedly. OPEN/CLOSE Press REPEAT during playback. A – B PLAY MODE REPEAT MARKER Each time this button is pressed, repeat mode changes REPEAT SUBTITLE AUDIO... -
Page 22: Repeat A-B
SPECIFYING THE PLAY SEQUENCE Repeat A-B This function allows you to specify two points and play between them repeatedly. OPEN/CLOSE Press A-B during play at the point where you A – B PLAY MODE REPEAT MARKER want to start A-B repeat. A –... -
Page 23: Programmed Play
SPECIFYING THE PLAY SEQUENCE Programmed play [DVD-A] [VCD] [CD] You can enjoy listening to your favorite tracks selected from one or more discs in any desired order by programming OPEN/CLOSE tracks. PLAY MODE REPEAT A – B MARKER PLAY MODE Press a (STOP) to stop play. -
Page 24: Bookmarks
SPECIFYING THE PLAY SEQUENCE Bookmarks This feature allows you to mark up to 5 points so that you can quickly return to those points later. OPEN/CLOSE Press MARKER. PLAY MODE REPEAT A – B MARKER MARKER The marker icon appears on the screen. SUBTITLE AUDIO ANGLE... -
Page 25: On-Screen Menu
ON-SCREEN MENU You can control various items using on-screen menu bar. Operating menu bar Press ON SCREEN. Digital 1 ENG 3/2.1 ch 1 : 46 : 50 Each time ON SCREEN is pressed, the menu bar changes as below. 1 2 3 ✱ ✱ a Icons for disc menu b Icons for player menu –... -
Page 26: Icons For Disc Menu
ON-SCREEN MENU Icons for disc menu example: DVD-Video Digital 1 ENG 3/2.1 ch 1 : 46 : 50 DVD-V DVD-A DVD-V Title number Angle number DVD-A VCD CD Track number P B C Playback control DVD-V Indicates whether playback control is on Chapter number or off. -
Page 27: Icons For Player Menu
ON-SCREEN MENU Icons for player menu I Play mode menu I Audio menu example: DVD-Video example: DVD-Video 1 2 3 ✱ ✱ SP OFF DVD-V A-B repeat (^ p.18) Virtual surround mode [ENTER] (start point) ^ [ENTER] (finish point) SP OFF To cancel Allows you to enjoy surround-like effect without [ENTER]... -
Page 28: Video Menu
ON-SCREEN MENU I Video menu When PROGRESSIVE is on (U.S.A. and Canada models) Auto DVD-A DVD-V Digital picture mode DVD-A DVD-V To select the picture mode: [ , ] Digital picture mode N: Normal To select the picture mode: [ , ] C: Cinema image (suited for movie viewing) N: Normal U: User mode... -
Page 29: Setup Menu
SETUP MENU SETUP MENU With the setup menu, you can change this unit’s system defaults to suit your preference and your home theater system. Some items must be adjusted to play a disc properly. Operating the setup menu This section shows common procedures (some items require additional steps). -
Page 30: Summary Of Settings
SETUP MENU Summary of settings The below chart shows the menu groups and each items. In the ‘Options’ column, the factory settings are underlined. Menu groups Items Options Audio DVD-A DVD-V Disc (U.S.A. and Canada models) ^ See Select the preferred audio track language. English French Spanish... -
Page 31: Language Selection And Language Code List
SETUP MENU Menu groups Items Options Audio Dolby Digital DVD-A DVD-V Bitstream Decide the signal type that output from this unit’s digital outputs. Select ‘Bitstream’ when connected device has Dolby Digital decoder. Select ‘PCM’ when not. DTS Digital Surround DVD-A DVD-V Bitstream Decide the signal type that output from this unit’s digital outputs. -
Page 32: Ratings
SETUP MENU Ratings [DVD-V] Depending on software capability, you can prevent discs or scenes with objection- able material from being played according to your desired rating. You can select OPEN/CLOSE the level and lock it by designating password. PLAY MODE REPEAT A –... -
Page 33: Output Mode
SETUP MENU I Output mode 1 Main (L) Center Main (R) 2 1 3 Change the settings of each speaker in accordance with your speaker system. Exit Press the cursor buttons (q, w, , ) to select a speaker and press ENTER. -
Page 34: Appendix
If this unit fails to operate normally, check the following points to determine whether the fault can be corrected, or if the fault is not listed in the PROBLEM column, disconnect the power code and contact your authorized YAMAHA dealer or service center. - Page 35 TROUBLESHOOTING Refer to PROBLEM POSSIBLE CAUSE WHAT TO DO Page No sound when playing Incorrect setting(s) at the audio section of Select proper settings. 26, 27 a disc encoded with ‘Setup menu’ on this unit or at ‘input mode’ DTS. on your amplifier.
-
Page 36: Specifications
YAMAHA ELECTRONIQUE FRANCE S.A. RUE AMBROISE CROIZAT BP70 CROISSY-BEAUBOURG 77312 MARNE-LA-VALLEE CEDEX02, FRANCE YAMAHA ELECTRONICS (UK) LTD. YAMAHA HOUSE, 200 RICKMANSWORTH ROAD WATFORD, HERTS WD1 7JS, ENGLAND YAMAHA SCANDINAVIA A.B. J A WETTERGRENS GATA 1, BOX 30053, 400 43 VÄSTRA FRÖLUNDA, SWEDEN Printed in Malaysia V816690 YAMAHA MUSIC AUSTRALIA PTY, LTD.
Need help?
Do you have a question about the DV-C6480 - Progressive-Scan DVD Player and is the answer not in the manual?
Questions and answers