Advertisement
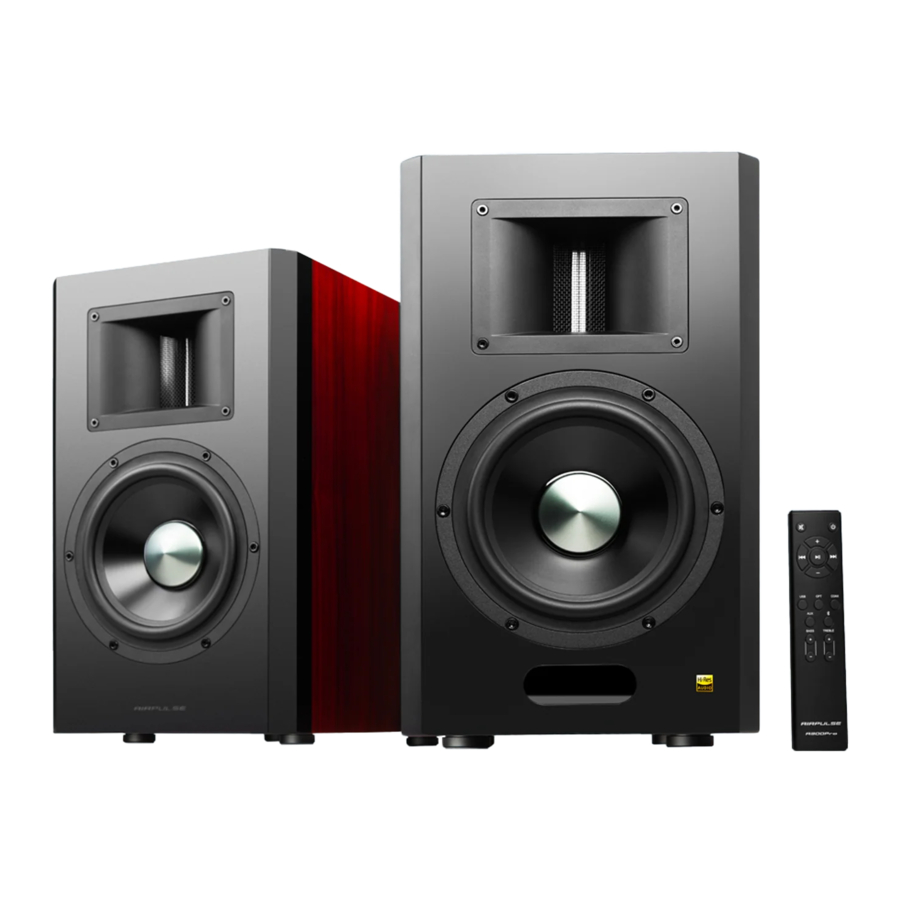
Box contents

Note: Images are for illustrative purposes only and may differ from the actual product.
Speakers illustration

- LED display window and remote receiving window
Displays the current audio source signal![]()
Also displays the master volume level and treble/bass level when adjusting volume and treble/bass level in other inputs (AUX/CoaxiaI/OpticaI/USB/Bluetooth). - Volume dial
Rotate to adjust volume level and input sensitivity;
When the "INPUT SELECT" switches are set at "OTHERS" positions, press to switch input signal.
When powered on, press and hold to enter standby; when in standby, press and hold to power on. - Input sensitivity indicator
When the "INPUT SELECT" switches are set at "BALANCED" and "UNBALANCED" positions, this indicator will be steady lit. - Volume indicator
When the "INPUT SELECT" switches are set at "OTHERS" positions, this indicator will be steady lit. - Volume and input sensitivity display window
When the "INPUT SELECT" switches are set at "BALANCED" and "UNBALANCED" positions, it will display the current input sensitivity value, ranging from-30 to +6dB.
When the "INPUT SELECT" switches are set at "OTHERS" positions, it will display the current volume level (0-60). - Input selection toggle switch
Slide the "INPUT SELECT" switches to "BALANCED" positions on both speakers when using XLR cables to respectively input signal to the left and right speakers;
Slide the "INPUT SELECT" switches to "UNBALANCED" positions on both speakers when using RCA audio cables to respectively input signal to the left and right speakers;
Slide the "INPUT SELECT" switches to "OTHERS" positions on both speakers when in the wireless connection mode. - Pairing button
The left and right speakers have been paired before leaving the factory. If the wireless connection fails to resume, please follow "The left and right speakers pairing" to press the pairing buttons to re-pair. - Pairing indicator
Red indicator steady lit = the left and right speakers already paired.
Indicator flashing in a breathing pattern = the left and right speakers not connected or connection failed.
Professional operating mode: When the "INPUT SELECT" switches are set at "BALANCED" and "UNBALANCED" positions on both speakers, the left and right speakers can be operated separately and the treble/bass dial can be used to adjust treble/bass level.
Note: The treble/bass dials on the rear panels of both speakers only function in the balanced and unbalanced inputs, they do not function in the wireless connection mode. - Unbalanced input (RCA) port
Connect to RCA output port of audio source devices using RCA audio cable; connect the left and right speakers respectively. - Balanced input (XLR) port
Connect to audio source devices with balanced output port using XLR cable; connect the left and right speakers respectively. - Bass level adjustment
In the balanced or unbalanced inputs, bass level of both speakers can be adjusted respectively within a ±6dB range. - Treble level adjustment
In the balanced or unbalanced inputs, treble level of both speakers can be adjusted respectively within a ±3dB range.
Wireless connection mode of the left and right speakers: When selecting this mode, slide the "INPUT SELECT" switches to "OTHERS" positions on both speakers. Then audio source signal can be input from AUX, COAX, OPT or USB port; and Bluetooth devices can be connected via Bluetooth.
All functions of the remote control are available in the wireless connection mode. - AUX input port
Connect to RCA output port of audio source devices using RCA audio cable. - Coaxial input port
Connect to audio source devices with coaxial output port using coaxial cable. - Optical input port
Connect to audio source devices with optical output port using fiber optic input audio cable. - USB B type port
Connect to audio source devices with USB output port using USB cable. - Power cord connector
Connect to plug of power cord. - Power switch
Turn on/off speaker power.
Remote control illustration
 The remote control does not function in the balanced and unbalanced inputs, it functions in other inputs (AUX/Coaxial/Optical/USB/Bluetooth).

 Standby button Standby button | Standby/power on | |
| Volume control buttons | ||
 Mute Mute | Mute off speaker output | |
 Volume up/down Volume up/down | Adjust playing volume | |
| Playback selection buttons | ||
 Previous/next track Previous/next track | Previous/next track in Bluetooth/USB input | |
 Play/pause Play/pause | Play/pause in Bluetooth/USB input | |
| Audio source selection buttons | ||
 USB USB | USB input | |
 OPT OPT | Optical input | |
 COAX COAX | Coaxial input | |
 AUX AUX | AUX input | |
 (Bluetooth) (Bluetooth) | Bluetooth input | |
| Treble and bass buttons | ||
 TREBLE+/- TREBLE+/- | Adjust treble level | When in other inputs (AUX/Coaxial/Optical/USB/Bluetooth), please use the |
 BASS +/- BASS +/- | Adjust bass level | remote control to adjust the treble/bass level, it will auto-memory the treble/bass level set last time. |
How to operate remote control
Aim remote control at the remote control receiving window on the right speaker.
The optimum operational distance is within 7 meters. When the system receives remote control commands, displayed value of display window will alert or flash.

Installing battery in remote control
Install or replace remote control battery:
- As the illustration shows, use a slotted screwdriver to remove the cover.

- Place the two AAA batteries (note the "+" and "-" pole) into the remote control and close the battery cover.


Note
- The battery life is normally about 6 months; please replace it when the remote control is not sensitive or the control distance to be shortened.
- Discard the battery immediately in the event of battery leakage, paying attention not to touch the leaking materials.
If leaking is in contact with skin or gets in eyes/mouth, rinse immediately and seek emergency treatment immediately. Please clean the battery compartment thoroughly prior to installing new battery. - Never use the remote control in conditions below:
- Places with high humidity, e.g. a bathroom
- Places with high temperature, e.g. near a heater or stove
- Places with extremely low temperature
- In dusty places
- Never mix old and new batteries. This will shorten new battery life or cause old battery leakage.
- Remove the battery when unused for a long period of time to avoid battery leakage. 6. Never use this product when battery compartment is not securely closed, and keep the remote control away from children.
- Never let children touch the battery. If the battery is accidentally swallowed, rush to hospital immediately.
Preparations
- Connect to playback devices

- Connect to power source

- Connect the power cables included to power ports on the rear panels of both speakers, and then insert power plugs into wall outlet;
- After all cables are connected securely, press power switches on the rear panels of both speakers to turn on main power;
- When in other inputs (AUX/Coaxial/Optical/USB/Bluetooth), press the "
![]() " button on the remote control to switch to Standby/ON state.
" button on the remote control to switch to Standby/ON state.
Please press the "![]() " power switches to turn off main power.
" power switches to turn off main power.
- Input selection switching

- For the balanced input, slide the "INPUT SELECT" switches to the "BALANCED" positions on both speakers.
- For the unbalanced input, slide the "INPUT SELECT" switches to the "UNBALANCED" positions on both speakers.
- For other inputs (AUX/Coaxial/Optical/USB/Bluetooth), slide the "INPUT SELECT" switches to the "OTHERS" positions on both speakers, and use the remote control or press the "VOLUME" dial on the right speaker to select the desired audio source.
- The left and right speakers pairing
The left and right speakers have been paired before leaving the factory. It should be in the wireless connection mode when both speakers are powered on and the red indicators on both speakers are lit constantly. Please follow the steps below to re-pair if needed.

- Power on both speakers, first press the "PAIR" button on the rear panel of the right speaker, the pairing indicator will flash rapidly;
- Then press and hold the "PAIR" button on the rear panel of the left speaker, the pairing indicator will flash rapidly;
- Wait until the red indicators on both speakers are lit constantly. Then the pairing is complete and wireless connection is made.


 " button on the remote control to switch to Standby/ON state.
 " power switches to turn off main power.

Note: If the red indicators on both speakers are lit in a breathing pattern, it indicates that there is no connection or the connection is unsuccessful, please repeat the above steps.
- Speakers placement

- Place both speakers on a solid, leveled and steady surface. For the optimum sound positioning and layering, using the specialstands of A300Pro is recommended.
- For the optimum stereo sound effect, the listener can slightly adjust speaker angel.
- For the most accurate sound and balance, the listener should be in the axis of equilateral triangle formed by the left and right speakers.
- High frequency has a much higher directivity, and for more accurate sound effect the speaker's tweeter should be at ear level of the listener.

Playing
Balanced input
- Connect the "BALANCED INPUT" ports on the rear panels of both speakers to audio source devices with balanced output port using XLR cables.

- Slide the "INPUT SELECT" switches to the "BALANCED" positions on the rear panels of both speakers, LED display window on the right speaker will display "BAL".

- Play music on the connected device, and use the "VOLUME" dials on the rear panels of both speakers to adjust volume to a desired level.
![]()
- Use the treble/bass dials on the rear panels of both speakers to adjust to a desired treble/bass level in terms of room size and your preference.
![]()


- XLR type interface is widely used in professional audio equipments. There are XLR interfaces on both speakers of A300Pro, supporting long-distance line transmission and reducing noise that may be picked up during transmission.
- There is no XLR cable attached in the package, and the users need to buy it on their own.
Unbalanced Input
- Connect the "UNBALANCED INPUT" ports on the rear panels of both speakers to audio source devices with RCA port using RCA audio cables.

- Slide the "INPUT SELECT" switches to the "UNBALANCED" positions on the rear panels of both speakers, LED display window on the right speaker will display "UNBAL".

- Play music on the connected device, and use the "VOLUME" dials on the rear panels of both speakers to adjust volume to a desired level.
![]()
- Use the treble/bass dials on the rear panels of both speakers to adjust to a desired treble/bass level in terms of room size and your preference.
![]()


Other inputs
AUX
- In the wireless connection mode, insert RCA audio cable into AUX input port on the rear panel of the right speaker (pay attention to L/R connector matching); then connect RCA audio cable to audio source devices with RCA output port.
(please ensure the left and right speakers have been paired)

- Slide the "INPUT SELECT" switches to the "OTHERS" positions on the rear panels of both speakers, and press the "AUX" button on the remote control or press the "VOLUME" dial on the rear panel of the right speaker to select AUX input, LED display window on the right speaker will display "AUX".

- Play music on the connected device, and press the "+"/"-" button on the remote control or press the "VOLUME" dial on the rear panel of the right speaker to adjust volume to a desired level.

- Use the treble/bass button on the remote control to adjust treble/bass to a desired level in terms of room size and your preference.
![]()


Optical/coaxial
- In the wireless connection mode, connect the right speaker to audio source device with optical or coaxial digital output port using fiber optic input audio cable (or coaxial cable).
(please ensure the left and right speakers have been paired)

- Slide the "INPUT SELECT" switches to the "OTHERS" positions on the rear panels of both speakers, and press the "OPT" (or "COAX") button on the remote control or press the "VOLUME" dial on the rear panel of the right speaker to select optical (or coaxial) input, LED display window on the right speaker will display "OPT" (or "COAX").

- Play music on the connected device, and press the 1'+"/"-" button on the remote control or press the"VOLUME" dial on the rear panel of the right speaker to adjust volume to a desired level.

- Use the treble/bass button on the remote control to adjust treble/bass to a desired level in terms of room size and your preference.
![]()


- Only the standard PCM audio signals (44.1KHz/48KHz/96KHz/192KHz) function in optical or coaxial mode.
- If the optical digital output of playing device is ACC, such as on a TV, please switch it to PCM.
USB
USB interface chip in the A300Pro is a XMOS chip commonly used by high-end audio equipments. After being connected to PC, USB interface will directly extract and play back digital audio signal in a manner similar to the "USB external sound card", to avoid sound degradation and dynamic range compression caused by digital-to-analog conversion of PC sound card, and to ensure the restoration of original sound quality.

- Only PCM audio signals (44.1KHz/48KHz/96KHz/192KHz) functions in USB mode.
- If connecting the speakers to a PC, driver program must be installed first for system to perform properly.
- USB driver in Mac operating system supports USB Audio Class 1 and Class 2 audio transmission by default, therefore driver program installation is not needed.
Install the special driver program (only for Windows)
Please install the special driver program on the PC before connect the PC to this product.
- Please visit our website www.airpulseaudio.com to download and extract the special driver program "A300Pro USB Driver".
- After installation is complete, exit from all applications.
Connect PC to speakers
In the wireless connection mode, connect Windows PC already installed with USB driver or Apple Mac to the USB input port on the right speaker using USB connecting cable.
(please ensure the left and right speakers have been paired)

Set this product as the audio output device of PC
- Slide the "INPUT SELECT" switches to the "OTHERS" positions on the rear panels of both speakers, and press the "USB" button on the remote control or press the "VOLUME" dial on the rear panel of the right speaker to select USB input, LED display window on the right speaker will display "USB".

- Set this product as the audio output device of PC
For Windows users, please open "Control panel" > "Sound" > "Play" > "Set as Default" Tab to set "XMOS USB Audio" as the current audio output device.
![]()
For Mac users, please open "System Preferences" > "Sound" > "Output" Tab to select "AIRPULSE A300Pro" as the current audio output device.
![]()


Play music on the PC
- Play music on the connected device, and press the "+"/"-" button on the remote control or press the "VOLUME" dial on the rear panel of the right speaker to adjust volume to a desired level.

- Use the treble/bass button on the remote control to adjust treble/bass to a desired level in terms of room size and your preference.
![]()
- In USB input, press the "
![]() "/"
"/"![]() " button on the remote control to switch songs, and press the "
" button on the remote control to switch songs, and press the "![]() " button to pause/play.
" button to pause/play.


 "/"
"/" " button on the remote control to switch songs, and press the "
 " button to pause/play.
- The play control under USB input belongs to USB HID control. This control needs support of player software, and so there may be compatibility differences for different audio player softwares.
- USB driver in Mac operating system supports USB Audio Class 1 and Class 2 audio transmission by default, therefore driver program installation is not needed.
- Default USB driver for audio on Windows 7/ Windows 10 operation system supports only USB Audio Class 1, which limits the audio stream to only 2 channels PCM with highest sample rate of 96 KHz. To support PCM with higher sample rate, USB interface chip of A300Pro is built on USB Audio Class 2, therefore the special driver program is needed for using with Windows 7/Windows 10.
- Please understand Windows XP operation system is no longer maintained by Microsoft, driver software to work with Windows XP is no available. There may be risk warning during installation, please install according to your needs.
- If you need to buy USB A type to B type connecting cable, you can search and buy it on the various e-commerce platforms.
- Only PCM audio signals (44.1KHz/48KHz/96KHz/192KHz) functions in USB mode.
Bluetooth
- In the wireless connection mode, slide the "INPUT SELECT" switches to the "OTHERS" positions on the rear panels of both speakers, and press the "
![]() " button on the remote control or press the "VOLUME" dial on the rear panel of the right speaker to select Bluetooth input, LED display window on the right speaker will display "
" button on the remote control or press the "VOLUME" dial on the rear panel of the right speaker to select Bluetooth input, LED display window on the right speaker will display "![]() ".
".
(please ensure the left and right speakers have been paired)

- Set your Bluetooth device to search for and connect to "AIRPULSE A300Pro"; pin code for connection is "0000" if needed.
Operations may be different among different devices, please refer to the operational instructions attached with the devices.
![]()
- Play music on the connected device, and press the "+"/"-" button on the remote control or press the "VOLUME" dial on the rear panel of the right speaker to adjust volume to a desired level.

- Use the treble/bass button on the remote control to adjust treble/bass to a desired level in terms of room size and your preference.
![]()
- In Bluetooth input, press the "
![]() "/"
"/"![]() " button on the remote control to switch songs, and press the "
" button on the remote control to switch songs, and press the "![]() " button to pause/play.
" button to pause/play.
 " button on the remote control or press the "VOLUME" dial on the rear panel of the right speaker to select Bluetooth input, LED display window on the right speaker will display "


- Effective Bluetooth connection distance is within 10 meters.
- The Bluetooth of A300Pro can only be searched and connected in Bluetooth input. The existing Bluetooth connection will be disconnected once the speaker is switched to other audio inputs. When switched to Bluetooth input, the speaker will try to connect to the Bluetooth device connected last time.
- To disconnect Bluetooth, press and hold the "
![]() " button on the remote control for above 2 seconds.
" button on the remote control for above 2 seconds. - To enjoy all Bluetooth functions please ensure your audio device has A2DP and AVRCP profiles.
- When connected to this product, Bluetooth connectivity and functions may be different among different Bluetooth devices, depending on software settings of Bluetooth devices.
- The Qualcomm® aptXTM decoder built in this product helps to achieve better wireless transmission sound quality, therefore please use the device supporting Qualcomm® aptXTM as the audio source.
Specifications/statement
| Tweeter: | Horn Loaded Ribbon Tweeter |
| Mid-Woofer: | 6.5inch Aluminum Cone Underhung Design Neodymium Power Mid-Woofer |
| Amplifier System: | Digital Amplifier with Xmos Processor |
| Power Output: | L/R (Treble):10W+10W, L/R (Woofer): 120W+120W |
| Frequency Range: | 40Hz-40KHz |
| Signal-Noise Ratio: | L/R: ≥90dB (A) |
| Input Mode: | Balanced/Unbalanced/AUX/USB/Optical/Coaxial/Bluetooth |
| Cabinet Size (WxHxD): | 225 x 385 x 350 (mm) |
| Net Weight: | 24 Kg (53 Pounds)/Set |
NOTICE: For the need of technical improvement and system upgrade, information contained herein may be subject to change from time to time without prior notice.
Troubleshooting
| Problem | Solution |
| No sound |
|
| |
| |
| Cannot connect via Bluetooth |
|
| |
| |
| The A300Pro does not turn on |
|
| Noise coming from speakers |
|
If you want to find out more about AIRPULSE, please visit our website at www.airpulseaudio.com
Important safety instruction
Please read the following contents carefully before turning on your equipment; and follow the instructions below.
Keep this information around for future reference.
- Please read the instructions carefully. Keep it in safe place for future reference
- Heed all warnings.
- Follow all instructions.
- Do not install near any heat sources such as radiators, heat registers, stoves, or other apparatus (including amplifiers) that produce heat.
- Do not defeat the safety purpose of the polarized or grounding-type plug. A polarized plug has two blades with one wider than the other. A grounding type plug has two blades and a third grounding prong. The wide blade or the third prong are provided for your safety. If the provided plug does not fit into your outlet, consult an electrician for replacement of the obsolete outlet.
- Protect the power cord from being walked on or pinched particularly at plugs, convenience receptacles, and the point where they exit from the speaker.
- Only use attachments/accessories specified by the manufacturer.
- Unplug this speaker during lightning storms or when unused for long periods of time.
- Before connecting speakers to power source, please turn off the power switch and make sure the volume is set at minimum level.
- Please do not place power cable and signal cable near heat source (such as electric heater and radiator). Do not leave cables where they can easily be stepped on or compressed.
- Use electric outlets that allow power cable be pulled out easily. When speakers are not being used for an extended period of time, please turn off power switch and disconnect power plug.
- In order to avoid damage from thunder and lightning, turn off power switch and disconnect speaker from power source during a rain storm.
- Please do not drag power cable when disconnecting from wall socket. Hold power cord firmly at the top to unplug from the wall socket.
- Use the speakers only within voltage specifications. Using the speakers with voltage higher than specifications is dangerous and can cause equipment damage, fire damage or bodily injury.
- These speakers do not include any self serviceable parts. Do not attempt to open the speaker to uninstall any parts or do any type of modifications. If problems occur during use please contact professional technicians only for repair.
- Please refer to the trouble shooting section in owner's manual for common operation errors and to determine possible malfunction.
- Please do not place speakers in places where they can be easily hit by falling objects or dropping and splashing liquid. Do not place any lit fire (such as candle) on top of speaker as this may lead to fire hazard. Do not place any liquid containers on top of speaker as this may fall on speakers and causing electric shock and damage to speaker.
- Place speakers in a stable position so they will not easily fall off causing damage and injury.
- Place speakers in a well ventilated and dry position, far from direct sunlight, heat source, vibration, dust, moist or extremely cold condition. For optimal performance, please leave at least 20 cm distance space around the speaker.
- Please do not use speaker at maximum volume for an extended period of time, This may cause damage to your hearing.
- Before moving the speakers, please first turn off power switch and disconnect from power source.
- When the following symptoms occur, please turn off power switch and disconnect from power source:
- Power cable or plug is worn or damaged.
- Abnormal odor or smoke is detected.
- Small objects falling inside the speaker.
- Sudden break off while playing music.
Consult a professional repair technician to diagnose and repair the speaker.
- Do not use chemical solvent to clean the surface of speaker. To avoid surface damage, use a clean and soft cloth only.
- Do not use the speakers in proximity closer than 22 cm to individuals wearing cardiac pacemaker or defibrillator.

- Use the same type of battery only to replace battery in remote control.
- Never disassemble, smash, or compress battery inside remote control; or toss it into a fire.
- Please stop using the remote control if it has the appearance of bulging, leaking, discoloring or any other abnormal symptoms. Improper use of battery can cause explosion or leaking which leads to burn or other bodily injury. Please dispose battery by referring to local legislation.
 Excessively loud music may lead to hearing loss. Please keep the volume in a safe range.
 Use only with the cart, stand, tripod, bracket, or table specified by the manufacturer, or sold with the speakers. When a cart is used, use caution when moving the cart/speakers combination to avoid injury from tip-over.
Power warning:
- Place the product near the power outlet for easy use.
- Before use, make sure that the operating voltage is the same as your local power supply. Correct operating voltage can be found on the product plate.
- For safety purpose, unplug the product during lightning storms or when unused for extended periods of time.
- Under normal conditions, the power supply may get hot. Please keep good ventilation in the area and exercise caution.
- Safety warning labels on the housing or bottom of the product or power adaptor.
 This symbol is to alert the user to the presence of un-insulated dangerous voltage within the product's enclosure that may be of sufficient magnitude to constitute a risk of electric shock to persons.
 This symbol is to warn the user not to disassemble the enclosure of the product and there is no user-replaceable part inside. Take the product to an authorized service center for repair.
 This symbol indicates that the product is for indoor use only.
The unit is of Class I construction and must be connected to a mains socket outlet with a protective earthing connection. Where the mains plug is used as the disconnect device, the disconnect device shall remain readily operable.
For wireless product:
- Wireless product may generate shortwave radio frequencies and interfere with the normal use of other electronic devices or medical equipment.
- Turn off the product when it's disallowed. Do not use the product in medical facilities, on airplane, at gas stations, near automatic gates, automatic fire alarm system or other automated devices.
- Do not use the product in the vicinity of a pacemaker within a 20cm range. The radio waves may affect the normal operation of the pacemaker or other medical devices.
Dongguan Platinum Audio Systems Co., LTD
No. 2 East Industry Road, Songshan Lake National High-tech
Industrial Development Zone, Dongguan 523808 China
www.airpulseaudio.com
Documents / Resources
References
Download manual
Here you can download full pdf version of manual, it may contain additional safety instructions, warranty information, FCC rules, etc.
Advertisement


Need help?
Do you have a question about the A300 Pro and is the answer not in the manual?
Questions and answers