Table of Contents
Advertisement
Available languages
Available languages
Quick Links
Advertisement
Chapters
Table of Contents

Related Manuals for Samsung DVD-V5650


Summary of Contents for Samsung DVD-V5650
- Page 1 Manuel d'instructions DVD-V5650 AK68-00956G.01 www.samsung.com/ca...
-
Page 2: Consignes De Sécurité
O N S I G N E S D E S É C U R I T É Consignes de sécurité importantes Lisez attentivement chacune des consignes énumérées ci-dessous. 2) Conservez ces consignes dans un lieu sûr. 3) Faites attention à tous les avertissements et à toutes les mises en garde. 4) Assurez-vous de bien suivre toutes les instructions d’utilisation. -
Page 3: Précautions
O N S I G N E S D E S É C U R I T É Précautions POUR ÉVITER LE RISQUE D’UN CHOC ÉLECTRIQUE, NE JAMAIS RETIRER LE CAPOT DE L’APPAREIL. AUCUN ÉLÉMENT NÉCESSAIRE À L’UTILISATEUR N’EST PLACÈ À L’INTÉRIEUR DE L’APPAREIL. - Page 4 O N S I G N E S D E S É C U R I T É ATTENTION CE PRODUIT UTILISE UN FAISCEAU LASER. EN OPÉRANT UN CONTRÔLE, UN AJUSTEMENT, OU TOUTE PROCÉDURE AUTRE QUE CELLES INDIQUÉES DANS CE MANUEL, VOUS VOUS EXPOSEZ À...
-
Page 5: Avant De Démarrer
VA N T D E D E M A R R E R Avant de démarrer Accessoires Piles 2EA 1,5V(AAA) Câbled’antenne Manuel d'utilisation' Remote Control Video/Audio Cable (AC43-12002H) (AC39-42001J) (AK68-00956G) (AK59-00051A) (AC39-00073A) Insertion des piles dans la télécommande Ouvrez le couvercle du compartiment des piles situé... -
Page 6: Table Of Contents
A B L E D E S AT I E R E S Table des matières Consignes de sécurité ..........................2 Consignes de sécurité importantes ......................2 Précautions ..............................3 Avant de démarrer ............................5 Accessoires............................5 Insertion des piles dans la télécommande ....................5 Chapitre 1: Configuration Caractéristiques générales ..........................8 Type de disque et caractéristiques ........................9... - Page 7 A B L E D E S AT I E R E S Chapitre 4 : Fonctionnement du lecteur DVD Lecture d’un disque ............................31 Utilisation des fonctions Recherche et Saut ....................33 Utilisation de la fonction Affichage Pendant la lecture d’un DVD/VCD/CD/MPEG4 ........34 Utilisation du menu Disque et Titre (lecteur DVD/VCD) ................36 Utilisation du menu Fonction (lecteur DVD/VCD) ..................37 Lecture répétée ............................38...
-
Page 8: Caractéristiques Générales
- Lecture CDG audio uniquement, non graphique. CE MODELE DE LECTEUR DVD 525p, VEUILLEZ - DVD-RW (mode VR) CONTACTER LE CENTRE D’ASSISTANCE CLIENTELE DE SAMSUNG.” - DVD-RW, -R, DVD+RW, et disque +R non finalisé. La capacité de lecture peut dépendre des ■... -
Page 9: Type De Disque Et Caractéristiques
O N F I G U R AT I O N Type de disque et caractéristiques Ce lecteur DVD peut lire les types de disque suivants ayant les logos correspondants : Types de disque (logos) Types d’enregistrement Taille du disque Temps maxi. de lecture Caractéristiques - Ce DVD contient une qualité... -
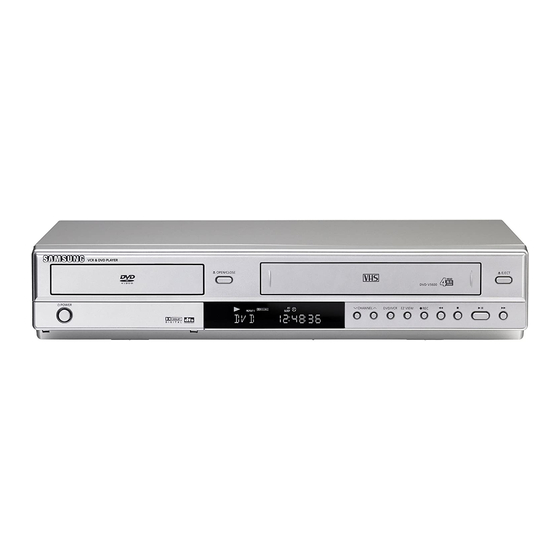
Page 10: Description
O N F I G U R AT I O N Description Commandes en façade TIROIR DISQUE Placez le disque ici. DVD/VCR Fente du magnétoscope Permet d’afficher le mode DVD ou magnétoscope. Insérez-y une cassette vidéo VHS standard.. 11 EZ VIEW EJECT Le format d’une image peut facilement être Pour éjecter une cassette vidéo lorsqu’elle est... - Page 11 O N F I G U R AT I O N Panneau arrière ❶ ❷ ❸ ❹ ➎ ❻ ❼ ❽ AUDIO OUT LINE OUT (VIDEO/AUDIO) Pour connecter aux prises d’entrée audio de Utilisez un câble Vidéo/Audio pour connecter aux votre téléviseur.
-
Page 12: Aperçu De La Télécommande
O N F I G U R AT I O N Aperçu de la télécommande 14 Bouton VCR Permet d'activer le Bouton POWER magnétoscope. Permet d'allumer et d'éteindre 15 Bouton DVD le lecteur Permet d'activer le lecteur DVD DVD-magnétoscope. 16 Bouton F.ADV / SKIP / INPUT Boutons CHIFFRE SEL. -
Page 13: Branchement Du Câble D'antenne
C h a p i t r e 2 R A N C H E M E N T S Branchement du câble d’antenne Il existe plusieurs manières de connecter votre lecteur DVD-magnétoscope. Sélectionnez l’une des connexions d’antenne suivantes correspondant le mieux à celles ci-dessous. Méthode 1 : Antenne + lecteur DVD-magnétoscope + TV : Aucune boîte de jonction ■... -
Page 14: Méthode 2 : Antenne + Lecteur Dvd-Magnétoscope + Tv : Boîte De Jonction Avec Plusieurs Chaînes Cryptées
R A N C H E M E N T S Méthode 2 : Antenne + lecteur DVD-magnétoscope + TV : Boîte de jonction avec plusieurs chaînes cryptées Wall Vous pouvez enregistrer des chaînes en sélectionnant la chaîne sur la boîte de jonction. Vous ne pouvez pas enregistrer une chaîne lorsque vous en regardez une autre. -
Page 15: Avant Le Branchement Du Lecteur Dvd-Magnétoscope
R A N C H E M E N T S Avant le branchement du lecteur DVD- magnétoscope Désactivez toujours le lecteur DVD-magnétoscope, le téléviseur et autres composants avant de connecter ou déconnecter des câbles. - Reportez-vous au manuel d'utilisation des composants supplémentaires que vous connectez (un téléviseur par exemple) pour plus d'informations concernant ces composants particuliers. -
Page 16: Connexion À Un Téléviseur (S-Vidéo)
R A N C H E M E N T S Connexion à un téléviseur (S-Vidéo) Connexion à votre téléviseur à l'aide d'un câble S-Vidéo. - Vous visualiserez des images d'une qualité supérieure. S-Vidéo sépare l'élément image en signaux noir et blanc (Y) et couleur (C) afin de proposer des images plus nettes que le mode d'entrée vidéo habituel. -
Page 17: Connexion À Un Téléviseur (Mode Entrelacé)
R A N C H E M E N T S Connexion à un téléviseur (mode Entrelacé) Connexion à votre téléviseur à l'aide des câbles vidéo composants. - Vous visualiserez des images d'une qualité supérieure et des images à la reproduction couleur précise. Le vidéo composant sépare l'élément image en des signaux noir et blanc (Y), bleu (PB) et rouge (PR) afin de proposer des images claires et nettes. -
Page 18: Connexion À Un Téléviseur (Mode Progressif)
R A N C H E M E N T S Connexion à un téléviseur (mode Progressif) l’aide de câbles vidéo composants (non fournis), connectez la borne COMPONENT VIDEO OUT située à l'arrière de votre lecteur DVD-magnétoscope à la borne COMPONENT IN de votre téléviseur. -
Page 19: Connexion À Un Système Audio
R A N C H E M E N T S Connexion à un système audio Connexion à un système audio (amplificateur 2 voies) l’aide des câbles audio, connectez les bornes AUDIO (rouge et blanche) OUT (LINE) situées à l'arrière du lecteur DVD-magnétoscope aux bornes AUDIO (red and white) IN de votre amplificateur. -
Page 20: Connexion À Un Système Audio (Amplificateur Dolby Digital, Mpeg2 Ou Dts)
R A N C H E M E N T S Connexion à un système audio (amplificateur Dolby digital, MPEG2 ou DTS) l’aide d'un câble coaxial (non fourni), connectez la borne DIGITAL AUDIO OUT (COAXIAL) située à l'arrière de votre lecteur DVD-magnétoscope à la borne DIGITAL AUDIO IN (COAXIAL) de votre amplificateur. -
Page 21: Connexion D'un Câble D'alimentation Et Configuration Automatique
R A N C H E M E N T S Connexion d'un câble d’alimentation et configuration automatique Le câble d'alimentation de votre lecteur DVD- magnétoscope doit être branché à une prise murale standard de 120 V/60 Hz. Evitez d'actionner des boutons de votre télécommande ou de l'unité... -
Page 22: Sélection D'une Langue De Menu
C h a p i t r e 3 O N F I G U R AT I O N N I T I A L E Sélection d’une langue de menu Pour changer la langue du MENU d'affichage à l'écran en anglais, français ou espagnol, respectez les étapes suivantes. -
Page 23: Réglage De L'horloge
O N F I G U R AT I O N N I T I A L E Réglage de l’horloge Ce menu sert à régler l'heure actuelle Vous devez régler l'heure afin de pouvoir utiliser l'enregistrement programmé. Réglage automatique de l’horloge Appuyez sur le bouton MENU. -
Page 24: Réglage Manuel De L'horloge
O N F I G U R AT I O N N I T I A L E Fuseau Horaire Appuyez sur les boutons "/# Fuseau horaire : Automatique Automatique Mountain pour sélectionner Fuseau Atlantic Pacific Eastern Alaska Horaire, puis appuyez sur le Central Hawaii % ou ENTER. - Page 25 O N F I G U R AT I O N N I T I A L E Réglage Initial Langue : Français SETUP Appuyez sur les boutons "/# L’horloge Chaînes buttons to select Setup, then Affi. du Panneau : Auto Coupure Auto : Non % ou ENTER.
-
Page 26: Mémorisation Des Chaînes
O N F I G U R AT I O N N I T I A L E Mémorisation des chaînes Sélection de la source du signal vidéo Cette fonction vous permet de régler manuellement la bande du tuner de votre lecteur DVD-magnétoscope sur l'antenne ou le réseau câblé, en fonction du système que vous avez relié... -
Page 27: Enregistrement Des Chaînes Dans La Mémoire (Méthode Automatique)
O N F I G U R AT I O N N I T I A L E Enregistrement des chaînes dans la mémoire (méthode automatique) La mémorisation automatique des chaînes recherche et enregistre automatiquement toutes les chaînes actives de votre zone. Chaînes Ant./Câble : Antenne... -
Page 28: Sélection Du Canal De Sortie Rf
O N F I G U R AT I O N N I T I A L E Sélection du canal de sortie RF Utilisez cette fonction si votre lecteur DVD-magnétoscope est relié au téléviseur au moyen d'un câble d'antenne RF (fréquence radioélectrique). Appuyez sur le bouton MENU. -
Page 29: Sélection De L'affichage Façade
O N F I G U R AT I O N N I T I A L E Sélection de l’affichage façade Vous pouvez régler l'affichage façade de façon à ce que celui-ci soit en mode Forte Luminosité ou en mode Faible luminosité... -
Page 30: Réglage De La Mise Hors Tension Automatique
O N F I G U R AT I O N N I T I A L E Réglage de la mise hors tension automatique Cette fonction permet d'éteindre automatiquement votre lecteur DVD-magnétoscope si aucun signal n'est reçu ou si vous n'appuyez sur aucun bouton pendant une durée déterminée. Appuyez sur le bouton MENU. -
Page 31: Lecture D'un Disque
C h a p i t r e 4 O N C T I O N N E M E N T D U L E C T E U R D V D Lecture d’un disque Avant la lecture Allumez votre téléviseur et réglez-le sur la bonne entrée vidéo de votre télécommande. - Page 32 O N C T I O N N E M E N T D U L E C T E U R D V D L’affichage se fige et le son est coupé. - Appuyez de nouveau sur le bouton (Marche/Pause) pour reprendre la Mise en pause de la lecture lecture.
-
Page 33: Utilisation Des Fonctions Recherche Et Saut
O N C T I O N N E M E N T D U L E C T E U R D V D Utilisation des fonctions Recherche et Saut Au cours de la lecture, vous pouvez faire une recherche rapide dans le chapitre ou la piste et utiliser la fonction saut pour aller à... - Page 34 O N C T I O N N E M E N T D U L E C T E U R D V D Utilisation de la fonction Affichage pendant la lecture d’un DVD/VCD/CD/MPEG4 Pendant la lecture d’un DVD/CD Vous pouvez sélectionner une information dans le menu Fonction du DVD en appuyant sur le bouton MENU.
- Page 35 O N C T I O N N E M E N T D U L E C T E U R D V D Pour quitter le menu, appuyez une nouvelle fois sur le bouton INFO. Remarque Pour accéder au titre souhaité lorsque le disque en comporte plusieurs. Par exemple, si le DVD contient plusieurs films, chaque film est identifié.
-
Page 36: Utilisation Du Menu Disque Et Titre (Lecteur Dvd/Vcd)
O N C T I O N N E M E N T D U L E C T E U R D V D Utilisation du menu Disque et Titre(lecteur DVD/VCD) Le bouton MENU peut être utilisé pendant la lecture pour accéder aux Pendant la lecture d’un DVD, menus Disque ou Titre d’un DVD. -
Page 37: Utilisation Du Menu Fonction (Lecteur Dvd/Vcd)
O N C T I O N N E M E N T D U L E C T E U R D V D Utilisation du menu Fonction (lecteur DVD/VCD) Le bouton MENU peut être utilisé pour accéder, pendant la lecture, aux fonctions Information, Zoom , Signet et Pendant la lecture d’un DVD, EZ View du lecteur DVD. -
Page 38: Lecture Répétée
O N C T I O N N E M E N T D U L E C T E U R D V D Lecture répétée Répétition de la piste, du chapitre, du titre actuel, d’une section choisie (A-B) ou de tout le disque. Pendant la lecture d’un DVD/VCD/CD Pendant la lecture, appuyez sur le bouton REPEAT... - Page 39 O N C T I O N N E M E N T D U L E C T E U R D V D Utilisation de la fonction répétition Pendant la lecture, appuyez sur Chapitre le bouton REPEAT de la télécommande.
-
Page 40: Lecture Lente Répétée
O N C T I O N N E M E N T D U L E C T E U R D V D Lecture lente répétée Cette fonction permet de répéter en vitesse lente des séquences comportant du sport, de la danse, un concert instrumental, etc. -
Page 41: Réglage Du Format De L'image (Vue Ez)
O N C T I O N N E M E N T D U L E C T E U R D V D Réglage du format de l’image (Vue EZ) Réglez le format de l’image (longueur x largeur) du téléviseur afin que le lecteur DVD affiche les films au format convenant à... - Page 42 O N C T I O N N E M E N T D U L E C T E U R D V D Si vous utilisez un téléviseur 4:3 Pour les disques au format 4:3 Pour les disques au format 16/9 - FORMAT CLASSIQUE - 4:3 Letter Box Affiche le contenu du titre du DVD au format 4:3...
-
Page 43: Sélection De La Langue Audio
O N C T I O N N E M E N T D U L E C T E U R D V D Sélection de la langue audio Vous pouvez sélectionner rapidement et facilement la langue audio voulue grâce au bouton AUDIO. Utilisation du bouton AUDIO (DVD/VCD/CD/MPEG4) Remarques... -
Page 44: Sélection De La Langue Des Sous-Titres
O N C T I O N N E M E N T D U L E C T E U R D V D Sélection de la langue des sous-titres Vous pouvez sélectionner rapidement et facilement le sous-titre voulu grâce au bouton SUBTITLE. Utilisation du bouton SUBTITLE (lecteur DVD/MPEG4) Remarques Pour changer le sous-titre voulu dans le... -
Page 45: Changement De L'angle De Caméra
O N C T I O N N E M E N T D U L E C T E U R D V D Changement de l’angle de caméra Lorsqu’un DVD contient plusieurs angles pour une scène donnée, vous pouvez utiliser la fonction ANGLE. - Page 46 O N C T I O N N E M E N T D U L E C T E U R D V D Rappel d’une scène marquée Appuyez sur le bouton MARK de la télécommande en cours de lecture. Appuyez sur les boutons %&$ pour sélectionner une scène marquée.
-
Page 47: Utilisation De La Fonction Zoom (Lecteur Dvd)
O N C T I O N N E M E N T D U L E C T E U R D V D Utilisation de la fonction Zoom (lecteur DVD) Pendant la lecture d’un DVD, appuyez sur le bouton MENU de la télécommande. -
Page 48: Séquences Animées Pour Mp3/Wma/Jpeg/Mpeg4
O N C T I O N N E M E N T D U L E C T E U R D V D Séquences animées pour MP3/WMA/JPEG/MPEG4 Les disques MP3/WMA/JPEG/MPEG4 contiennent des chansons et/ou des images individuelles pouvant être organisées en dossiers, comme cela vous est représenté... -
Page 49: Lecteur De Disques Mp3/Wma
O N C T I O N N E M E N T D U L E C T E U R D V D Lecture de disques MP3/WMA O f f 0 0 : 0 0 : 2 3 1 _ m p 3 Ouvrez le tiroir disque. - Page 50 O N C T I O N N E M E N T D U L E C T E U R D V D Fichier CD-R MP3/WMA Utilisez un taux de transfert de décompression d’au Lorsque vous enregistrez des fichiers MP3 ou WMA moins 64 Kbps pour enregistrer des fichiers WMA.
-
Page 51: Lecteur De Mpeg4
O N C T I O N N E M E N T D U L E C T E U R D V D Lecture de MPEG4 Fonction lecture MPEG4 Les fichiers AVI utilisés contiennent les données audio et vidéo. Seuls les fichiers au format AVI dotés de l'extension “.avi”... - Page 52 O N C T I O N N E M E N T D U L E C T E U R D V D Description des fonctions disponibles pour Fichier AVI d'un CD-R les fichiers MPEG-4 Cet appareil peut lire les formats de compression vidéo suivants dans le format de fichier AVI : Fonction Description...
-
Page 53: Lecture De Programme Et Lecture Aléatoire
O N C T I O N N E M E N T D U L E C T E U R D V D Lecture de programme et lecture aléatoire Vous pouvez écouter des chansons en mode aléatoire ou dans la séquence souhaitée. Il est possible de programmer jusqu’à... -
Page 54: Lecture D'un Cd Image
O N C T I O N N E M E N T D U L E C T E U R D V D Lecture d’un CD image Sélectionnez le dossier souhaité puis appuyez sur le bouton ENTER. Appuyez sur les boutons #&"... - Page 55 O N C T I O N N E M E N T D U L E C T E U R D V D Disques JPEG CD-R Seuls les fichiers possédant une extension « .jpg » et « .JPG » peuvent être lus. - Si le disque n'est pas fermé, la lecture débute plus tardivement et vous ne pouvez pas lire l'ensemble de vos fichiers enregistrés.
-
Page 56: Utilisation Du Menu Configuration
D V D O N C T I O N N E M E N T E C T E U R Utilisation du menu Configuration Grâce au menu Configuration, vous pouvez personnaliser votre lecteur DVD en sélectionnant différentes préférences relatives à la langue, en définissant un contrôle parental et même, en configurant votre lecteur en fonction du type d'écran de votre téléviseur. -
Page 57: Configuration Des Paramètres De Langue
D V D O N C T I O N N E M E N T E C T E U R Configuration des paramètres de langue Si vous réglez préalablement les options aucun menu de lecteur sur le menu disque avec affichage à... - Page 58 D V D O N C T I O N N E M E N T E C T E U R Fonction Langue Sélectionnez “Autres” si la langue Menus du Disque que vous désirez ne figure pas dans Langue des Menus du Disque la liste.
-
Page 59: Configuration Des Options Audio
D V D O N C T I O N N E M E N T E C T E U R Configuration des options audio Les options audio vous permettent de régler le son de votre système audio externe. Lorsque le lecteur DVD est en mode Arrêt, appuyez sur le bouton... -
Page 60: Options Audio
D V D O N C T I O N N E M E N T E C T E U R Options audio Sortie numérique Sélectionnez Flot binaire lorsque vous Options Audio connectez votre appareil à un décodeur PCM : conversion en audio Sortie Numérique : PCM : Non... -
Page 61: Configuration Des Options D'affichage
D V D O N C T I O N N E M E N T E C T E U R Configuration des options d’affichage Les options d'affichage vous permettent de configurer différentes fonctions vidéo du lecteur. Lorsque l'appareil est en mode Arrêt, appuyez sur le bouton MENU de la télécommande. - Page 62 D V D O N C T I O N N E M E N T E C T E U R Options d'affichage Format Ecran En fonction de votre type de téléviseur, il est possible que vous souhaitiez procéder à un réglage de l'écran (format de l'image) - Format “Boîte à...
-
Page 63: Configuration Du Contrôle Parental
D V D O N C T I O N N E M E N T E C T E U R Configuration du contrôle parental La fonction de contrôle parental peut être configurée si les DVD ont fait l'objet d'une évaluation vous permettant de contrôler le genre des DVD regardés par les membres de votre famille. - Page 64 D V D O N C T I O N N E M E N T E C T E U R Configuration du niveau d'évaluation Lorsque l'appareil est en mode Arrêt, appuyez sur le bouton MENU de la télécommande. Réglage DVD SETUP Langue...
-
Page 65: Modification Du Mot De Passe
D V D O N C T I O N N E M E N T E C T E U R Modification du mot de passe Lorsque l'appareil est en mode Arrêt, appuyez sur le bouton MENU de la télécommande. Réglage DVD SETUP Langue... -
Page 66: Insertion Et Éjection D'une Cassette Vidéo
C h a p i t r e 5 O N C T I O N N E M E N T D U M A G N E T O S C O P E Dans ce chapitre, vous apprendrez comment lire une cassette vidéo, comment utiliser le compteur de temps et les fonctions d'arrêt mémoire, et enfin comment enregistrer un programme télévisé... -
Page 67: Lecture D'une Cassette Vidéo Pré-Enregistrée
O N C T I O N N E M E N T D U M A G N E T O S C O P E Lecture d’une cassette vidéo pré- enregistrée Lecture de la cassette Pour plus d’informations concernant la languette de sécurité, reportez- vous page 78. -
Page 68: Fonctions De Lecture Magnétoscope Spéciales
O N C T I O N N E M E N T D U M A G N E T O S C O P E Fonctions de lecture magnétoscope spéciales Lors de la lecture d'une cassette vidéo, vous pouvez accéder à différentes fonctions de lecture spéciales : Image figée, Avance image par image, Sauter, Répéter, etc. -
Page 69: Utilisation De L'alignement Automatique
O N C T I O N N E M E N T D U M A G N E T O S C O P E Utilisation de l'alignement automatique Le réglage Alignement supprime les lignes blanches apparaissant parfois en cours de lecture en raison de légères différences existant dans les platines d'enregistrement. -
Page 70: Sélection D'un Type De Cassette
O N C T I O N N E M E N T D U M A G N E T O S C O P E Sélection d’un type de cassette Si vous souhaitez utiliser le compteur de bande pour afficher le temps restant sur la cassette, vous devez indiquer le type de cassette insérée. -
Page 71: Réglage De La Lecture Automatique
O N C T I O N N E M E N T D U M A G N E T O S C O P E Réglage de la lecture automatique Si vous souhaitez que la lecture démarre automatiquement lorsque vous insérez une cassette vidéo dans le magnétoscope, activez l'option Lecture automatique. -
Page 72: Réglage De La Répétition Automatique
O N C T I O N N E M E N T D U M A G N E T O S C O P E Réglage de la répétition automatique Si vous souhaitez que la lecture de vos cassettes vidéo se fasse de manière répétée, activez Répétition automatique. -
Page 73: Utilisation Du Compteur De Bande
O N C T I O N N E M E N T D U M A G N E T O S C O P E Utilisation du compteur de bande Le compteur de bande : - Indique le temps écoulé dans les modes lecture et enregistrement (heures, minutes et secondes). - Est remis à... -
Page 74: Utilisation De La Fonction Assemble Edit
O N C T I O N N E M E N T D U M A G N E T O S C O P E Utilisation de la fonction Assemble Edit Cette fonction vous permet de démarrer un nouvel enregistrement à un point spécifique de la cassette sans décrochage important entre les scènes. -
Page 75: Sélection Du Mode Audio Output
O N C T I O N N E M E N T D U M A G N E T O S C O P E Sélectionnez la source depuis laquelle vous souhaitez enregistrer en appuyant sur : CH " ou #pour - Le bouton les chaînes de télévision. -
Page 76: Recherche D'une Séquence Spécifique
O N C T I O N N E M E N T D U M A G N E T O S C O P E Recherche d’une séquence spécifique Chaque fois que vous enregistrez une cassette sur le lecteur DVD-magnétoscope, un “index” se fixe automatiquement sur la cassette lorsque l’enregistrement démarre. - Page 77 O N C T I O N N E M E N T D U M A G N E T O S C O P E Système de recherche variable Aller à [0:00:00] Fonctions du VCR Utilisez cette fonction lorsque SETUP Aller à...
-
Page 78: Enregistrement De Base
O N C T I O N N E M E N T D U M A G N E T O S C O P E Enregistrement de base Vous pouvez enregistrer un programme télévisé en cours de diffusion en insérant une cassette vierge dans le magnétoscope et en appuyant sur le bouton REC. -
Page 79: Fonctions D'enregistrement Particulières
O N C T I O N N E M E N T D U M A G N E T O S C O P E Remarque L’enregistrement depuis le lecteur DVD vers le magnétoscope n’est pas possible. Appuyez sur le bouton REC de la télécommande ou de la façade. -
Page 80: Utilisation De L'enregistrement Immédiat
O N C T I O N N E M E N T D U M A G N E T O S C O P E Regarder un DVD lors d'un enregistrement Insérez un DVD dans le tiroir disque, puis appuyez sur le bouton (Lecture/Pause). -
Page 81: Sélection De La Vitesse D'enregistrement
O N C T I O N N E M E N T D U M A G N E T O S C O P E En mode Enregistrement, appuyez à nouveau sur le bouton REC pour activer l'enregistrement immédiat (OTR). -
Page 82: Utilisation De L'enregistrement Programmé
O N C T I O N N E M E N T D U M A G N E T O S C O P E Utilisation de l’enregistrement programmé Insérez une cassette vidéo vierge dans la fente du magnétoscope. Assurez-vous de laisser intacte la languette de sécurité... - Page 83 O N C T I O N N E M E N T D U M A G N E T O S C O P E Sélection de la vitesse automatique Si la durée de la cassette vidéo n'est pas suffisante pour un enregistrement programmé...
-
Page 84: Dépannage
E F E R E N C E Dépannage Avant de contacter un centre de service agréé Samsung, effectuez les vérifications élémentaires suivantes. Si vous ne savez pas résoudre vous-même le problème après avoir lu les instructions ci-dessus, veuillez noter : - Le modèle et le numéro de série se trouvant à... - Page 85 E F E R E N C E Problème Action Page • Appuyez sur le bouton pendant plus de 5 secondes sans disque L'écran est bloqué dans le lecteur. Tous les réglages se réinitialisent sur les réglages usine. • Pour un démarrage à froid sans disque dans le lecteur, appuyez simultanément pendant 5 secondes sur les boutons de la Mot de passe...
-
Page 86: Caractéristiques Techniques
120V CA, 60 Hz, 25 watts Système ENVIRONNEMENT 5 - 40°C ; humidité 10 % - 75 % POIDS 13.8 lbs. - Samsung Electronics Co., Ltd se réserve le droit de modifier les caractéristiques sans préavis. - Le poids et les dimensions sont approximatives. FRE-86... - Page 87 Contactez SAMSUNG WORLD WIDE Si vous avez des commentaires our des questions concernant les produits Samsung, contactez le centre de service à la clientèle SAMSUNG. ☎ Region Country Customer Care Center Web Site CANADA 1-800-SAMSUNG (7267864) www.samsung.com/ca North America MEXICO 01-800-SAMSUNG (7267864) www.samsung.com/mx...
- Page 88 GARANTIE LIMITÉE À L’ACHETEUR INITIAL Samsung Electronics Canada Inc. (SECA) garantit ce produit contre tout défaut de fabrication. SECA garantit aussi que si cet appareil ne fonctionne pas convenablement durant la période de garantie SECA se réservera le droit de réparer ou de remplacer l’appareil défectueux. Toutes les réparations sous garantie doivent être effectuées par un Centre de service autorisé...
- Page 89 Instruction Manual DVD-V5650 AK68-00956G.01 www.samsung.com/ca...
-
Page 90: Important Safety Instructions
A F E T Y N S T R U C T I O N S Important Safety Instructions 1) Read these instructions. 2) Keep these instructions. 3) Heed all warnings. 4) Follow all instructions. 5) Do not use this apparatus near water. 6) Clean only with dry cloth. - Page 91 A F E T Y N S T R U C T I O N S Precautions TO REDUCE THE RISK OF ELECTRIC SHOCK, DO NOT REMOVE THE COVER (OR BACK). NO USER-SERVICEABLE PARTS ARE INSIDE. REFER SERVICING TO QUALIFIED SERVICE PERSONNEL. This symbol indicates This symbol indicates “dangerous voltage”...
-
Page 92: Handling Cautions
A F E T Y N S T R U C T I O N S CAUTION THIS PRODUCT UTILIZES A LASER. USE OF CONTROLS OR ADJUSTMENTS OR PERFORMANCE OF PROCEDURES OTHER THAN THOSE SPECIFIED HEREIN MAY RESULT IN HAZARDOUS RADIATION EXPOSURE. DO NOT OPEN COVER AND DO NOT REPAIR YOURSELF. -
Page 93: Before You Start
E F O R E Y O U S TA R T Before you start Accessories Batteries-2EA Video/Audio Cable Remote Control Antenna Cable User’s Guide 1.5V(AAA) (AC39-00073A) (AK59-00051A) (AC39-42001J) (AK68-00956G) (AC43-12002H) Install Batteries in the Remote Control Open the battery cover on the back of the remote control. - Page 94 A B L E O F O N T E N T S Table of Contents Safety Instructions ............................2 Important Safety Instructions ........................2 Precautions ..............................3 Before you start ............................5 Accessories............................5 Install Batteries in the Remote Control ....................5 Chapter 1: Setup General Features............................8 Disc Type and Characteristics ........................9...
- Page 95 A B L E O F O N T E N T S Chapter 4: DVD Operations Playing a Disc ..............................31 Using the Search and Skip Functions ......................33 Using the Display Function ..........................34 Using the Disc and Title Menu (DVD/VCD) ....................36 Using the Function Menu (DVD/VCD) ......................37 Repeat Play ..............................38 Slow Repeat Play ............................40...
-
Page 96: General Features
QUESTIONS REGARDING YOUR TV SET - Super Audio CD (CD, HD layer) COMPATIBILITY WITH THIS DVD-VCR, PLEASE - CDGs play audio only, not graphics. CONTACT SAMSUNG'S CUSTOMER SERVICE - DVD-RW (VR mode) CENTER.” - Non-finalizing DVD-RW, -R, DVD+RW, and +R disc. -
Page 97: Disc Type And Characteristics
E T U P Disc Type and Characteristics This DVD-VCR is capable of playing the following types of discs with the corresponding logos: Types (Logos) Recording Types Disc Size Max. Playing Time Characteristics Disc - DVD contains excellent sound Single-sided 240 min. 5”... -
Page 98: Description
E T U P Description Front Panel Controls DISC TRAY DVD/VCR Place the disc here. Press to view DVD or VCR mode. VCR Deck 11 EZ VIEW Insert a standard VHS video tape. The aspect ratio of a picture can easily be adjusted to your TV's screen size. -
Page 99: Rear Panel
E T U P Rear Panel ❶ ❷ ❸ ❹ ➎ ❻ ❼ ❽ AUDIO OUT RF IN (FROM ANT.) Connect to the Audio input jacks of your Connect the RF Antenna cable to your DVD- television. You can use as audio output terminal VCR. -
Page 100: Tour Of The Remote Control
E T U P Tour of the Remote Control POWER button 14 VCR button Press to turn the DVD-VCR Use to operate VCR. on and off. DVD button NUMBER Buttons Use to operate DVD. AUDIO button F.ADV/SKIP/INPUT SEL. Use this button to access button Ú... -
Page 101: Connecting The Antenna Cable
C h a p t e r 2 O N N E C T I O N S Connecting the Antenna Cable There are several ways to connect your DVD-VCR. Select one of the following antenna connections that best suits you below. Method 1: Antenna + DVD-VCR + TV: No Cable box ■... -
Page 102: Method2: Antenna + Dvd-Vcr + Tv: Cable Box With Many Scrambled Channels
O N N E C T I O N S Method2: Antenna + DVD-VCR + TV: Cable box with many scrambled channels Wall You can record channels by selecting the channel on the cable box. You cannot record one channel while watching another channel. -
Page 103: Before Connecting The Dvd-Vcr
O N N E C T I O N S Before Connecting the DVD-VCR Always turn off the DVD-VCR, TV, and other components before you connect or disconnect any cables. - Refer to the user’s manual of the additional components (such as a TV) you are connecting for more information on those particular components. -
Page 104: Connection To A Tv (S-Video)
O N N E C T I O N S Connection to a TV (S-Video) Connecting to your TV using an S-Video cable. - You will enjoy high quality images. S-Video separates the picture element into black and white(Y) and color(C) signals to present clearer images than regular video input mode. -
Page 105: Connection To A Tv (Interlace)
O N N E C T I O N S Connection to a TV (Interlace) Connecting to your TV using Component video cables. - You will enjoy high quality and accurate color reproduction images. Component video separates the picture element into black and white(Y), blue(P ), red(P ) signals to present clear and clean images. -
Page 106: Connection To A Tv (Progressive)
O N N E C T I O N S Connection to a TV (Progressive) Using component video cables (not included), connect the COMPONENT VIDEO OUT terminal on the rear of the DVD-VCR to the COMPONENT terminal of your Using the audio cables, connect from the AUDIO or LINE OUT AUDIO (red and white) terminals on the rear of the DVD-VCR to the... -
Page 107: Connection To An Audio System
O N N E C T I O N S Connection to an Audio System Connection to an Audio System (2 Channel Amplifier) Using the audio cables, connect the (LINE) AUDIO (red and white) OUT terminals on the rear of the DVD-VCR to the AUDIO (red and white) IN terminals of the... - Page 108 O N N E C T I O N S Connection to an Audio System (Dolby digital, MPEG2 or DTS Amplifier) Using a coaxial cable (not included), connect the DIGITAL AUDIO OUT (COAXIAL) terminal on the rear of the DVD-VCR to the DIGITAL AUDIO IN (COAXIAL) terminal of the Amplifier.
-
Page 109: Connecting A Power Cord & Auto Setup
O N N E C T I O N S Connecting a Power Cord & Auto Setup Your DVD-VCR's power cord should be plugged into a standard 120V/60Hz wall outlet. Avoid pressing any buttons on the remote control or on the unit during Auto Setup. -
Page 110: Selecting A Menu Language
C h a p t e r 3 N I T I A L E T U P Selecting a Menu Language To change the on-screen MENU language to English, French or Spanish, follow these steps. Press the MENU button. Press the "&# buttons to Setup, then press the % select... -
Page 111: Setting The Clock
N I T I A L E T U P Setting the Clock This menu is used to set the current time. You need to set the time to use timer recording. Setting the Clock Automatically Press the MENU button. Press the "&# buttons to select Setup, then press the %... -
Page 112: Setting The Clock Manually
N I T I A L E T U P Press the "&# buttons to select Time Zone, then press % or ENTER button. Select the time zone of your area by using the "&#,$&% buttons, then press the ENTER button. - Page 113 N I T I A L E T U P Press the "&# buttons to Setup, then press the % select or ENTER button. Press the "&# buttons to Clock, then press the % select or ENTER button. Press the "&# buttons to select Manual Clock, then % or ENTER button.
-
Page 114: Memorizing The Channels
N I T I A L E T U P Memorizing the Channels Selecting the Video Signal-source This feature allows you to manually set the DVD-VCR’s tuner band to Antenna or Cable, whichever you connected to the Antenna In jack during initial setup. Use this setting only if Auto Setup detected the incorrect tuner band, i.e. -
Page 115: Storing Channels In Memory (Automatic Method)
N I T I A L E T U P Storing Channels in Memory (Automatic Method) Auto Channel Memory will automatically seek and store all active channels in your area. Press the "&# buttons to select Auto Channel Memory, % or ENTER then press the button. -
Page 116: Selecting The Rf Output Channel
N I T I A L E T U P Selecting the RF Output Channel Use this feature if the DVD-VCR is connected to your TV using the RF antenna cable. Press the MENU button. Press the "&# buttons to Setup, then press the % select or ENTER button. -
Page 117: Selecting The Front Panel Display
N I T I A L E T U P Selecting the Front Panel Display You can set the Front Panel Display to be bright all the time, dim all the time, or to automatically dim during power off. Press the MENU button. Press the "&# buttons to select Setup, then press the %... -
Page 118: Setting The Power Off Automatically
N I T I A L E T U P Setting the Power Off Automatically This feature automatically turns off your DVD-VCR if no signal is received and you do not press any buttons for the selected time. Press the MENU button. Press the "&# buttons to select Setup, then press the %... -
Page 119: Playing A Disc
C h a p t e r 4 D V D O P E R AT I O N S Playing a Disc Before Play Turn on your TV and set it to the correct Video Input on your TV's remote control. - If you connected an external Audio System, turn on your Audio System and set it to the correct Audio Input. - Page 120 D V D O P E R AT I O N S Screen stops, no sound. - To resume, press the (Play/Pause) button once again. Pausing Play Press the (Play/Pause) Note button on your remote control If the player is left for about 5 minutes in or on the front panel during pause mode, it will stop.
-
Page 121: Using The Search And Skip Functions
D V D O P E R AT I O N S Using the Search and Skip Functions During play, you can search quickly through a chapter or track, and use the skip function to jump to the next selection. Searching through a Chapter or Track If you want to search at a faster speed... -
Page 122: Using The Display Function
D V D O P E R AT I O N S Using the Display Function When Playing a DVD/VCD/CD/MPEG4 You can select information in the DVD Function menu by pressing the MENU button. During play, press the INFO button on the remote control. Press the "#$ buttons to select the desired item. - Page 123 D V D O P E R AT I O N S To exit the menu, press the INFO button again. Note To access the desired title when there is more than one in the disc. For example, if there is more than one movie on a DVD, each movie will be identified. TITLE CHAPTER Most DVD discs are recorded in chapters so that you can quickly find a specific passage (similar to...
-
Page 124: Using The Disc And Title Menu (Dvd/Vcd)
D V D O P E R AT I O N S Using the Disc and Title Menu (DVD/VCD) MENU button can be used to access Disc and title menus on a DVD during During playback of a DVD disc, playback. -
Page 125: Using The Function Menu (Dvd/Vcd)
D V D O P E R AT I O N S Using the Function Menu (DVD/VCD) MENU button can be used to access DVD functions such as Information, Zoom, Bookmark, Repeat and EZ view During the playback of a DVD menu during DVD playback. -
Page 126: Repeat Play
D V D O P E R AT I O N S Repeat Play Repeat the current track, chapter, title, a chosen section (A-B), or all of the disc. When playing a DVD/VCD/CD During play, press the REPEAT button on the remote control. Repeat screen appears. - Page 127 D V D O P E R AT I O N S Using the A-B Repeat function During play, press the REPEAT Chapter button on the remote control. Repeat screen appears. Track Press the &#% buttons to Chapter Title A A - B select Chapter VCD/CD...
-
Page 128: Slow Repeat Play
D V D O P E R AT I O N S Slow Repeat Play This feature allows you to slowly to repeat scenes containing sports, dancing, musical instruments being played etc., so you can study them more closely. When playing a DVD During play, press the (Play/Pause) button. -
Page 129: Adjusting The Aspect Ratio (Ez View)
D V D O P E R AT I O N S Adjusting the Aspect Ratio (EZ View) Set the aspect ratio (length x width) of your TV screen so the DVD-VCR will display movies at the appropriate size for your television. To Playback using Aspect Ratio (DVD) The EZ View feature is not available... - Page 130 D V D O P E R AT I O N S If you are using a 4:3 TV For 4:3 aspect ratio discs For 16:9 aspect ratio discs - NORMAL SCREEN - 4:3 Letter Box Displays the content of the DVD title in 4:3 Displays the content of the DVD title in 16:9 aspect ratio.
-
Page 131: Selecting The Audio Language
D V D O P E R AT I O N S Selecting the Audio Language You can select a desired audio language quickly and easily with the AUDIO button. Using the AUDIO button (DVD/VCD/CD/MPEG4) Notes To change the desired audio in the Disc Menu, press the DISC MENU button. -
Page 132: Selecting The Subtitle Language
D V D O P E R AT I O N S Selecting the Subtitle Language You can select a desired subtitle quickly and easily with the SUBTITLE button. Using the SUBTITLE button (DVD/MPEG4) Notes To change the desired subtitle in the Disc Menu, press the DISC MENU button. -
Page 133: Changing The Camera Angle
D V D O P E R AT I O N S Changing the Camera Angle When a DVD contains multiple angles of a particular scene, you can use the ANGLE function. Using the ANGLE button (DVD) If the disc contains multiple angles, the ANGLE appears on the screen. -
Page 134: Recalling A Marked Scene
D V D O P E R AT I O N S Recalling a Marked Scene During play, press the MARK button on the remote control. Press the &#% buttons to select a marked scene. Press the (Play/Pause) button to play the marked scene. -
Page 135: Using The Zoom Function
D V D O P E R AT I O N S Using the Zoom Function (DVD/VCD) During the playback of a DVD disc, press the MENU button on the remote control. Press the "#$ buttons to select Function, then press % or ENTER button. -
Page 136: Clips Menu For Mp3/Wma/Jpeg/Mpeg4
D V D O P E R AT I O N S Clips Menu for MP3/WMA/JPEG/MPEG4 Discs with MP3/WMA/JPEG/MPEG4 contain individual songs and/or pictures that can be organized into folders as shown below. They are similar to how you use your computer to put files into different folders. Open the disc tray. -
Page 137: Mp3/Wma Playback
D V D O P E R AT I O N S MP3/WMA Playback O f f 0 0 : 0 0 : 2 3 1 _ m p 3 Open the disc tray. B e c a u s e Yo u C a c t u s Place the disc on the tray. - Page 138 D V D O P E R AT I O N S CD-R MP3/WMA file Use a decompression transfer rate of at least When you record MP3 or WMA files on CD-R, 64Kbps when recording WMA files. please refer to the following. Sound quality with WMA files basically depends - Your MP3 or WMA files should be ISO 9660 or...
-
Page 139: Mpeg4 Playback
D V D O P E R AT I O N S MPEG4 Playback MPEG4 Play Function AVI files are used to contain the audio and video data. Only AVI format files with the “.avi” extensions can be played. Open the disc tray. - Page 140 D V D O P E R AT I O N S MPEG4 Function Description CD-R AVI file Function Description Reference page During play, press the This unit can play the following video compression Skip button, it moves forward formats within the AVI file format: or backward 5 minutes.
-
Page 141: Program Play & Random Play
D V D O P E R AT I O N S Program Play & Random Play You can listen to songs randomly or in the desired sequence. Up to 20 tracks can be programmed. This function is available only with Audio CDs. Program Play Note Random Play... -
Page 142: Picture Cd Playback
D V D O P E R AT I O N S Picture CD Playback Select the desired folder then press the ENTER button. Press the "#$ buttons to select a Picture file in the clips menu, then press the ENTER button. - Page 143 D V D O P E R AT I O N S CD-R JPEG Discs Only files with the “.jpg” and “.JPG” extensions can be played. - If the disc is not closed, it will take longer to start playing and not all of the recorded files may be played. - Only CD-R discs with JPEG files in ISO 9660 or Joliet format can be played.
-
Page 144: Using The Setup Menu
D V D O P E R AT I O N S Using the Setup Menu The Setup menu lets you customize your DVD-VCR by allowing you to select various language preferences, set up a parental level, even adjust the player to the type of television screen you have. With the unit in Stop mode, press the MENU button on the... -
Page 145: Setting Up The Language Features
D V D O P E R AT I O N S Setting Up the Language Features If you set the player menu on the OSD disc menu, audio and subtitle language in advance, they will come up automatically every time you watch a movie. With the unit in Stop mode, press the MENU button on the... - Page 146 D V D O P E R AT I O N S Language Function Select “Others” if the language you Disc Menu want is not listed. To set the Disc Menu - If the selected language is not Language to your preferred recorded on the disc, the original pre- language, follow these steps.
-
Page 147: Setting Up The Audio Options
D V D O P E R AT I O N S Setting Up the Audio Options Audio Options allows you to set up sound for use with your external audio system. With the DVD in Stop mode, press the MENU button on the remote control. - Page 148 D V D O P E R AT I O N S Audio Options Digital Output PCM: Converts to PCM(2CH) audio. PCM Down Sampling : On Manufactured under license from Dolby - Bitstream: Outputs Dolby Laboratories. “Dolby” and the double-D Digital via the digital symbol are trademarks of Dolby output.
-
Page 149: Setting Up The Display Options
D V D O P E R AT I O N S Setting Up the Display Options Display options enable you to set various video functions of the player. With the unit in Stop mode, press the MENU button on the remote control. -
Page 150: Display Options
D V D O P E R AT I O N S Display Options Aspect Depending on the type of television you have, you may want to adjust the screen setting (aspect ratio). - 4:3 Letter Box: Select when you want to see the total 16:9 ratio screen the DVD supplies, even though you have a TV with a 4:3 ratio screen. -
Page 151: Setting Up The Parental Control
D V D O P E R AT I O N S Setting Up the Parental Control The Parental Control function works in conjunction with DVDs that have been assigned a rating, which helps you control the types of DVDs that your family watches. There are up to 8 rating levels on a disc. With the DVD in Stop mode, press the MENU button on the... -
Page 152: Setting Up The Rating Level
D V D O P E R AT I O N S Setting Up the Rating Level With the unit in stop mode, press the MENU button on the remote control. Press the "#$ buttons to select DVD, then press the % or ENTER button. -
Page 153: Changing The Password
D V D O P E R AT I O N S Changing the Password With the unit in stop mode, press the MENU button on the remote control. Press the "#$ buttons to select DVD, then press the % or ENTER button. DivX(R) Registration Press the "#$ buttons to select... -
Page 154: Video Cassette Tape
C h a p t e r 5 V C R O P E R AT I O N S In this chapter, you will learn how to play a video cassette tape, how to use the time counter and memory stop features, and how to record a program as you are watching TV. -
Page 155: Playing A Pre-Recorded Video Cassette Tape
V C R O P E R AT I O N S Playing a Pre-Recorded Video Cassette Tape Playing the Tape For more information on the safety tab, see page 78. Insert the video cassette tape. If the tape doesn’t begin to play automatically, press the (Play/Pause) button. -
Page 156: Special Vcr Playback Features
V C R O P E R AT I O N S Special VCR Playback Features While a videotape is playing, you can enjoy a variety of special playback features, including Still, Frame Advance, Skip, Repeat, and more. Press the Play/Pause button again to resume normal playback. Frame Advance In the pause mode, press... -
Page 157: Using Automatic Tracking
V C R O P E R AT I O N S Using Automatic Tracking Tracking adjustment removes the white lines that sometimes appear during playback because of slight differences in recording decks. The TRK button will automatically align the recorded tracks with the playback heads to solve this problem. -
Page 158: Selecting The Cassette Type
V C R O P E R AT I O N S Selecting the Cassette Type If you wish to use the tape counter to display the time remaining on a cassette, you must indicate the type of cassette inserted. Press the MENU button on the remote control. -
Page 159: Setting The Auto Play
V C R O P E R AT I O N S Setting the Auto Play If you want your videotapes to play automatically when you insert them, turn on Auto Play. Note Only tapes that are missing the Record Safety Tab will play automatically when Press the MENU button on the inserted (See page 66). -
Page 160: Setting The Auto Repeat
V C R O P E R AT I O N S Setting the Auto Repeat If you want your videotapes to play repeatedly, turn on Auto Repeat. Press the MENU button on the remote control. Press the "$# buttons to select VCR, then press the % or ENTER button. -
Page 161: Using The Tape Counter
V C R O P E R AT I O N S Using the Tape Counter The tape counter: - Indicates the elapsed time in the play and record modes (hours, minutes and seconds). - Is reset when a cassette is inserted in the DVD-VCR. - Allows you to easily find the beginning of a sequence. -
Page 162: Using The Assemble Edit Function
V C R O P E R AT I O N S Using the Assemble Edit Function This function allows you to start a new recording at a specific position on the cassette while maintaining a very smooth scene change. Insert the cassette to be edited in your DVD-VCR. -
Page 163: Selecting The Audio Output Mode
V C R O P E R AT I O N S Select the source from which you wish to record by pressing: CH " or # button for - The television channel. - The INPUT SEL. button for LINE1 or LINE2 input source. -
Page 164: Searching For A Specific Sequence
V C R O P E R AT I O N S Searching for a Specific Sequence Each time you record a cassette on this DVD-VCR, an “index” is automatically marked on the tape when recording starts. The Search function allows you to fast-forward or rewind to a specific index and start playback from that point. Depending on the direction selected, the indexes are numbered as follows: Prev Seq. -
Page 165: Variable Search System
V C R O P E R AT I O N S Variable Search System To [0:00:00] Stop Use this feature when you want to search for the 0:00:00 counter position on a cassette. Press the CLEAR button at the point on the tape where you want to set the counter to [0:00:00]. -
Page 166: Basic Recording
V C R O P E R AT I O N S Basic Recording You can record a TV show in progress by inserting a blank tape and pressing the REC button. You can even add time in 30-minute increments up to 4 hours by pressing the REC button repeatedly; see page 81. -
Page 167: Special Recording Features
V C R O P E R AT I O N S Note Recording from the DVD to the VCR is not possible. Press the REC button on the remote control or front panel. For options while recording is in progress, see “Special Recording Features”... -
Page 168: Using One-Touch Recording
V C R O P E R AT I O N S To Watch a DVD while Recording Insert a DVD in the DVD tray and press the (Play/Pause). The output will automatically change to the DVD. To Add Recording Time One-Touch Recording (OTR) below. -
Page 169: Selecting The Recording Speed
V C R O P E R AT I O N S While in Record mode, press REC button again to activate One-Touch Recording (OTR). Record length 0:30 appears on the On-screen display and the DVD-VCR will record for exactly 30 minutes. Record length 0:30... -
Page 170: Making A Timer Recording
V C R O P E R AT I O N S Making a Timer Recording Insert a blank videotape into the VCR deck. Be sure to leave the Record Safety Tab intact. With the Timer Recording function, you can program up to 7 events at a time to record up to a month in advance. - Page 171 V C R O P E R AT I O N S Selecting Auto Speed If the length of the videotape is not long enough for a timer recording in the SP mode, set the recording tape speed to “Auto”. Recording will start in the SP mode. If the length is not long enough, the tape speed will automatically change from SP mode to SLP mode.
-
Page 172: Troubleshooting
If you are unable to solve the problem after reading the above instructions, note: - The model and serial number on the rear of your DVD-VCR - The warranty information - A clear description of the problem Then contact your nearest SAMSUNG service center. Identifying DVD Problems Problem Action Page •... - Page 173 E F E R E N C E Problem Action Page • Press the button for more than 5 seconds with no disc in The screen is the unit. All settings will revert to the factory settings. blocked • From a cold start with no disc in unit, press the button Forgot password simultaneously on the front panel for 5 seconds.
-
Page 174: Technical Specifications
0.003 % POWER REQUIREMENT 120V AC, 60 Hz, 25 watts SYSTEM ENVIRONMENT 41-104ûF (5-40ûC); 10%-75% humidity WEIGHT 13.8 lbs. - Samsung Electronics Co., Ltd reserves the right to change the specifications with out notice. - Weight and dimensions are approximate. ENG-86... - Page 175 Contact SAMSUNG WORLD WIDE If you have any questions or comments relating to Samsung products, please contact the SAMSUNG customer care centre. ☎ Region Country Customer Care Center Web Site CANADA 1-800-SAMSUNG (7267864) www.samsung.com/ca North America MEXICO 01-800-SAMSUNG (7267864) www.samsung.com/mx U.S.A...
-
Page 176: Limited Warranty To Original Purchaser
LIMITED WARRANTY TO ORIGINAL PURCHASER Samsung Electronics Canada Inc.(SECA), warrants that this product is free from defective material and workmanship. SECA further warrants that if this product falls to operate properly within the specified warranty period and the failure is due to improper workmanship or defective materials, SECA will repair or replace the product at its option.
Need help?
Do you have a question about the DVD-V5650 and is the answer not in the manual?
Questions and answers