Advertisement
Advertisement
Table of Contents

Related Manuals for Traxxas DISRUPTOR Disruptor 4S


Summary of Contents for Traxxas DISRUPTOR Disruptor 4S
- Page 1 MODEL 106064-4 owner s manual ’...
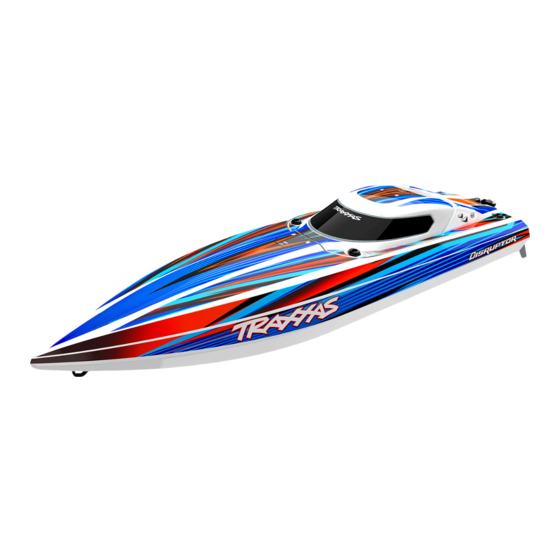
- Page 2 INTRODUCTION The all-new 4s Disruptor from Traxxas is the perfect brushless boat for We want you to feel confident that you own one of the best- BEFORE YOU PROCEED all your marine adventures. At 26” long, Disruptor is quick and agile...
-
Page 3: Before You Proceed
Carefully read and follow all instructions in this and any Terms of Use: Traxxas accompanying materials to prevent serious damage to your This product is surrendered by Traxxas to the purchaser with the 6250 Traxxas Way McKinney, Texas 75070 model. Failure to follow these instructions will be considered... -
Page 4: Safety Precautions
SAFETY PRECAUTIONS All of us at Traxxas want you to safely enjoy your new model. • Due to the high-performance nature of the electric motor, it can Operate your model sensibly and with care, and it will be exciting, become hot during use. Do not touch the motor when installing All instructions and safe, and fun for you and those around you. - Page 5 As a reminder, all • ALWAYS use a Traxxas iD charger to charge Traxxas iD batteries. batteries should be recycled at the end of their useful life.
- Page 6 SAFETY PRECAUTIONS (continued from previous page) • DO NOT leave the charger and battery unattended while • ALWAYS unplug the charger and disconnect the battery when not charging, discharging, or anytime the charger is ON with a battery in use. connected.
-
Page 7: Tools, Supplies And Required Equipment
1.5mm “L” wrench Boat stand model, but are a good idea to include in any R/C toolbox: • Safety glasses • Traxxas Ultra Premium Tire Glue, Part #6468 (CA glue) • Hobby knife • Side cutters and/or needle nose pliers... - Page 8 DISRUPTOR OVERVIEW Motor Mount Motor Receiver Box Traxxas High-Current Connector Battery Strap Channel Rudder Support LED Light Pipe Hull Propeller Nut Propeller Steering Linkage Rudder Arm Collet Battery Strap Drive Dog Rudder Support Trim Tab & Turn Fin Drive Strut...
-
Page 9: Quick Start: Getting Up To Speed
QUICK START: GETTING UP TO SPEED The following guide is an overview of the procedures for getting your model running. Look for the Quick Start logo on the bottom corners of Quick Start pages. The Quick Start Guide is not intended to replace the 1. - Page 10 TQ 2.4GHz radio system. For additional handling, high capacity, and can last up to 1000 charging cycles. information and how-to videos, visit Traxxas.com. Good charging procedures are required to reduce the possibility RADIO AND POWER SYSTEM TERMINOLOGY of developing a “memory”...
- Page 11 TRAXXAS TQ 2.4GHz RADIO SYSTEM IMPORTANT RADIO SYSTEM PRECAUTIONS 2-channel radio system - The TQ 2.4GHz radio system, consisting of • Do not kink the receiver antenna wire. Kinks in the antenna wire the receiver, the transmitter, and the servos. The system uses two To prevent loss of radio range will reduce range.
- Page 12 TRAXXAS TQ 2.4GHz RADIO SYSTEM WIRING DIAGRAM ESC/Motor Wiring Diagram Your model is equipped with the Traxxas TQ 2.4GHz transmitter. The transmitter has two channels: Channel one operates the steering, and channel two operates the throttle. The receiver Brushless Motor (see side bar for proper inside the model has three output channels.
- Page 13 Make certain you choose the correct type of charger for the batteries solid green light. batteries. you select. Traxxas recommends you choose a genuine Traxxas EZ- If the status LED flashes red, the Caution: Discontinue running Peak iD charger for safer charging and maximum battery life and...
- Page 14 TRAXXAS TQ 2.4GHz RADIO SYSTEM REMOVING AND INSTALLING THE HATCH INSTALLING THE BATTERY PACKS Your model includes an innovative latching system for securing the Disruptor uses hook-and-loop straps Battery iD hatch to the boat hull. to secure the battery pack. Loosen...
- Page 15 TRAXXAS TQ 2.4GHz RADIO SYSTEM RADIO SYSTEM CONTROLS • In order for the transmitter and receiver to bind to one another, the receiver in the model must be turned on within 20 seconds of turning on the transmitter. The transmitter LED will flash fast red, indicating a failure to link.
- Page 16 TRAXXAS TQ 2.4GHz RADIO SYSTEM USING THE RADIO SYSTEM Range-Testing the Radio System The TQ 2.4GHz Radio System has been pre-adjusted at the factory Before each running session with your model, you should range- for correct operation with your model. The adjustment should be Remember, always turn the test your radio system to ensure that it operates properly.
- Page 17 TRAXXAS TQ 2.4GHz RADIO SYSTEM TRANSMITTER LED CODES No matter how fast or far you drive your model, always leave adequate space between you, the model, and others. Never drive LED Color / Pattern Name Notes Setting Up the Antenna directly toward yourself or others.
-
Page 18: Adjusting The Electronic Speed Control
2s, 3s or 4s LiPo battery Battery connector: automatically. power. When you turn your model on, Traxxas High-Current 4. Continue to hold the transmitter trigger at full throttle. After about the speed control’s status LED is green, Connector two seconds, the red LED will blink once (C). - Page 19 ADJUSTING THE ELECTRONIC SPEED CONTROL Thermal Shutdown Protection The VXL-4s Marine is equipped with thermal shutdown protection to guard against overheating caused by excessive current flow. If the operating temperature exceeds safe limits, the VXL-4s Marine will automatically shut down and the ESC’s red LED will blink. The LED will continuously blink red even if the throttle trigger is moved back and forth.
-
Page 20: Driving Your Model
SELF RIGHTING • If the boat starts getting very light on the water (about to blow Your Disruptor is equipped with Traxxas Self Righting to return the over), reduce throttle to settle the hull back into the water. boat to an upright position if it accidentally flips over in the water. - Page 21 ADJUSTING YOUR MODEL RUN TIME Tips for Increasing Run Time Your model is able to achieve long run times due to the greater efficiency • Use a high-quality peak-detecting charger. of the high voltage electrical system. A large factor affecting run time is •...
- Page 22 ADJUSTING YOUR MODEL RECEIVER BOX: MAINTAINING A WATERTIGHT SEAL Removing and Installing Radio Gear 3. Plug ESC and servo wires into the receiver The unique design of the receiver box allows the removal and (see page 12). installation of the receiver without losing the ability to maintain a 4.
-
Page 23: Maintaining Your Model
MAINTAINING YOUR MODEL Your model requires maintenance in order to stay in top running • While the drive cable is removed from the model, dry and condition. The following procedures should be taken very lubricate the bushings in the drive strut. Reinstall the drive cable Always wear eye protection seriously. - Page 24 MAINTAINING YOUR MODEL Radio Tray Removal Disruptor’s unique power module allows you to easily remove the motor, drive system, and electronics as a unit for easy access to the hull interior. With the power module removed, you can easily work on the drive system or electronics without the entire hull taking up your bench space.
-
Page 25: Troubleshooting
The following section addresses some very basic questions you may have While your model is a great performer out of the box, there are steps you can about your model. If you can’t find a solution here, you may call Traxxas take to increase the speed of the boat. - Page 26 ’ MODEL 106064-4 6250 TRAXXAS WAY, McKINNEY, TEXAS 75070 1-888-TRAXXAS 240814 106064-4-OM-EN-R00...
Need help?
Do you have a question about the DISRUPTOR Disruptor 4S and is the answer not in the manual?
Questions and answers