Traxxas TRX4 Sport Assembly Manual
Hide thumbs
Also See for TRX4 Sport:
- Owner's manual (30 pages) ,
- Owner's manual (31 pages) ,
- Owner's manual (30 pages)
Table of Contents
Advertisement
Advertisement
Table of Contents

Related Manuals for Traxxas TRX4 Sport


Summary of Contents for Traxxas TRX4 Sport
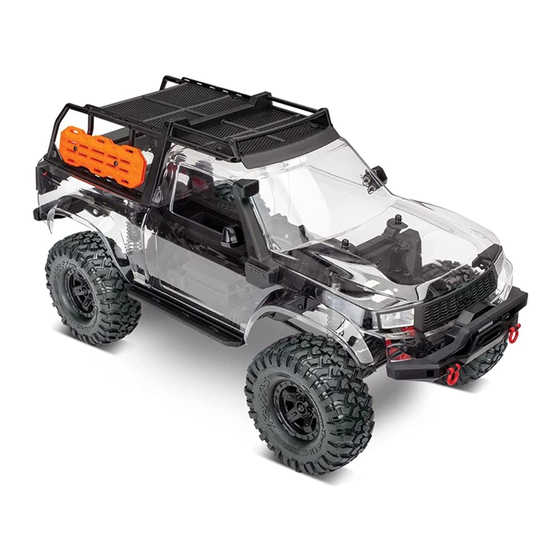
- Page 1 MODEL 82010-4 ASSEMBLY MANUAL...
- Page 2 • DO NOT let any exposed battery contacts or wires touch each associated with LiPo battery use. Traxxas does not recommend other. This will cause the battery to short circuit and create the risk that anyone under the age of 14 use or handle LiPo battery packs of fire.
- Page 3 SAFETY PRECAUTIONS All of us at Traxxas want you to safely enjoy your new • No Reverse Voltage: The ESC is not protected against model. Operate your model sensibly and with care, and reverse polarity voltage. it will be exciting, safe, and fun for you and those around •...
- Page 4 In other words, we built it the Traxxas way -- rugged, Please read the text next to each diagram. The text contains powerful, and ready to handle the rigors of remote locations...
- Page 5 SELECTING A CHARGER AND BATTERIES FOR YOUR MODEL SELECTING A RADIO SYSTEM FOR YOUR MODEL Your model does not include a battery or charger. Traxxas Your model does not include a transmitter, receiver, or Power Cell iD batteries are strongly recommended for servo.
- Page 6 INTRODUCTION HARDWARE DESCRIPTIONS The following chart is provided to help you identify the many different sizes and types of hardware that are used in the assembly of this model. Note the difference between the length measurements of the roundhead and countersunk screws. A ruler is provided at the bottom of each page to measure the length of the screws in millimeters.
- Page 7 A. TRANSMISSION ASSEMBLY TRANSMISSION BAG A1. Insert 5x11x4mm bearings into transmission case halves Transmission Case Halves (2) 5x11x4mm BB (5) Note: Bearing Seating Press down hard to ensure bearings are fully seated. Bearing installs on the Side view outside of case half Side view A2.
- Page 8 A. TRANSMISSION ASSEMBLY A3. Install input and output assemblies into main transmission housing TRANSMISSION BAG Place assemblies into transmission case halves 2.5x8mm CS (5) Shift Shaft Plug Secure transmission case halves together 2.5x8mm Shift Shaft Plug Input Gear Single Speed Assembly Gear Assembly 2.5x8mm...
- Page 9 A. TRANSMISSION ASSEMBLY TRANSMISSION BAG A5. Assemble and install transfer case gears Short output shaft assembly Long Transfer Case Output Shaft 27T transfer case gear assembly Short Transfer Case Output Shaft 2x9.8 Pin (3) Apply drop of grease 27T Transfer Case Gear (3) Apply drop of grease Insert pin...
- Page 10 A. TRANSMISSION ASSEMBLY TRANSMISSION BAG A7. Install slipper clutch and spur gear 39T Spur Gear Locknut 4x8 Metal Washer Spring washer orientation Spring Washer Slipper Plate Remove friction material backing and apply to spur gear Slipper Friction Material To tighten the slipper nut, insert the 2.0mm hex wrench into the hole in the end of the input shaft.
- Page 11 B. REAR AXLE ASSEMBLY B1. Assemble differential spool SPOOL BAG Ring Gear Differential Spool Ring Gear 7x14x5mm BB Differential Spool 2.5x8mm BCS 10x15x4mm BB 2.5X8mm BCS (4) 10x15x4mm BB Tighten screws in a cross pattern Completed spool ACCESSORY 7x14x5mm BB Option Part 8195 Locking Diff Kit Option Part...
- Page 12 B. REAR AXLE ASSEMBLY REAR AXLE BAG B3. Insert bearings and pinion gear into axle housing Apply drop Rear Axle Housing of grease Spool Assembly 11T Pinion Gear 6x13x5mm BB 5x11x4mm BB Assembled 6x13x5mm BB 5x11x4mm BB TOOLS BAG High Performance Grease Apply drop of grease B4.
- Page 13 B. REAR AXLE ASSEMBLY REAR AXLE BAG B5. Install axle portal mounts to axle housing Axle Portal Mounts (2) 2.5x10mm CCS 2.5x10mm CCS (6) Note Orientation Note Orientation ACCESSORY Aluminum Accessory 2.5x10mm CCS Portal Axle Adapter B6. Insert bearings into portal housings REAR AXLE BAG Inner Rear Portal Housing Outer Rear Portal Housing...
- Page 14 B. REAR AXLE ASSEMBLY REAR AXLE BAG B7. Assemble and install portal input and output gears 2x12mm Pin Portal output gear assembly 10x15x4mm BB Portal Output Gear Apply drop of grease 2x12mm Pin Portal Stub Axle Portal input Portal Input Gear gear assembly (Rear) TOOLS BAG...
- Page 15 B. REAR AXLE ASSEMBLY B9. Install axle driveshafts REAR AXLE BAG Right Axle Driveshaft 2.5x16mm CS (4) (Long) Right Axle Driveshaft Left Axle Driveshaft Left Axle (Short) Driveshaft Right Axle Driveshaft 2.5x16mm CS Left Axle Driveshaft 2.5x16mm CS ACCESSORY Option Part 8061 Heavy Duty Rear Axles B10.
- Page 16 B. REAR AXLE ASSEMBLY Completed rear axle assembly Check your assembly carefully. Straight on view 16 • TRX-4 SPORT...
- Page 17 C. FRONT AXLE ASSEMBLY C1. Assemble differential spool SPOOL BAG Ring Gear Differential Spool Ring Gear 7x14x5mm BB Differential Spool 2.5x8mm BCS 10x15x4mm BB 2.5X8mm BCS (4) 10x15x4mm BB Tighten screws in a cross pattern Completed spool ACCESSORY 7x14x5mm BB Option Part 8195 Locking Diff Kit Option Part...
- Page 18 C. FRONT AXLE ASSEMBLY FRONT AXLE BAG C3. Insert bearings and pinion gear into axle housing Front Axle Housing Spool Assembly 6x13x5mm BB Apply drop 11T Pinion Gear of grease Assembled 5x11x4mm BB 6x13x5mm BB 5x11x4mm BB TOOLS BAG High Performance Grease Apply drop of grease C4.
- Page 19 C. FRONT AXLE ASSEMBLY C5. Install caster blocks onto axle housing FRONT AXLE BAG Left Caster Block 2.5x10 CCS Right Caster Block 2.5x10mm CCS (6) Note Orientation ACCESSORY Aluminum Accessory Caster Blocks 2.5x10 CCS Note Orientation FRONT AXLE BAG C6. Insert bearings into portal housings Inner Front Portal Housing Outer Front Portal Housing 4x10mm BB...
- Page 20 C. FRONT AXLE ASSEMBLY C7. Assemble and install portal input and output gears FRONT AXLE BAG Left Driveshaft (Short) Portal input gear assembly Front Left Driveshaft Front Right Driveshaft 2x12mm Pin Right Driveshaft (Long) 2.5x4mm BCS (3) Portal Input Gear (Front) 2.5x10mm CS (8) Front Driveshaft...
- Page 21 C. FRONT AXLE ASSEMBLY FRONT AXLE BAG C8. Install portal/driveshaft assemblies to axle 3x12mm BCS (4) Right Axle Driveshaft (Long) 3x12mm BCS Portal Kingpin Bushing (4) Assembly Left Axle Driveshaft (Short) Left Axle Driveshaft 3x12mm (Short) Kingpin Bushing Kingpin Bushing Right Axle Driveshaft 3x12mm BCS...
- Page 22 C. FRONT AXLE ASSEMBLY Completed front axle assembly Check your assembly carefully. Straight on view 22 • TRX-4 SPORT...
- Page 23 D. CHASSIS ASSEMBLY CHASSIS PLASTICS BAG D1. Assemble front bumper mount crossmember, steering servo mount, and shock tower to right chassis rail Right Chassis Rail Note Orientation Steering Servo Mount Front Bumper Steering Servo Mount Crossmember Mount Front Bumper Mount Crossmember Right Chassis Rail Right Front Shock Tower Front View...
- Page 24 D. CHASSIS ASSEMBLY CHASSIS PLASTICS BAG D3. Assemble front lower gear cover and center skidplate to chassis rail Lower Gear Cover Center Lower Gear Center Skidplate Skidplate Cover Lower Gear Cover Rear Right Wire Clip 3x10mm BCS (2) 3x12mm BCS 3x10mm BCS 3x10mm BCS Top view...
- Page 25 D. CHASSIS ASSEMBLY CHASSIS PLASTICS BAG CHASSIS PLASTICS BAG D5. Assemble left chassis rail and left front shock tower to right chassis rail assembly Left Chassis Rail Left Front Shock Tower Front Battery Plate 3x10mm BCS (2) 3x12mm BCS (2) Left Chassis Rail 3x10mm...
- Page 26 D. CHASSIS ASSEMBLY CHASSIS PLASTICS BAG CHASSIS PLASTICS BAG D7. Assemble left rear shock tower to right chassis rail assembly Left Rear Shock Tower 3x10mm BCS (4) 3x12mm BCS 3x10mm 3x10mm 3x12mm Completed chassis assembly Check your assembly carefully. 26 • TRX-4 SPORT...
- Page 27 E. ELECTRONICS INSTALLATION CHASSIS PLASTICS BAG ELECTRONICS BAG E1. Install transmission assembly into chassis assembly Chassis Assembly 3x10mm BCS Transmission Assembly 3x10mm BCS (3) 3x10mm E2. Install motor into chassis assembly ELECTRONICS BAG Pinion gear should be 1-1.5mm Upper Gear Cover from end of motor shaft Motor sold separately Motor Mount Plate...
- Page 28 *2262 BEC kit is required for 2250 & 2255 ELECTRONICS BAG E5. Install ESC onto chassis assembly Note: If using a Traxxas ESC, place ESC wire 3x12mm BCS (2) under screw boss before installing screws. Electronic speed control sold separately...
- Page 29 E8. Install wires into receiver box ELECTRONICS BAG Correct wire routing Zip Tie (2) Bundle excess wires in receiver box Receiver sold separately Traxxas Radio Systems: CH1 - Steering Servo CH2 - Electronic Speed Control Caution! Pinch point for wires. TRX-4 SPORT • 29...
- Page 30 E. ELECTRONICS INSTALLATION E9. Waterproof and seal the receiver box ELECTRONICS BAG Receiver Box 3x8mm BCS 2.5x8mm CS (2) Plug Receiver Clamp Foam Seal 3x8mm BCS 3x8mm BCS (3) Receiver Box Receiver Wire Receiver Box Cover Cover Clamp 2.5x8mm CS Receiver Box Plug O-Ring Seal Receiver Wire Clamp...
- Page 31 E. ELECTRONICS INSTALLATION E11. Center the steering servo E12. Install servo horn on steering servo ELECTRONICS BAG Steering Servo Horn Transmitter, ESC, and Battery sold separately Servo sold separately 3x6mm BCS 3x6mm BCS Steering Servo Horn Turn transmitter on Plug battery into ESC (see transmitter instructions) (see ESC instructions) Turn on the model...
- Page 32 F. SUSPENSION & DRIVELINE INSTALLATION F1. Assemble GTS shocks DAMPER BAG Shock Assemblies Silicone Shock Oil Front Shock Springs Fill with Slowly move (white stripe) shock oil Unscrew piston to remove Rear Shock Springs excess air (orange stripe) 6.7mm (0.26") Upper Spring Retainers Lower Spring Retainers Note: Shaft...
- Page 33 F. SUSPENSION & DRIVELINE INSTALLATION FRONT AXLE BAG F2. Install steering link to portal housings 3x15mm BCS SUSPENSION LINK BAG 3x15mm BCS Drag Link Drag Link ACCESSORY Drag Link Option Part 8274 Hollow Ball Set 92.18mm 133.18mm F3. Attach front shocks and front lower suspension links to front axle assembly SUSPENSION LINK BAG 3x27mm BCS (2) Front Lower...
- Page 34 F. SUSPENSION & DRIVELINE INSTALLATION F4. Attach steering link, front panhard bar and front upper suspension link to front axle assembly SUSPENSION LINK BAG 3x15mm BCS (2) Front Upper Suspension Link 3x23mm BCS 3x23mm BCS Steering Link Front Panhard Bar Front Upper Suspension Link Steering Link...
- Page 35 F. SUSPENSION & DRIVELINE INSTALLATION SUSPENSION LINK BAG F5. Attach front axle assembly to chassis assembly 3x15mm BCS 3x15mm BCS (4) (Steering Link) 3x23mm BCS (3) 3x15mm BCS (Front Lower Link) 3x23mm BCS (Front Upper Link) 3x15mm BCS (Front Lower Link) Install front panhard bar to chassis and steering link to steering servo 3x15mm BCS...
- Page 36 F. SUSPENSION & DRIVELINE INSTALLATION F6. Attach rear shocks and rear suspension links to rear axle assembly SUSPENSION LINK BAG 3x27mm BCS (2) Right Rear Left Rear Shock Assembly Shock Assembly 3x30mm BCS 3x30mm BCS (Rear Upper Links) Rear Upper Suspension Links Rear Lower Suspension Links...
- Page 37 F. SUSPENSION & DRIVELINE INSTALLATION SUSPENSION LINK BAG F7. Attach rear axle assembly to chassis assembly 3x15mm BCS (2) 3x23mm BCS (2) 3x27mm BCS (2) 3x15mm BCS (Rear Lower Link) 3x27mm BCS (Rear Upper Link) 3x23mm BCS (Rear Shock) 3x15mm BCS (Rear Lower Link) 3x27mm BCS (Rear Upper Link)
- Page 38 F. SUSPENSION & DRIVELINE INSTALLATION DRIVELINE BAG F8. Assemble front and rear driveshafts 3x6mm BCS (4) Short half shaft assembly Long half shaft assembly 3x6mm 3x6mm CV Cross Pin (4) CV Ball CV Ball Short Female Long Female Half Shaft Half Shaft Stock Pin (4) CV Cross Pin...
- Page 39 F. SUSPENSION & DRIVELINE INSTALLATION DRIVELINE BAG F9. Install front and rear driveshafts 3x10mm Screw Pin (4) Rear driveshaft installation Front driveshaft installation 3x10mm 3x10mm 3x10mm 3x10mm Screw Pin Screw Pin Screw Pin Screw Pin Completed suspension & driveline installation Check your assembly carefully.
- Page 40 G1. Assemble wheels and tires; install on front and rear axles M4x0.7 NL (4) Wheels (4) Tires with Foam Inserts (4) Traxxas Ultra Premium Tire Glue (part #6468, sold separately) ACCESSORY Glue the tires to the wheels. Use your thumb to push Option Part the side of the tire away from the wheel.
- Page 41 G. FINAL CHASSIS ASSEMBLY BODY ACCESSORIES BAG G3. Install front and rear body mounts Front Body Front body mount location Mount 2.5x18mm Screw Pin (4) Point arrow to front of model. Point arrow to front of model. Front Body Mount Second from top Rear Body Mount 2.5x18mm...
- Page 42 G. FINAL CHASSIS ASSEMBLY BODY ACCESSORIES BAG G5. Attach rock sliders to left and right floor pans 3x10mm 3x10mm BCS (8) 3x10mm 3x10mm Rock Sliders (2) Note Orientation: 3x10mm Shorter ends towards front Chassis assembly complete 42 • TRX-4 SPORT...
- Page 43 H. BODY ASSEMBLY Painting the Body Note: Please read this entire section and plan your paint job before beginning. BUYING PAINT SPRAYING THE BODY The body supplied with your model is molded from lightweight and Read the directions on your bottle or can of paint and shake, mix, or durable clear polycarbonate.
- Page 44 H. BODY ASSEMBLY H2. Assemble and install grill, left mirror, and tailgate BODY ACCESSORIES BAG Front grill assembly Front grill assembly Left mirror assembly Front Grill Left Side Front Grill Headlight Clamps (L&R) Mirror Front Grill Retainer 2.5X8mm BCS (6) Left mirror assembly Front Grill Retainer...
- Page 45 H. BODY ASSEMBLY BODY ACCESSORIES BAG H3. Assemble accessories to left expedition rack Left Expedition Left Expedition Rack Rack Fuel Tank (L&R) 3x8mm FCS Fuel Tank (R) Fire Extinguisher, Axe & Shovel Axe and Shovel Orientation Accessory Mount Accessory Mount Cover 3x10mm Fuel Tank (L) 3x8mm FCS (2)
- Page 46 H. BODY ASSEMBLY BODY ACCESSORIES BAG H6. Install expedition rack and tailgate cap Expedition Rack Assembly Tailgate Cap Tailgate Cap Retainer Expedition Rack Expedition Retainer (L&R) Rack Assembly 3x8mm FCS (4) Tailgate 3x10mm FCS (4) Tailgate Cap Retainer 3x8mm 3x10mm Expedition Rack Retainer (R)
- Page 47 NOTES TRX-4 SPORT • 47...
- Page 48 ASSEMBLY MANUAL MODEL 82010-4 6250 TRAXXAS WAY, McKINNEY, TEXAS 75070 1-888-TRAXXAS 181212 KC2672-R01...
Need help?
Do you have a question about the TRX4 Sport and is the answer not in the manual?
Questions and answers