
Related Manuals for Magnavox MBP5130


Summary of Contents for Magnavox MBP5130
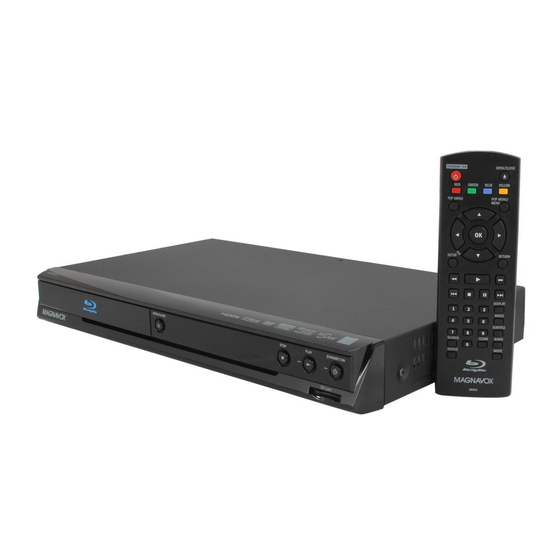
- Page 1 Owner’s Manual MBP5130/F7 Blu-ray Disc / DVD Player © 2010 Funai Electric Co., Ltd.
-
Page 2: Introduction
INTRODUCTION IMPORTANT SAFETY INSTRUCTIONS Safety Instructions The model and serial numbers Model No.: 1. Read these instructions. of this unit may be found on the 2. Keep these instructions. cabinet. 3. Heed all warnings. You should record and retain Serial No.: 4. - Page 3 RADIO-TV INTERFERENCE IMPORTANT COPYRIGHT INFORMATION This equipment has been tested and found to Unauthorized copying, broadcasting, public comply with the limits for a Class B digital device, performance and lending of discs are prohibited. pursuant to Part 15 of the FCC Rules. These limits This item incorporates copy protection are designed to provide reasonable protection technology that is protected by U.S.
-
Page 4: Supplied Accessories
Note about Recycling © 2010 Funai Electric Co., Ltd. • This unit’s packaging materials are recyclable All rights reserved. No part of this manual may be and can be reused. Please dispose reproduced, copied, transmitted, disseminated, of any materials in accordance with transcribed, downloaded or stored in any storage your local recycling regulations. -
Page 5: Table Of Contents
Watching Streaming Movies ..........25 CONTENTS Blockbuster Operations ............26 Before Activating the Connection to INTRODUCTION..............2 Blockbuster ................26 Safety Instructions ..............2 Activating the Connection to Blockbuster ....26 Supplied Accessories .............. 4 Guide to Blockbuster Menu Screen ......26 Trademark Information ............6 Renting or Purchasing Movies / TV Episodes ....26 Front Panel ................. -
Page 6: Trademark Information
Trademark Information “AVCHD” and the “AVCHD” logo are trademarks HDMI, the HDMI Logo, of Panasonic and High-Definition Corporation and Multimedia Interface are Sony Corporation. trademarks or registered trademarks of HDMI Licensing LLC in the United States and other “BONUSVIEW” is trademark of Blu-ray countries. -
Page 7: Front Panel
Front Panel 4 5 6* 7 STOP STANDBY/ON OPEN/CLOSE PLAY SD card (*) The unit can also be turned on by pressing these buttons. 8. y STANDBY/ON button 1. Disc tray 2. A OPEN/CLOSE button* • Press to turn on the unit, or to turn the unit 3. -
Page 8: Remote Control
8. H (skip) button Remote Control • During playback, press once to return to the beginning of the current title, chapter or track. • During playback, press twice to return to the previous title, chapter or track. • During the JPEG playback, press to return to STANDBY/ON the previous file. -
Page 9: Installing The Batteries In The Remote Control
24. MODE button Opening Screen • During BD or DVD or AVCHD files playback, In stop mode, opening screen is displayed. press to display the setting for the rapid playback and the picture adjustment. • During BD, DVD and CD playback, press to display the setting for the virtual surround. -
Page 10: Connections
CONNECTIONS Connection to the TV HDMI Video / Audio Connection (Supports up to 1080i / 1080p, 1080p24 resolution.) Your TV COAXIAL Wireless LAN HDMIOUT AUDIO VIDEO HDMI IN HDMI cable(not supplied) HDMIOUT • No analog audio connection required. • Use an HDMI cable with the HDMI logo (a certified HDMI cable) for this connection. •... -
Page 11: Connection To An Audio System
Connection to an Audio System • When you change the connections, all devices should be turned off. • Refer to the manual accompanying external devices for more information. 2-Channel Analog Audio Connection Digital Audio Connection stereo system AV receiver/amplifier AUDIO IN DIGITAL AUDIO INPUT COAXIAL Analog audio input jacks... -
Page 12: Connection To The Network
Connection to the Network By connecting this unit to the Internet, you can access Netflix, Blockbuster and VUDU services and applications, BD-Live features on a Blu-ray Disc and perform network update. - For more information about software update, refer to “Network Update” on page 44. - For more information about BD-Live, refer to “Enjoying BD-Live Discs with Internet”... -
Page 13: Wireless Connection
Wireless Connection Make the following connection if you are using a wireless router. Networking equipment (modem,etc.) COAXIAL Wireless LAN HDMIOUT AUDIO VIDEO Internet Hub or wireless broadband router LAN cable(not supplied) Note • After you made the wireless connection, set up necessary network settings. (For network setting of wireless connection, refer to “Wireless”... -
Page 14: Playback
• This unit does not support miniSDHC and PLAYBACK microSDHC Memory Card. • For miniSD Card and microSD Card, an adapter Information on Playback is necessary. Before you start playing back a disc, read the • Portions of this product are protected under following information. -
Page 15: Region Codes
Disc information Region Codes This unit has been designed to play back BD-video with region “A” and DVD-video with region “1” 1 / 14 0 : 00: 51 or “ALL”. You cannot play back BD-video or DVD- 1. Current track number / Total number of video that are labeled for other regions. -
Page 16: Reading The Sd Memory Card
Selecting the Media Mode Reading the SD Memory Card You can play back the AVCHD / WMA / JPEG files in For the playback media to be read by this unit, the correct media mode should be selected. You can an SD Memory Card. -
Page 17: Using The Title / Disc / Pop-Up Menu
• In the “Disc” mode, the resume information will Note • Contents of menus and corresponding menu be cleared when; operations may vary among discs. Refer to the - [C (stop)] is pressed while in the Resume-On- manual accompanying the disc for details. Stop mode. -
Page 18: Kodak Picture Cd
KODAK Picture CD 3. Press [C (stop)] to stop playback. This unit can also run JPEG files stored on KODAK It is recommended that files to be played back Picture CD. You can enjoy picture images on the in this unit are recorded under the following TV set by playing back the KODAK Picture CD. -
Page 19: Fast Forward / Fast Reverse
Fast Forward / Fast Reverse Repeat Playback 1. During playback, press [D (forward)] Available repeat functions vary depending the repeatedly for fast forward. discs. During playback, press [E (reverse)] 1. During playback, press [REPEAT] repeatedly repeatedly for fast reverse. to select the desired repeat mode. Every time you press [D (forward)] or Repeat mode Available media... -
Page 20: Random Playback
• Playback from a desired track / file and random audio CD: “CD-DA” will be displayed. playback are not available during program WMA/JPEG: Current Disc, SD Memory playback. Card, or folder name will be displayed. • Press [MODE] to switch to the random playback Track / Track / Folder / File list in the mode. -
Page 21: Rapid Playback
Noise reduction (DVD-video only) • To repeat the current track / file in the random selection, press [REPEAT] repeatedly until Reduces the noise of the playback picture. “ Track” appears during playback. To repeat the entire random selection press [REPEAT] “Off”... -
Page 22: Pip (Bonusview) Setting
Enjoying BD-Live Discs with Internet PIP (BONUSVIEW) Setting You can enjoy BD-Live which enables you to use Some BD-videos have the PIP function which interactive features when the unit is connected enables you to display the secondary video in to the Internet. (For network connection, refer to the primary video. -
Page 23: Search
Search Using [the Number buttons] (Direct Search) Using [H/G (skip)] Title search 1. During playback, press [G (skip)] to move In stop mode, enter the title number you want to the next track / title / chapter / file. Press to search using [the Number buttons]. -
Page 24: Switching Audio Soundtrack
Note Note • The secondary audio will not be output when • Some discs will only allow you to change the the secondary video is not displayed or when subtitles from the disc menu or pop-up menu. “BD Audio Mode” is set to “HD Audio Output”. Press [TOP MENU] or [POP MENU / MENU] to (For some BDs, secondary audio will be output display the disc menu or pop-up menu. -
Page 25: Network Operations
“Netflix Deactivate” to “Yes”. (Refer to must visit the following website on your PC and page 44.) become a Netflix member. netflix.com/MAGNAVOX • The screen image of Netflix may change after Before Activating the Connection to Netflix updating the firmware. -
Page 26: Blockbuster Operations
To access the movie list appears on the PC. - For Blockbuster, visit 2 Search: To access search screen www.blockbuster.com/magnavox 3 My Library : To access the list of 2. On this unit, press [BLUE] while opening rented or purchased screen is displayed. -
Page 27: Searching Movies / Tv Episodes
3. Use [K/L/s/B] to select the desired title, Note then press [OK]. • Depending on your network environment and • Title details screen of the selected title will speed, the playback may be paused or stopped. appear. To improve playback condition, use high speed 4. -
Page 28: Guide To Vudu Menu Screen
Guide to VUDU Menu Screen Renting or Purchasing VUDU Movies / TV Episodes App Home Screen After activating this unit, you are ready to App Home screen is the entry point to VUDU purchase or rent movies / TV episodes and watch applications including VUDU movies. -
Page 29: Watching Rented Or Purchased Vudu Movies / Tv Episodes
Watching Rented or Purchased VUDU Movies / FUNCTION SETUP TV Episodes In the setup menu you can change the setting for 1. Follow steps 1 to 2 in “Renting or Purchasing audio, video, language, etc. You cannot change VUDU Movies / TV Episodes” on page 28. the setting during playback. -
Page 30: Custom
- inside the parentheses next to “Auto” will be Custom the language which is currently selected by “ Custom” menu contains all the setting items. your TV. 1. In stop mode, press [SETUP]. • For “Audio”, “Subtitle”, and “Disc Menu”, if you 2. -
Page 31: Audio
Note for “HDMI Video Resolution” Setting items Descriptions • Even if you set “HDMI Video Resolution” setting BD Audio Mode For BD, selects whether to “Auto”, when this unit is connected to a DVI to output the secondary compatible display devices with an HDMI-DVI and interactive audio cable, 480p signal will be output. -
Page 32: Hdmi Audio Out Setting
HDMI Audio Out Setting When using HDMI connections make “HDMI Audio Out” setting in “Audio” menu according to the specifications of the device to be connected. Refer to page 31. Normally, set it to “HDMI Multi(Normal)” so that the unit automatically picks and outputs the best audio format suited to your connected device. Device to be connected “HDMI Audio Out”... -
Page 33: Speaker Setting (Available When You Have Hdmi Cable Connected To Hdmi Out Jack)
Speaker Setting (Available when you have HDMI cable connected to HDMI OUT jack) This unit allows you to enjoy multi-channel surround sound such as 7.1-channel / 5.1-channel surround. To make the most of its feature, set up your speakers appropriately by referring to the following table. How to navigate through “HDMI Multi(LPCM)”: 1) Use [K/L] to select your desired menu item then press [OK]. - Page 34 Menu Setting items Descriptions Channel Level Test Tone: Select “Off” to deactivate “Test Tests or sets the volume for each “Test Tone” is the test tone which Tone”. Select “Manual”, then press speaker. can be output from the speakers [OK] to manually set the volume for so you can adjust the volume for the desired speaker.
-
Page 35: Parental
Parental Ratings control allows you to set a limit, which prevents your children from viewing inappropriate materials. Playback will be stopped if the ratings exceed the levels you set, and it will require you to enter a password before playing back the disc. Parental BD Rating Level DVD Rating Level... -
Page 36: Others
Others Others Angle Icon fun-Link (HDMI CEC) Mode Select Disc Network Connection Software Update • To select the setting items and options, refer to “ Custom” on page 30. • “ Quick” menu consists of the setting menus frequently used, and they are accompanied with . •... - Page 37 Setting items Options / Descriptions Network Connection Perform a network connection Connection Test test. After you change IP address • Refer to page or DNS setting, always perform 39 for more this test. information. Network Wired* Easy* If you select “Easy”, connection test will automatically start.
-
Page 38: Fun-Link (Hdmi Cec)
Setting items Options / Descriptions Software Update Current Version Allows you to Indicates the current firmware version. update this unit’s Disc Update firmware. Refer to Allows you page 43. to update this unit’s software using a disc. Network Update You can update the software version by... -
Page 39: Network Connection
• If the connection test fails, you may need to Network Connection change the MAC address settings on your ”Others"“Network Connection” router. You can check the MAC address of this [SETUP] unit on “Custom” screen. (Refer to “Custom Set up network connection settings in order (Wired)“... - Page 40 To set the network setting to “Custom”(wired), c) Use [K/L] to select “Primary DNS” or “Secondary DNS”, then press [OK]. DNS setting screen will follow the following procedure. appear. Enter primary DNS and secondary DNS 1. Follow steps 1 to 2 in “Easy (Wired)” on with cursor buttons and number buttons.
- Page 41 a) Use [K/L] to select “Proxy Address”, then press • For proxy port, certain ports might be closed, [OK]. Proxy address setting screen will appear. blocked or unusable depending on your Enter proxy address. network environment. • The keyboard screen will appear. Connection Speed You can set connection speed as your preference.
- Page 42 <Wireless Router> “None”: In order to use a wireless network, you must set Set the authentication setting to “None”. up the connection to the wireless router. “WEP”: Set the authentication setting to “WEP”. You must set the wireless router to “WPA-PSK (TKIP)”: infrastructure mode.
-
Page 43: Software Update
42, skip to step 3. 1. Prepare a software update disc: 1. Follow steps 1 to 2 in “Find wireless network” Access www.magnavox.com, and download on page 42. the latest version software to a blank disc by following the directions described on the site. -
Page 44: Initialize
The indicators show the progress status... • The version of Netflix will also be updated (Success) PLAY indicator lights up. if newer version of Netflix is available when updating the software. STANDBY/ON STOP PLAY Initialize Menus to reset player settings, format SD card, (Error)* PLAY and STANDBY/ON indicators flash. -
Page 45: Others
OTHERS Troubleshooting If the unit does not perform properly when operated as instructed in this manual, check the unit, consulting the following checklist. Problem Solution No power. - Check if the AC cord is properly connected. - Unplug the AC cord once, and wait for 5-10 seconds and then plug it in again. - Page 46 Cannot use Netflix feature. - Netflix is available only in the United States. - Check if the network connection is properly made. - Visit netflix.com/MAGNAVOX on your PC and become a Netflix member. Cannot add movies or TV - Visit netflix.com on your PC.
- Page 47 Problem Solution Cannot rent or buy movies / - You need to activate the VUDU account. (Refer to page 27) TV episodes on VUDU. - Log into your account at http://my.vudu.com and check your payment information. Note • Some functions are not available in specific modes, but this is not a malfunction. Read the description in this manual for details on correct operations.
-
Page 48: Language Code List
• If this unit becomes inoperative, do not try to correct the problem by yourself. There are no user- serviceable parts inside. Turn the unit to the standby mode, unplug the power plug, and please contact 1-800-605-8610 or visit : www.magnavox.com/support www.funaiservice.com/... -
Page 49: Specifications
Specifications General Signal system NTSC color Power requirements 120 V AC, 60 Hz Power consumption 16 W (standby: 0.5 W) Dimensions (width x height x depth) 14.2 x 2.0 x 8.5 inches (360 x 50 x 215mm) Weight 4.04 lbs. (1.83 kg) Operating temperature 41°F (5°C) to 104°F (40°C) Operating humidity... -
Page 50: Español
Códigos de Región ESPAÑOL Esta unidad se ha diseñado para reproducir BD- vídeo con región “A” y DVD-vídeo con región “1” o Discos Reproducibles “ALL”. No podrá reproducir BD-vídeo o DVD-vídeo Este aparato es compatible con la reproducción que estén tituladas para otras regiones. Busque de los siguientes discos y archivos. -
Page 51: Reproducción Directa
Reproducción Directa 1. Presione [OPEN/CLOSE A] para abrir la bandeja de discos e insertar su disco con el rótulo apuntando hacia arriba. Presione de nuevo [OPEN/CLOSE A] para cerrar la bandeja de discos. • Asegúrese de que el disco sea compatible con este aparato. -
Page 52: Limited Warranty
To locate your nearest AUTHORIZED SERVICE CENTER or for general service inquiries, please contact us at: FUNAI SERVICE CORPORATION Tel: 1-800-605-8610 www.magnavox.com/support www.funaiservice.com/ 2200 Spiegel Drive Groveport, OH 43125 E5S20UD 1VMN29953B ★★ Printed in China...
Need help?
Do you have a question about the MBP5130 and is the answer not in the manual?
Questions and answers