Magnavox MBP5120F Owner's Manual
Blu-ray disc/dvd player
Hide thumbs
Also See for MBP5120F:
- Quick start manual (2 pages) ,
- Specifications (2 pages) ,
- Connection manual (2 pages)

Related Manuals for Magnavox MBP5120F


Summary of Contents for Magnavox MBP5120F
- Page 1 Owner’s Manual MBP5120F/F7 Blu-ray Disc / DVD Player © 2010 Funai Electric Co., Ltd.
-
Page 2: Introduction
INTRODUCTION Safety Instructions The model and serial numbers of this unit may be found on the cabinet. You should record and retain those numbers for future reference. WARNING: TO REDUCE THE RISK OF FIRE OR ELECTRIC SHOCK, DO NOT EXPOSE THIS APPARATUS TO RAIN OR MOISTURE. -
Page 3: Laser Safety
RADIO-TV INTERFERENCE This equipment has been tested and found to comply with the limits for a Class B digital device, pursuant to Part 15 of the FCC Rules. These limits are designed to provide reasonable protection against harmful interference in a residential installation. -
Page 4: Supplied Accessories
Note about Recycling • This unit’s packaging materials are recyclable and can be reused. Please dispose of any materials in accordance with your local recycling regulations. • Batteries should never be thrown away or incinerated but disposed of in accordance with your local regulations concerning chemical wastes. -
Page 5: Table Of Contents
CONTENTS INTRODUCTION...2 Safety Instructions ... 2 Supplied Accessories ... 4 Trademark Information ... 6 Front Panel ... 7 Rear Panel ... 7 Remote Control ... 8 Installing the Batteries in the Remote Control ... 9 Opening Screen ... 9 CONNECTIONS ...10 Connection to the TV ...10 Connection to an Audio System ...11 2-Channel Analog Audio Connection ...11... -
Page 6: Trademark Information
Trademark Information HDMI, the HDMI Logo, and High-Definition Multimedia Interface are trademarks or registered trademarks of HDMI Licensing LLC in the United States and other countries. Manufactured under license from Dolby Laboratories. Dolby and the double-D symbol are trademarks of Dolby Laboratories. -
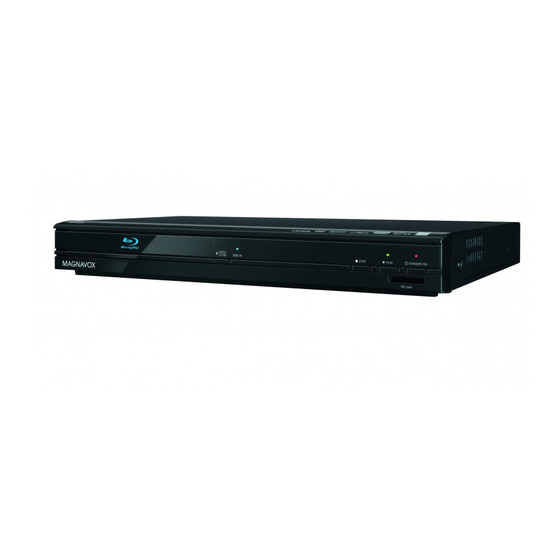
Page 7: Front Panel
Front Panel (*) The unit can also be turned on by pressing these buttons. 1. Disc tray 2. A OPEN/CLOSE button* 3. Infrared sensor window 4. C STOP button 5. B PLAY button* 6. PLAY indicator • This indicator lights up in green when discs or SD cards play back. -
Page 8: Remote Control
Remote Control STANDBY/ON (*) The unit can also be turned on by pressing these buttons. 1. STANDBY/ON y button • Press to turn on the unit, or to turn the unit into the standby mode. (To completely turn off the unit, you must unplug the AC power cord.) 2. -
Page 9: Installing The Batteries In The Remote Control
24. MODE button • During BD or DVD playback, press to display the setting for the rapid playback and the picture adjustment. • During BD, DVD and CD playback, press to display the setting for the virtual surround. • During BD playback, press to turn the picture- in-picture feature on or off (only applicable to BD-video which supports the PIP function). -
Page 10: Connections
CONNECTIONS Connection to the TV HDMI Video / Audio Connection (Supports up to 1080i / 1080p, 1080p24 resolution.) COAXIAL Wireless LAN HDMIOUT AUDIO VIDEO HDMI cable(not supplied) HDMIOUT • No analog audio connection required. • Use an HDMI cable with the HDMI logo (a certified HDMI cable) for this connection. •... -
Page 11: Connection To An Audio System
Connection to an Audio System • When you change the connections, all devices should be turned off. • Refer to the manual accompanying external devices for more information. 2-Channel Analog Audio Connection stereo system Analog audio input jacks Wireless LAN HDMIOUT AUDIO VIDEO... -
Page 12: Connection To The Network
Connection to the Network By connecting this unit to the Internet, you can access VUDU services and applications, BD-Live features on a Blu-ray Disc and perform network update. - For more information about software update, refer to “Network Update” on page 41. - For more information about BD-Live, refer to “Enjoying BD-Live Discs with Internet”... -
Page 13: Wireless Connection
Wireless Connection Make the following connection if you are using a wireless router. Networking equipment (modem,etc.) Internet Note • After you made the wireless connection, set up necessary network settings. (For network setting of wireless connection, refer to “Wireless” on page 38.) •... -
Page 14: Playback
PLAYBACK Information on Playback Before you start playing back a disc, read the following information. Playable Discs and Files Playable discs Blu-ray Disc - BD-video (single / dual layer) - BD-RE ver. 2.1 (single / dual layer) (Recorded in BDMV format) - BD-R ver. -
Page 15: Region Codes
Region Codes This unit has been designed to play back BD-video with region “A” and DVD-video with region “1” or “ALL”. You cannot play back BD-video or DVD- video that are labeled for other regions. Look for the symbols on your BD-video or DVD-video. If these region symbols do not appear on your BD- video or DVD-video, you cannot play back the disc in this unit. -
Page 16: Reading The Sd Memory Card
Reading the SD Memory Card You can play back the JPEG files in an SD Memory Card. With the SD Memory Card, you can also enjoy the following functions. - Special additional contents for BD-ROM Profile 1 ver.1.1. (For more information about the special additional contents, refer to the instruction book that came with the disc.) - BD-Live function (BD-ROM ver. -
Page 17: Using The Title / Disc / Pop-Up Menu
- [C (stop)] is pressed while in the Resume-On- Stop mode. - the parental level is changed. - the disc tray is opened. • In the “SD Card” mode, the resume information will be cleared when; - [C (stop)] is pressed while in the Resume-On- Stop mode. -
Page 18: Kodak Picture Cd
3. Press [C (stop)] to stop playback. It is recommended that files to be played back in this unit are recorded under the following specifications: <JPEG> • Upper limit : 2,560 x 1,900 dots (sub sampling is 4:4:4) 5,120 x 3,840 dots (sub sampling is up to 4:2:2) •... -
Page 19: Fast Forward / Fast Reverse
Fast Forward / Fast Reverse 1. During playback, press [D (forward)] repeatedly for fast forward. During playback, press [E (reverse)] repeatedly for fast reverse. Every time you press [D (forward)] or [E (reverse)], the playback speed will change. 2. Press [B (play)] to return to normal playback. -
Page 20: Random Playback
audio CD: “CD-DA” will be displayed. JPEG: Current Disc, SD Memory Card, or folder name will be displayed. Track / Track / Folder / File list in the Folder / File original order list: Programmed Track / File list in the list : programmed order Cumulative playback time of all tracks in the... -
Page 21: Rapid Playback
• To repeat the current track / file in the random selection, press [REPEAT] repeatedly until “ Track” appears during playback. To repeat the entire random selection press [REPEAT] repeatedly until “ All” appears during playback. • Playback from a desired track / file is not available during random playback. -
Page 22: Pip (Bonusview) Setting
PIP (BONUSVIEW) Setting Some BD-videos have the PIP function which enables you to display the secondary video in the primary video. You can call up the secondary video by pressing [MODE] whenever the scene contains the secondary video. primary video secondary video 1. -
Page 23: Search
Search Using [H/G (skip)] 1. During playback, press [G (skip)] to move to the next track / title / chapter / file. Press it repeatedly to skip to subsequent tracks. Press [H (skip)] once to go back to the beginning of the current track. Press it repeatedly to go to the previous tracks. -
Page 24: Switching Audio Soundtrack
Note • Some discs will only allow you to change the subtitles from the disc menu or pop-up menu. Press [TOP MENU] or [POP MENU / MENU] to display the disc menu or pop-up menu. • If 4-digit-language code appears in the subtitle menu, refer to “Language Code List”... -
Page 25: Network Operations
3 Press [RETURN] to exit. • You can also set “BD Audio Mode” from the setup menu. Refer to page 28. Note • In “Mix Audio Output” mode, if there is no secondary and interactive audio, the audio will be output as “HD Audio Output” mode. NETWORK OPERATIONS VUDU Operations With this unit, you can enjoy VUDU HD on-... -
Page 26: Renting Or Purchasing Vudu Movies / Tv Episodes
Renting or Purchasing VUDU Movies / TV Episodes After activating this unit, you are ready to purchase or rent movies / TV episodes and watch directly on your TV. 1. Press [RED] while opening screen is displayed. • For opening screen, refer to page 9. 2. -
Page 27: Custom
A) If “B” does not appear on the right side of the setting items when you select the items: Press [OK] repeatedly to change options. B) If “B” appears on the right side of the setting items when you select the items: 1) Press [OK]. -
Page 28: Audio
*1) An individual picture on the TV screen is called “Frame”, which consists of two separate images called “Field”. Some pictures may be blurred at the auto setting in “Still Mode” setting due to their data characteristics. Note for “HDMI Video Resolution” •... -
Page 29: Hdmi Audio Out Setting
HDMI Audio Out Setting When using HDMI connections make “HDMI Audio Out” setting in “Audio” menu according to the specifications of the device to be connected. Refer to page 28. Normally, set it to “HDMI Multi(Normal)” so that the unit automatically picks and outputs the best audio format suited to your connected device. Device to be connected Device compatible with Dolby Digital, Dolby Digital Plus, Dolby... -
Page 30: Speaker Setting (Available When You Have Hdmi Cable Connected To Hdmi Out Jack)
Speaker Setting (Available when you have HDMI cable connected to HDMI OUT jack) This unit allows you to enjoy multi-channel surround sound such as 7.1-channel / 5.1-channel surround. To make the most of its feature, set up your speakers appropriately by referring to the following table. How to navigate through “HDMI Multi(LPCM)”: 1) Use [K/L] to select your desired menu item then press [OK]. - Page 31 Menu Channel Level Tests or sets the volume for each speaker. Delay Time This is a parameter for optimizing the timing at which the sound outputs from the speakers according to the distance from the listening position. • For “Speaker Size” setting, the settings of each speaker size may be adjusted automatically corresponding to each setting.
-
Page 32: Parental
Parental Ratings control allows you to set a limit, which prevents your children from viewing inappropriate materials. Playback will be stopped if the ratings exceed the levels you set, and it will require you to enter a password before playing back the disc. Parental BD Rating Level DVD Rating Level... -
Page 33: Others
Others Others Angle Icon fun-Link (HDMI CEC) Mode Select Disc Network Connection Software Update • To select the setting items and options, refer to “ • “ Quick” menu consists of the setting menus frequently used, and they are accompanied with . •... - Page 34 Setting items Network Connection Connection Test • Refer to page 36 for more information. Network Wired* Selection Wireless Disable Disclaimer Options/Descriptions Easy* Custom IP Address Auto(DHCP)* Setting Manual IP Address Subnet Mask Default Gateway DNS Setting Auto(DHCP)* Manual Primary Secondary Proxy Do Not Use* Setting...
-
Page 35: Fun-Link (Hdmi Cec)
Setting items Software Update Current Version Allows you to Indicates the current firmware version. update this unit’s Disc Update firmware. Refer to Allows you page 41. to update this unit’s software using a disc. Network Update You can update the software version by connecting... -
Page 36: Network Connection
Network Connection [SETUP] “Others“ “Network Connection” Set up network connection settings in order to use BD-Live, VUDU or network update function. Connection Test After you enable a network connection or change the network settings, always perform the connection test to check if the connection is correctly made. -
Page 37: Proxy Setting
1. Follow steps 1 to 2 in “Easy (Wired)” on page 36. 2. Use [K/L] to select “Custom”, then press [OK]. - Setting menu of “Custom”(wired) will be displayed. 3. Use [K/L] to highlight the item you want to set. •... - Page 38 a) Use [K/L] to select “Proxy Address”, then press [OK]. Proxy address setting screen will appear. Enter proxy address. • The keyboard screen will appear. Others Proxy Address 2 3 4 5 6 7 8 9 0 a b c d e f g h i k l m n o p q r s t u v w x y z .
- Page 39 <Wireless Router> In order to use a wireless network, you must set up the connection to the wireless router. Find wireless network Search for wireless networks automatically and select the wireless network name (SSID) from the list. 1. In “Network Connection” menu, use [K/L] to select “Network Selection”, then press [OK].
- Page 40 Manually enter your SSID Set up the connection to the wireless router manually by entering the wireless network name (SSID). 1. Follow steps 1 to 3 in “Find wireless network” on page 39. 2. Use [K/L] to select “Manually enter your SSID”, then press [OK].
-
Page 41: Software Update
Software Update [SETUP] “Other“ “Software Update” This unit lets you update the software yourself using a software update disc. To update the software, you must first download the latest version software to a disc, then execute “Software Update”. Current Version You can confirm the current software version. -
Page 42: Initialize
Initialize Menus to reset player settings, format SD card, clear erased BD-ROM data or network settings, and deactivate VUDU. 1. In stop mode, press [SETUP]. 2. Use [K/L] to select , then press [OK]. 3. Use [K/L] to select a desired option, then press [OK]. -
Page 43: Others
OTHERS Troubleshooting If the unit does not perform properly when operated as instructed in this manual, check the unit, consulting the following checklist. Problem No power. No sound or picture. No audio / video signal on the display device via HDMI cable. Distorted picture. - Page 44 Problem The unit cannot read BD / DVD/ CD. Angle does not switch. Playback does not start when the title is selected. The password for rating level has been forgotten. Cannot connect to the network. Cannot use the wireless connection. Cannot connect to the network while my PC is connected to the network.
-
Page 45: Language Code List
Language Code List Language Code Language French [FRE] Abkhazian 4748 Frisian Afar 4747 Galician Afrikaans 4752 Georgian Albanian 6563 German [GER] Amharic 4759 Greek [GRE] Arabic 4764 Greenlandic Armenian 5471 Guarani Assamese 4765 Gujarati Aymara 4771 Hausa Azerbaijani 4772 Hebrew Bashkir 4847 Hindi... -
Page 46: Specifications
Specifications Signal system Power requirements Power consumption Dimensions (width x height x depth) Weight Operating temperature Operating humidity Video output (RCA jack x 1) HDMI output (HDMI jack x 1) Audio output (Analog) (RCA jack x 2) Audio output (Digital) (RCA jack x 1) LAN terminal Wireless LAN Note... - Page 47 MEMO...
-
Page 48: Limits And Exclusions
FUNAI CORP. will repair this product, free of charge in the USA in the event of defect in materials or workmanship as follows: DURATION: PARTS: FUNAI CORP. will provide parts to replace defective parts without charge for one (1) year from the date of original retail purchase.
Need help?
Do you have a question about the MBP5120F and is the answer not in the manual?
Questions and answers