
Subscribe to Our Youtube Channel
Related Manuals for LG BD645


Summary of Contents for LG BD645
- Page 1 OWNER’S MANUAL 3D Blu-ray Disc™ Player Please read this manual carefully before operating your set and retain it for future reference. BD645 www.lg.com P/NO : SAC35234602...
-
Page 3: Do Not Block Any Ventilation Openings
Getting Started Safety Information CAUTION CAUTION: This product employs a Laser System. RISK OF ELECTRIC SHOCK To ensure proper use of this product, please read DO NOT OPEN this owner’s manual carefully and retain it for future CAUTION: TO REDUCE THE RISK OF ELECTRIC reference. - Page 4 Getting Started This device is equipped with a portable battery or y Connect the equipment into an outlet on a accumulator. circuit different from that to which the receiver is connected. Safety way to remove the battery or the battery from the equipment: Remove the y Consult the dealer or an experienced radio/TV old battery or battery pack, follow the steps technician for help.
- Page 5 Getting Started IMPORTANT SAFETY Notes on Copyrights y Because AACS (Advanced Access Content INSTRUCTIONS System) is approved as content protection system for Blu-ray Disc format, similar to use of 1. Read these instructions. CSS (Content Scramble System) for DVD format, 2.
-
Page 6: Table Of Contents
Table of Contents Table of Contents System Setting Settings – Adjust the Setup Settings – [DISPLAY] Menu Getting Started – [LANGUAGE] Menu – [AUDIO] Menu Safety Information – [LOCK] Menu Introduction – [NETWORK] Menu – Playable Discs and symbols used in –... - Page 7 Table of Contents Audio CD Recording Troubleshooting Troubleshooting – General – Network – Picture – Sound – Customer Support – Open source software notice Appendix Controlling a TV with the Supplied Remote Control – Setting up the remote to control your Network Software Update –...
-
Page 8: Getting Started
Getting Started Introduction Playable Discs and symbols used in this manual Media/Term Logo Symbol Description y Discs such as movies that can be purchased or rented. y “Blu-ray 3D” discs and “Blu-ray 3D ONLY” discs y BD-R/RE discs that are recorded in BDAV format. Blu-ray y BD-R/RE discs that contain Video, Audio or Photo files. -
Page 9: About The "7" Symbol Display
[Mastered] in order to make the discs compatible with the LG players when formatting rewritable discs. When setting the option to Live System, you cannot use it on LG player. (Mastered/Live File System : Disc format system for windows Vista) -
Page 10: File Compatibility
Getting Started File compatibility Video files File File Codec Format Audio Format Subtitle Location Extension “.avi”, “.mpg”, XVID, MPEG1 SS, Dolby Digital, SubRip (.srt / .txt), SAMI (.smi), “.mpeg”, “.mkv”, H.264/MPEG-4 AVC, DTS, MP3, SubStation Alpha (.ssa/.txt), Disc, “.mp4”, “.asf”, MPEG2 PS, MPEG2 TS WMA, AAC, MicroDVD (.sub/.txt), VobSub... -
Page 11: Avchd (Advanced Video Codec High Definition)
Getting Started Note Note y The file name is limited to 180 characters. y This player supports UTF-8 files even it contains Unicode subtitle contents. This y A “avi” file which is encoded “WMV 9 codec” player can not support the pure Unicode is not supported. -
Page 12: About Dlna
Getting Started About DLNA Regional Code This Player is a DLNA Certified digital media player This unit has a regional code printed on the rear of that can display and play movie, photo and music the unit. This unit can play only BD-ROM or DVD content from your DLNA-compatible digital media discs labeled same as the rear of the unit or “ALL”. -
Page 13: Remote Control
Getting Started Remote control TITLE/POP-UP: Displays the DVD • • • • • • a • • • • • • title menu or BD-ROM’s pop-up 1 (POWER): Switches the player menu, if available. ON or OFF. DISC MENU: Accesses menu on a B (OPEN/CLOSE): Opens and disc. -
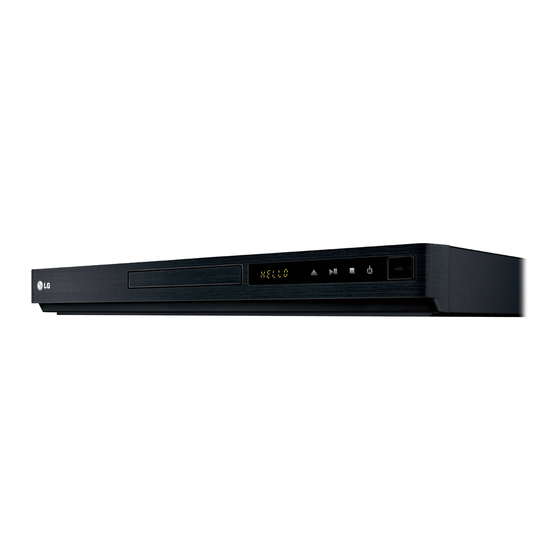
Page 14: Front Panel
Getting Started Front panel a Disc Tray e N (PLAY / PAUSE) b Display Window f Z (STOP) c Remote Sensor g 1 (POWER) Button d B (OPEN/CLOSE) h USB Port Rear panel a AC power cord e DIGITAL AUDIO OUT (OPTICAL) b VIDEO OUT f LAN port c 2CH AUDIO OUT (Left/Right) -
Page 15: Connecting
Connecting Connecting to Your TV HDMI Connection If you have a HDMI TV or monitor, you can connect it to this player using a HDMI cable (Type A, High Make one of the following connections, depending Speed HDMI Cable). Connect the HDMI jack on on the capabilities of your existing equipment. -
Page 16: What Is Simplink
4.5 m(15 ft.)). What is SIMPLINK? Some functions of this unit are controlled by the TV’s remote control when this unit and LG TV’s with Resolution Setting SIMPLINK are connected through HDMI connection. Controllable functions by LG TV’s remote control;... -
Page 17: Connecting To An Amplifier
Connecting Connecting to an 4. Use W/S to select the [Resolution] option then press ENTER (b) to move to the third level. Amplifier Make one of the following connections, depending on the capabilities of your existing equipment. y HDMI Audio connection (page 18) y Digital Audio connection (page 18) 5. -
Page 18: Connecting To An Amplifier Via Hdmi Output
Connecting Connecting to an Amplifier via Connecting to an Amplifier via HDMI Output Digital Audio Output Connect the player’s HDMI OUT jack to the Connect the player’s DIGITAL AUDIO OUT jack corresponding in jack on your amplifier using a to the corresponding in jack (OPTICAL) on your HDMI cable. -
Page 19: Channel Audio Output
Connecting Connecting to your Connecting to an Amplifier via 2 Channel Audio Output Home Network Connect the Left and Right 2CH AUDIO OUT jacks on the player to the audio left and right in jacks This player can be connected to a local area on your amplifier, receiver, or stereo system using network (LAN) via the LAN port on the rear panel. -
Page 20: Wired Network Setup
Connecting Note Wired Network Setup y When plugging or unplugging the LAN If there is a DHCP server on the local area network cable, hold the plug portion of the cable. (LAN) via wired connection, this player will When unplugging, do not pull on the LAN automatically be allocated an IP address. - Page 21 Connecting connection. Select [OK] and press ENTER (b) to y Some internet connection operations may not complete the network connection. be possible due to certain restrictions set by the Internet service provider (ISP) supplying your 6. If you select [Test] and press ENTER (b) at broadband Internet connection.
-
Page 22: Usb Device Connection
Connecting Note USB device connection y This player supports USB flash drive/ external HDD formatted in FAT16, FAT32 and This player can play Video, Audio and photo files NTFS when accessing files (music, photo, contained in the USB device. movie). However, for BD-Live and Audio CD recording, only FAT16 and FAT32 formats Playback content in the USB are supported. -
Page 23: System Setting
System Setting Settings [DISPLAY] Menu TV Aspect Ratio Adjust the Setup Settings Select a TV aspect ratio option according to your TV type. You can change the settings of the player in the [Setup] menu. [4:3 Letter Box] 1. Press HOME (n). Select when a standard 4:3 TV is connected. - Page 24 System Setting Resolution HDMI Color Setting Sets the output resolution HDMI video signal. Refer Select the type of output from the HDMI OUT jack. to page 16 for details about the resolution setting. For this setting, please refer to the manuals of your display device.
-
Page 25: [Language] Menu
System Setting [LANGUAGE] Menu [AUDIO] Menu Each disc has a variety of audio output options. Set Display Menu the player’s Audio options according to the type of audio system you use. Select a language for the [Setup] menu and on- screen display. -
Page 26: Digital Audio Output
System Setting Sampling Freq. DTS Neo:6 (Digital Audio Output) If the player is connected to the multi-channel Audio Receiver by HDMI connection, set this option [192 kHz] to enjoy the multi-channel surround sound with Select this if your A/V Receiver or Amplifier is the 2-channel audio source. -
Page 27: [Lock] Menu
System Setting [LOCK] Menu Blu-ray Disc Rating Set an age limit of BD-ROM play. Use number The [LOCK] settings affect only Blu-ray Disc and buttons to input an age limit for BD-ROM viewing. DVD playback. To access the any features in [LOCK] settings, you [255] must enter the 4-digit security code you have All BD-ROM can be played. -
Page 28: [Others] Menu
System Setting BD-LIVE connection Software You can restrict Internet access when BD-Live [Information] functions are used. Displays the current software version. [Permitted] [Update] Internet access is permitted for all BD-Live You can update the software by connecting contents. the unit directly to the software update server (see page 45). -
Page 29: Operating
Operating Note General Playback y Playback functions described in this manual are not always available in every file and media. Some functions can be restricted Using [HOME] menu depending on many factors. y Depending on the BD-ROM titles, a USB The home menu appears when you press HOME device connection may be needed for the (n). -
Page 30: Playing Blu-Ray 3D Disc
Operating Playing Blu-ray 3D disc Enjoying BD-Live This player can play the Blu-ray 3D discs which BD-ROM supporting BD-Live (BD-ROM version 2 contains separate views for the left and right eyes. Profile 2) that has a network extension function allows you to enjoy more functions such as downloading new movie trailers by connecting this Preparation unit to the internet. -
Page 31: Playing A File On A Network Server
Operating Playing a file on a network Basic operations for video and server audio content To stop playback This player can play video, audio and photo files Press Z (STOP) while playback. located in a DLNA server through your home network. -
Page 32: Basic Operations For Photo Content
Operating Basic operations for photo Resume playback content eroyt To play a slide show The unit records the point where you pressed the Press d (PLAY) to start slide show. Z (STOP) depending on the disc. If “MZ (Resume Stop)” appears on the screen briefly, To stop a slide show press d (PLAY) to resume playback (from the scene Press Z (STOP) while slide show. -
Page 33: Advanced Playback
Operating Advanced Playback Repeating a specific portion eroty Repeat Playback This player can repeat a portion you have selected. erotu 1. While playback, press REPEAT (h) to select [A-] at the beginning of the portion you wish to repeat. During playback, press REPEAT (h) repeatedly to 2. -
Page 34: Marker Search
Operating Marker Search Using the search menu eroy eroy You can start playback from up to nine memorized Using search menu, you can easily to find the point points. where you want to start playback. To enter a marker To search a point 1. -
Page 35: Changing Content List View
Operating Changing content list view Viewing content information On the [Movie], [Music] or [Photo] menu, you can The player can display the content information. change the content list view. 1. Select a file using W/S/A/D. 2. Press INFO/DISPLAY (m) to display the option Method 1 menu. -
Page 36: Last Scene Memory
Operating Last Scene Memory e Rotate – Press ENTER (b) to rotate the photo clockwise. f Zoom – Press ENTER (b) to display the This unit memorizes the last scene from the last disc [Zoom] menu. that is viewed. The last scene remains in memory g Effect –... -
Page 37: On-Screen Display
Operating 5. Use D to select [OK], and press ENTER (b) to 2. Select an option using W/S. complete music selection. 3. Use A/D to adjust the selected option value. On-Screen display 4. Press BACK (x) to exit the On-Screen display. Note y If no button is pressed for a few seconds, You can display and adjust various information and... -
Page 38: Hearing A Different Audio
Operating Hearing a different audio Watching from a different angle eroy 1. During playback, press INFO/DISPLAY (m) to display the On-Screen display. If the disc contains scenes recorded at different 2. Use W/S to select the [Audio] option. camera angles, you can change to a different camera angle during playback. -
Page 39: Changing The Picture Mode
Operating Changing the Picture Mode Changing subtitle code page eroy You can change the [Picture mode] option while If the subtitle is displayed in broken letter, you can playback. change the subtitle code page to view the subtitle file properly. 1. -
Page 40: Audio Cd Recording
This equipment should not be used for such purposes. LG expressly disclaims any responsibility for illegal distribution or use of unauthorized content in commercial purpose. -
Page 41: Troubleshooting
Troubleshooting Troubleshooting General Symptom Cause & Solution The Power does not turn on. y Plug the power cord into the wall outlet securely. The unit does not start y Insert a playable disc. (Check the disc type, colour system, and playback. -
Page 42: Network
Troubleshooting Network Symptom Cause & Solution BD-Live feature does not y The connected USB storage may not have enough space. Connect the USB storage with at least 1GB free space. work. y Ensure that the unit is correctly connected to the local area network and can access the internet (see page 19). -
Page 43: Sound
You can update the Player using the latest software to enhance the products operation and/or add new features. To obtain the latest software for this player (if updates have been made), please visit http://lgservice.com or contact LG Electronics customer care center. Open source software notice To obtain the corresponding source code under GPL, LGPL and other open source licenses, please visit http://opensource.lge.com. -
Page 44: Appendix
Appendix Controlling a TV with Setting up the remote to control your TV the Supplied Remote You can operate your TV with the supplied remote Control control. If your TV is listed in the table below, set the appropriate manufacturer code. You can control your TV using the buttons below. -
Page 45: Network Software Update
Appendix Network Software Software Update Update You can update the player using the latest software to enhance the products operation and/or add new features. You can update the software by connecting the unit directly to the software update Network update notification server. -
Page 46: About Nero Mediahome 4 Essentials
Installing Nero MediaHome 4 environment. In this case, you can obtain Essentials the latest software from the authorized LG Electronics Service Center then update your Before you install Nero MediaHome 4 Essentials, player. Refer to “Customer Support” on page 43. -
Page 47: Sharing Files And Folders
Appendix Sharing files and folders y Graphics card with at least 32 MB video memory, minimum resolution of 800 x 600 pixels, and 16- On your computer, you must share the folder bit color settings. contained Video, Audio and/or photo content to y Windows®... -
Page 48: Area Code List
Appendix Area Code List Choose an area code from this list. Area Code Area Code Area Code Area Code Afghanistan Fiji Monaco Singapore Mongolia Slovak Republic Argentina Finland Slovenia Australia France Morocco Austria Germany Nepal South Africa Belgium Great Britain Netherlands South Korea Bhutan... -
Page 49: Language Code List
Appendix Language Code List Use this list to input your desired language for the following initial settings: [Disc Audio], [Disc Subtitle] and [Disc Menu]. Language Code Language Code Language Code Language Code Afar 6565 French 7082 Lithuanian 7684 Sindhi 8368 Afrikaans 6570 Frisian... -
Page 50: Trademarks And Licenses
Appendix Trademarks and Licenses Manufactured under license under U.S. Patent #’s: 5,451,942; 5,956,674; 5,974,380; 5,978,762; 6,226,616; 6,487,535; 7,212,872; 7,333,929; 7,392,195; 7,272,567 & other U.S. and worldwide patents issued & pending. DTS and the symbol Blu-ray Disc™, Blu-ray™, Blu-ray 3D™, BD-Live™, are registered trademarks, &... -
Page 51: Audio Output Specifications
Appendix Audio Output Specifications Jack/Setting Digital Output (SPDIF) (DIGITAL AUDIO OUT) Analog Source 2CH Output Primary Pass-Thru PCM Stereo DTS Re-encode Dolby Digital PCM 2ch PCM 2ch Dolby Digital Dolby Digital Plus PCM 2ch PCM 2ch Dolby Digital Dolby TrueHD PCM 2ch PCM 2ch DTS (2ch) - Page 52 Appendix y You must select a digital audio output and a maximum sampling frequency that your Amplifier (or AV receiver) accepts using [Digital Output (SPDIF)], [HDMI] and [Sampling Freq.] options on the [Setup] menu (see page 26). y With digital audio connection (DIGITAL AUDIO OUT or HDMI), Disc Menu button sounds of BD- ROM may not be heard if the [Digital Output (SPDIF)] or [HDMI] option is set to [Primary Pass-...
-
Page 53: Specifications
Appendix Specifications General Power requirements Refer to main label on the rear panel. Power consumption 16 W Dimensions (W x H x D) Approx. 430 x 45 x 190 mm (16.9 x 1.7 x 7.5 inches) Net Weight (Approx.) 1.6 kg (3.5 lbs) Operating temperature 5 °C to 35 °C (41 °F to 95 °F) Operating humidity... -
Page 54: Maintenance
Appendix Maintenance Notes on Discs Handling Discs Handling the Unit Do not touch the playback side of the disc. Hold the disc by the edges so that fingerprints do not get on the surface. Never stick paper or tape on the When shipping the unit disc. -
Page 55: Important Information Relating To Network Services
Appendix Important Information Relating to Network Services All information, data, documents, communications, downloads, files, text, images, photographs, graphics, videos, webcasts, publications, tools, resources, software, code, programs, applets, widgets, applications, products and other content (“Content”) and all services and offerings (“Services”) provided or made available by or through any third party (each a “Service Provider”) is the sole responsibility of the Service Provider from whom it...
Need help?
Do you have a question about the BD645 and is the answer not in the manual?
Questions and answers