Table of Contents
Advertisement
Available languages
Available languages
SMART PORTABLE
AIR CONDITIONER
INSTRUCTION MANUAL
ITM. / ART. 1776312
CATALOG NUMBER
BP05JWAWF
Thank you for choosing BLACK+DECKER!
PLEASE READ BEFORE RETURNING THIS PRODUCT FOR
ANY REASON.
If you have a question or experience a problem with your BLACK+DECKER
purchase, go to www.blackanddecker.com/instantanswers
If you can't find the answer or do not have access to the Internet, call
844-299-0879 from 10:30 a.m. to 6:30 p.m. EST Mon. - Fri. to speak with an
agent. Please have the catalog number available when you call.
SAVE THIS MANUAL FOR FUTURE REFERENCE.
ACTIVATE
WARRANTY
Advertisement
Chapters
Table of Contents
Troubleshooting

Related Manuals for Black & Decker BP05JWAWF


Summary of Contents for Black & Decker BP05JWAWF
- Page 1 WARRANTY AIR CONDITIONER INSTRUCTION MANUAL ITM. / ART. 1776312 CATALOG NUMBER BP05JWAWF Thank you for choosing BLACK+DECKER! PLEASE READ BEFORE RETURNING THIS PRODUCT FOR ANY REASON. If you have a question or experience a problem with your BLACK+DECKER purchase, go to www.blackanddecker.com/instantanswers If you can’t find the answer or do not have access to the Internet, call...
-
Page 2: Table Of Contents
CONTENTS SAFETY INFORMATION Important Safety Instructions ............................3-4 Grounding Instructions ................................. 5 LCDI Power Cord and Plug ..............................6 Safety Guidelines ..............................7-11 SET UP & USE Parts & Features ..................................12 Installation Guide ..............................13 Window Slider Kit Installation ...........................14 Exhaust Hose Installation ............................15 Control Panel ..............................16-18 Downloading the App and Operating with Wi-Fi ................19-33 Connect Using Bluetooth .......................... -
Page 3: Safety Information
SAFETY INFORMATION DANGER WARNING CAUTION DANGER - Immediate hazards WARNING - Hazards or unsafe CAUTION - Hazards or unsafe which WILL result in severe practices which COULD result in practices which COULD result in personal injury or death severe personal injury or death minor personal injury IMPORTANT SAFETY INSTRUCTIONS WARNING... - Page 4 SAFETY INFORMATION HANDLING ALKALINE BATTERIES WARNING When handling alkaline batteries, basic safety precautions should be followed, including the following Should fluid from the battery accidentally get into your eyes, there is a threat of loss of eyesight, do not rub them. Immediately rinse your eyes with clean tap water and then consult a physician immediately.
-
Page 5: Grounding Instructions
SAFETY INFORMATION GROUNDING INSTRUCTIONS ELECTRICAL REQUIREMENTS In the event of malfunction or breakdown, grounding provides a path of least resistance for electric current to reduce the risk of electric shock. The appliance must be connected to a cord having an equipment-grounding conductor and a grounding plug. -
Page 6: Lcdi Power Cord And Plug
SAFETY INFORMATION LCDI POWER CORD AND PLUG This air conditioner is equipped with an LCDI (Leakage Current Detection and Interruption) power cord that is required by UL. This power supply cord contains state-of-the-art electronics that sense leakage current. If the cord is damaged and leakage occurs, power will be disconnected from the unit. -
Page 7: Safety Guidelines
SAFETY INFORMATION SAFETY GUIDELINES WARNING: To prevent injury to the user or other people and property damage, the following instructions must be followed. Incorrect operation due to ignoring of instructions may cause harm or damage. ALWAYS DO THIS NEVER DO THIS ENERGY SAVE •... -
Page 8: Important Safeguard
SAFETY INFORMATION IMPORTANT SAFEGUARD WARNING: • This hermetically sealed system contains fluorinated greenhouse gases. ENVIRONMENTAL INFORMATION: This unit contains fluoridated greenhouse gases covered by the Kyoto Protocol. • Do not use this unit for functions other than those described in this instruction manual. - Page 9 SAFETY INFORMATION WARNING: • This appliance is not intended for use by persons (including children) with reduced physical, sensory or mental capabilities, or lack of experience and knowledge, unless they have been given supervision or instruction concerning use of the appliance by a person responsible for their safety. •...
- Page 10 SAFETY INFORMATION FCC ID: 2ANDL-WBR3 FCC Caution This device complies with part 15 of the FCC Rules. Operation is subject to the following two conditions: (1) This device may not cause harmful interference, and (2) this device must accept any interference received, including interference that may cause undesired operation. Any changes or modifications not expressly approved by the party responsible for compliance could void the user’s authority to operate the equipment.
-
Page 11: Operation Condition
SAFETY INFORMATION OPERATION CONDITION The air conditioner must be operated within the temperature range indicated below: NOTE: Unit performance may be affected when in use outside of these operating temperatures. MODE ROOM TEMPERATURE COOL 64°F (18°C) ~ 95°F (35°C) 64°F (18°C) ~ 95°F (35°C) The air conditioner should be operated in the relative humidity range of 30%~90% RH. -
Page 12: Set Up & Use
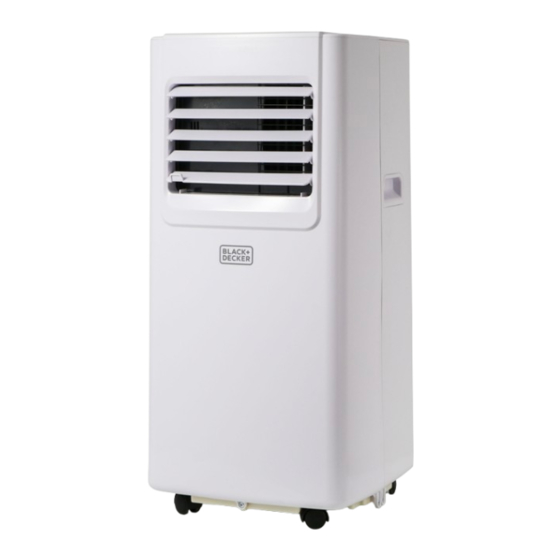
SET UP & USE PARTS & FEATURES Control Panel Evaporator Filter Handle Casters (4) Air Exhaust Hose Hose Inlet Hose Outlet Remote Control 2 AAA batteries Window Panel 3 PCS 2 x Wing Nut and Bolt Foam Strip Drain Hose 2 ft/0.6 m Page 12... -
Page 13: Installation Guide
SET UP & USE INSTALLATION GUIDE LOCATION • The air conditioner should be placed on a firm floor to minimize noise and vibration. For safe and secure positioning, place the unit on a smooth, level floor strong enough to support the unit. •... -
Page 14: Window Slider Kit Installation
SET UP & USE WINDOW SLIDER KIT INSTALLATION Your window slider kit has been designed to fit most standard “Vertical” and “Horizontal” window applications; however, it may be necessary for you to improvise/modify some aspect of the installation procedures for certain types of window. -
Page 15: Exhaust Hose Installation
SET UP & USE EXHAUST HOSE INSTALLATION The air exhaust hose and hose inlet must be installed or removed from the portable air conditioner in accordance with the way it is being used: COOL, DRY: Air exhaust hose and hose inlet should be connected to the portable air conditioner. FAN: Air exhaust hose and hose inlet should be disconnected from the portable air conditioner. -
Page 16: Control Panel
SET UP & USE CONTROL PANEL Sleep Mode Indicator Light Timer Fan Speed Display Full Tank Indicator Light Indicator Light Area Cool Indicator Light Power On Indicator Light Power Button Timer Mode Speed Button Increase Decrease Sleep Selection Button Button Button Button Button... -
Page 17: Cool Mode
SET UP & USE FAN MODE COOL MODE • Press the “MODE” button until the Ideal for hot weather when “FAN” indicator light comes on. you need to cool the room. To set operation of the appliance • Press the speed button to select HIGH, correctly, press the or buttons until or LOW fan speed. - Page 18 SET UP & USE TIMER SLEEP • To set the AUTO STOP timer. The SLEEP function gradually adjusts When the unit is ON, press the the temperature of the room to TIMER button. provide a comfortable environment. Press the SLEEP button to activate. •...
-
Page 19: Downloading The App And Operating With Wi-Fi
SET UP & USE DOWNLOADING THE APP AND OPERATING WITH Wi-Fi Re-install APP Operation Operation New Account (registered before) Steps Items Download and Step 1 Install APP Step 2 Registration Account Step 3 Login Add Device to Registered Device Step 4 control will remain. -
Page 20: Download And Install The App
SET UP & USE Wi-Fi MODULE SPECIFICATION AND BASIC INFORMATION 1. Minimum specifications on a Smart phone: Android 5.0 version or higher IOS 10.0 version or higher 2. Basic parameters for Wi-Fi: Parameters Details Network frequency 2.400 - 2.500GHz Standards of WLAN IEEE 802.11 b/g/n(channels 1-14) IPv4/IPv6/TCP/UDP/HTTPS/ Protocol stack support... - Page 21 SET UP & USE Wi-Fi CONNECTION METHODS 1. If you don’t have an account please tap button “Sign Up”. 2. Read the Privacy Policy and tap “Agree”. 3. Tap“▼” and choose the country. Scroll to choose the country. Page 21...
- Page 22 SET UP & USE 4. Enter your E-mail address. 5. Tap the button “Get verification code”. 6. Enter the verification code you received from E-mail. 7. Set the password with 6-20 characters including characters and numbers. 8. Tap “Done”. Page 22...
-
Page 23: Resetting The Password
SET UP & USE LOG IN 1. If you already have account, tap “Log In”. 2. Enter your registered account and password. 3. Tap “Log In” button. RESETTING THE PASSWORD If you forgot the password or you want to reset the password, operate as below: 1. - Page 24 SET UP & USE ENABLE LOCATION SETTINGS 1. Once logged into the app, ensure that Bluetooth is enabled on your phone and that permissions are enabled. 2. Tap on "Add Device" located in the top right corner of the screen. Page 24...
- Page 25 SET UP & USE 3. When location services are enabled, tap on "Set Now". 4. If there is difficulty connecting to the app automatically, please ensure that location services on your phone are turned "on" or "enabled". Page 25...
- Page 26 SET UP & USE 5. location settings, enable location services by accessing the Welcome Home Screen within the app. 6. On the Welcome Home Screen, tap on "Location" and manually enter your current location. 7. Follow the prompts to set up family member management, which allows different profiles to control appliances according to their preferences.
-
Page 27: Connection Methods
SET UP & USE CONNECTION METHODS There are two ways to connect the appliance to the APP. EZ mode is the simplest and fastest way to connect. AP mode is an alternate method to connect directly to the appliance. Please make sure the appliance is plugged into a wall outlet and is in standby mode before connecting it to the APP. - Page 28 SET UP & USE 2. Tap “Home Appliances”. 3. Tap “Portable AC BP05JWAWF”. Make sure to enable location. This will allow the APP to automatically search for the device. 4. Tap “Set Now”. 5. Input the Wi-Fi name and password when prompted, then tap "Next".
- Page 29 SET UP & USE 6. On the control panel, press and hold the fan button on the control panel of the appliance, for 3 seconds when prompted in the APP. 7. The power indicator light on the control panel of the unit will blink rapidly. Tap on the phrase located on the bottom of the screen “Tap when Power Indicator Light blinks rapidly”.
-
Page 30: Changing Modes
SET UP & USE 9. Once connected, the Portable Air Conditioner can be controlled by the APP. Portable AC NOTE: If the APP is not connecting to the appliance in EZ mode, connect using AP mode. CHANGING MODES 1. Tap on the mode shown on the top right corner of the screen to access a window displaying both EZ Mode and AP Mode. - Page 31 CONNECTING TO THE APPLIANCE USING AP MODE 1. Click “+” in the upper right corner of the “Home” screen or tap “Add device”. 2. Tap “Home Appliances”. 3. Tap “Portable AC BP05JWAWF”. Select "AP Mode" on the top right corner of the screen.
- Page 32 SET UP & USE 4. On the control panel, press and hold the fan button for 3 seconds. 5. The power indicator light on the control panel of the unit will blink slowly. Tap on the phrase located on the bottom of the screen “Tap when Power Indicator Light blinks slowly”.
- Page 33 SET UP & USE 9. Return to the APP. Wait for appliance to connect. 10. Once connected, the Portable Air Conditioner can be controlled by the APP. Portable AC Page 33...
-
Page 34: Connect Using Bluetooth
CONNECT USING BLUETOOTH 1. Tap “Home Appliances”. 2. Tap “Portable AC BP05JWAWF”. 3. Select “Bluetooth” on the top right corner of the screen. 4. Press and hold the fan button on the control panel of the appliance, for 3 seconds when prompted in the APP. -
Page 35: Controlling The Portable Air Conditioner With The App
SET UP & USE CONTROLLING THE PORTABLE AIR CONDITIONER WITH THE APP Tap the power symbol on the top right of the screen to power on the air conditioner. Tap “Mode”. Select Cool, Dry or Fan. Tap – or + to select temperature. Tap “Swing”... - Page 36 SET UP & USE In Dry mode, the unit automatically selects a low fan speed. An alert will indicate if the water tank needs to be drained. See drainage instruction on page 52. Tap Timer. Make selections to schedule the Timer ON and OFF. Page 36...
-
Page 37: Voice Control Device Settings
SET UP & USE VOICE CONTROL DEVICE SETTINGS Follow pairing instructions to connect the Air Conditioner to the Black + Decker APP using the same Wi-Fi Network. The Default name when using voice control is “Portable AC” as shown on the top of the screens. - Page 38 SET UP & USE A pop up window will appear. Type in the new name. The name should be easy to remember and different than other connected devices using voice control. Tap “Confirm”. Page 38...
-
Page 39: Set Up Voice Control With Alexa
SET UP & USE SET UP VOICE CONTROL WITH ALEXA You will need an Alexa device such as Amazon Echo, Echo Dot set up with the Alexa APP according to manufacturer’s instructions. The device should be powered on and connected to a Wi-Fi network. On the homepage of the Black + Decker APP tap “Profile”... - Page 40 SET UP & USE Tap “Sign in with Amazon”. Sign in and use the same password used for the Alexa APP. Tap “Link”. Page 40...
- Page 41 SET UP & USE Open the Alexa APP and enable “Smart Home Skills” for Black + Decker Home. Alexa can locate the device when you say “Alexa, discover my device”. Follow the prompts in the Alexa APP to manage the device and control the air conditioner using the voice commands.
- Page 42 SET UP & USE ALEXA VOICE COMMANDS The following examples use the device name “Portable AC”. Refer to the “Voice control device settings” section for instructions on how to change the device name. To turn the unit ON/OFF. “Alexa, turn on the Portable AC.” “Alexa, turn off the Portable AC.”...
-
Page 43: Set Up Voice Control With Google Assistant
SET UP & USE SET UP VOICE CONTROL WITH GOOGLE ASSISTANT You will need a device such as Google Nest, Google Nest mini set up with the Google Home APP according to manufacturer’s instructions. The device should be powered on and connected to a Wi-Fi network. On the homepage of the Black + Decker APP tap “Profile”... - Page 44 SET UP & USE Tap “Google Assistant”. Open the Google Home App and tap settings on the bottom, right of the screen. Tap “Works with Google”. Page 44...
- Page 45 SET UP & USE Search for “Black + Decker Home” by typing it in the search bar. Tap to select “Black + Decker Home”. The Google APP will show prompts to link with a verification code from the Black + Decker Home APP or link with account Password. Use the same e-mail and password as the Black + Decker Home APP to complete the Authorization.
- Page 46 SET UP & USE GOOGLE ASSISTANT VOICE COMMANDS The following examples use the device name “Portable AC”. Refer to the “Voice control device settings” section for instructions on how to change the device name. To turn the unit ON/OFF. “OK Google, turn on the Portable AC.” “OK Google, turn off the Portable AC.”...
-
Page 47: Operating From The Remote Control
SET UP & USE OPERATING FROM THE REMOTE CONTROL BATTERY INSTALLATION (BATTERIES INCLUDED) (1) Slide open the battery compartment cover. (2) Insert 2 × “AAA” batteries as shown. (3) Slide back the battery cover. CAUTION: Use only AAA or IEC R03 1.5V alkaline batteries. Remove the batteries if the remote is not used for a month or longer. -
Page 48: Remote Control
SET UP & USE REMOTE CONTROL Mode Button Fan Speed Button Increase / Decrease Button Timer Button Sleep Button Air Swing Button ON / OFF POWER BUTTON: Press to Turn ON or OFF. TIMER BUTTON: Used to set a delay start or shut down time. MODE BUTTON: Each time you press the button COOL, DRY, FAN. -
Page 49: Power Button
SET UP & USE POWER BUTTON • Press to Turn Air Conditioner ON or OFF. MODE BUTTON • Press the mode button to scroll through COOL, DRY, FAN. • The corresponding symbol will illuminate on the LED display to indicate which mode is selected. - Page 50 SET UP & USE TIMER • To set the AUTO STOP timer. When the unit is ON, press the TIMER button. • Press the or button to select the AUTO TIME by 1 hour increments, up to 24 hours. The control panel will indicate the selected time. Press the TIMER button again to set the selected time.
-
Page 51: Protection Functions
SET UP & USE PROTECTION FUNCTIONS • Frost Protection Function: In a cold environment, if the temperature of the EVA pipe sensor is too low, the machine will automatically enter protection status; if the temperature of the EVA pipe sensor rises to a certain temperature (50°F), it can automatically revert to normal operation. -
Page 52: Water Drainage
SET UP & USE WATER DRAINAGE This air conditioner is equipped with auto water evaporation so the water compartment would not typically fill in cooling mode unless there is high humidity. Water drainage will generally only be required at the end of the season. (see START-END OF SEASON OPERATIONS, Page 53). -
Page 53: Cleaning & Care
CLEANING & CARE CLEANING WARNING: Before cleaning or maintenance, turn the appliance off by pressing the button on the control panel or button on the remote control. Unplug from the electrical outlet. CLEANING THE CABINET You should clean the appliance with a slightly damp cloth then dry with a dry cloth. -
Page 54: Troubleshooting & Warranty
TROUBLESHOOTING & WARRANTY BEFORE YOU CALL FOR SERVICE IF THE AIR CONDITIONER FAILS TO OPERATE: A) Check to make sure that the air conditioner is plugged in securely. If it is not, remove the plug from the outlet, wait 10 seconds and plug it in again securely. -
Page 55: Troubleshooting
TROUBLESHOOTING & WARRANTY Troubleshoot your problem by using the chart below. If the air conditioner still does not work properly, contact BLACK+DECKER customer service center or the nearest authorized service center. Customers must never troubleshoot internal components. TROUBLE POSSIBLE CAUSE POSSIBLE REMEDY The air conditioner A. - Page 56 TROUBLESHOOTING & WARRANTY APP AND VOICE CONTROL TROUBLESHOOTING TROUBLE POSSIBLE CAUSE POSSIBLE REMEDY The Wi-Fi is not enabled on the Turn on the cell phone’s Wi-Fi. cellphone. Unable to register or Install a Wi-Fi extender (not included). login to account. Wi-Fi signal is weak.
- Page 57 TROUBLESHOOTING & WARRANTY TROUBLE POSSIBLE CAUSE POSSIBLE REMEDY Turn off the Wi-Fi functions of some of the connected devices. The number of connected devices reached the limit of the router. Re-configure the router. Appliance is not connecting with the App. Remove the device from the MAC address filter on the router.
-
Page 58: Limited Warranty
TROUBLESHOOTING & WARRANTY LIMITED WARRANTY Any repair, replacement, or warranty service, REPAIR OR REPLACEMENT AS PROVIDED UNDER THIS WARRANTY IS THE EXCLUSIVE REMEDY OF and all questions about this product should be THE CUSTOMER; W APPLIANCE Co.. SHALL NOT BE directed to W Appliance Co. - Page 59 ACTIVATE WARRANTY BLACK & DECKER, BLACK+DECKER, the BLACK & DECKER and BLACK+DECKER logos and product names are trademarks of The Black & Decker Corporation, used under license. All rights reserved. Product in this box may differ slightly from that pictured. Does not affect function.
- Page 60 WARRANTY PORTÁTIL INTELIGENTE MANUAL DE INSTRUCCIONES ITM. / ART. 1776312 NÚMERO DE CATÁLOGO BP05JWAWF ¡Gracias por elegir BLACK+DECKER! POR FAVOR, LEA ANTES DE DEVOLVER ESTE PRODUCTO POR CUALQUIER MOTIVO. Si tiene una pregunta o experimenta un problema con su compra BLACK+DECKER, ingrese a www.blackanddecker.com/instantanswers.
- Page 61 CONTENIDO INFORMACIÓN DE SEGURIDAD Instrucciones de seguridad importantes ......................62-63 Instrucciones de puesta a tierra ............................64 Cable de alimentación y enchufe LCDI ........................65 Pautas de seguridad ............................66-70 CONFIGURACIÓN Y USO Piezas y características ................................71 Guía de instalación ..............................72 Instalación del kit de ventana ..........................73 Instalación del ducto de ventilación ......................74 Panel de control .............................
-
Page 62: Información De Seguridad
INFORMACIÓN DE SEGURIDAD PELIGRO ADVERTENCIA PRECAUCIÓN PELIGRO - Peligros inmediatos PRECAUCIÓN - Peligros o ADVERTENCIA - Peligros o prácticas inseguras que PODRÍAN provocar que PROVOCARÁN lesiones prácticas inseguras que PODRÍAN lesiones personales graves o la muerte personales graves o la muerte provocar lesiones personales leves INSTRUCCIONES DE SEGURIDAD IMPORTANTES ADVERTENCIA... - Page 63 INFORMACIÓN DE SEGURIDAD MANIPULACIÓN DE PILAS ALCALINAS ADVERTENCIA Al manipular pilas alcalinas, deben tomarse ciertas precauciones básicas de seguridad, entre las que se incluyen las siguientes: Si el líquido de las pilas entra accidentalmente en contacto con los ojos, existe el riesgo de pérdida de la visión, no se los frote.
-
Page 64: Instrucciones De Puesta A Tierra
INFORMACIÓN DE SEGURIDAD INSTRUCCIONES DE PUESTA A TIERRA REQUISITOS ELÉCTRICOS En caso de mal funcionamiento o avería, la conexión a tierra proporciona un camino de menor resistencia para la corriente eléctrica con el fin de reducir el riesgo de electrocución. El aparato debe conectarse a un cable con un conductor de puesta a tierra y un enchufe con toma de tierra. -
Page 65: Cable De Alimentación Y Enchufe Lcdi
INFORMACIÓN DE SEGURIDAD CABLE DE ALIMENTACIÓN Y ENCHUFE LCDI Este aire acondicionado está equipado con un cable de alimentación LCDI (Detección e Interrupción de Fugas de Corriente) como es requerido por UL. Este cable de alimentación contiene componentes electrónicos de última generación que detectan las fugas de corriente. -
Page 66: Pautas De Seguridad
INFORMACIÓN DE SEGURIDAD PAUTAS DE SEGURIDAD ADVERTENCIA: Para evitar lesiones al usuario o a otras personas y daños materiales, deben seguirse las siguientes instrucciones. El funcionamiento incorrecto debido a la ignorancia de las instrucciones puede causar daños. HAGA SIEMPRE ESTO NUNCA HAGA ESTO AHORRO DE ENERGÍA •... - Page 67 INFORMACIÓN DE SEGURIDAD PRECAUCIÓN IMPORTANTE ADVERTENCIA: • Este sistema herméticamente cerrado contiene gases fluorados de efecto invernadero. INFORMACIÓN MEDIOAMBIENTAL: Esta unidad contiene gases fluorados de efecto invernadero cubiertos por el Protocolo de Kioto. • No utilice este aparato para funciones distintas de las descritas en este manual de instrucciones.
- Page 68 INFORMACIÓN DE SEGURIDAD ADVERTENCIA: • Este aparato no está destinado a ser utilizado por personas (incluidos niños) con capacidades físicas, sensoriales o mentales reducidas, o con falta de experiencia y conocimientos, a menos que hayan sido supervisadas o instruidas acerca del uso del aparato por una persona responsable de su seguridad.
- Page 69 INFORMACIÓN DE SEGURIDAD FCC ID: 2ANDL-WBR3 Precaución de la FCC Este dispositivo cumple la parte 15 de las normas de la FCC. El funcionamiento está sujeto a las dos condiciones siguientes: (1) Este dispositivo no puede causar interferencias perjudiciales, y (2) este dispositivo debe aceptar cualquier interferencia recibida, incluidas las interferencias que puedan causar un funcionamiento no deseado.
-
Page 70: Condición De Funcionamiento
INFORMACIÓN DE SEGURIDAD CONDICIÓN DE FUNCIONAMIENTO El aire acondicionado debe funcionar dentro del intervalo de temperaturas indicado a continuación. NOTA: El rendimiento de la unidad puede verse afectado cuando se utiliza fuera de estas temperaturas de funcionamiento. MODO TEMPERATURA AMBIENTE FRÍO 64°F (18°C) ~ 95°F (35°C) SECAR... -
Page 71: Configuración Y Uso
CONFIGURACIÓN Y USO PIEZAS Y CARACTERÍSTICAS Panel de control Filtro del evaporador Drenaje de deshumidi- ficación Mango Ruedas (4) Entrada del Ducto de escape de ducto aire Salida del ducto Control remoto 2 pilas AAA 2XTuerca de mariposa Panel de ventana 3 piezas Tira de espuma y tornillo Manguera de drenaje... -
Page 72: Guía De Instalación
CONFIGURACIÓN Y USO GUÍA DE INSTALACIÓN UBICACIÓN • El aire acondicionado debe colocarse sobre un suelo firme para minimizar el ruido y las vibraciones. Para una colocación segura, ubique el aparato sobre un suelo liso y nivelado lo suficientemente fuerte como para soportar la unidad. •... -
Page 73: Instalación Del Kit De Ventana
CONFIGURACIÓN Y USO INSTALACIÓN DEL KIT DE VENTANA El kit de ventana ha sido diseñado para adaptarse a la mayoría de las ventanas “Verticales” y “Horizontales”; sin embargo, puede ser necesario que usted improvise/modifique algún aspecto de los procedimientos de instalación para ciertos tipos de ventanas. -
Page 74: Instalación Del Ducto De Ventilación
CONFIGURACIÓN Y USO INSTALACIÓN DEL DUCTO DE SALIDA DE AIRE El ducto de salida de aire y la toma de aire deben instalarse o retirarse del aire acondicionado portátil de acuerdo con el modo en que se esté utilizando: ENFRIAR, SECAR: El ducto de salida de aire y la toma de aire deben conectarse al aire acondicionado portátil. -
Page 75: Panel De Control
CONFIGURACIÓN Y USO PANEL DE CONTROL Luz indicadora del modo de Indicador reposo luminoso Indicador luminoso Indicador luminoso del Ventilador de velocidad del temporizador depósito Frío Pantalla ventilador Secar lleno Indicador luminoso Botón de encendido encendido Botón de Botón de temporizador Botón de Botón... -
Page 76: Modo Ventilador
CONFIGURACIÓN Y USO NOTA: Consulte la sección de drenaje MODO FRÍO del agua (página 52). Ideal para cuando hace calor y se necesita refrescar la MODO VENTILADOR habitación. Para ajustar correctamente • Pulse el botón “MODE” hasta que se el funcionamiento del aparato, pulse encienda la luz indicadora “FAN”. - Page 77 CONFIGURACIÓN Y USO TEMPORIZADOR DORMIR • Para ajustar el temporizador de La función DORMIR ajusta PARADA AUTOMÁTICA. Cuando gradualmente la temperatura de el aparato esté encendido, pulse el la habitación para proporcionar un botón TIMER. ambiente confortable. Pulse el botón SLEEP para activarla.
-
Page 78: Descarga De La Aplicación Y Uso Mediante Wi-Fi
CONFIGURACIÓN Y USO DESCARGA DE LA APLICACIÓN Y USO MEDIANTE WI-FI Vuelva a instalar Pasos a Artículos de Cuenta nueva la APP (registrada seguir funcionamiento anteriormente) Descargar e instalar Paso 1 SÍ SÍ la aplicación Paso 2 Cuenta de registro SÍ... - Page 79 CONFIGURACIÓN Y USO ESPECIFICACIONES E INFORMACIÓN BÁSICA DEL MÓDULO WI-FI 1. Especificaciones mínimas del teléfono inteligente: Android versión 5.0 o superior IOS versión 10.0 o superior 2. Parámetros básicos para Wi-Fi: Parámetros Detalles Frecuencia de la red 2.400 - 2.500GHz Estándares de WLAN IEEE 802.11 b/g/n(channels 1-14) IPv4/IPv6/TCP/UDP/HTTPS/...
- Page 80 CONFIGURACIÓN Y USO MÉTODOS DE CONEXIÓN WI-FI 1. Si no tiene una cuenta, pulse el botón “Registrarse”. 2. Lea la Política de Privacidad y pulse “Aceptar”. 3. Pulse “▼” y elija el país (desplácese para elegir el país). Scroll to choose the country.
- Page 81 CONFIGURACIÓN Y USO 4. Introduzca su dirección de correo electrónico. 5. Pulse el botón “Obtener código de verificación”. 6. Introduzca el código de verificación que ha recibido por correo electrónico. 7. Establezca una contraseña con 6-20 caracteres, incluidos caracteres y números. 8.
-
Page 82: Inicio De Sesión
CONFIGURACIÓN Y USO INICIO DE SESIÓN 1. Si ya tiene cuenta, pulse “Iniciar sesión”. 2. Introduzca su cuenta registrada y su contraseña. 3. Pulse el botón “Iniciar sesión”. RESTABLECER LA CONTRASEÑA Si ha olvidado la contraseña o desea restablecerla, proceda como se indica a continuación: 1. - Page 83 CONFIGURACIÓN Y USO ACTIVAR LA CONFIGURACIÓN DE UBICACIÓN 1. Una vez iniciada la sesión en la aplicación, asegúrese de que el Bluetooth esté acti- vado en su smartphone y de que los permisos están activados. 2. Pulse “Añadir dispositivo” en la esquina superior derecha de la pantalla. Page 83...
- Page 84 CONFIGURACIÓN Y USO 3. Cuando los servicios de ubicación estén activados, pulse “Establecer ahora”. 4. Si tiene dificultades para conectarse automáticamente a la aplicación, asegúrese de que los servicios de ubicación de su smartphone estén activados. Page 84...
- Page 85 CONFIGURACIÓN Y USO 5. Active los servicios de ubicación accediendo a la pantalla de inicio de la aplicación. 6. En la pantalla de inicio, pulse sobre “Ubicación” e introduzca manualmente su ubicación actual. 7. Siga las instrucciones para configurar la gestión de los miembros de la familia, que permite a los distintos perfiles controlar los aparatos según sus preferencias.
-
Page 86: Métodos De Conexión
CONFIGURACIÓN Y USO MÉTODOS DE CONEXIÓN Hay dos formas de conectar el aparato a la APP. El modo EZ es la forma más sencilla y rápida de conectarse. El modo AP es un método alternativo para conectarse directamente al aparato. Asegúrese de que el aparato esté... - Page 87 CONFIGURACIÓN Y USO 2. Pulse “Electrodomésticos”. 3. Pulse “Portable AC BPO5JWAWF”. Asegúrese de activar la ubicación. Esto permitirá que la APP busque automáticamente el dispositivo. 4. Pulse “Establecer ahora”. 5. Introduzca el nombre y la contraseña de la red Wi-Fi cuando se le solicite y, a continuación, pulse “Siguiente”.
- Page 88 CONFIGURACIÓN Y USO 6. En el panel de control, pulse y mantenga pulsado el botón del ventilador durante 3 segundos cuando se le solicite en la APP. 7. La luz indicadora de encendido del panel de control del aparato parpadeará rápida- mente.
- Page 89 CONFIGURACIÓN Y USO 9. Una vez conectado, el aire acondicionado portátil puede ser controlado por la APP. Portable AC NOTA: Si la APP no se conecta al aparato en modo EZ, conéctese utilizando el modo CAMBIAR DE MODO 1. Pulse sobre el modo mostrado en la esquina superior derecha de la pantalla para acceder a una ventana que muestra tanto el Modo EZ como el Modo AP.
- Page 90 CONFIGURACIÓN Y USO CONEXIÓN AL DISPOSITIVO MEDIANTE EL MODO AP 1. Haga clic en “+” en la esquina superior derecha de la pantalla “Inicio” o toque “Añadir dispositivo”. 2. Pulse “Electrodomésticos”. 3. Toque “Portable AC BPO5JWAWF” y seleccione “Modo AP” en la esquina superior derecha de la pantalla.
- Page 91 CONFIGURACIÓN Y USO 4. En el panel de control, mantenga presionado el botón del ventilador durante 3 segundos. 5. La luz indicadora de encendido del panel de control de la unidad parpadeará lentamente. Pulse sobre la frase situada en la parte inferior de la pantalla “Pulse cuando la luz indicadora de encendido parpadee lentamente”.
- Page 92 CONFIGURACIÓN Y USO 9. Vuelva a la APP. Espere a que el aparato se conecte. 10. Una vez conectado, el aire acondicionado portátil puede ser controlado por la APP. Portable AC Page 92...
-
Page 93: Conexión Bluetooth
CONFIGURACIÓN Y USO CONEXIÓN BLUETOOTH 1. Pulse “Electrodomésticos”. 2. Pulse “Portable AC BPO5JWAWF”. 3. Selecciona “Bluetooth” en la esquina superior derecha de la pantalla. 4. Pulse y mantenga presionado el botón del ventilador en el panel de control del aparato, durante 3 segundos cuando se le indique en la APP. 5. -
Page 94: Control Del Aire Acondicionado Portátil Mediante La Aplicación
CONFIGURACIÓN Y USO CONTROLAR EL AIRE ACONDICIONADO PORTÁTIL CON LA APLICACIÓN Toque el símbolo de encendido en la parte superior derecha de la pantalla para encender el aire acondicionado. Pulse “Modo”. Seleccione Frío, Secar o Ventilador. Pulse - o + para seleccionar la temperatura. Toque “Swing”... - Page 95 CONFIGURACIÓN Y USO En el modo Secar, la unidad selecciona automáticamente una velocidad baja del ventilador. Una alerta indicará si es necesario vaciar el depósito de agua. Consulte las instrucciones de drenaje en la página 52. Toque Temporizador. Seleccione para programar el encendido y apagado con el temporizador. Page 95...
-
Page 96: Configuración Del Dispositivo Para Control Por Voz
CONFIGURACIÓN Y USO CONFIGURACIÓN DEL DISPOSITIVO PARA CONTROL POR Siga las instrucciones de emparejamiento para conectar el aire acondicionado a la APP Black + Decker utilizando la misma red Wi-Fi. El nombre predeterminado cuando se utiliza el control por voz es “Portable AC”, como se muestra en la parte superior de la pantalla. - Page 97 CONFIGURACIÓN Y USO Aparecerá una ventana emergente. Escriba el nuevo nombre. El nombre debe ser fácil de recordar y diferente del de otros dispositivos conectados que utilicen el control por voz. Pulse “Confirmar”. Page 97...
-
Page 98: Configuración Del Control Por Voz Con Amazon Alexa
CONFIGURACIÓN Y USO CONFIGURACIÓN DEL CONTROL POR VOZ CON AMAZON ALEXA Necesitará un dispositivo Alexa como Amazon Echo o Echo Dot configurado con la APP Alexa según las instrucciones del fabricante. El dispositivo debe estar encendido y conectado a una red Wi-Fi. En la página de inicio de la APP Black + Decker, pulse “Perfil”... - Page 99 CONFIGURACIÓN Y USO Pulse “Iniciar sesión con Amazon”. Inicie sesión y utilice la misma contraseña que para la APP de Alexa. Pulse “Vincular”. Page 99...
- Page 100 CONFIGURACIÓN Y USO Abra la APP Alexa y active “Smart Home Skills” para Black + Decker Home. Alexa puede localizar el dispositivo cuando diga “Alexa, descubre mi dispositivo”. Siga las indicaciones de la APP Alexa para gestionar el dispositivo y controlar el aire acondicionado mediante los comandos de voz.
- Page 101 CONFIGURACIÓN Y USO COMANDOS DE VOZ ALEXA En los siguientes ejemplos se utiliza el nombre de dispositivo “aire acondicionado portátil”. Consulte la sección “Configuración del dispositivo de control por voz” para obtener instrucciones sobre cómo cambiar el nombre del dispositivo. Para encender y apagar la “Alexa, enciende el aire acondicionado portátil”.
-
Page 102: Configuración Del Control Por Voz Con El Asistente De Google
CONFIGURACIÓN Y USO CONFIGURACIÓN DEL CONTROL POR VOZ CON EL ASISTENTE DE GOOGLE Necesitará un dispositivo como Google Nest o Google Nest mini configurado con la APP Google Home según las instrucciones del fabricante. El dispositivo debe estar encendido y conectado a una red Wi-Fi. En la página de inicio de la APP Black + Decker, pulse “Perfil”... - Page 103 CONFIGURACIÓN Y USO Toque “Asistente de Google”. Abra la aplicación Google Home y toque Configuración en la parte inferior derecha de la pantalla. Toque “Funciona con Google”. Page 103...
- Page 104 CONFIGURACIÓN Y USO Busque “Black + Decker Home” escribiéndolo en la barra de búsqueda. Pulse para seleccionar “Black + Decker Home”. La APP de Google mostrará indicaciones para enlazar con un código de verificación de la APP Black + Decker Home o enlazar con la contraseña de la cuenta. Utilice el mismo correo electrónico y contraseña de la APP Black + Decker Home para comple- tar la autorización.
- Page 105 CONFIGURACIÓN Y USO COMANDOS DE VOZ DEL ASISTENTE DE GOOGLE En los siguientes ejemplos se utiliza el nombre de dispositivo “aire acondicionado portátil”. Consulte la sección “Configuración del dispositivo de control por voz” para obtener instrucciones sobre cómo cambiar el nombre del dispositivo. Para encender y apagar la unidad.
-
Page 106: Operación Desde El Control Remoto
CONFIGURACIÓN Y USO OPERACIÓN DESDE EL CONTROL REMOTO INSTALACIÓN DE LAS PILAS (PILAS INCLUIDAS) (1) Abra la tapa del compartimento de las pilas. (2) Inserte 2 pilas “AAA” como se muestra. (3) Deslice hacia atrás la tapa de la batería. PRECAUCIÓN: Utilice sólo pilas alcalinas AAA o IEC RO3 de 1,5 V. - Page 107 CONFIGURACIÓN Y USO CONTROL REMOTO Botón de modo Botón de velocidad del ventilador Botón Aumentar / Disminuir Botón de temporizador Botón de dormir Botón de giro aire ENCENDIDO/ APAGADO BOTÓN DE ENCENDIDO: Pulsar para encender o apagar BOTÓN TEMPORIZADOR: Permite programar un temporizador de arranque o de parada.
-
Page 108: Botón De Encendido
CONFIGURACIÓN Y USO BOTÓN DE ENCENDIDO • Pulse para encender o apagar el aire acondicionado. BOTÓN DE MODO • Pulse el botón de modo para cambiar entre FRÍO, SECAR, y VENTILADOR. • El símbolo correspondiente se iluminará en la pantalla LED para indicar el modo seleccionado. - Page 109 CONFIGURACIÓN Y USO TEMPORIZADOR • Para ajustar el temporizador de PARADA AUTOMÁTICA. Cuando el aparato esté encendido, pulse el botón TIMER. • Pulse el botón o para seleccionar el TIEMPO AUTO en incrementos de 1 hora, hasta 24 horas. El panel de control indicará el tiempo seleccionado. Pulse de nuevo el botón TIMER para ajustar el tiempo seleccionado.
-
Page 110: Funciones De Protección
CONFIGURACIÓN Y USO FUNCIONES DE PROTECCIÓN • Función de protección contra congelamiento: En un entorno frío, si la temperatura del sensor de la tubería EVA es demasiado baja, el aparato entrará automáticamente en estado de protección: si la temperatura del sensor de la tubería EVA sube a una temperatura determinada (50°F), puede volver automáticamente al funcionamiento normal. -
Page 111: Drenaje De Agua
CONFIGURACIÓN Y USO DRENAJE DE AGUA Este aire acondicionado está equipado con evaporación automática de agua, por lo que el compartimento de agua no se llenaría normalmente en el modo de refrigeración a menos que haya mucha humedad. Por lo general, el drenaje del agua sólo será... -
Page 112: Limpieza Y Cuidado
LIMPIEZA Y CUIDADO LIMPIEZA ADVERTENCIA: Antes de limpiar o realizar tareas de mantenimiento, apague el aparato pulsando el botón del panel de control o mando a distancia. Desenchúfelo de la toma de corriente. LIMPIEZA DE LA CARCAZA Limpie el aparato con un paño ligeramente humedecido y séquelo con un paño seco. -
Page 113: Solución De Problemas Y Garantía
SOLUCIÓN DE PROBLEMAS Y GARANTÍA ANTES DE LLAMAR AL SERVICIO TÉCNICO SI EL AIRE ACONDICIONADO NO FUNCIONA: A) Compruebe que el aire acondicionado esté bien enchufado. Si no es así, desenchufe el aparato de la toma de corriente, espere 10 segundos y vuelva a enchufarlo firmemente. -
Page 114: Solución De Problemas
SOLUCIÓN DE PROBLEMAS Y GARANTÍA Solucione su problema utilizando la tabla siguiente. Si el aire acondicionado sigue sin funcionar correctamente, póngase en contacto con el centro de atención al cliente BLACK+DECKER o con el centro de servicio autorizado más cercano. Los clientes nunca deben reparar los componentes internos. - Page 115 SOLUCIÓN DE PROBLEMAS Y GARANTÍA SOLUCIÓN DE PROBLEMAS DE APLICACIONES Y CONTROL DE VOZ PROBLEMA POSIBLE CAUSA POSIBLE SOLUCIÓN El Wi-Fi no está activado en el Enciende el Wi-Fi del smartphone. smartphone. No es posible registrarse o Instale un extensor Wi-Fi (no incluido). acceder a la cuenta.
- Page 116 SOLUCIÓN DE PROBLEMAS Y GARANTÍA PROBLEMA POSIBLE CAUSA POSIBLE SOLUCIÓN Desactive las funciones Wi-Fi de algunos de los dis- positivos conectados. El número de dispositivos co- nectados ha alcanzado el límite del router. Vuelva a configurar el router. El aparato no se conecta con la aplicación.
-
Page 117: Garantía Limitada
SOLUCIÓN DE PROBLEMAS Y GARANTÍA GARANTÍA LIMITADA Cualquier reparación, reemplazo o servicio LA REPARACIÓN O REEMPLAZO SEGÚN LO ESTIPULADO EN ESTA GARANTÍA ES EL de garantía, y todas las preguntas sobre este ÚNICO RECURSO DEL CLIENTE; W APPLIANCE producto deben dirigirse a W Appliance Co. al Co.. - Page 118 ACTIVATE WARRANTY BLACK & DECKER, BLACK+DECKER, los logotipos y nombres de productos de BLACK & DECKER y BLACK+DECKER son marcas comerciales de The Black & Decker Corporation, utilizado bajo licencia. Reservados todos los derechos. El producto de esta caja puede diferir ligeramente del que se muestra en la imagen.
Need help?
Do you have a question about the BP05JWAWF and is the answer not in the manual?
Questions and answers