Advertisement
- 1 Safety Instructions
- 2 Package Contents
- 3 Product Overview
- 4 Assembly
- 5 Charging
- 6 Connect with Mi Home/Xiaomi Home App
- 7 How to Ride
- 8 Lock/Unlock Your Scooter
- 9 Precautions
- 10 Fold/Unfold & Carry
- 11 Care & Maintenance
- 12 Specifications
- 13 Safety Warning
- 14 Troubleshooting
- 15 Documents / Resources
Safety Instructions
IMPORTANT SAFETY INSTRUCTIONS
When using an electrical appliance, basic precautions should always be followed, including the following:
READ ALL INSTRUCTIONS BEFORE USING (THIS APPLIANCE). Failure to follow the warnings and instructions may result in electric shock, fire and/or serious injury.
SAVE THESE INSTRUCTIONS
Prolonged Exposure to UV Rays, Rain and the Elements May Damage the Enclosure Materials, Store Indoors When Not in Use.

To reduce the risk of injury, user must read instruction manual
- The scooter shall be used by one person only. Shoes muse be worn while riding. Do not use the scooter for other purpose. This scooter is not intended for acrobatic use.
- The product is recommended for riders above age of 16 and below age of 50. People who are not suitable for riding this product include:
- persons under the influence of alcohol or drugs,
- persons unable to engage in strenuous physical activities due to health or physical conditions,
- persons who are incapable of keeping their balance or who cannot keep their balance due to impaired motor skills,
- persons whose size exceeds the weight limit,
- women who are pregnant,
- persons who suffer from visual and/or hearing impairments.
- Comply with local laws and regulations when riding this product. Do not ride where prohibited by local laws.
- When riding in countries and regions where there are no relevant national standards and regulations for electric scooters, please be sure to strictly abide by the safety requirements for drivers in this operation manual. Brightway innovation Intelligent Technology (Suzhou) Co., Ltd. will not bear any direct responsibility and joint and several liability for all property, personal losses, accidents, legal disputes, and all other adverse events that cause conflicts of interest caused by the use of behaviors in violation of the instructions for use.
- Do not ride in traffic lanes or residential areas where vehicles and pedestrians are both allowed. When passing through a place designated for pedestrians who are entitled to the right-of-way laws like crosswalk, please get off to walk along with the scooter.
- Do not choose places where children, pedestrians, pets, vehicles, bicycles or other obstacles and potential dangers may appear for your first ride.
- Perform a basic inspection of the electric scooter before each ride. If there are abnormal conditions such as loose parts, low battery alerts, flat tires or excessive wear of tires, strange sounds, malfunctions and other abnormal conditions, stop riding immediately and call for professional support.
- To ride safely, you must be able to clearly see what is in front of you and you must be clearly visible to others.
- Do not ride in bad weather, low visibility, or after intense physical exertion.
- Always park the scooter with kickstand on an even and stable surface.
- This electric scooter is a leisure device. However, when entering a public area, it will be considered a means of transportation and subject to possible safety risks for all means of transportation. Riding in strict accordance with the instructions in this manual will protect you and others to the greatest extent.
- The user should check the limits of use in accordance with the local regulations. Ride the scooter on the roads or areas permitted by local regulations and laws and park it in the areas permitted. The maximum speed of the scooter is limited to 19.9 mph (32 km/h). If the local regulations and laws have different provisions on the maximum speed, the local regulations and laws will prevail. Please respect and follow the road safety and vehicle rules.
- Respect pedestrians' Right of Way. Try not to startle them while driving, especially children. When you ride from behind pedestrians, ring your bell to give them a heads-up and slow your scooter down to pass from their left, and keep to the right at a low speed while riding across them (applicable to countries where vehicles drive on the right). When you drive across pedestrians, keep the lowest speed or getting off the vehicle.
- In any case, anticipate your trajectory and your speed while respecting the code of the road, the code of the sidewalk and the most vulnerable. Notify your presence when approaching a pedestrian or cyclist when you are not seen or heard. Cross the protected passages while walking. Cross the protected passages while walking. Avoid high traffic areas or overcrowded areas.
- Riding with high speed or a speed that is not appropriate or adequate for the situation (bad weather conditions, bad surface conditions, or the like) may lead into a potential loss of stability or loss of control. To reduce any risk, you must follow all instructions in this manual. Be careful when mounting and dismantling the product, it may fall and cause injury.
- Traffic in the city has many obstacles to cross such as curbs or steps. It is recommended to avoid obstacle jumps. It is important to anticipate and adapt your trajectory and speed to those of a pedestrian before crossing these obstacles. It is also recommended to get out of the vehicle when these obstacles become dangerous due to their shape, height or slippage.
- Do not lend your scooter to whoever does not know the operations. Before lending the electric scooter to others, please make sure that the rider has read this instruction manual and watched the instruction video, and understood the basic operation. Remind riders to wear safety protection correctly to ensure the safety of riders.
- Contact your seller for appropriate training organizations.
- In all cases, take care of yourself and others.
- Any load attached to the handlebar will affect the stability of the vehicle.
- Do not touch the brake system, it could cause injuries due to sharp edges. The brake may become hot in use. Do not touch after use.
- The A-weighted emission sound pressure level is less than 70 dB(A).
- For a better riding experience, it is recommended to carry out a regular maintenance of the product.
- Eliminate any sharp edges caused by use.
- Accessories and any additional items which are not approved by the manufacturer shall not be used.
- Regularly check the tightening of the various bolted elements, in particular the wheel axles, the folding system, the steering system and the brake shaft.
- Do not modify or transform the vehicle, including the steering tube and sleeve, stem, folding mechanism and rear brake.
- Make sure the scooter is turned off when being transported and kept in its original packaging if possible.
- In order to avoid accidental injuries such as electric shock and fire caused by improper use, please read the instructions carefully before use, and keep them properly for future reference.
- Please use this product in accordance with the instructions in the User Manual. Users are responsible for any loss or damage arising from improper use of this product.
- Do not charge if the charge port or charge cable is wet. Read this manual carefully before charging.
- Do not charge the scooter at an ambient temperature above 40°C or below 0°C.
- Personal e-mobility devices not intended for use in high altitude locations, which may require increased electrical spacings in electrical circuits, shall indicate that they are not intended for use at elevations greater than 2000 m above sea level.
![]()
For the purposes of recharging the battery, only use the detachable supply unit provided with this appliance. Do not use a battery charger from any other product. Keep a safe distance from the surrounding combustibles when charging.![]()
Do not use any third-party battery or battery charger. Use only with BCTA+71420-1701 supply unit.![]()
Keep plastic covering away from children to avoid suffocation.![]()
Never use the product close to a water source.![]()
Stop using the product when damaged.![]()
Risk of Fire and Electric Shock – No User Serviceable Parts.

 detachable power supply part
Environmental Instructions
The scooter contains a rechargeable lithium-ion battery pack, and improper disposal of these batteries will cause harm to the environment. Follow the steps below to remove the batteries before disposing of the scooter and discard the batteries properly:
- Before removing the battery, power off and drain it to the full extent. Then tear the footpad and unscrew the fixing bolts between the pedal and frame to open the foot pedal.
- Unplug the battery connector, and then remove the batteries. Do not damage the battery case to avoid any risk of injuries.
- Discard the removed batteries at a professional recycling facility.
Package Contents

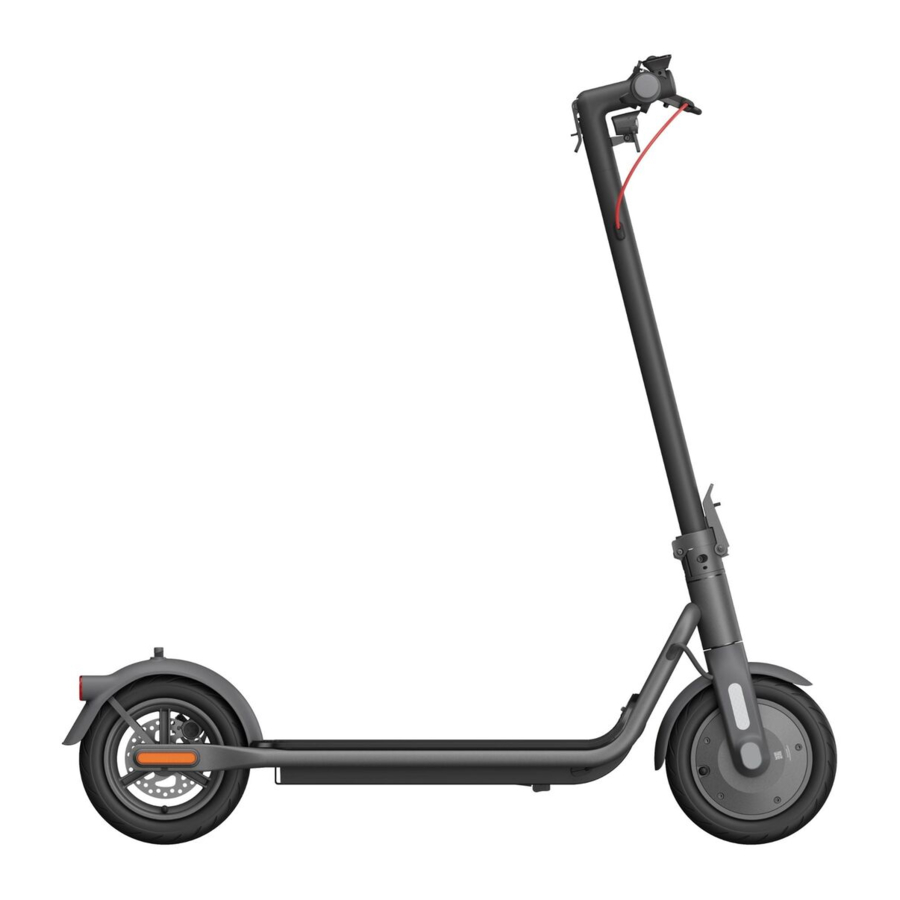
Product Overview
Electric Scooter

The illustrations in this manual are for reference only, the actual appearance shall be subject to actual product.
Dashboard

- Lock: When the icon lights up, it indicates that the scooter is locked. You can lock/unlock the scooter via the Mi Home/Xiaomi Home app.
- Bluetooth: The Bluetooth icon is always on, indicating that the scooter has been successfully connected to the mobile device.
- Inflation: When the inflation icon is on, it means that it is time to maintain the tires.Tips: After maintenance, follow the instructions on the APP or press the brake and power key at the same time to turn off the inflation reminder on the dashboard.
- Error Notification: When the wrench icon displays red, it indicates that the scooter has an error.
- Temperature Warning: If the battery temperature is too high or too low, the thermometer icon will be on. Use or charge the scooter after its battery temperature returns to the normal operating range.
- Speedometer: It displays the current speed when the scooter is working. When the scooter has an issue, it displays an error code. When the scooter is charging, it displays the current battery level.
- Riding Modes:
![]() is for walking mode, and its maximum speed is 6 km/h.
is for walking mode, and its maximum speed is 6 km/h.
D is for standard mode.
S is for sport mode. - Battery Level: The battery power is indicated by 5 bars, each representing approximately 20% of a full battery.
Power Button

Power Button: Press the button ![]() to turn the scooter on, and hold the button
to turn the scooter on, and hold the button ![]() for 2 to 3 seconds to turn the scooter off. When the scooter is on, press once to turn on/off the headlight and tail light, and press twice to change riding modes.
for 2 to 3 seconds to turn the scooter off. When the scooter is on, press once to turn on/off the headlight and tail light, and press twice to change riding modes.
 Note: The scooter will turn off automatically when it enters standby mode for more than 10 minutes. The standby mode means that the scooter is being charged or not locked when it is on and not running.
Assembly
- Erect the vertical column to a complete upright position, lift up the safety lock and push the folding wrench inward tightly. Then open the kickstand.

- Press the safety lock and pull out the quick release lever. Then turn the handlebar 90° counterclockwise and push the quick release lever inward.


Install AirTag holder
 Tips: You need to buy AirTag separately.
Preload the AirTag into the AirTag holder according to the pictures.

Hold the stem, press the safety lock, pull out the quick release lever, fold the stem, and insert the AirTag holder into the base.
Erect the vertical column to a complete upright position, lift up the safety lock and push the folding wrench inward tightly.

Charging
The scooter is fully charged when the LED on the battery charger changes from red to green.

- Open the charging
![]()
- Plug the battery charger into the charging port.
![]()
After charging, pull the plug and close the charging port cover tightly
![]()


- Only use the original battery charger to avoid potential damage or fire. Switch off the vehicle or into a certain non-operational mode during charging.
- Do not charge when the charging port or power cord is wet. If the battery is damaged or soaked with water, it is forbidden to charge or continue to use the battery


When the scooter is turned off for about a month with the battery level of the scooter being lower than 30%, the scooter will enter sleep mode. In this case, the scooter cannot be turned on. To exit the sleep mode, charge the scooter for about three seconds to activate the battery.
Connect with Mi Home/Xiaomi Home App
- Scan the QR code on the scooter, located on the right side of the footboard, or on the back cover of the user manual to download the Mi Home APP.

- Open the Mi Home/Xiaomi Home app. Tap "+" on the top right corner and open "Scan" to scan the QR code again. Then follow the instructions in the app to add the scooter.
![]()


Note:
- The QR code is unique to your scooter, please keep it safe.
- When connecting the scooter to the Mi Home/Xiaomi Home app, place your phone to the scooter as close as possible to make sure it is within the effective Bluetooth range.
- If change the account, delete the scooter from the account it is paired with first, then reconnect the scooter with the Mi Home/Xiaomi Home app.
Reset Bluetooth
Make sure the scooter is turned on. Squeeze the brake lever, and press the power button 5 times to reset. When the scooter beeps, it has been reset successfully.
Restore Factory Settings
Make sure the scooter is turned on. Squeeze the brake lever, and simultaneously press and hold the power button for 7 seconds. When you hear a beep, the scooter has been restored to factory settings. This operation will completely delete the data stored in the scooter, please proceed with caution.
Note: The scooter cannot be restored to factory settings during riding or when locked.
How to Ride
Before riding
Before each ride, please check the status of your scooter, including tire performance, remaining battery level and scooter body state, and ensure that no part is loose or damaged.

Before riding, please wear helmets, knee pads, elbow pads, and other protective gear at all times.

Starting & Accelerating
Step on the deck with one foot, and slowly kicks off the other on the ground. When the scooter starts to coast, put both feet on the deck and gently press the accelerator.

Tips: For your riding safety, the motor will not start until the speed reaches 5km/h.
Steering
Tilt your body to the steering direction as you turn, and slowly turn the handlebar.

Decelerating & Braking & Parking
Release the accelerator to slow down, and squeeze the brake lever for a sudden brake.

When the scooter slows down or stops, put one foot on the ground to get off the scooter. Put down the kickstand when parking the scooter.

To avoid others using the scooter without your permission, you can lock the scooter when it is parked.
Lock/Unlock Your Scooter
When the scooter is locked, the motor is locked and all the icons on the control panel will automatically go out except the Bluetooth icon and the lock icon. If the scooter goes beyond the Bluetooth connection range, the Bluetooth will be disconnected and its icon will go out.
After the scooter is locked in the app, the motor will be locked and the power button will not function. If the scooter is moved forcibly, its front wheel cannot move normally, and it will have a rolling resistance accompanied by the buzzer alarm and a vibrating alert on the phone. This function cannot prevent the scooter from being stolen, please keep your scooter safe. The scooter will automatically turn off after 24 hours of being locked, and it will remain locked when turned on again. To unlock the scooter, tap "Unlock" in the app. Locking the scooter will consume the scooter's power, please use this function wisely.
Note: The phone will vibrate only if the page of the scooter in the Mi Home/Xiaomi Home app is open.
Precautions
Note: Before using the product, please carefully read and abide by the following important safety information.
![]() This product can only be used by one person, do not carry others at the same time.
This product can only be used by one person, do not carry others at the same time.

 Do not try riding up or down stairs, nor try jumping over obstacles.

![]() Do not keep your feet on the rear mudguard.
Do not keep your feet on the rear mudguard.

![]() Do not use mobile phone or wear earphones when operating the scooter.
Do not use mobile phone or wear earphones when operating the scooter.

![]() Do not touch the disc brake.
Do not touch the disc brake.

![]() Do not hang bags or other heavy stuff on the handlebar.
Do not hang bags or other heavy stuff on the handlebar.

![]() Do not use this product beyond the maximum load (120 kg) as specified by this product.
Do not use this product beyond the maximum load (120 kg) as specified by this product.

 Do not press the accelerator when you're walking alongside the scooter.

![]() Do not abruptly change the steering direction at high speed.
Do not abruptly change the steering direction at high speed.

![]() Avoid hitting your head on door frames, elevators, and other overhead obstacles.
Avoid hitting your head on door frames, elevators, and other overhead obstacles.

![]() Please don't ride in bad weathers such as rain, snow, fog, hail, and when the road is slippery or icy. If you encounter the above situations on the way, please do not make an emergency break. Keep your distance and slow down to get off. You can walk with your scooter or fold it up for transportation.
Please don't ride in bad weathers such as rain, snow, fog, hail, and when the road is slippery or icy. If you encounter the above situations on the way, please do not make an emergency break. Keep your distance and slow down to get off. You can walk with your scooter or fold it up for transportation.

![]() Do not make dangerous actions during riding, such as riding with one leg or one hand. Make sure that both legs and hands are kept on the electric scooter.
Do not make dangerous actions during riding, such as riding with one leg or one hand. Make sure that both legs and hands are kept on the electric scooter.

![]() Unless otherwise authorized by the local laws, it is forbidden and illegal to ride on public roads, motorways, and expressways.
Unless otherwise authorized by the local laws, it is forbidden and illegal to ride on public roads, motorways, and expressways.

 In case of uneven roads or other poor road conditions, please slow down in time and ride carefully, slow down or get off the vehicle. Scooter is special riding products. Please try to ride on flat roads without potholes.

Fold/Unfold & Carry
The scooter MUST be turned off before being folded.
Fold
- The scooter MUST be turned off before being folded. Hold the handlebar, press the safety lock, and pull out the quick release lever. Then turn the handlebar 90° clockwise and push the quick release lever inward.
![]()

- Hold the stem, press the safety lock, pull out the quick release lever, then fold the stem.


Unfold
Align the buckle with the hook and secure them together.

Carry
Hold the stem with either one hand or both hands to carry.

Safety Tips: When lifting the stem of the scooter, NEVER put your hands between the joints as may result in serious injuries.
Care & Maintenance
Cleaning
Before cleaning the scooter, you must turn off the power, unplug the charging cables and close the charging cover tightly.
Wipe the main chassis with a soft damp cloth, the hard-to-remove dirt can be scrubbed with a toothbrush. Afterwards, wipe all areas with a dry cloth.
- Do not wash the scooter with a high-pressure water spray.
- Do not clean the scooter with corrosive cleaner, which will damage the external and internal structure of the scooter.
Battery
Always charge before exhausting the battery to prolong the battery's lifespan.
When riding, storing or charging, do not exceed the specified temperature limit (refer to specifications). Failure to follow instructions for use, storage or charging may result in battery damage, failure to charge and void warranty.
The fully charged scooter has an approximate standby time of 120-180 days. If it is not used for a long time, it should be charged every 30 days. Please pay attention to the standby time to prevent irreversible damage to the battery caused by not charging.
- Do not use battery packs of other models or brands, as there may be a safety risk.
- Only use the original battery charger to avoid potential damage or fire.
- If the battery is damaged or soaked with water, do not charge or continue to use it.
- Do not remove the battery. Removing the battery is complicated, and improper operation may affect the operation of the scooter.
Storage
If the scooter will not be used for an extended period, fully charge it, then turn it off and store it in a cool, dry place.
Make sure the scooter is turned off when being transported and kept in its original packaging if possible.
- Please do not leave the scooter under hot sun or severely humid place for extended periods of time.
- Please do not place the scooter near flammable materials.
- This product contains a built-in lithium battery and must be transported only when permitted by local laws and regulations.
Inflate the Tire
Check the tire pressure every month, and inflate the tires if the pressure is too low. The recommended tire pressure is 45-50 psi.

If there is a lack of air in the front and rear tires, you may use the extended nozzle supplied with the scooter to inflate tires. First connect the extension nozzle with air pump, then unscrew the front (rear) tire valve cap, and connect the extension nozzle and the valve securely together, then Inflate the tire.
Tire removal is very complicated. Please do not remove the tire by yourself. Improper operation may affect the operation of the scooter. Please contact professional support.
Adjust the Disc Brake
Tool: 4 mm hex key (the tool needs to be prepared by the user).

Before adjusting, make sure the scooter is turned off and not being charged. During adjusting, pull the end of the brake cable to make the cable tight.
Note: If the brake is too tight, use the tool to loosen the screw by turning it counterclockwise, pull the disc brake rocker arm outwards, and then tighten the screw. If the brake is too loose, use the tool to loosen the screw by turning it counterclockwise, push the disc brake rocker arm forwards, and then tighten the screw.
As with any mechanical component, a vehicle is subject to high stresses and wear. The various materials and components may react differently to wear or fatigue. If the expected service life for a component has been exceeded, it may break suddenly, therefore risking causing injuries to the user. Cracks, scratches and discoloration in the areas subject to high stresses indicate that the component has exceeded its service life and please contact an authorized or a specialized repairer.
Scooter Maintenance Schedule (Recommended):
Maintaining the scooter regularly can help keep the scooter neat and in good condition, avoid safety hazards, minimize breakdowns, slow down the deterioration of the scooter, and extend the scooter's service life.
| Item | Service Object | Actions | Every month | Every 3 months | Every 500 km/ 6 months | Every 1000 km/ 1 year | Every 10000 km/ 3 years |
| Tires | Tire Pressure | Inflate the tire until its pressure reaches 45-50 psi. | ✓ | ✓ | ✓ | ✓ | |
| Tire Tread Wear | Check whether the tire is cracked, deformed, worn, etc. | ✓ | ✓ | ✓ | |||
| Screws | Handlebar Assembly Screws | Tighten the screw that connects the handlebar assembly with the stem assembly (with the recommended torque of 4.8 ± 0.2 N- m). | ✓ | ✓ | ✓ | ✓ | |
| Tighten the accelerator screw (with the recommended torque of 1.6 ± 0.1 N- m). | ✓ | ✓ | |||||
| Tighten the brake lever screw (with the recommended torque of 5 ± 0.2 N- m). | |||||||
| Disc Brake Caliper | Tighten the screw that fixes the disc brake caliper (with the recommended torque of 3.5 ± 0.5 N- m). | ✓ | ✓ | ✓ | |||
| Functions | Brake Adjustment | Before adjusting, make sure the scooter is turned off and not being charged. Tool: 4 mm hex key (the tool needs to be prepared by the user). During adjusting, pull the end of the brake cable to make the cable tight.
| ✓ | ✓ | ✓ | ||
| Charging | Charge the scooter at a suitable temperature. The indicator on the battery charger is red when the scooter is charging, and turns green when the scooter is fully charged. The control panel will show the charging status simultaneously during charging. | ✓ | ✓ | ✓ | |||
| Steering | Turn the handlebar 60° to the left and right to make sure the turning angle is correct and the steering is free from resistance and stagnation. | ✓ | ✓ | ||||
| Important Components | Battery Assembly | Fully charge the scooter before leaving it unused for a long time, and turn it on to charge every 60 days. | ✓ |
Specifications

[1] Vehicle height: From the ground to the top of the scooter.
[2] General range: Measured when there is no wind and at 77°F (25°C), the scooter is fully charged to ride at a constant speed of 9.3 mph (15 km/h) on a flat surface with a load of 165.3 lbs (75 kg)
[3] To recharge the battery, only use the battery charger provided in the package. Please see battery charger parameters in Specifications.
Safety Warning
- Sharp Edges
- Crush Hazard
- Hot Surface
- Mind Your Hand
- Do Not Disassemble
- Pinch Point
Troubleshooting
| Error Codes | Reasons | Solutions |
| 10 | Dashboard failure | Please timely contact after-sales service for detection and repair. |
| 11/12/28/29/40 | Controller failure | |
| 14 | Accelerator failure | Please check that the accelerator is returned to its position, otherwise it cannot run normally. |
| Please timely contact after-sales service for detection and repair if the accelerator wiring harness is loose or damaged. | ||
| 15 | Brake failure | Please check that the brake lever is returned to its position, otherwise it cannot run normally. |
| Please timely contact after-sales service for detection and repair if the accelerator wiring harness is loose or damaged. | ||
| 18 | Motor failure | Please timely contact after-sales service for detection and repair. |
| 21/24/39 | Battery pack failure | |
| 45 | Controller over temperature | Let the scooter cool down, and do not use it until the temperature has returned to normal. |
| 50 | Battery pack over temperature | |
| 52/53 | Battery pack communication fault, verification failure | Try to restart the scooter to restore it. If it cannot be restored, contact after-sales service for detection and repair. |
Documents / ResourcesDownload manual
Here you can download full pdf version of manual, it may contain additional safety instructions, warranty information, FCC rules, etc.
Advertisement


Need help?
Do you have a question about the V50 and is the answer not in the manual?
Questions and answers