Advertisement
- 1 Product Overview
- 2 Preparing for Use
- 3 Instructions for Use
- 4 Care and Maintenance
-
5
Troubleshooting
- 5.1 Unable to power on
- 5.2 Unable to charge
- 5.3 Network connection failure
- 5.4 Unable to create partition map in the app
- 5.5 Cannot locate the station, unable to return
- 5.6 Slow charging speed
- 5.7 Abnormal behavior
- 5.8 Side Brush fell off
- 5.9 Ground not cleaned up
- 5.10 Dust leaked while working
- 5.11 Loud operating noise
- 5.12 Abnormal sound emitted while moving
- 6 Documents / Resources
Product Overview
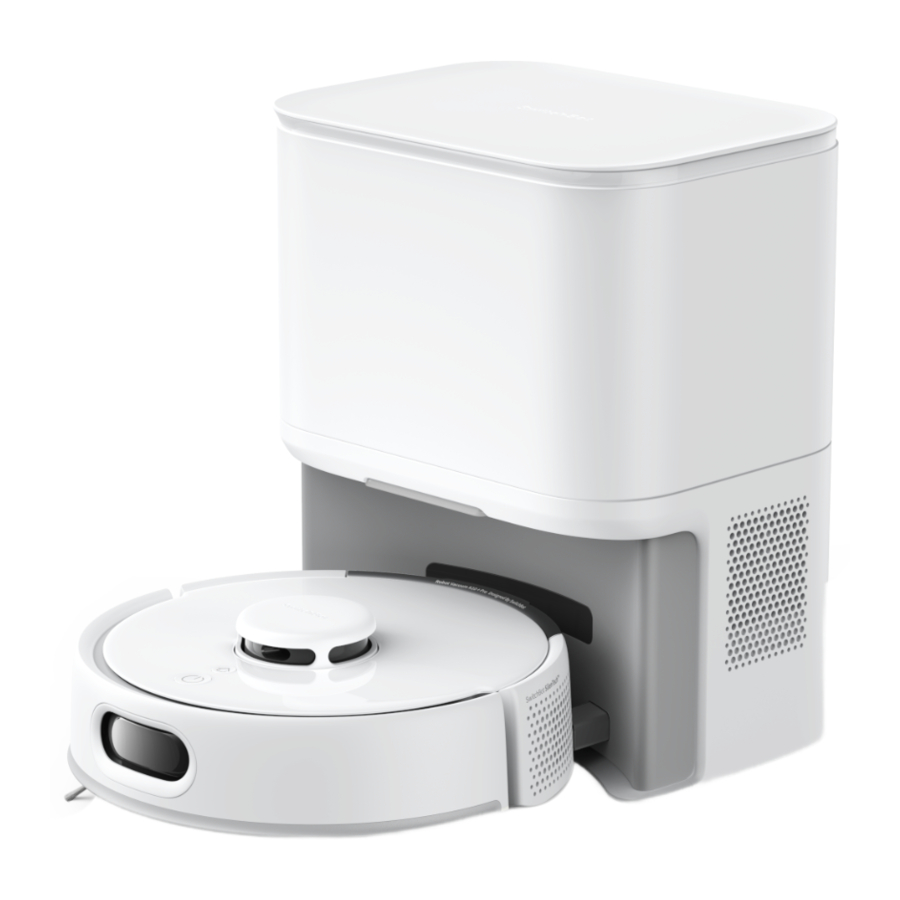
List of Components
Robot


Dustbin

Dual Empty Station


Preparing for Use
Decluttering
Before starting the robot, please check the floor and clean up any scattered items such as wires, socks, slippers, children's toys, etc. to improve the efficiency of the robot. Clear the floor of hard or sharp objects (e.g., nails, glass), and move away items that are fragile, valuable, or potentially dangerous to avoid being caught, tangled, or knocked over by the robot, causing personal injury or property damage.

Before cleaning, please use a physical barrier to avoid areas where robot may fall or get stuck, ensuring the safety and smooth operation of your robot.

Open the doors of the rooms to be cleaned, arrange the furniture neatly, and try to clear a largest cleaning space. Please avoid standing in front of your robot, doorways, or narrow passages in case your robot cannot detect the area to be cleaned.
 Note
Note
- When using the robot for the first time, follow it throughout its whole cleaning route and watch for potential problems. This will help you identify and resolve minor issues, ensuring a more efficient cleaning process in the future.
- If the robot gets stuck under low furniture, you can try the following solutions:
- Block the bottom of the furniture;
- Set a virtual wall in the app to prevent the robot from entering;
- If possible, raise the furniture slightly.
Placing the Dual Empty Station

- Place the Dual Empty Station on a hard, level surface (such as a floor or ceramic tile) against a wall, ensuring there is at least 1 m (3.3 ft.) of space in front and above, and 0.5 m (1.6 ft.) on both sides. Make sure the location has a good Wi-Fi signal to provide a better network connection and app user experience.
- Plug the Dual Empty Station into an outlet, ensure the indicator light turns on.
Note
- The power cord may be dragged by the robot if hanging on the ground, causing the Dual Empty Station to move or disconnect from power.
- The indicator light on the Dual Empty Station will stay on when powered, and turn off when the robot is charging.
- If there is an issue with the Dual Empty Station, the indicator light will turn red and stay on as a reminder.
- Make sure to place the Dual Empty Station on a level indoor surface, away from open flames, heat sources, water, narrow spaces, or areas where the robot may fall.
- Placing the Dual Empty Station on non-hard surfaces (such as carpets, mats, etc.) poses a risk of tipping over, and the robot may not be able to leave the Dual Empty Station properly.
- Do not place the Dual Empty Station under direct sunlight or block its signal emitter area with any objects, as this may prevent the robot from returning automatically.
- Please maintain the Dual Empty Station according to the maintenance instructions and avoid using wet cloths or wipes for cleaning.
Preparing Your Robot
Removing the protective foam strips

Installing the Side Brush

Note
When you hear a clicking sound, it means the Side Brush has been properly installed.
Powering on and charging
- Remove the faceplate as shown in the picture, and turn on the Power Switch. "I" means powered on, and "O" means powered off.


- Wait for the indicator light on your robot to turn on, then manually dock your robot to the Dual Empty Station to charge, as shown in the picture. You will hear the voice prompt "Charging".


Note
Before the initial use of the robot, it's advised to charge it for 3 to 4 hours. If it fails to turn on, it may be due to low battery. Please dock the robot directly to the Dual Empty Station.
Instructions for Use
Connecting to Our App
- Download the SwitchBot app to experience more personalized settings and a better user experience.
You will need:
- A smartphone or tablet using Bluetooth 4.2 or later.
- The latest version of our app, downloadable via the Apple App Store or Google Play Store.
- A SwitchBot account, you can register via our app or sign in to your account directly if you already have one.
![]()
![apps.apple.com]()
![]()
![play.google.com]()
iOS and Android system requirements:
https://support.switch-bot.com/hc/en-us/articles/12567397397271
![]()


- Open our app, tap the "+1' icon at the right-hand corner of the home page, select Add Device.
- Find the device icon and select, follow the instructions to add your device.
Starting Your Robot
Vacuuming
Press the  button to start cleaning, or control via our app.

Mopping
- Find the mopping pad plate in the package.
![]()

- Attach a mopping cloth to the mopping pad plate.
Option 1: Use the original mopping cloth

Option 2: Use a common mopping cloth


Note
Dimensions of a common mopping cloth is usually approx. 30 x 20 cm (11.8 x 7.9 in.), while your robot's mopping pad plate is compatible with 20 x 15 cm (7.9 x 5.9 in.) cloth. If you use a common mopping cloth, fold or cut it in half before attaching to the mopping pad plate.
- Cover the mopping pad plate on the Anti-TangIe Rubber Brush.
![]()
- Press the
![]() button to start mopping, or control via our app.
button to start mopping, or control via our app.

Note
- Set no-go zones in the app so your robot won't mop and wet areas like carpets.
![]()
- The mopping cloth will become dry after 20 or 30 minutes of use. It is recommended to only mop designated rooms or areas set in the app.
![]()
- The dry mopping cloth can still wipe away some dust or hair, but it is not as effective as when it's wet. Please replace the dry mopping cloth in time when mopping.


Pausing Your Robot
Press any button on your robot to stop it while working. When paused, tap the button to resume the previous cleaning task, tap the  button to finish the task, and your robot will return to the Dual Empty Station to recharge.
Recharging
After finishing a cleaning task, your robot will automatically return to the Dual Empty Station to recharge. To manually send it back to recharge, press the button on your robot. The indicator light will be pulsing when charging.
Note
If the robot cannot find the station, it will automatically return to the starting position. Please manually dock it to the station for charging.
Hibernation
If your robot is not operated for more than 10 minutes, it will automatically enter hibernation. Press any button to wake it up.
Note
The robot will not enter hibernation while charging.
Do Not Disturb Mode
The default setting for this mode is from 22:00 to 08:00, and you can modify or disable this function via our app. During the Do Not Disturb period, device button lights will stay off, and your robot will not automatically resume cleaning or play voice prompts.
Child Lock
You can use the Child Lock function in our app to lock the robot buttons. You can remove this function via our app.
Restoring Factory Settings
Press and hold the button, button, and DTOF LiDAR for 6s at the same time until you hear the voice prompt.

Care and Maintenance
To keep your robot running at peak performance, perform the procedures on the following pages. If you notice the robot picking up less debris from your floor, empty the bin, clean the brushes, and clean or replace the filter if needed. Replace the dust bag in time when it is full.
| Part | Care Frequency | Replacement Frequency |
| Dust Bag | Every 70 days | |
| Bin | Wash bin as needed | |
| Cliff Sensor | Clean once a month or when prompted by the app | |
| Filter | Clean once a month or when prompted by the app | Every 2 or 3 months |
| Front Caster Wheel | Clean once a month. Clean more if your pet sheds a lot. | Every 12 months |
| Side Brush | Clean once a month. Clean more if your pet sheds a lot. | Every 12 months |
| Anti-TangIe Rubber Brush Brush | Clean once a month. Clean more if your pet sheds a lot. | Every 12 months |
Replacement frequency may vary. Parts should be replaced if visible wear appears. If you need to purchase accessory kits, please visit authorized channels or our official website www.switch-bot.com
Daily Maintenance (Robot)
Open the Canister Lid and find the cleaning tool.

Cleaning the Bin and Filter
- Open the faceplate and remove bin.


- Press the red area (marked in the picture) to open and empty the bin.
![]()
- Remove the filter and tap to clean it.


- Rinse the bin and filter using warm water and completely dry them.

- Reinstall the filter and bin back in the robot.


Cleaning the Mopping Pad Plate
- Remove the mopping pad plate and throw away the disposable mopping cloth. Wash the pad plate with water.
![]()
- Place the Mopping Pad Plate on the Canister Lid.
![]()


Cleaning the Side Brush
- Pull to remove the Side Brush.
![]()
- Remove any hair or debris and replace the brush.
- Align and reinstall the brush.

Note
Replace the Side Brush once every year.
Cleaning the Front Caster Wheel
- Pull firmly on the front wheel to remove it from the robot.
![]()
- Remove any debris from inside the wheel cavity.
- Reinstall the wheel. Make sure the wheel clicks into place.

Note
Replace the Front Caster Wheel once every year.
Cleaning the Anti-Tangle Rubber Brush
- Remove the brush frame and lift the brush from the left side.
![]()
- Remove and clean hair and debris from the brush caps. Remove hair from the brush.

- Reinstall the brush caps into place.


Note
Replace the Anti-Tangle Rubber Brush every 12 months.
Cleaning Sensors and Charging Contacts
Wipe sensors and charging contacts with a clean, dry cloth.

Note
Do not spray cleaning solution or water onto the sensors, sensor openings or charging contacts.
Replacing the Dust Bag
- Lift up on the canister lid to open.
- Pull up on the hard paper card to remove the bag from the canister.


- Discard the used bag.
- Install a new bag, sliding the card into the guide rails. Press down on the lid, making sure it is completely closed.
![]()

Troubleshooting
Common Issues
Unable to power on
- The battery level is low. Put the robot on the charging station and charge it before use.
- The ambient temperature is too low or too high. Only use the robot within the range of 4ºC to 40ºC (39ºF to 104ºF).
Unable to charge
- The station is not powered, please make sure both ends of the power cord are plugged in properly.
- Poor contact, please clean the charging contacts on the station, robot, and vacuum cleaner.
Network connection failure
- Incorrect Wi-Fi password, please enter the correct Wi-Fi password.
- Switch to a 2.4GHz network for pairing, as 5GHz networks and enterprise routers are not supported.
- Keep the robot within a range with good Wi-Fi signal strength.
- The robot may not be in the ready-to-configure state, exit the app and re-enter, then follow the pairing steps to try again.
Unable to create partition map in the app
- The robot needs to start mapping from the station, it is recommended to use the Fast Mapping feature.
- Do not move the robot during the first mapping process to avoid locating failure.
- If the robot does not return to the station after completing the first mapping task, check and remove any obstacles on the ground.
Cannot locate the station, unable to return
- The station is powered off or the robot was moved.
- The charging route is blocked, such as by a closed door.
- Too many obstacles near the station, please place it in an open area.
- After moving the robot, it will relocate itself. If locating fails, it will generate a new map. If the Dual Empty Station is too far away, it may not be able to recharge, please manually dock the robot to charge.
- Wipe the signal emission area of the station in case there is dust or dirt.
- Gently wipe the Front Docking Sensor of the robot with a soft, dry cloth and keep the lens clean and unobstructed.
Slow charging speed
- The robot takes about 6 hours to charge from low to full battery.
- In high or low-temperature environments, the robot will automatically reduce charging speed to extend battery life.
- The charging contact area may be dirty, please wipe it with a dry cloth.
Abnormal behavior
- Please turn off and restart the robot.
Side Brush fell off
- Please reinstall the Side Brush, making sure to hear a "click" to indicate it is in place.
- The Side Brush may have fallen off due to tangled wires. Please clear wires on the floor before use.
Ground not cleaned up
- The dustbin is full. Please empty it.
- The filter may be clogged with dust. Please check and clean as necessary.
- The filter is not dry after cleaning. Please let it air dry before using.
Dust leaked while working
- Remove the Anti-TangIe Rubber Brush and dustbin, and clear any debris near the Anti-Tangle Rubber Brush.
Loud operating noise
- The dustbin is full. Please empty it.
- Hard objects may be tangled in the Anti-Tangle Rubber Brush and dustbin. Please check and clean as necessary.
- The Side Brush and Anti-Tangle Rubber Brush may be tangled with debris. Please check and clean as necessary.
- You can lower the suction power of the robot to Quiet or Low if necessary.
Abnormal sound emitted while moving
- Rotate and press the wheels to check for any debris tangled or stuck. Clean the debris or contact customer service if the issue persists.
Random movement path
- Loose wires, slippers, and other objects on the floor may affect the robot's normal operation. Please tidy up before use.
- Working on wet and slippery floors may cause the wheels to slip. Please manually wipe or air dry the floor before using.
Stopped due to being stuck
- The robot may be stuck under furniture of a similar height. Consider raising the furniture, manually blocking or using our app to set a virtual wall to avoid the area.
- Check the corresponding area for any wires, curtains, or carpet edges that may be tangled with or obstructing the robot. Manually remove any obstructions for smooth operation.
Missed cleaning some rooms
- Please ensure all room doors are fully opened.
- Check if there is a doorsill higher than 1.8 cm (0.7 in.) at the entrance of the room.
- If the entrance is slippery, causing the robot to skid and malfunction, it is recommended to manually clean up the water on the floor.
Frequently entered No-go Zones or passed Virtual Walls
- Check the app to see if the current map is abnormal. You can restore the map in Maps via our app.
- When setting virtual walls or No-go Zones, adjust the boundaries according to the home environment, making sure to include areas where the robot may get stuck (such as sunken steps, furniture bottoms, etc.).
Ongoing cleaning task interrupted
- When the robot's battery is depleted, it will automatically shut down.
Note: If the robot cannot be charged by the Dual Empty Station, the possible cause is that the station is not connected to power or there is poor contact between the robot and the station. Please check if the power supply is connected properly.
Didn't resume cleaning after being fully charged
- Make sure the robot is not in Do Not Disturb mode, as it will not resume cleaning in this mode.
- If the robot is manually docked to the station or is sent to the station by pressing the
![]() button, it will not resume cleaning after being fully charged.
button, it will not resume cleaning after being fully charged.
Scheduled cleaning not performed
- The cleaning will only start when the remaining battery is more than 20%.
Didn't empty dust after returning
- The robot will not empty dust during the Do Not Disturb time period.
- Please check if the dust bag is full. Replace the dust bag in a timely manner, preferably every 1 to 2 months.
- If the dust bag is not full, check for blockages in the Debris Evacuation Port and the bottom Debris Evacuation Tube of the station. Remove any blockages before using.
LED Indicator on the Dual Empty Station stays orange
- The dust bag is not in position. Please check and install it correctly.
- The dust bag is full. Please check and replace with a new dust bag.
- The canister lid of the Dual Empty Station is not closed. Please check and close it tightly.
LED Indicator Light Status
| LED Indicator Light | Descriptions |
| Solid White | The robot is fully charged or cleaning properly. |
| Slowly Flashing White | The robot is charging. |
| Blinking White | The robot is ready to configure Wi-Fi. |
| Solid Orange | Low battery. |
| Blinking Orange | The robot has run out of power or an error occured. |
Network Reconfiguration
Press and hold the and buttons for 3 seconds to reconfigure your Wi-Fi network.
Firmware Upgrades
In order to improve user experience, we will regularly release firmware updates to introduce new functions and solve any software defects that may occur during usage. When a new firmware version is available, we will send an upgrade notification to your account via our app. When upgrading, please make sure your product has sufficient battery or stay powered on and make sure your smartphone is within range to prevent interference.
Specifications
Robot Vacuum
Material: ABS Size: 248 x 248 x 92 mm (9.8 x 9.8 x 3.6 in.)
Weight: Approx. 2.3 kg (81.1 oz.)
Rated Power: 40 W
Battery Voltage: 14.4 V
Battery Capacity: 3200 mAh
Operating Temperature: 0 oc to 30 oc (32 ºF to 86 ºF)
Connectivity: 2.4 GHz Wi-Fi, Bluetooth 4.2 or later
Dual Empty Station
Size: 195 x 297 x 410 mm (7.7 x 16.1 in.)
Rated Input: 24 V  2.86 A
Rated Power (Charging): 50 W
Rated Power (Emptying Dust): 650 W
Documents / Resources
References
![www.switch-bot.com]() SwitchBot Official Website - Your Simple Switch to a Smart Home – SwitchBot International
SwitchBot Official Website - Your Simple Switch to a Smart Home – SwitchBot International![apps.apple.com]() App Store 上的“SwitchBot”
App Store 上的“SwitchBot”![play.google.com]() Google Play
Google Play
Download manual
Here you can download full pdf version of manual, it may contain additional safety instructions, warranty information, FCC rules, etc.
Advertisement


Need help?
Do you have a question about the K10+ Pro and is the answer not in the manual?
Questions and answers