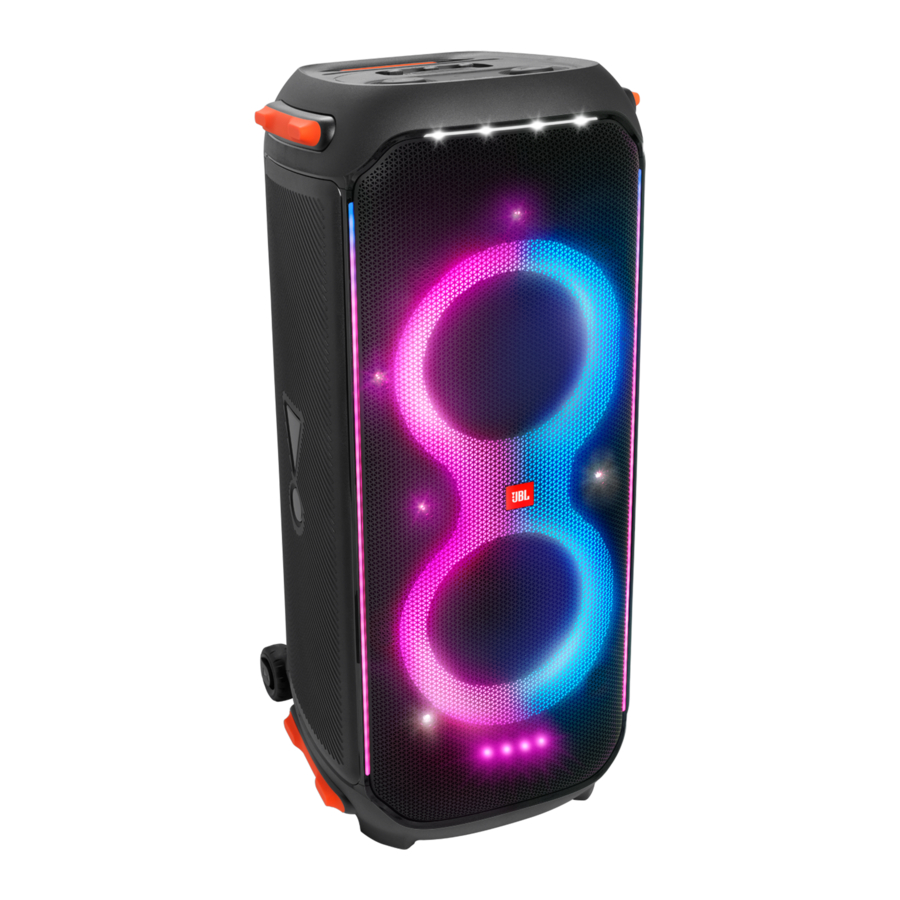
JBL Harman PARTYBOX 710 Manual
- Quick start manual (32 pages) ,
- Owner's manual (17 pages) ,
- Quick start manual (24 pages)
Advertisement
WHAT'S IN THE BOX

- Main unit
- Power cord*
- Quick Start Guide, Safety Sheet, Warranty Card
*Power cord quantity and plug type vary by regions.
PRODUCT OVERVIEW
Top Panel

- KARAOKE controls (for MIC input only)
- BASS +- Adjust the bass level.
- TREBLE +
- Adjust the treble level.
- ECHO +
- Adjust the echo level.
![]()
- Select a special sound effect such as horn, clapping, scratch.
![]()
- Turn the power on or off.
![]()
- Play, pause or resume.
- Rotate clockwise/counterclockwise to increase/decrease the main volume.
![]()
- Enhances the bass level: level 1, level 2, or off.
- LED ring
![]()
- Press to enter Bluetooth pairing mode.
- Press and hold for more than 10 seconds to forget all paired devices.
![]()
- Press to turn light effect on or off.
- Hold for more than 2 seconds to turn strobe light on or off.
- Rotate clockwise/counterclockwise to switch between different light patterns.
- Mobile device dock
![]()
Do not look directly at the light-emitting parts when the speaker lights are turned on.
LED behavior

Back Panel

- USB
- Connect to a USB storage device.
- Charge your mobile device.
- AUX IN
- Connect to an external audio device through a 3.5 mm audio cable (not supplied).
- GAIN 2
- Adjust gain of the corresponding microphone (
![]() ) or guitar input.
) or guitar input.
- Adjust gain of the corresponding microphone (
- Microphone/guitar volume knob (for
![]() )
) - Adjust volume of the corresponding microphone (
![]() ) or guitar (if connected).
) or guitar (if connected).
- Adjust volume of the corresponding microphone (
![]()
- Connect to a microphone or guitar.
![]() IN/OUT
IN/OUT - Daisy-chain multiple PartyBox speakers through 3.5 mm audio cables (not supplied).
- TWS
- Press to enter True Wireless Stereo (TWS) pairing mode.
![]()
- Connect to a microphone.
- Microphone volume knob (for
![]() )
) - Adjust volume of the corresponding microphone (
![]() ) (if connected).
) (if connected).
- Adjust volume of the corresponding microphone (
- GAIN 1
- Adjust gain of the corresponding microphone (
![]() ) input.
) input.
- Adjust gain of the corresponding microphone (
- AC
- Connect to AC power supply.
 )
)  IN/OUT
 PLACEMENT

- Do not sit or lean on the speaker or push it sideways to avoid tipover and possible damages.
Place the speaker on a flat, stable surface and ensure that the rubber feet side is down.
POWER ON
- Use the provided power cords only.

- Connect AC power.
- Press
![]() to power on.
to power on.
Tip:
- The speaker switches to standby mode automatically after 20 minutes of inactivity. You can press
![]() on the speaker to switch to normal operation.
on the speaker to switch to normal operation.
USING YOUR PARTYBOX
Notes:
- Only one sound source can be played at a time. The priority order is USB > BLUETOOTH > AUX.
- Starting a source with higher priority will always interrupt a source with lower priority.
- To start a source with lower priority, stop the source with higher priority first.
Bluetooth Connection
You can use the speaker with your Bluetooth enabled smartphone or tablet.

- Press
![]() on the speaker to enter Bluetooth pairing mode.
on the speaker to enter Bluetooth pairing mode. - Choose "JBL PartyBox 710" on your Bluetooth device to connect.
- Once successfully connected, you can stream audio from your Bluetooth device to this speaker.
Notes:
- This speaker can memorize a maximum of 8 paired devices. The ninth paired device will replace the first one.
- Enter "0000" if a PIN code is requested for connection to a Bluetooth device.
- Bluetooth performance can be affected by the distance between this product and your Bluetooth device and the environment of operation.
To terminate the Bluetooth-enabled device:
- Turn off this speaker, or
- Disable Bluetooth on your device.
To reconnect the Bluetooth enabled device:
- When you turn on this speaker next time, it tries to reconnect the last connected device automatically.
- If not, manually select "JBL PartyBox 710" on your Bluetooth device to connect.
USB Connection
Plug a USB storage device that contains playable audio contents into the USB port of the speaker.

- The speaker switches to the USB source automatically.
- Audio playback will start automatically.
Tip:
- The speaker plays audio files on the USB storage device from the root folder to the last level of subfolders in alphabetical sequence. Up to 8 levels of subfolders are supported.
Supported audio formats
| Extension | Codec | Sample rate | Bitrate |
| WAVE | PCM | 44.1KHz ~ 192KHz | < 5Mbps |
| LPCM | 44.1KHz ~ 192KHz | < 5Mbps | |
| IMA_ADPCM | 44.1KHz ~ 192KHz | < 5Mbps | |
| MPEG | 44.1KHz ~ 192KHz | < 5Mbps | |
| MULAW | 44.1KHz ~ 192KHz | < 5Mbps | |
| MP3 | MPEG1 layer1/2/3 | 32KHz ~ 48KHz | 32Kbps ~ 320Kbps |
| MPEG2 layer1/2/3 | 16KHz ~ 24KHz | 8Kbps ~ 160Kbps | |
| MPEG2.5 layer3 | 8KHz ~ 12KHz | 8Kbps ~ 160Kbps | |
| WMA | ≤ 320Kbps | 8Kbps ~ 48Kbps |
Music Control

- Press
![]() once to pause or resume playback.
once to pause or resume playback. - Press
![]() twice to skip to the next track.
twice to skip to the next track. - Press
![]() three times to skip to the previous track.
three times to skip to the previous track. - Rotate the volume knob clockwise or counterclockwise to increase or decrease main volume.
- Press BASS BOOST to enhance the bass level: level 1, level 2, or off.
Note:
- The skip operation is unavailable in AUX mode.
AUX Connection

- Connect an external audio device to the speaker through a 3.5 mm audio cable (not supplied).
- After stopping playback from any other source, start audio playback on the external device.
Mixing Sound with a Microphone and/or Guitar
By using a microphone or electric guitar (not supplied), you can mix sound with an audio source.
Notes:
- Always set the guitar or microphone volume to the minimum level before guitar or microphone connection/disconnection.
- Always disconnect the guitar or microphone when you are not using them.
Connecting a Microphone

- Connect a microphone to the
![]() or
or ![]() socket.
socket. - When connecting a microphone to the
![]() socket, switch the slider to show
socket, switch the slider to show ![]() .
.
Connecting a Guitar

- Connect a guitar to the
![]() socket.
socket. - Switch the slider to show
![]() .
.
Mixing Sound
Sing through the microphone or play guitar.
- To adjust the volume of the audio source, rotate the volume knob clockwise or counterclockwise.
- To adjust the volume of the microphone or guitar, rotate the corresponding microphone or guitar volume knob.
- To adjust the gain of the wired microphone or guitar, rotate the corresponding GAIN 1 or GAIN 2 control respectively.
- To adjust the echo, treble and bass level of the microphone, rotate the ECHO, TREBLE and BASS knob respectively.
Charging Your Mobile Device

CARRYING YOUR PARTYBOX
- Before carrying the speaker, ensure that all the cords are disconnected.
- To avoid personal injury and/or property damage, hold the product firmly while carrying.
The PartyBox 710 is designed with a handle to help you move the speaker around easily.
ADVANCED USAGE
Light Effect

- Press
![]() to turn light effect on or off.
to turn light effect on or off. - Hold
![]() for more than 2 seconds to turn strobe light on or off.
for more than 2 seconds to turn strobe light on or off. - Rotate the knob clockwise / counterclockwise to switch between different light patterns: Rock, Flow, Cross, Ripple, or Flash.
Sound Effect
Press  to select a special sound effect such as horn, clapping, scratch.

TWS Mode
You can connect two PartyBox speakers to each other via TWS mode.
Press TWS on both speakers.

To exit TWS mode:
Power off or press TWS on either speaker.
Tip:
- By default, the speaker connected to your Bluetooth device acts as the primary speaker (left channel), while the other one acts as the secondary speaker (right channel).
JBL PartyBox App
Download and install the JBL PartyBox App to get more from the product.


Daisy Chain

Factory reset
To restore the factory settings, hold ![]() and
and  for more than 10 seconds.
IPX4
- Always keep the port dry before connecting AC power.
- To ensure splash resistance, always keep the protective covers closed securely.
The speaker is IPX4 splash resistant.

SPECIFICATIONS
| Transducers: | 2 x 216 mm (8") woofer, 2 x 70 mm (2.75") tweeter |
| Output power: | 800 W RMS (IEC60268) |
| Power input: | 100 – 240 VAC ~50/60 Hz |
| Frequency response: | 35 Hz – 20 kHz (-6 dB) |
| Signal-to-noise ratio: | > 80 dB |
| Cable type: | right-angle AC power cable (type varies by regions) |
| Cable length: | 2.0 m/6.6 ft |
| USB charge out: | 5 V/2.1 A (max) |
| USB format: | FAT16, FAT32 |
| Bluetooth® version: | 5.1 |
| Bluetooth® profile: | A2DP V1.3, AVRCP V1.6 |
| Bluetooth® transmitter frequency range: | 2400 MHz – 2483.5 MHz |
| Bluetooth® transmitter power: | ≤ 11 dBm (EIRP) |
| Bluetooth® transmitter modulation: | GFSK, π/4 DQPSK, 8DPSK |
| Supported formats: | .mp3, .wma, .wav |
| Aux-In: | 250 mVrms (3.5 mm connector) |
| Mic-In: | 20 mVrms |
| Guitar-In: | 100 mVrms |
| Bluetooth/USB input: | -12 dBFS |
| Product dimensions (W x H x D): | 399 mm x 905 mm x 436 mm/15.7" x 35.6" x 17.2" |
| Net weight: | 27.8 kg/61.3 lbs |
| Packaging dimensions (W x H x D): | 1048 mm x 505 mm x 467 mm/41.26" x 19.88" x 18.39" |
| Gross weight: | 31 kg/68.34 lbs |
TROUBLESHOOTING
- Never try to repair the product by yourself. If you have any problems while using this product, check the following points before you request service.
System
The speaker will not turn on
- Check the AC power connection.
No response from some buttons
- The product may be in demo mode. In demo mode, all the input sources and buttons, except
![]() and the volume and light pattern knobs, are disabled. Hold
and the volume and light pattern knobs, are disabled. Hold ![]() and
and ![]() simultaneously for more than 5 seconds to exit.
simultaneously for more than 5 seconds to exit.
 and the volume and light pattern knobs, are disabled. Hold
 Sound
No sound from the speaker
- Ensure that the speaker is powered on.
- Adjust volume.
- Ensure that a sound source is active and not muted.
Bluetooth
A device cannot connect with the speaker
- Ensure that the Bluetooth function of the device is enabled.
- The speaker is already connected with another Bluetooth device. Hold
![]() on the speaker for more than 20 seconds to disconnect and pair with a new device.
on the speaker for more than 20 seconds to disconnect and pair with a new device.
Poor audio quality from a connected Bluetooth device
- The Bluetooth reception is poor. Move the device closer to the speaker, or remove any obstacle between the device and speaker.
IMPORTANT SAFETY INSTRUCTIONS
For all products:
- Read these instructions.
- Keep these instructions.
- Heed all warnings.
- Follow all instructions.
- Do not block any ventilation openings. Install this apparatus in accordance with the manufacturer's instructions.
- Do not install this apparatus near any heat sources such as radiators, heat registers, stoves or other apparatus (including amplifiers) that produce heat.
- Do not defeat the safety purpose of the polarized or groundingtype plug. A polarized plug has two blades with one wider than the other. A grounding-type plug has two blades and a third grounding prong. The wide blade or the third prong is provided for your safety. If the provided plug does not fit into your outlet, consult an electrician for replacement of the obsolete outlet.
- Protect the power cord from being walked on or pinched, particularly at plugs, convenience receptacles and the point where they exit from the apparatus.
- Use only attachments/accessories specified by the manufacturer.
- Use only with the cart, stand, tripod, bracket or table specified by the manufacturer or sold with the apparatus. When a cart is used, use caution when moving the cart/apparatus combination to avoid injury from tip-over.
![]()
- Unplug this apparatus during lightning storms or when unused for long periods of time.
- To disconnect this apparatus from the AC mains completely, disconnect the power-supply cord plug from the AC receptacle.
- The mains plug of the power-supply cord shall remain readily operable.
- This apparatus is intended to be used only with the power supply and/or charging cable provided by the manufacturer.


RISK OF ELECTRIC SHOCK. DO NOT OPEN.
 THE LIGHTNING FLASH WITH AN ARROWHEAD SYMBOL, WITHIN AN EQUILATERAL TRIANGLE, IS INTENDED TO ALERT THE USER TO THE PRESENCE OF UNINSULATED "DANGEROUS VOLTAGE" WITHIN THE PRODUCT'S ENCLOSURE THAT MAY BE OF SUFFICIENT MAGNITUDE TO CONSTITUTE A RISK OF ELECTRIC SHOCK TO PERSONS.
 THE EXCLAMATION POINT WITHIN AN EQUILATERAL TRIANGLE IS INTENDED TO ALERT THE USER TO THE PRESENCE OF IMPORTANT OPERATING AND MAINTENANCE (SERVICING) INSTRUCTIONS IN THE LITERATURE ACCOMPANYING THE PRODUCT.

TO REDUCE THE RISK OF FIRE OR ELECTRIC SHOCK, DO NOT EXPOSE THIS APPARATUS TO RAIN OR MOISTURE.

EPILEPSY WARNING
A few people may experience epileptic seizures when viewing flashing lights.
If you have any questions about these products, their installation or their operation, please contact your retailer or customer service, or visit us at www.jbl.com.
Documents / Resources
References
Download manual
Here you can download full pdf version of manual, it may contain additional safety instructions, warranty information, FCC rules, etc.
Advertisement


Need help?
Do you have a question about the Harman PARTYBOX 710 and is the answer not in the manual?
Questions and answers