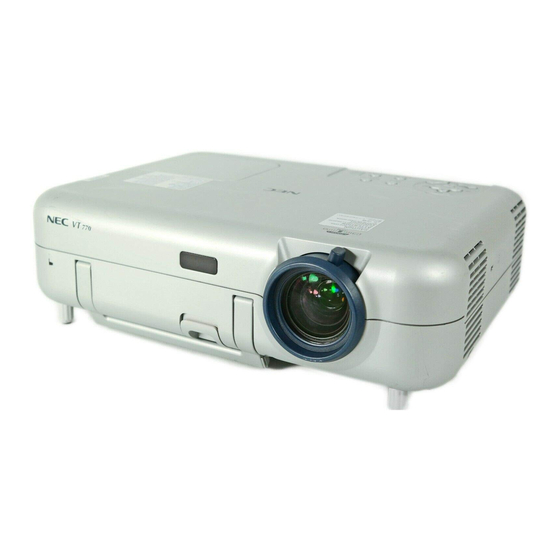
NEC VT770 Quick Setup Manual
Hide thumbs
Also See for VT770:
- User manual (126 pages) ,
- Installation manual (8 pages) ,
- Brochure & specs (6 pages)
Table of Contents
Advertisement
Quick Links
Mini D-SUB 15 pin connector
15poliger Mini D-Sub Anschluss
Connecteur Mini D-Sub à 15 broches
Connettore mini D-SUB a 15 pin
Conector Mini D-Sub de 15 contactos
15-polig Mini D-Sub-kontakt
Power cable (supplied)
Netzkabel (Lieferumfang)
Câble d'alimentation (fourni)
Cavo d´alimentazione (in dotazione)
Cable de alimentación (suministrado)
Nätkabel (medföljer)
RGB signal cable (supplied)
RGB-Signalkabel (Lieferumfang)
Câble de signal RGB (fourni)
Connect the supplied 15pin-15pin
signal cable.
For older Macintosh computers, use a commercially
available pin adapter to connect to your Macintosh's
video port.
Connect the supplied power cable.
Schließen Sie das mitgelieferte
15polige Signalkabel an.
Verwenden Sie für ältere Macintosh-Computer
einen handelsüblichen Stiftadapter für den
Anschluss an Ihren Macintosh-Videoport.
Schließen Sie das mitgelieferte
Netzkabel an.
Connecter le câble de signal 15
broches-15 broches fourni.
Pour les ordinateurs Macintosh anciens, utiliser un
adaptateur à broche disponible dans le commerce
pour connecter au port vidéo du Macintosh.
Connecter le câble d'alimentation
fourni.
If you encounter problems while setting up or using the projector, see "Trouble-
shooting" in the user's manual on the supplied CD-ROM or the Important
Information.
Se avete qualunque problema durante la messa a punto o nell'utilizzo del
proiettore, consultate "Localizzazione dei guasti" nel manuale delle istruzioni nel
CD-ROM fornito oppure le Informazioni Importanti.
OFF
POWER
VIDEO
COMPUTER
1
2
S-VIDEO
SELECT
SOURCE
AUTO ADJUST
SELECT
LAMP
STATUS
POWER
3D REFORM
ON/STAND BY
PC CARD
Turn on the projector.
To turn on the power to the projector, press and hold the ON/
STAND BY button on the projector cabinet or the POWER ON
button on the remote control for a minimum of 2 seconds.
Schalten Sie den Projektor ein.
Drücken und halten Sie zum Einschalten des Projektors die ON/
STAND BY-Taste am Projektorgehäuse oder die POWER ON-
Taste auf der Fernbedienung mindestens 2 Sekunden lang
gedrückt.
Allumer le projecteur.
Pour allumer le projecteur, appuyer sur la touche ON/STAND BY
du coffret du projecteur ou sur la touche POWER ON de la
télécommande et la maintenir enfoncée pendant au moins 2
secondes.
Accensione del proiettore.
Per accendere la corrente del proiettore, premete e mantenete
premuto il tasto ON/STAND BY sull´involucro del proiettore o il
tasto POWER ON del telecomando, mantenendolo premuto per
almeno 2 secondi.
Encienda el proyector.
Para conectar la alimentación del proyector, pulse el botón ON/
STAND BY en la cubierta del proyector o el botón POWER ON
en el mando a distancia durante al menos 2 segundos.
Slå på strömmen till projektorn.
Tryck på ON/STAND BY-tangenten på projektorhöljet eller
POWER ON-tangenten på fjärrkontrollen intryckt i minst 2
sekunder för att slå på strömmen till projektorn.
COMPUTER 1
COMPONENT
PC CARD
USB(MOUSE)
Y
Cb/Pb
Cr/Pr
USB(COMPUTER)
AUDIO
COMPUTER 2
MONITOR OUT
AUDIO
COMPUTER 1
AUDIO
L/MONO
R
S-VIDEO
AUDIO
VIDEO
L/MONO
R
PC CONTROL
COMPUTER 2
AUDIO
AC IN
Cavo dei segnali RGB (in dotazione)
Cable de señal RGB (suministrado)
RGB-signalkabel (medföljer)
Collegate il cavo dei segnali 15 pin –
15 pin in dotazione.
Per i computer Macintosh di vecchia data, usate un
adattatore venduto separatamente per collegare la
porta video del Macintosh.
Collegate il cavo d´alimentazione in
dotazione.
Conecte el cable de señal de 15-15
contactos suministrado.
Para ordenadores Macintosh más antiguos, utilice un
adaptador de contactos (disponible en el comercio)
para realizar la conexión al puerto de vídeo del
ordenador Macintosh.
Conecte el cable de alimentación
suministrado.
Anslut den medlevererade 15P-15P-
signalkabeln.
För äldre Macintosh-datorer krävs det en särskild
stiftadapter (säljs separat) för anslutning till din
Macintoshs videoport.
Anslut den medlevererade nätkabeln.
Falls Sie beim Aufstellen oder bei der Verwendung des Projektors irgendwelche
Probleme haben sollten, lesen Sie bitte den Abschnitt "Fehlersuche" im
Benutzerhandbuch auf der im Lieferumfang enthaltenen CD-ROM oder den
Abschnitt Wichtige Informationen.
Si se le presenta algún problema mientras configura o utiliza el proyector,
consulte "Detección de fallos" en el manual del usuario en el CD-ROM
suministrado o información importante.
ON
OFF
AUTO ADJ.
VIDEO
COMPONENT
S-VIDEO
Selecting a Source.
Turn on the computer. Press the COMPUTER 1 or COMPUTER 2 button on the remote control.
NOTE: Optimizing RGB image automatically.
Press the AUTO AJD. button on the remote control to optimize an RGB image automatically.
Auswählen einer Quelle.
Schalten Sie den Computer ein. Drücken Sie die COMPUTER 1- oder COMPUTER 2-Taste auf
der Fernbedienung.
HINWEIS: Automatische Optimierung des RGB-Bildes.
Drücken Sie zum automatischen Optimieren des RGB-Bildes die AUTO AJD.-Taste auf der
Fernbedienung.
Sélectionner une source.
Mettre l'ordinateur en marche. Presser la touche COMPUTER 1 ou COMPUTER 2 de la
télécommande.
REMARQUE: Optimiser automatiquement une image RGB.
Appuyer sur la touche AUTO ADJ. de la télécommande pour optimiser automatiquement une
image RGB.
Selezione di una fonte.
Accendete il computer. Premete il tasto COMPUTER 1 o COMPUTER 2 sul telecomando.
NOTA: Ottimizzazione automatica dell'immagine RGB.
Premete il tasto AUTO ADJ. sul telecomando per ottimizzare automaticamente l'immagine RGB.
Selección de una fuente.
Encienda el ordenador. Pulse el botón COMPUTER 1 o COMPUTER 2 en el mando a
distancia.
NOTA: Optimización automática de la imagen RGB.
Pulse el botón AUTO ADJ. en el mando a distancia para optimizar la imagen RGB
automáticamente.
Välja en källa.
Slå på datorn. Tryck på COMPUTER 1- eller COMPUTER 2-tangenten på fjärrkontrollen.
OBSERVERA: Automatisk optimering av RGB-bilder.
Tryck på AUTO ADJ.-tangenten på fjärrkontrollen för att optimera en RGB-bild automatiskt.
Turn on the main power switch.
To turn on the main power to the projector, press the Main Power switch to the on position ( I ).
The projector will go into its standby mode and the power indicator will glow orange.
Schalten Sie den Hauptnetzschalter ein.
Drücken Sie zum Einschalten der Hauptstromversorgung zum Projektor den Hauptnetzschalter in Ein-Position ( I ).
Der Projektor schaltet sich in seinen Standby-Modus und die Netzanzeige leuchtet orange.
Enfoncer l'interrupteur d'alimentation général.
Pour mettre le projecteur sous tension, enfoncer l'interrupteur d'alimentation en position marche ( I ).
Le projecteur se met dans son mode veille et l'indicateur d'alimentation s'allume en orange.
Accendete l´interruttore principale.
Per accendere la corrente principale del proiettore, premete l´interruttore principale nella posizione di
accensione ( I ).
Il proiettore passerà al modo di attesa e l'indicatore di corrente si accenderà in arancione.
Active el interruptor de alimentación principal.
Para conectar la alimentación principal del proyector, pulse el interruptor de alimentación principal de modo que
quede en la posición de activado ( I ).
El proyector entrará en modo de espera y el indicador de potencia se iluminará en naranja.
Slå på huvudströmbrytaren.
För att slå på strömmen till projektorn, ställ huvudströmbrytaren i På-läget ( I ).
Projektorn ställs i Standby-läget och strömindikatorn lyser orange.
ON
POWER
OFF
ON
AUTO ADJ.
POWER
COMPUTER
1
2
VIDEO
AUTO ADJ.
COMPUTER
COMPONENT
1
2
S-VIDEO
COMPONENT
SELECT
SELECT
PJ
Copyright© 2003 by NEC Viewtechnology, Ltd.
Cr/
Pr
LAMP
STATUS
POWER
En cas de problèmes lors de l'installation ou de l'utilisation du projecteur, voir la
section "Dépistage des pannes" dans le manuel de l'utilisateur sur le CD-ROM
fourni ou les Informations Importantes.
Se "Felsökning" i bruksanvisningen på den medföljande CD-ROM-skivan eller
Viktig information, om du skulle få några problem då du ställer in eller använder
projektorn.
Adjustable Tilt Foot lever
Einstellbare Kippfußtaste
Touche du pied à inclinaison réglable
Tasto del piede di inclinazione regolabile
Botón de pata de inclinación ajustable
Justerbar lutningsfottangent
Adjustable Tilt Foot
Einstellbarer Kippfuß
Pied à inclinaison réglable
Piede d'inclinazione regolabile
Pata de inclinación ajustable
Justerbar lutningsfot
Adjust the Tilt Foot.
Push up and hold the Adjustable Tilt Foot Button on the front of the projector
to extend the adjustable tilt feet (maximum height: 30mm/1.2").
Einstellung des Kippfußes.
Halten Sie die einstellbare Kippfußtaste an der Vorderseite des Projektors
gedrückt, um die einstellbaren Kippfüße auszufahren (maximale Höhe: 30
mm).
Régler le pied de réglage de l'inclinaison.
Pousser vers le haut et maintenir le bouton de réglage de l'inclinaison à
l'avant du projecteur pour augmenter la hauteur du pied de réglage (hauteur
maximale : 30 mm).
Regolate il piedino d'inclinazione.
Alzate e tenete il tasto del piedino d'inclinazione regolabile sulla parte
anteriore del proiettore per aprire i piedi inclinabili e regolabili (altezza
massima: 30 mm).
Ajuste de las patas de inclinación.
Presione hacia arriba (y manténgalo en dicha posición) el botón de las patas de
inclinación, situado en la parte delantera del proyector, para extender las patas
ajustables (altura máxima: 30 mm).
Justera lutningen med foten.
Tryck upp och håll justerfotsknappen på projektorns framsida för att förlänga
justerfötterna (maxhöjd: 30mm).
7N8P4101
Printed in Japan
Printed on recycled paper
Advertisement
Table of Contents

Related Manuals for NEC VT770


Summary of Contents for NEC VT770
- Page 1 7N8P4101 Printed in Japan Printed on recycled paper Copyright© 2003 by NEC Viewtechnology, Ltd. Mini D-SUB 15 pin connector 15poliger Mini D-Sub Anschluss Connecteur Mini D-Sub à 15 broches COMPUTER 1 Connettore mini D-SUB a 15 pin COMPONENT PC CARD...
- Page 2 Correcting Keystone Distortion Correzione della deformazione trapezoidale [Keystone] [Chiave] ● Auto Keystone Correction (Vertical) ● Correzione automatica della deformazione trapezoidale The Auto Keystone correction feature will correct the vertical (Verticale) distortion of a projected image on the screen. La funzione di correzione automatica della deformazione trapezoidale Zoom lever Focus ring No special operation required.
Need help?
Do you have a question about the VT770 and is the answer not in the manual?
Questions and answers