Table of Contents

Subscribe to Our Youtube Channel
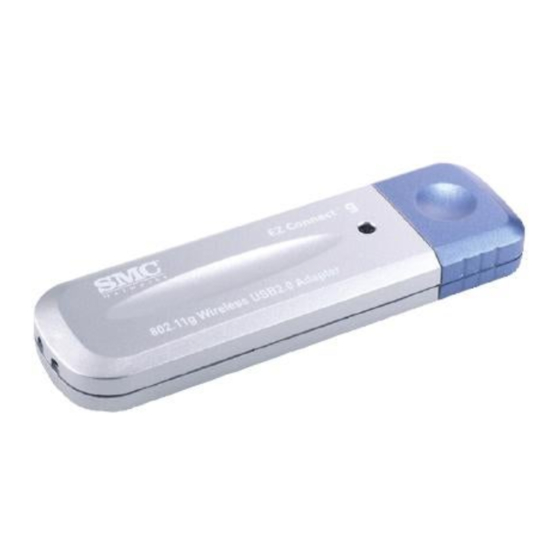
Related Manuals for SMC Networks WUSB-G2


Summary of Contents for SMC Networks WUSB-G2
- Page 1 EZ Connect™g 2.4GHz 802.11g Wireless USB2.0 Adapter SMCWUSB-G2...
- Page 2 Limited Lifetime warranty covers a product during the Life of that Product, which is defined as the period of time during which the product is an “Active” SMC product. A product is considered to be “Active” while it is listed on the current SMC price list. As new...
- Page 3 RIGHTS, WHICH MAY VARY FROM STATE TO STATE. NOTHING IN THIS WARRANTY SHALL BE TAKEN TO AFFECT YOUR STATUTORY RIGHTS. * SMC will provide warranty service for one year following discontinuance from the active SMC price list. Under the limited lifetime warranty, internal and external power supplies, fans, and cables are covered by a standard one-year warranty from date of purchase.
- Page 4 Compliances Federal Communication Commission Interference Statement This equipment has been tested and found to comply with the limits for a Class B digital device, pursuant to Part 15 of the FCC Rules. These limits are designed to provide reasonable protection against harmful interference in a residential installation. This equipment generates, uses and can radiate radio frequency energy and, if not installed and used in accordance with the instructions, may cause harmful interference to radio communications.
- Page 5 • EN 60950-1 A copy of the CE Declaration of Conformity is available for download at: http://www.smc.com Intended for indoor use in the following countries: AT, BE, CZ, CY, DK, EE, FI, FR, DE, GR, HU, IS, IE, IT, LV, LT, LU, MT, NL, NO, PL,...
-
Page 6: Table Of Contents
Table of Contents Package Contents ......................1 Chapter 1 Introduction....................... 2 Key Features ....................2 LED Status...................... 2 System Requirements ..................2 Wireless LAN Networking ................3 Chapter 2 Installation Guide..................6 Before You Begin .................... 6 Installing the Drivers ..................6 Chapter 3 Uninstall Guide ................... -
Page 7: Package Contents
Package Contents Open the package carefully, and make sure that none of the items listed below are missing: • EZ Connect™ g 802.11g Wireless USB2.0 Adapter (SMCWUSB-G2) • EZ Installation Wizard & Documentation CD • Quick Installation Guide • Warranty Information Card... -
Page 8: Chapter 1 Introduction
Chapter 1 Introduction The SMCWUSB-G2 is a USB 2.0 pen-size wireless adapter supporting IEEE 802.11b/g 2.4GHz radio operation. It provides high-speed wireless connection with data rate up to 54Mbps. Additionally, wireless roaming allows the user to move among different AP without losing the current connection. -
Page 9: Wireless Lan Networking
1.4 Wireless LAN Networking Wireless LAN networking works in either of the two modes: ad-hoc and infrastructure. In infrastructure mode, wireless devices communicate to a wired LAN via access points. Each access point and its wireless devices are known as a Basic Service Set (BSS). An Extended Service Set (ESS) is two or more BSSs in the same subnet. - Page 10 When a number of wireless stations are connected using a single access point, you have a Basic Service Set (BSS). In the ESS diagram below, communication is done through the access points, which relay data packets to other wireless stations or devices connected to the wired network. Wireless stations can then access resources, such as a printer, on the wired network.
- Page 11 In an ESS environment, users are able to move from one access point to another without losing the connection. In the diagram below, when the user moves from BSS (1) to BSS (2) the adapter automatically switches to the channel used in BSS (2). Roaming in an ESS network diagram...
-
Page 12: Chapter 2 Installation Guide
Chapter 2 Installation Guide 2.1 Before You Begin Before installing the new drivers of your SMCWUSB-G2 please close all programs. During the installation, Windows may need to copy systems files from its installation CD. Therefore, you may need a copy of the Windows installation CD at hand before installing the drivers. 2.2 Installing the Drivers Follow the steps below in order to install the SMCWUSB-G2 drivers: 1) Insert the EZ Installation &... - Page 13 Figure 2-2 Install Shield—Choose Destination Location Wait a few moments until the files are copied to the computer. Figure 2-3 Install Shield—Setup Status 4) The first part of the installation is complete. Click the [Finish] button.
- Page 14 Figure 2-4 Utility Installation Complete 5) Now insert the SMCWUSB-G2 into an available USB port of your computer. Windows will automatically detect the device and display the “Found New Hardware Wizard”. Click [No, not this time], then click [Next] to continue. Figure 2-5 Found New Hardware Wizard 6) Click [Install the Software Automatically (Recommended)], then click [Next] to continue.
- Page 15 Figure 2-6 Found New Hardware Wizard 7) A hardware installation warning may appear, click [Continue Anyway]. Figure 2-7 Hardware Installation Warning 8) Click [Finish] to complete driver and utility installation. Your SMCWUSB-G2 adapter is now installed and ready to use.
- Page 16 Figure 2-8 Driver Installation Complete...
-
Page 17: Chapter 3 Uninstall Guide
Chapter 3 Uninstall Guide If the device installation is unsuccessful for any reason, the best way to solve the problem may be to completely uninstall the device and its utility and repeat the installation procedure again. Hereby, customers can use one of the following two methods to uninstall the Drivers and Utility. -
Page 18: Through Programs Menu
Figure 3-3 Uninstalling process finished 3.2 Through Programs Menu Follow the steps below in order to uninstall the Drivers and Utility: 1) Click on Start > Programs > SMC > Uninstall SMCWUSB-G2 Wireless Utility. Figure 3-4 Uninstall from programs... - Page 19 Then, process will go to Install Shield Wizard. The screen will pop up the following conversation “Do you want to completely remove the selected application and all of its features” 2) Click on the OK button to confirm the Uninstalling process. Figure 3-5 Confirm the Uninstalling process.
- Page 20 Figure 3-7 Uninstalling process finished...
-
Page 21: Chapter 4 Software Configuration
Chapter 4 Software Configuration 4.1 Station Mode Configuration This chapter focuses on how to configure the device in Station mode (wireless LAN client) Current Network Information The Current Network Information screen displays the current status of the wireless radio as a station. Figure 4-1 Current Network Information 4.1.1 More Setting General Connection Setting... - Page 22 Figure 4-2 More setting You can click “Change” button to change general connection settings.
- Page 23 Figure 4-3 More setting—Click Change...
- Page 24 Figure 4-4 More setting—WEP SSID: Enter the SSID of the network. The SSID is a unique name shared among all points in your wireless network. The SSID must be identical for all points in the network, and is case-sensitive. Place a check in the any box if you would like the device to connect to the first available Access Point with the strongest signal.
-
Page 25: Wep Encryption
4.1.1.2 WEP Encryption You may select 64, 128 or 256 bit WEP (Wired Equivalent Privacy) key to encrypt data (Default setting is Disable). WEP encrypts each frame transmitted from the radio using one of the Keys from a panel. When you use WEP to communicate with the other wireless clients, all the wireless devices in this network must have the same encryption key or pass phrase. -
Page 26: Wpa/Wpa2 Authentication With Tkip/Aes Encryption
Figure 4-6 Disabled WEP key settings The key is provided via IEEE 802.1X authentication: Place a check in this box is IEEE 802.1X authentication is used. By selecting this option, the WEP key settings will be disabled. Click on the Apply button, and then you can use the IEEE 802.1X authentication. 4.1.1.3 WPA/WPA2 Authentication with TKIP/AES Encryption WPA (Wi-Fi Protected Access) was designed to improve upon the security features of WEP (Wired Equivalent Privacy). - Page 27 Figure 4-7 More settings—TKIP Authentication: Select WPA from the drop-down list. Encryption: Select TKIP or AES from the drop-down list. Click on the WPA Encryption Setting button. In this section you can configure the settings for TLS or PEAP. TLS (Transport Layer Security) is an IETF standardized authentication protocol that uses PKI (Public Key Infrastructure) certificate-based authentication of both the client and authentication server.
- Page 28 Figure 4-8 WPA setting Protocol: Select TLS from the drop-down list. User Name: Enter the user name that is used for authentication purposes. Passphrase: Enter a WPA passphrase. For ASCII text, enter 8-63 characters, for hexadecimal enter 64 characters). Certificate: Make sure that you have downloaded and installed the certificate on the computer.
-
Page 29: Wpa-Psk Authentication
4.1.1.4 WPA-PSK Authentication Figure 4-9 WPA-PSK Authentication Authentication: Select WPA-PSK from the drop-down list. Encryption: Select an encryption type from the drop-down list. Click on the Apply button to save the changes. 4.1.1.5 Profiles Multiple profiles can be created for different Network Names (SSIDs) and security settings. This allows a user to quickly associate with another network, instead of entering the credentials each time. -
Page 30: Advanced Settings
Figure 4-10 More Setting—Profile Profile Name: Displays the name of current profile. One device can have many profiles, but only one profile can be loaded at a time. Load: Select a profile from the drop-down list and then click on the Load button. Save Current: Enter a new profile name and then click on the Save Current button to save the profile. - Page 31 Figure 4-11 Advanced Setting Power Consumption Setting: If your desktop or notebook is connected to external power, select Continuous Access Mode (CAM), if your notebook is using a battery, select Maximum Power-Saving Mode, or Fast Power-Saving Mode.
-
Page 32: Chapter 5 Example Configuration
Chapter 5 Example configuration 5.1 Configuration of WEP Encryption Suppose you have an installed and using AP, the SSID is TEST and it adopts 64 bit WEP encryption with the key “1111111111”. To establish a connection with this AP, you should follow five steps below: Double click “TEST”... - Page 33 Step 3:Click “Change” Figure 5-3 In WEP key setting dialogue box click “change" to continue our setting. Key length: 64 bit Default key ID:#1 Key format:Hexadecimal Key value:enter “1111111111” in #1 Click the close button in top right left of the screen, and it will return to the screen of wireless utility.
-
Page 34: Appendix A: Glossary
Appendix A: Glossary IEEE 802.11b - The IEEE 802.11b standard specifies a wireless networking at 11 Mbps using direct-sequence spread-spectrum (DSSS) technology and operating in the unlicensed radio spectrum at 2.4GHz, and WEP encryption for security. IEEE 802.11b networks are also referred to as Wi-Fi networks. IEEE 802.11g - Specification for wireless networking at 54 Mbps using direct-sequence spread-spectrum (DSSS) technology, using OFDM modulation and operating in the unlicensed radio spectrum at 2.4GHz, and backward compatibility with IEEE 8021b... - Page 35 PSK- Pre-Shared Key TKIP- Temporal Key Integrity Protocol AES- Advanced Encryption Standard TLS- Transport Layer Security TTLS- Tunnel Transport Layer Security PEAP- Protected Extended Authentication Protocol RADIUS- Remote Authentication Dial In User Service...
-
Page 36: Appendix B: Specifications
Appendix B: Specifications Normal A-type USB 2.0 Connector Interface IEEE 802.1b; IEEE 802.1g Standards Windows 98, ME, 2000, XP, Vista Operating System In door up to 100m, out door up to 300m (It is limited to the Transmission environment). Distance 54/48/36/24/18/12/9/6 Mbps 11g OFDM,11/5.5/3/2/1 Mbps 11b Radio Data Rate DSSS,(Auto Rate Sensing) - Page 37 SMCWUSB-G2 SMCWBR11-G...
Need help?
Do you have a question about the WUSB-G2 and is the answer not in the manual?
Questions and answers