Table of Contents

Related Manuals for VDO MS 4200 RS


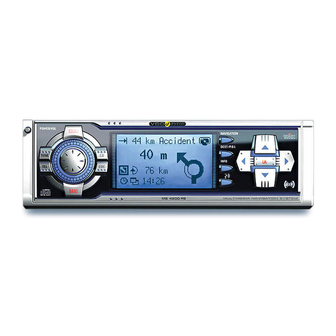
Summary of Contents for VDO MS 4200 RS
- Page 1 MS 4200 RS Operating Software MO 4254 Owner’s manual and mounting instruction Mode d’emploi et manuel d’installation Bedienungs- und Einbauanleitung Gebruiksaanwijzing en inbouwhandleiding Istruzioni d’uso e d’installazione www.vdodayton.com...
- Page 2 SDVC [A1] [A3] [A2] [A5] [A4] [A6] [A8] [A7] +12V Power Amplifier Tel. in TMC receiver Remote CD Changer +30˚ -10˚...
-
Page 3: Table Of Contents
CONTENTS Contents NEW OPERATING SOFTWARE MO 4254......3 Safety instructions ........3 New functions . - Page 4 CONTENTS CD CHANGER ........37 CD changer (accessories) .
-
Page 5: New Operating Software Mo 4254
NEW OPERATING SOFTWARE MO 4254 Safety instructions The use of the navigation radio by no means relieves the driver of his/her responsibilities. The highway code must always be observed. Always observe the current traffic situation. The applicable traffic regulations and the prevailing traffic situation always take precedence over the instructions issued by the navigation system if they contradict one another. -
Page 6: New Functions
NEW OPERATING SOFTWARE MO 4254 New functions The new operating software for your navigation system provides a number of new or expanded functions: Improved guidance Improved visual and audible turn-off prompts thanks to additional symbols and optimised voice-output characteristics. Improved “Alternative route” The settings range for planning an alterative route has been improved from only 10 km to up to 50 km. - Page 7 NEW OPERATING SOFTWARE MO 4254 Additional route criteria “Avoid ferry” and “Avoid tunnel” In addition to the previously available route criteria, “No toll road”, ferries and tunnels can be deliberately avoided during route planning. Availability of this function depends on the map data used. If route planning is not possible without the selected exceptions, toll roads, ferries and tunnels are included in route planning.
- Page 8 NEW OPERATING SOFTWARE MO 4254 Speed information Display of the legal speed limit applicable to the current route segment in the guidance screen, provided the map CD inserted supports this function. With an additional audible warning, the reaching or exceeding of this speed limit is indicated by means of an audible signal.
-
Page 9: New C-Iq Functions
NEW OPERATING SOFTWARE MO 4254 New C-IQ functions Prepaid C-IQ You can purchase country maps for navigation and/or travel info products (e.g. hotel and restaurant guides) at a flat rate and in advance for use on a daily basis, but without having to specify the actual days concerned. -
Page 10: What Else Has Changed In Mo 4254
NEW OPERATING SOFTWARE MO 4254 Info Points function Visual and audible indication of important points along your route. Different providers of travel and traffic information have optimised these specifically for navigation systems. This includes information about fixed speed camera installations or other safety relevant information (e.g. - Page 11 NEW OPERATING SOFTWARE MO 4254 AF re-tuning (only in FM) (See page 33) The radio continuously checks a series of alternate frequencies (AF) for the selected station and automatically chooses the best frequency. Deactivate this function only if you hear brief interruptions of transmission or if the unit automatically switches to an undesired station (e.g.
-
Page 12: Tips For Convenient Operation
NEW OPERATING SOFTWARE MO 4254 Tips for convenient operation Cross-border guidance Owing to the high data volume, the European navigation data is stored on several CD ROMs (map CDs). In order to nevertheless achieve cross-border guidance, the most important European cities and roads (Major Roads Europe) are additionally stored on the map CDs at present. -
Page 13: Installation Instructions
INSTALLATION INSTRUCTIONS IMPORTANT INFORMATION Please read this information carefully and follow the all the instructions outlined below. This will ensure the reliable operation and long service life of your navigation radio. Keep the packaging and operating instructions in a safe place in order to pass them on to a subsequent owner in the event of selling the unit at a later date. - Page 14 INSTALLATION INSTRUCTIONS Connection overview, ISO chamber A, Fig. 2: Connection Input digital speedometer signal / SDVC Switch input reversing signal (reversing light plus) Switch input telephone mute function + 12 V permanent positive; terminal 30 Switch output for electronic antenna /relay motor antenna Switch input pilot light +12 V ignition positive;...
- Page 15 INSTALLATION INSTRUCTIONS Reversing signal (A2): Connect pin A2 to a suitable reversing signal point (positive lead of reversing lamp). Note: Operation of the navigation system is not possible without a reversing signal. The absence of a reversing signal may lead to inaccurate navigation. Telephone mute function (A3), optional: Connect pin A3 to the mute function output of the car phone or the hands-free unit.
- Page 16 INSTALLATION INSTRUCTIONS Optional connections ISO chamber C, Fig. 4 - 6 Line-out (yellow connector C1): (adapter cable, accessories) An amplifier with additional loudspeakers can be connected to the unit via this connector. Telephone input (green connector C2): (adapter cable, accessories) Connect the loudspeaker output of your mobile phone or hands-free unit to lead C2.
- Page 17 INSTALLATION INSTRUCTIONS Note before installing, Fig. 13: – The radio must be installed horizontally. Deviations of - 10 to + 30 degrees can be set in the “Mounting angle” menu (see “Initial operation”). Larger deviations may result in malfunctions. – A rigid connection to the vehicle body is a prerequisite for correct functioning of the system Insert the installation bracket into the DIN slot and bend the appropriate metal tabs...
- Page 18 Gently push the tools outwards and carefully pull the radio out of the installation bracket using the tools. Service Please visit our website for up-to-date information: www.vdodayton.com or contact a VDO Dayton dealer. Subject to technical modifications and errors.
-
Page 19: General Information
GENERAL INFORMATION Notes on operating instructions The following reading aids are used to simplify these operating instructions: requests you to perform an action. shows the unit’s reaction provides additional information – identifies a list. Safety instructions and warnings contain important information for the safe use of the unit. -
Page 20: How Does The Navigation System Work
GENERAL INFORMATION How does the navigation system work? The position and movements of the vehicle are recorded by the navigation system’s sensors. The distance travelled is determined by the vehicle speedometer signal, rotary motion in curves is detected by a gyro sensor (inertial compass). -
Page 21: The Digital Road Map
GENERAL INFORMATION The digital road map To be able to plan a route to a destination address, the navigation system not only requires the current position of the vehicle but also a digital road map containing the destination address itself and the roads leading to the destination address. This digital road map is on the map CD which you insert into the navigation computer. -
Page 22: Safety
SAFETY The system has the following safety functions to prevent theft: Removable operating panel Take the removable operating panel with you, whenever you leave the vehicle. Keep the panel in its protective case. Always replace the operating panel before driving off. When the front is opened, acoustic signals will sound (independent of the presence of the removable operating panel). -
Page 23: Preface
PREFACE RDS (Radio Data System) Many FM stations transmit RDS information. The VDO navigation radio evaluates the RDS telegram and offers the following advantages: – PS (Program Service Name): Display of station name, – PTY (Program TYpe): Station selection by program type, page 34 –... -
Page 24: Operation
OPERATION Control elements 1 REL ..Release button for removable control panel 2 VOL/POWER . . Press: Switching on / off ... . Turn: Setting the volume 3 TUNE . -
Page 25: Displays
OPERATION Displays In radio mode: : Traffic Announcements / TMC (see “INFORMATION” menu) Time CD icon flashes: route is being planned. Do not remove map CD! Waveband Preset number Frequency Selected search sensitivity (for automatic search tuning) Program (Station) name Selected search mode (only with RDS stations) In CD player mode:... -
Page 26: Inserting A Cd
OPERATION Inserting a CD 1. Open the front panel. 2. Insert the CD into the drive (printed side up). For audio CDs, playback starts automatically. 3. Close the front panel. Removing a CD 1. Press the eject button to open the front panel. 2. -
Page 27: Menu Operation
OPERATION Menu operation Cursor The currently selected line or field on the screen is designated as the cursor. The cursor is identified by an inverse field (bright letters on black background). Move the cursor using the cursor buttons 8, 2, 4 or 6. -
Page 28: Entering Letters
OPERATION Entering letters Characters are entered by selecting letters from a list. In the following, this type of entering will simply be called “typewriter”. Move the cursor using the cursor buttons 4, 6, 8 and 2 to the desired letter. ‰... -
Page 29: Normal And Expert Modes
OPERATION Normal and expert modes With its radio, CD and CD changer modes, the unit offers two possible methods for selecting the functions. You can choose between the “ ” and “ ” modes. The “ ” mode reduces the number of operator steps when selecting search functions. -
Page 30: Information" Menu
“INFORMATION” MENU The “INFORMATION” menu The “ ” menu allows you to configure the type and amount of information the unit will receive via the radio data system (RDS). Press the INFO button. The “ ” menu is displayed. The following options are available: TMC Scan (Traffic Message Channel) If you activate this function, the automatic search will only look for stations transmitting TMC information and will ensure that you receive as much TMC data as... - Page 31 “INFORMATION” MENU Behaviour of TMC and TA If you switch on TMC Scan, you ensure that the radio will only search for stations transmitting TMC data during the automatic search. If the reception quality of the TMC station deteriorates drastically, the unit will indicate this by outputting a warning message.
-
Page 32: Sound Settings
SOUND SETTINGS The “SOUND” menu In the “ ” menu, you can set your navigation radio’s sound and several other sound reproduction parameters to your own preferences. The sound settings for bass and treble/tone are valid for the currently active sound source (radio, CD or CDC). - Page 33 SOUND SETTINGS Sound set-up Setting one of the following functions: – : Reset the sound setting to the factory-set values and switch off loudness. – Activate this function to equalise volume differences between the various sound sources. – Set the enhancement of low tones at loudness. –...
-
Page 34: Radio
RADIO Radio Listening to radio If the unit is not yet in radio mode: Press the TUNE button. Select waveband In radio mode: Press the BAND button. Select the desired waveband and press OK. The following wavebands are available: FM, FM AS (Autostore) MW, MW AS (Autostore), SW and LW. -
Page 35: The "Radio" Menu
RADIO The “RADIO” menu In radio mode: Press the TUNE button. The “ ” menu is displayed. The following functions are available: RDS Memo (only on FM) Searches for all currently available RDS stations and stores them in alphabetic order. Activate this function to refresh the RDS Memo. - Page 36 RADIO Extra Info Display of information on the selected station: – recall number (if the station was stored), – station name (for RDS stations), – frequency, – program type (PTY, if the station transmits the PTY ID) and – the selected sound type for radio mode. PTY Search (only on FM) This function allows you to search for stations of the desired program type.
-
Page 37: Cd Player
CD PLAYER CD player You can play 12 cm audio CDs on your CD player. We strongly recommend only playing 12 cm CDs. Please do not use 8 cm CDs (neither with nor without adapter). On no account must unusually-shaped CDs be inserted into the player. If you ignore these recommendations, you risk damaging your unit. -
Page 38: The "Cd" Menu
CD PLAYER The “CD” menu In CD player mode: Press the CD button. The “ ” menu is displayed. The following functions are available: Scan Activate this function to briefly scan all tracks on the inserted CD. Press OK to cancel the scanning process and to listen to the track of your choice. Repeat Track Activate this function to repeat the current track. -
Page 39: Cd Changer
CD CHANGER CD changer (accessories) A digital VDO Dayton CD changer can be connected to the navigation radio. We strongly recommend only playing 12 cm CDs. Please do not use 8 cm CDs (neither with nor without adapter). On no account must unusually-shaped CDs be inserted into the player. If you ignore these recommendations, you risk damaging your unit. -
Page 40: The "Cd Changer" Menu
CD CHANGER The “CD CHANGER” menu In CD changer mode: Press the CDC button. The “ ” menu is displayed. The following functions are available: Scan Activate this function to briefly scan all tracks on the currently selected CD. Press OK to cancel the scanning process and to listen to the track of your choice. Random Activate this function to listen to the tracks on the currently selected CD in random order. -
Page 41: Initialisation
INITIALISATION The “INITIALISATION” menu Select “ ” in one of the following menus: “ ”, “ ”, “ ” or “ ”. The “ ” menu is displayed. The “ ” menu allows you to adjust the navigation radio to your needs. The following functions are available: Telephone Adapt your unit’s telephone input to your car phone:... - Page 42 INITIALISATION On Off Logic Activate this function to limit the operation of the device to one hour after the ignition key is removed. Display Setting the display contrast and display brightness (day and night settings). Set the required contrast and brightness for the display in order to optimise the legibility of the text in accordance with lighting conditions.
-
Page 43: C-Iq - Intelligent Content On Demand
C-IQ – INTELLIGENT CONTENT ON DEMAND C-IQ – Your key to map, traffic and travel information Your navigation radio is supplied with a CD containing the latest version of the map software along with travel and traffic information (for dynamic navigation). The information on the CD is encrypted and can be partially or completely activated for a defined period with the aid of an access code. - Page 44 C-IQ – INTELLIGENT CONTENT ON DEMAND Activating products Once you have received your activation code, enter it into the system. In the main control menu, select “ ” then “ ”. The cursor appears automatically on the first digit of the code. Press OK to activate each digit in the code.
- Page 45 C-IQ – INTELLIGENT CONTENT ON DEMAND Preview Together with your map and travel information software you will also receive the opportunity to inspect different products free of charge before ordering them. You can have the system display the status of this preview: Select “...
-
Page 46: Navigation
NAVIGATION Main control A map CD must be inserted into the CD player for some of the functions in navigation mode. If the unit is not yet in navigation mode: Press the NAVIGATION button. The navigation main control is displayed. The following items are available in the main control: Destination input Opens the “... -
Page 47: Destination Input
NAVIGATION Destination input Destinations may be entered in several ways: – Entering city, road and house number or crossroads by means of the “typewriter.” See the following page. – Loading an address stored in the personal address book. See page 63. –... - Page 48 NAVIGATION Entering a new address An input wizard will help you enter a new address. It will lead you step by step through all the necessary entries such as country, city, road, house number or crossroads and required routing criterion. Step 1: City or postal code Select ”...
- Page 49 NAVIGATION Step 2: Road Once the city has been entered the input wizard automatically jumps to the “ ” input menu. Enter the name of the road using the “typewriter” or select a name from the list using Step 3: House number or junction If house numbers are available for a selected road, they can be entered with a separate input menu.
-
Page 50: Special Destinations (Pois)
NAVIGATION Special destinations (POIs) You may also input the destination address by selecting special facilities (POI = Points of Interest) stored in the database. These include e.g.: – airports, – hotels, – petrol station, – car repair garages – car parks, etc. Depending upon the information already entered in the destination input screen, a list of general interest facilities appears which are present on the current map CD. -
Page 51: Destination Input Via Gps Coordinates
NAVIGATION Special facilities in the vicinity of the current position You may also set a destination address by selecting a special facility in the vicinity of the current vehicle location. Briefly press the DEST/P.O.I. button twice Select “ ” in the destination input menu. A list of categories of special facilities is shown. -
Page 52: Via Point Input
NAVIGATION Via point input If you wish to visit other locations en route to the entered destination address, these can be stored as via points. The navigation system then plans the route to include the via points in the given sequence before the destination address is reached. - Page 53 NAVIGATION Delete via points not reached Via point which you have not reached or which are no longer desirable to you must be deleted from the via point list so that the navigation system may plan the route to the next via point or to the final destination.
-
Page 54: Guidance
NAVIGATION Guidance The guidance screen appears as soon as you activate the guidance. The guidance screen displays the following information: 1 Road direction arrow: The arrow indicates the course of the road. 2 Simplified presentation of the next turn-off prompt. 3 Turn-off prompt: A graphic display of the next crossroads or junction. -
Page 55: Audible Messages
NAVIGATION Audible messages During guidance, the navigation radio will provide acoustic routing information in addition to the symbols on the guidance screen. Commonly, the directive to turn into another road consists of two voice messages: an early warning e.g. “Right turn ahead” the instruction to turn e.g. - Page 56 NAVIGATION On longer route segments without junctions or crossroads, an arrow is displayed indicating the course of the road over the next 100 m. In addition, a reduced diagram of the next turn-off prompt appears on the left, above the route direction arrow. Thus, the driver is always warned in advance of the next change of direction.
-
Page 57: Route Selection
NAVIGATION Route selection During guidance, you may also modify the route criterion and activate or deactivate dynamic route planning. The system will then plan a new route taking into account the new setting of the current position of your car. In the guidance screen, select the symbol for route selection (on the basis of the setting in the destination input U, V, W or X). -
Page 58: Information During Guidance
NAVIGATION Information during guidance During guidance, you can call up several information screens: Move the cursor to the symbol and confirm by pressing OK. The list of information menus appears. The following information menus are available: Route list This option is available as soon as a route has been planned. - Page 59 NAVIGATION Displaying/deleting via points If via points have been entered for the current destination, the “ ” option will be active. The number of via points still to be reached also appears. Select the required via point from the list in order to view details or delete it.
-
Page 60: Traffic Information
NAVIGATION Traffic information Use the “Traffic info” option in the main control to obtain information about traffic conditions in three different categories: – At the car position – At the destination – On the route To access traffic information, the radio must be tuned to an RDS TMC station. Please note that the selected RDS-TMC station may not provide any traffic information relating to your destination if the destination is located outside the station range. - Page 61 NAVIGATION Viewing details relating to traffic information Select the required traffic report from one of the three lists (“At position”, “At destination”, “On the route”) in order to view details relating to traffic information. The first details screen appears: The following information is available: –...
-
Page 62: Dynamic Guidance With Tmc
NAVIGATION Dynamic guidance with TMC With RDS TMC (Traffic Message Channel), the current traffic situation is taken into account when planning the route to your destination. You will be informed, for example, of accidents, congestion or construction sites as soon as such a traffic situation occurs. -
Page 63: Dynamic Route Planning
NAVIGATION Bypassing a traffic obstruction locally When you approach the last exit before reaching a traffic obstruction, the navigation system will alert you and offer you the option of planning a detour route. As soon as a traffic obstruction is detected on your route and the detour option is displayed on the guidance screen: Confirm the detour option in the top line of the guidance screen. -
Page 64: Alternative Route
NAVIGATION Alternative route During guidance, you can cause the navigation system to plan an alternative route. Use this function if, for example, you want to avoid stationary traffic not reported via TMC or if you wish to plan an alternative route. The alternative route will be calculated for a selectable distance from the current position of the car. -
Page 65: Address Manager
NAVIGATION Address manager The navigation radio offers the opportunity of storing at least 30 destination addresses in a personal address book. In the address book, you can store your destinations separately under the categories “Private” and “Business”. The “Home” and “Work” shortcuts, which can be programmed with your home address and business address respectively, are also available here. - Page 66 NAVIGATION Store current loc. Would you like to store a favourite restaurant in the destination memory? You can store the current position of your car as follows: Select “ ” in the address manager. Select which address books the address should be stored in (private, business, home or work).
-
Page 67: Emergency Menu
NAVIGATION Emergency menu In the main control, select “ ”. The “ ” menu is displayed. The following options are available in the “ ” menu: GPS position Display of the current geographic vehicle location as calculated by the Global Positioning System. -
Page 68: System Settings
NAVIGATION System settings To customise the navigation functions to your own needs, you can change several settings. In the main control, select “ ”. The “ ” menu is displayed. The following information screens are available: Speed In the “ ”... -
Page 69: Guidance Screen
NAVIGATION Guidance screen Here you can select the information which should appear on the guidance screen. Show event Select whether traffic obstructions on your route should appear in the top line of the guidance screen or not. Remain. distance Select whether the distance-to-go to the destination or via point should appear in the status field of the guidance screen or not. -
Page 70: Measuring Units
NAVIGATION Language Choose one of the two languages loaded in the system, Select “ ” to replace one of the two loaded languages with another language from the system software CD (included). Select the language to be replaced. You will be prompted to insert the software CD. Insert the language CD in the CD player of the radio. -
Page 71: Loading Software Updates
NAVIGATION Loading software updates In order to extend the range of functions provided by the unit, you can load new software versions from a software update CD, if available for your navigation radio: Switch on the radio. Open the front and remove the CD if still inserted. Insert the software update CD into the CD player. -
Page 72: Troubleshooting
Unit not functioning / Not suitable for VW/Audi The power supply connector pin assignment for VW and Audi is not the same. vehicles • Use the VDO Dayton MA1910 adapter for the connection. Display still showing “INIT”. Will not function. The unit is faulty. - Page 73 • Check that you have inserted a map CD which contains C-IQ data. Map CDs without C-IQ will not be accepted by the system. Hotlines are available in many countries to handle queries about the VDO Dayton multimedia systems. Up-to-date telephone numbers can be found in the accompanying info sheet.
Need help?
Do you have a question about the MS 4200 RS and is the answer not in the manual?
Questions and answers