Casio fx-570ES PLUS, fx-991ES PLUS Manual
- User manual (84 pages) ,
- User manual (46 pages) ,
- User manual (84 pages)
Advertisement
- 1 Important Information
- 2 Sample Operations
- 3 Initializing the Calculator
- 4 Safety Precautions
- 5 Handling Precautions
- 6 Removing the Hard Case
- 7 Turning Power On and Off
- 8 Adjusting Display Contrast
- 9 Key Markings
- 10 Reading the Display
- 11 Using Menus
- 12 Specifying the Calculation Mode
- 13 Configuring the Calculator Setup
- 14 Inputting Expressions and Values
- 15 Toggling Calculation Results
-
16
Basic Calculations
- 16.1 Fraction Calculations
- 16.2 Percent Calculations
- 16.3 Degree, Minute, Second (Sexagesimal) Calculations
- 16.4 Multi-Statements
- 16.5 Using Engineering Notation
- 16.6 Calculation History
- 16.7 Replay
- 16.8 Answer Memory (Ans)
- 16.9 Variables (A, B, C, D, E, F, X, Y)
- 16.10 Independent Memory (M)
- 16.11 Clearing the Contents of All Memories
- 17 Function Calculations
- 18 Complex Number Calculations (CMPLX)
- 19 Using CALC
- 20 Using SOLVE
- 21 Statistical Calculations (STAT)
- 22 Base-n Calculations (BASE-N)
- 23 Equation Calculations (EQN)
- 24 Matrix Calculations (MATRIX)
- 25 Creating a Number Table from a Function (TABLE)
- 26 Vector Calculations (VECTOR)
- 27 Scientific Constants
- 28 Metric Conversion
- 29 Calculation Ranges, Number of Digits, and Precision
- 30 Errors
- 31 Before Assuming Malfunction of the Calculator...
- 32 Replacing the Battery
- 33 Specifications
- 34 Frequently Asked Questions
- 35 Documents / Resources
CASIO Worldwide Education Website
http://edu.casio.com
CASIO EDUCATIONAL FORUM
http://edu.casio.com/forum/
Important Information
- The displays and illustrations (such as key markings) shown in this User's Guide are for illustrative purposes only, and may differ somewhat from the actual items they represent.
- The contents of this manual are subject to change without notice.
- In no event shall CASIO Computer Co., Ltd. be liable to anyone for special, collateral, incidental, or consequential damages in connection with or arising out of the purchase or use of this product and items that come with it. Moreover, CASIO Computer Co., Ltd. shall not be liable for any claim of any kind whatsoever by any other party arising out of the use of this product and the items that come with it.
- Be sure to keep all user documentation handy for future reference.
Sample Operations
Sample operations in this manual are indicated by a  icon. Unless specifically stated, all sample operations assume that the calculator is in its initial default setup. Use the procedure under "Initializing the Calculator" to return the calculator to its initial default setup.
For information about the ,
,  ,
,  and
and  marks that are shown in the sample operations, see "Configuring the Calculator Setup".
Initializing the Calculator
Perform the following procedure when you want to initialize the calculator and return the calculation mode and setup to their initial default settings. Note that this operation also clears all data currently in calculator memory.

Safety Precautions
 Battery Battery
|
Handling Precautions
- Even if the calculator is operating normally, replace the battery at least once every three years (LR44 (GPA76)) or two years (R03 (UM-4)). A dead battery can leak, causing damage to and malfunction of the calculator. Never leave a dead battery in the calculator. Do not try using the calculator while the battery is completely dead (fx-991ES PLUS).
- The battery that comes with the calculator discharges slightly during shipment and storage. Because of this, it may require replacement sooner than the normal expected battery life.
- Do not use an oxyride battery* or any other type of nickel-based primary battery with this product. Incompatibility between such batteries and product specifications can result in shorter battery life and product malfunction.
- Avoid use and storage of the calculator in areas subjected to temperature extremes, and large amounts of humidity and dust.
- Do not subject the calculator to excessive impact, pressure, or bending.
- Never try to take the calculator apart.
- Use a soft, dry cloth to clean the exterior of the calculator.
- Whenever discarding the calculator or batteries, be sure to do so in accordance with the laws and regulations in your particular area.
* Company and product names used in this manual may be registered trademarks or trademarks of their respective owners.
Removing the Hard Case
Before using the calculator, slide its hard case downwards to remove it, and then affix the hard case to the back of the calculator as shown in the illustration nearby.

Turning Power On and Off
Press  to turn on the calculator.
Press  (OFF) to turn off the calculator.
Auto Power Off
Your calculator will turn off automatically if you do not perform any operation for about 10 minutes. If this happens, press the key to turn the calculator back on.
Adjusting Display Contrast
Display the CONTRAST screen by performing the following key operation:  . Next, use
 and
and  to adjust contrast. After the setting is the way you want, press
  .
.

If adjusting display contrast does not improve display readability, it probably means that battery power is low. Replace the battery.
Key Markings
Pressing the  or
or  key followed by a second Alternate function key performs the alternate function of the second key.
The alternate function is indicated by the text printed above the key.

The following shows what the different colors of the alternate function key text mean.
| If key marking text is this color: | It means this: |
| Yellow | Press and then the key to access the applicable function. |
| Red | Press and then the key to input the applicable variable, constant, or symbol. |
| Purple (or enclosed in purple brackets) | Enter the CMPLX Mode to access the function. |
| Green (or enclosed in green brackets) | Enter the BASE-N Mode to access the function. |
Reading the Display
The display of the calculator shows expressions you input, calculation results, and various indicators.

- If a
![]() indicator appears on the right side of the calculation result, it means the displayed calculation result continues to the right. Use
indicator appears on the right side of the calculation result, it means the displayed calculation result continues to the right. Use ![]() and
and ![]() to scroll the calculation result display.
to scroll the calculation result display. - If a
![]() indicator appears on the right side of the input expression, it means the displayed calculation continues to the right. Use
indicator appears on the right side of the input expression, it means the displayed calculation continues to the right. Use ![]() and
and![]() to scroll the input expression display. Note that if you want to scroll the input expression while both the
to scroll the input expression display. Note that if you want to scroll the input expression while both the ![]() and
and ![]() indicators are displayed, you will need to press
indicators are displayed, you will need to press ![]() first and then use
first and then use ![]() and
and ![]() to scroll.
to scroll.
 indicator appears on the right side of the input expression, it means the displayed calculation continues to the right. Use
 Display indicators
| This indicator: | Means this: |
 | The keypad has been shifted by pressing the key. The keypad will unshift and this indicator will disappear when you press a key. |
 | The alpha input mode has been entered by pressing the key. The alpha input mode will be exited and this indicator will disappear when you press a key. |
| M | There is a value stored in independent memory. |
| STO | The calculator is standing by for input of a variable name to assign a value to the variable. This indicator appears after you press  (STO). (STO). |
| RCL | The calculator is standing by for input of a variable name to recall the variable's value. This indicator appears after you press  . . |
| STAT | The calculator is in the STAT Mode. |
| CMPLX | The calculator is in the CMPLX Mode. |
| MAT | The calculator is in the MATRIX Mode. |
| VCT | The calculator is in the VECTOR Mode. |
| 7 | The default angle unit is degrees. |
| 8 | The default angle unit is radians. |
| 9 | The default angle unit is grads. |
| FIX | A fixed number of decimal places is in effect. |
| SCI | A fixed number of significant digits is in effect. |
| Math | Natural Display is selected as the display format. |
 | Calculation history memory data is available and can be replayed, or there is more data above/below the current screen. |
| Disp | The display currently shows an intermediate result of a multi-statement calculation. |
For some type of calculation that takes a long time to execute, the display may show only the above indicators (without any value) while it performs the calculation internally.
Using Menus
Some of the calculator's operations are performed using menus. Pressing  or
or  , for example, will display a menu of applicable functions.
The following are the operations you should use to navigate between menus.
- You can select a menu item by pressing the number key that corresponds to the number to its left on the menu screen.
- The
![]() indicator in the upper right corner of a menu means there is another menu below the current one. The
indicator in the upper right corner of a menu means there is another menu below the current one. The ![]() indicator means another menu above. Use
indicator means another menu above. Use ![]() and
and ![]() to switch between menus.
to switch between menus. - To close a menu without selecting anything, press
![]() .
.
 indicator in the upper right corner of a menu means there is another menu below the current one. The
  indicator means another menu above. Use
 Specifying the Calculation Mode
| When you want to perform this type of operation: | Perform this key operation: |
| General calculations |  (COMP) (COMP) |
| Complex number calculations |  (CMPLX) (CMPLX) |
| Statistical and regression calculations |  (STAT) (STAT) |
| Calculations involving specific number systems (binary, octal, decimal, hexadecimal) |  (BASE-N) (BASE-N) |
| Equation solution |  (EQN) (EQN) |
| Matrix calculations |  (MATRIX) (MATRIX) |
| Generation of a number table based on an expression |  (TABLE) (TABLE) |
| Vector calculations |  (VECTOR) (VECTOR) |
 Note: The initial default calculation mode is the COMP Mode.
Configuring the Calculator Setup
First perform the following key operation to display the setup menu:  (SETUP). Next, use
  and
and  and the number keys to configure the settings you want.
Underlined ( ___ ) settings are initial defaults.
 Specifies the display format.
Natural Display (MthIO) causes fractions, irrational numbers, and other expressions to be displayed as they are written on paper.

MthIO: Selects MathO or LineO. MathO displays input and calculation results using the same format as they are written on paper. LineO displays input the same way as MathO, but calculation results are displayed in linear format.
Linear Display (LineIO) causes fractions and other expressions to be displayed in a single line.

Note:
- The calculator switches to Linear Display automatically whenever you enter the STAT, BASE-N, MATRIX, or VECTOR Mode.
- In this manual, the B symbol next to a sample operation indicates Natural Display (MathO), while the b symbol indicates Linear Display.
 Specifies degrees, radians or grads as the angle unit for value input and calculation result display.
Note: In this manual, the  symbol next to a sample operation indicates degrees, while the
 symbol indicates radians.
 Specifies the number of digits for display of a calculation result.
Fix: The value you specify (from 0 to 9) controls the number of decimal places for displayed calculation results. Calculation results are rounded off to the specified digit before being displayed.
Example: 
Sci: The value you specify (from 1 to 10) controls the number of significant digits for displayed calculation results. Calculation results are rounded off to the specified digit before being displayed.
Example: 
Norm: Selecting one of the two available settings ( Norm 1 , Norm 2) determines the range in which results will be displayed in non-exponential format. Outside the specified range, results are displayed using exponential format.
Norm 1: 
Norm 2: 
Example: 
 Specifies either mixed fraction (ab/c) or improper fraction (d/c) for display of fractions in calculation results.
 Specifies either rectangular coordinates
  or polar coordinates
  for EQN Mode solutions.
 Specifies whether or not to display a FREQ (frequency) column in the STAT Mode Stat Editor.
 Specifies whether to display a dot or a comma for the calculation result decimal point. A dot is always displayed during input.
Note: When dot is selected as the decimal point, the separator for multiple results is a comma (,). When comma is selected, the separator is a semicolon (;).
 Adjusts display contrast. See "Adjusting Display Contrast" for details.
Initializing Calculator Settings
Perform the following procedure to initialize the calculator, which returns the calculation mode to COMP and returns all other settings, including setup menu settings, to their initial defaults.

Inputting Expressions and Values
Basic Input Rules
Calculations can be input in the same form as they are written. When you press  the priority sequence of the input calculation will be evaluated automatically and the result will appear on the display.

* 1 Input of the closing parenthesis is required for sin, sinh, and other functions that include parentheses.
* 2 These multiplication symbols ( × ) can be omitted. A multiplication symbol can be omitted when it occurs immediately before an opening parenthesis, immediately before sin or other function that includes parentheses, immediately before the Ran# (random number) function, or immediately before a variable (A, B, C, D, E, F, M, X, Y), scientific constants, π or e.
* 3 The closing parenthesis immediately before the operation can be omitted.
 Input example omitting
  and
and  operations in the above example.

Note:
- If the calculation becomes longer than the screen width during input, the screen will scroll automatically to the right and the
![]() indicator will appear on the display. When this happens, you can scroll back to the left by using
indicator will appear on the display. When this happens, you can scroll back to the left by using ![]() and
and ![]() to move the cursor.
to move the cursor. - When Linear Display is selected, pressing
![]() will cause the cursor to jump to the beginning of the calculation, while
will cause the cursor to jump to the beginning of the calculation, while ![]() will jump to the end.
will jump to the end. - When Natural Display is selected, pressing
![]() while the cursor is at the end of the input calculation will cause it to jump to the beginning, while pressing
while the cursor is at the end of the input calculation will cause it to jump to the beginning, while pressing ![]() while the cursor is at the beginning will cause it to jump to the end.
while the cursor is at the beginning will cause it to jump to the end. - You can input up to 99 bytes for a calculation. Each numeral, symbol, or function normally uses one byte. Some functions require three to 13 bytes.
- The cursor will change shape to
![]() when there are 10 bytes or less of allowed input remaining. If this happens, end calculation input and then press
when there are 10 bytes or less of allowed input remaining. If this happens, end calculation input and then press ![]() .
.
 indicator will appear on the display. When this happens, you can scroll back to the left by using
  when there are 10 bytes or less of allowed input remaining. If this happens, end calculation input and then press
 Calculation Priority Sequence
The priority sequence of input calculations is evaluated in accordance with the rules below. When the priority of two expressions is the same, the calculation is performed from left to right.
| 1st | Parenthetical expressions |
| 2nd | Functions that require an argument to the right and a closing parenthesis ")" following the argument. |
| 3rd | Functions that come after the input value (  , %, , %,  t ), powers ( t ), powers ( ), roots ), roots |
| 4th | Fractions |
| 5th | Negative sign (–), base- n symbols (d, h, b, o)
Since x2 has a higher priority than the negative sign, inputting |
| 6th | Metric conversion commands (cm in, etc.), STAT Mode estimated values  |
| 7th | Multiplication where the multiplication sign is omitted |
| 8th | Permutation  , combination , combination  , complex number polar coordinate symbol , complex number polar coordinate symbol  |
| 9th | Dot product (·) |
| 10th | Multiplication, division ( ×, ÷) |
| 11th | Addition, subtraction (+, –) |
| 12th | Logical AND (and) |
| 13th | Logical OR, XOR, XNOR (or, xor, xnor) |


 would result in the squaring of 2 and then appending a negative sign to the result. Always keep the priority sequence in mind, and enclose negative values in parentheses when required.
Inputting with Natural Display
Selecting Natural Display makes it possible to input and display fractions and certain functions  just as they are written in your textbook.

- Certain types of expressions can cause the height of a calculation formula to be greater than one display line. The maximum allowable height of a calculation formula is two display screens (31 dots × 2). Further input will become impossible if the height of the calculation you are inputting exceeds the allowable limit.
- Nesting of functions and parentheses is allowed. Further input will become impossible if you nest too many functions and/or parentheses. If this happens, divide the calculation into multiple parts and calculate each part separately.
Note: When you press and obtain a calculation result using Natural Display, part of the expression you input may be cut off. If you need to view the entire input expression again, press  and then use and to scroll the input expression.
Using Values and Expressions as Arguments
(Natural Display only)
A value or an expression that you have already input can be used as the argument of a function. After you have input ![]() , for example, you can make it the argument of
, for example, you can make it the argument of  , resulting in
  .
.
 To input
  and then change it to

As shown above, the value or expression to the right of the cursor after  (INS) are pressed becomes the argument of the function that is specified next. The range encompassed as the argument is everything up to the first open parenthesis to the right, if there is one, or everything up to the first function to the right (sin(30), log2(4), etc.)
This capability can be used with the following functions: 

Overwrite Input Mode (Linear Display only)
You can select either insert or overwrite as the input mode, but only while Linear Display is selected. In the overwrite mode, text you input replaces the text at the current cursor location. You can toggle between the insert and overwrite modes by performing the operations: (INS). The cursor appears as "  " in the insert mode and as "
  " in the overwrite mode.
Note: Natural Display always uses the insert mode, so changing display format from Linear Display to Natural Display will automatically switch to the insert mode.
Correcting and Clearing an Expression
To delete a single character or function: Move the cursor so it is directly to the right of the character or function you want to delete, and then press  . In the overwrite mode, move the cursor so it is directly under the character or function you want to delete, and then press .
To insert a character or function into a calculation: Use and to move the cursor to the location where you want to insert the character or function and then input it. Be sure always to use the insert mode if Linear Display is selected.
To clear all of the calculation you are inputting: Press  .
.
Toggling Calculation Results
While Natural Display is selected, each press of  will toggle the currently displayed calculation result between its fraction form and decimal form, its
  form and decimal form, or its π form and decimal form.

While Linear Display is selected, each press of will toggle the currently displayed calculation result between its decimal form and fraction form.

- Depending on the type of calculation result that is on the display when you press the
![]() key, the conversion process may take some time to perform.
key, the conversion process may take some time to perform. - With certain calculation results, pressing the
![]() key will not convert the displayed value.
key will not convert the displayed value. - You cannot switch from decimal form to mixed fraction form if the total number of digits used in the mixed fraction (including integer, numerator, denominator, and separator symbols) is greater than 10.
Note: With Natural Display (MathO), pressing  instead of after inputting a calculation will display the calculation result in decimal form. Pressingafter that will switch to the fraction form or π form of the calculation result. The
 form of the result will not appear in this case.
Basic Calculations
Fraction Calculations
Note that the input method for fractions is different, depending upon whether you are using Natural Display or Linear Display.

Note:
- Mixing fractions and decimal values in a calculation while Linear Display is selected will cause the result to be displayed as a decimal value.
- Fractions in calculation results are displayed after being reduced to their lowest terms.
To switch a calculation result between improper fraction and mixed fraction form: Perform the following key operation: 
To switch a calculation result between fraction and decimal form:
Press .
Percent Calculations
Inputting a value and pressing  (%) causes the input value to become a percent.

Degree, Minute, Second (Sexagesimal) Calculations
Performing an addition or subtraction operation between sexagesimal values, or a multiplication or division operation between a sexagesimal value and a decimal value will cause the result to be displayed as a sexagesimal value. You also can convert between sexagesimal and decimal. The following is the input format for a sexagesimal value: {degrees}  {minutes}
  { seconds}
  .
.
Note: You must always input something for the degrees and minutes, even if they are zero.
 Calculations")
Multi-Statements
You can use the colon character (:) to connect two or more expressions and execute them in sequence from left to right when you press  .
.

Using Engineering Notation
A simple key operation transforms a displayed value to engineering notation.
 Transform the value 1234 to engineering notation, shifting the decimal point to the right.


Transform the value 123 to engineering notation, shifting the decimal point to the left.

Calculation History
In the COMP, CMPLX, or BASE-N Mode, the calculator remembers up to approximately 200 bytes of data for the newest calculation. You can scroll through calculation history contents usingand .

Note: Calculation history data is all cleared whenever you press  , when you change to a different calculation mode, when you change the display format, or whenever you perform any reset operation.
Replay
While a calculation result is on the display, you can press or to edit the expression you used for the previous calculation.

Note: If you want to edit a calculation when the  indicator is on the right side of a calculation result display (see "Reading the Display"), press and then use and to scroll the calculation.
Answer Memory (Ans)
The last calculation result obtained is stored in Ans (answer) memory. Ans memory contents are updated whenever a new calculation result is displayed.
")
Variables (A, B, C, D, E, F, X, Y)
Your calculator has eight preset variables named A, B, C, D, E, F, X, and Y. You can assign values to variables and also use the variables in calculations.
")
Independent Memory (M)
You can add calculation results to or subtract results from independent memory. The "M" appears on the display when there is any value other than zero stored in independent memory.
")
Note: Variable M is used for independent memory.
Clearing the Contents of All Memories
Ans memory, independent memory, and variable contents are retained even if you press  , change the calculation mode, or turn off the calculator. Perform the following procedure when you want to clear the contents of all memories.

Function Calculations
For actual operations using each function, see the "Examples" section following the list below.
π : π is displayed as 3.141592654, but π = 3.14159265358980 is used for internal calculations.
e : e is displayed as 2.718281828, but e = 2.71828182845904 is used for internal calculations.
sin, cos, tan, sin −1, cos −1 , tan −1 : Trigonometric functions. Specify the angle unit before performing calculations. See  .
.
sinh, cosh, tanh, sinh−1 , cosh −1 , tanh −1 : Hyperbolic functions. Input a function from the menu that appears when you press w. The angle unit setting does not affect calculations. See ![]() .
.
°, r, g : These functions specify the angle unit. ° specifies degrees, r radians, and g grads. Input a function from the menu that appears when you perform the following key operation:  . See
. See  .
.
 : Exponential functions. Note that the input method is different depending upon whether you are using Natural Display or Linear Display. See
log : Logarithmic function. Use the  key to input log a b as log ( a , b ). Base 10 is the default setting if you do not input anything for a . The
  key also can be used for input, but only while Natural Display is selected. In this case, you must input a value for the base. See
  .
.
ln: Natural logarithm to base e . See  .
.
 : Powers, power roots, and reciprocals. Note that the input methods for
  are different depending upon whether you are using Natural Display or Linear Display. See
  .
.
Note:
- The following functions cannot be input in consecutive sequence:
![]() . If you input
. If you input ![]() , for example, the final
, for example, the final ![]() will be ignored. To input
will be ignored. To input ![]() , input
, input ![]() , press the
, press the ![]() key, and then press
key, and then press ![]() .
. - x2 , x3 , x −1 can be used in complex number calculations.
 . If you input
  , for example, the final
  will be ignored. To input
  , input
  , press the
  .
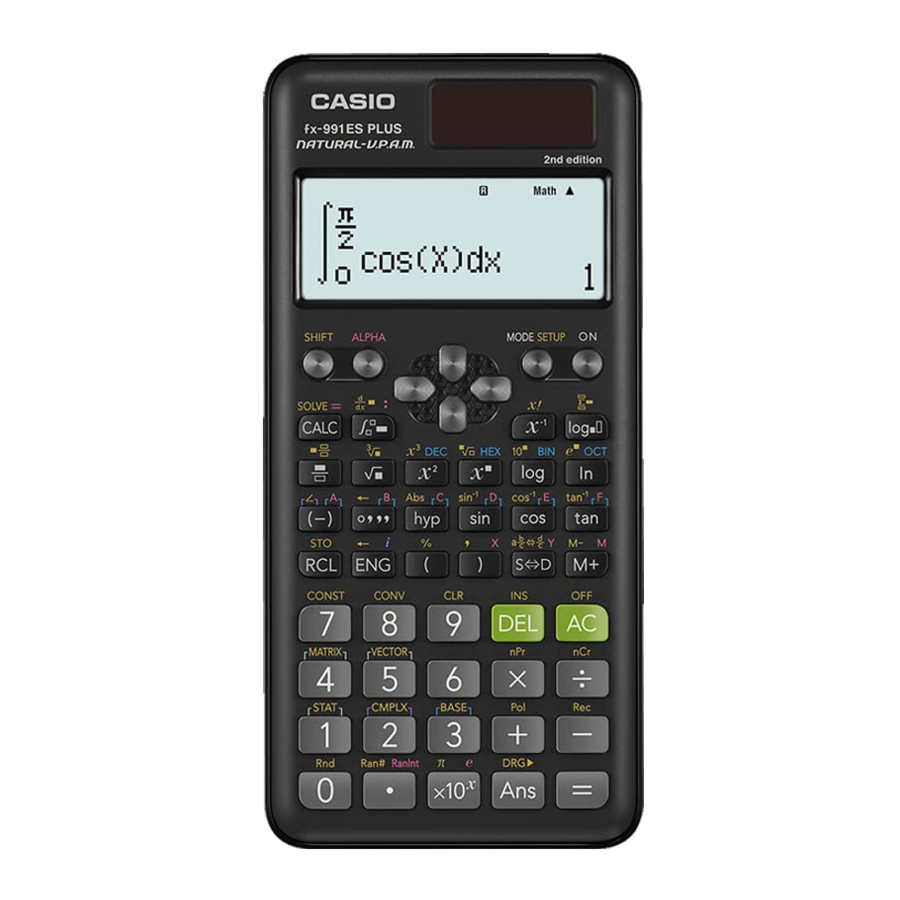
. : Function for performing numerical integration using the Gauss-Kronrod method. Natural Display input syntax is
  , while Linear Display input syntax is
  . tol specifies tolerance, which becomes 1 × 10 –5 when nothing is input for tol . Also see "Integration and Differential Calculation Precautions" and "Tips for Successful Integration Calculations" for more information. See
  .
.
 : Function for approximation of the derivative based on the central difference method. Natural Display input syntax is
  , while Linear Display input syntax is
  . tol specifies tolerance, which becomes 1 × 10 –10 when nothing is input for tol . Also see "Integration and Differential Calculation Precautions" for more information. See
  .
.
 : Function that, for a specified range of f (x ), determines sum
 . Natural Display input syntax is
  , while Linear Display input syntax is Σ ( f (x ), a , b ). a and b are integers that can be specified within the range of
  . See
. See  .
.
Note: The following cannot be used in f (x ), a , or b : Pol, Rec, ∫, d / dx , Σ.
Pol, Rec : Pol converts rectangular coordinates to polar coordinates, while Rec converts polar coordinates to rectangular coordinates. See  .
.
Specify the angle unit before performing calculations.
The calculation result for r and  and for x and y are each assigned respectively to variables X and Y. Calculation result θ is displayed in the range of
  180°.
180°.

x ! : Factorial function. See  .
.
Abs : Absolute value function. Note that the input method is different depending upon whether you are using Natural Display or Linear Display. See 
Ran# : Generates a 3-digit pseudo random number that is less than 1. The result is displayed as a fraction when Natural Display is selected. See  .
.
RanInt# : For input of the function of the form RanInt#( a , b ), which generates a random integer within the range of a to b . See  .
.
n Pr , n Cr : Permutation ( nPr ) and combination ( nC ) functions. See  .
.
Rnd : The argument of this function is made a decimal value and then rounded in accordance with the current number of display digits setting (Norm, Fix, or Sci). With Norm 1 or Norm 2, the argument is rounded off to 10 digits. With Fix and Sci, the argument is rounded off to the specified digit. When Fix 3 is the display digits setting, for example, the result of 10 ÷ 3 is displayed as 3.333, while the calculator maintains a value of 3.33333333333333 (15 digits) internally for calculation. In the case of Rnd(10÷3) = 3.333 (with Fix 3), both the displayed value and the calculator's internal value become 3.333. Because of this a series of calculations will produce different results depending on whether Rnd is used (Rnd(10÷3) × 3 = 9.999) or not used (10 ÷ 3 × 3 = 10.000). See  .
.
Note: Using functions can slow down a calculation, which may delay display of the result. Do not perform any subsequent operation while waiting for the calculation result to appear. To interrupt an ongoing calculation before its result appears, press  .
.
Integration and Differential Calculation Precautions
- Integration and differential calculations can be performed in the COMP Mode (
![]() ) only.
) only. - The following cannot be used in f( x ), a , b , or tol : Pol, Rec, ∫, d / dx , Σ.
- When using a trigonometric function in f(x), specify Rad as the angle unit.
- A smaller tol value increases precision, but it also increases calculation time. When specifying tol , use value that is 1 × 10 –14 or greater.
 ) only.
Precautions for Integration Calculation Only
- Integration normally requires considerable time to perform.
- Forf (x )< 0 where
![]() (as in the case of
(as in the case of ![]() ), calculation will produce a negative result.
), calculation will produce a negative result. - Depending on the content of f(x) and the region of integration, calculation error that exceeds the tolerance may be generated, causing the calculator to display an error message.
 (as in the case of
  ), calculation will produce a negative result.
Precautions for Differential Calculation Only
- If convergence to a solution cannot be found whentol input is omitted, the tol value will be adjusted automatically to determine the solution.
- Non-consecutive points, abrupt fluctuation, extremely large or small points, inflection points, and the inclusion of points that cannot be differentiated, or a differential point or differential calculation result that approaches zero can cause poor precision or error.
Tips for Successful Integration Calculations
When a periodic function or integration interval results in positive and negative f (x) function values
Perform separate integrations for each cycle, or for the positive part and the negative part, and then combine the results.

When integration values fluctuate widely due to minute shifts in the integration interval Divide the integration interval into multiple parts (in a way that breaks areas of wide fluctuation into small parts), perform integration on each part, and then combine the results.

Examples


Complex Number Calculations (CMPLX)
 To perform complex number calculations, first press (CMPLX) to enter the CMPLX Mode. You can use either rectangular coordinates ( a + bi ) or polar coordinates (
 ) to input complex numbers. Complex number calculation results are displayed in accordance with the complex number format setting on the setup menu.
")
Note:
- If you are planning to perform input and display of the calculation result in polar coordinate format, specify the angle unit before starting the calculation.
- The
![]() value of the calculation result is displayed in the range of
value of the calculation result is displayed in the range of ![]() .
. - Display of the calculation result while Linear Display is selected will show a and bi (or r and
![]() ) on separate lines.
) on separate lines.
 value of the calculation result is displayed in the range of
  .
.CMPLX Mode Calculation Examples


Using a Command to Specify the Calculation Result Format
Either of two special commands ( ) can be input at the end of a calculation to specify the display format of the calculation results. The command overrides the calculator's complex number format setting.

Using CALC
CALC lets you save calculation expressions that contain variables, which you can then recall and execute in the COMP Mode  ) and the CMPLX Mode (
 ). The following describes the types of expressions you can save with CALC.
- Expressions: 2X + 3Y, 2AX + 3BY + C, A + Bi
- Multi-statements: X + Y: X (X + Y)
- Equalities with a single variable on the left and an expression including variables on the right: A = B + C, Y = X 2 + X + 3 (Use
![]() to input the equals sign of the equality.)
to input the equals sign of the equality.)


 to input the equals sign of the equality.)

Note: During the time from when you press until you exit CALC by pressing
  , you should use Linear Display input procedures for input.
Using SOLVE
SOLVE uses Newton's Law to approximate the solution of equations. Note that SOLVE can be used in the COMP Mode (  ) only. The following describes the types of equations whose solutions can be obtained using SOLVE.
- Equations that include variable X: X2 + 2X – 2, Y = X + 5, X = sin(M), X + 3 = B + C
SOLVE solves for X. An expression like X2 + 2X – 2 is treated as X2 + 2X – 2 = 0. - Equations input using the following syntax: {equation}, {solution variable}
SOLVE solves for Y, for example, when an equation is input as: Y = X + 5, Y
- If an equation contains input functions that include an open parenthesis (such as sin and log), do not omit the closing parenthesis.
- The following functions are not allowed inside of an equation: ∫, d / dx , Σ, Pol, Rec.


Note: During the time from when you press  (SOLVE) until you exit SOLVE by pressing
  , you should use Linear Display input procedures for input.
- Depending on what you input for the initial value for X (solution variable), SOLVE may not be able to obtain solutions. If this happens, try changing the initial value so they are closer to the solution.
- SOLVE may not be able to determine the correct solution, even when one exists.
- SOLVE uses Newton's Law, so even if there are multiple solutions, only one of them will be returned.
- Due to limitations in Newton's Law, solutions tend to be difficult to obtain for equations like the following:
![]()

Solution Screen Contents
Solutions are always displayed in decimal form.

"(Left Side) – (Right Side) result" shows the result when the right side of the equation is subtracted from the left side, after assigning the obtained value to the variable being solved for. The closer this result is to zero, the higher the accuracy of the solution.
Continue Screen
SOLVE performs convergence a preset number of times. If it cannot find a solution, it displays a confirmation screen that shows "Continue: [=]", asking if you want to continue. Press  to continue or
  to cancel the SOLVE operation.


Statistical Calculations (STAT)
To start a statistical calculation, perform the key operation  (STAT) to enter the STAT Mode and then use the screen that appears to select the type of calculation you want to perform.
| To select this type of statistical calculation: (Regression formula shown in parentheses) | Press this key: |
| Single-variable (X) |  (1-VAR) (1-VAR) |
| Paired-variable (X, Y), linear regression ( y = A + B x ) |  (A+BX) (A+BX) |
Paired-variable (X, Y), quadratic regression ( y = A + B x + C x2 ) |  ( _+CX2 ) ( _+CX2 ) |
| Paired-variable (X, Y), logarithmic regression ( y = A + Blnx ) |  (ln X) (ln X) |
| Paired-variable (X, Y), e exponential regression ( y = AeBx) |  (e ^X) (e ^X) |
| Paired-variable (X, Y), ab exponential regression ( y = ABx ) |  (A (A  B^X) B^X) |
| Paired-variable (X, Y), power regression ( y = AxB ) |  (AX^B) (AX^B) |
| Paired-variable (X, Y), inverse regression ( y = A + B/ x ) |  (1/X) (1/X) |
Pressing any of the above keys ( 1 to 8) displays the Stat Editor.
Note: When you want to change the calculation type after entering the STAT Mode, perform the key operation  (STAT) (Type) to display the calculation type selection screen.
Inputting Data
Use the Stat Editor to input data. Perform the following key operation to display the Stat Editor: (STAT) (Data).
The Stat Editor provides 80 rows for data input when there is an X column only, 40 rows when there are X and FREQ columns or X and Y columns, or 26 rows when there are X, Y, and FREQ columns.
Note: Use the FREQ (frequency) column to input the quantity (frequency) of identical data items. Display of the FREQ column can be turned on (displayed) or off (not displayed) using the Stat Format setting on the setup menu.

- All data currently input in the Stat Editor is deleted whenever you exit the STAT Mode, switch between the single-variable and a paired- variable statistical calculation type, or change the Stat Format setting on the setup menu.
- The following operations are not supported by the Stat Editor:
![]() . Pol, Rec, and multi-statements also cannot be input with the Stat Editor.
. Pol, Rec, and multi-statements also cannot be input with the Stat Editor.
 . Pol, Rec, and multi-statements also cannot be input with the Stat Editor.
 To change the data in a cell: In the Stat Editor, move the cursor to the cell that contains the data you want to change, input the new data, and then press  .
.
To delete a line: In the Stat Editor, move the cursor to the line that you want to delete and then press  .
.
To insert a line: In the Stat Editor, move the cursor to the location where you want to insert the line and then perform the following key operation:  .
.
To delete all Stat Editor contents: In the Stat Editor, perform the following key operation:  .
.
Obtaining Statistical Values from Input Data
To obtain statistical values, press while in the Stat Editor and then recall the statistical variable ( σx , Σx 2 , etc.) you want. Supported statistical variables and the keys you should press to recall them are shown below. For single-variable statistical calculations, the variables marked with an asterisk (*) are available.
Sum: Σx 2 *, Σx *, Σy 2 , Σ y , Σ xy , Σx 3 , Σ x2 y , Σx 4

Number of Items: n *, Mean:  , Population Standard Deviation:
  ,
,  Sample Standard Deviation:

Regression Coefficients: A, B, Correlation Coefficient: r , Estimated Values: 

Regression Coefficients for Quadratic Regression: A, B, C, Estimated Values: 

- See the table at the beginning of this section of the manual for the regression formulas.
![]() are not variables. They are commands of the type that take an argument immediately before them. See "Calculating Estimated Values" for more information.
are not variables. They are commands of the type that take an argument immediately before them. See "Calculating Estimated Values" for more information.
 are not variables. They are commands of the type that take an argument immediately before them. See "Calculating Estimated Values" for more information.
 Minimum Value: minX*, minY, Maximum Value: maxX*, maxY

Note: While single-variable statistical calculation is selected, you can input the functions and commands for performing normal distribution calculation from the menu that appears when you perform the following key operation:  . See "Performing Normal Distribution Calculations" for details.
 To input the single-variable data x = {1, 2, 2, 3, 3, 3, 4, 4, 5}, using the FREQ column to specify the number of repeats for each items ({ xn ; freq n } = {1;1, 2;2, 3;3, 4;2, 5;1}), and calculate the mean and population standard deviation.

Results: Mean: 3 Population Standard Deviation: 1.154700538
 To calculate the linear regression and logarithmic regression correlation coefficients for the following paired-variable data and determine the regression formula for the strongest correlation: ( x , y ) = (20, 3150), (110, 7310), (200, 8800), (290, 9310). Specify Fix 3 (three decimal places) for results.

Results: Linear Regression Correlation Coefficient: 0.923
Logarithmic Regression Correlation Coefficient: 0.998
Logarithmic Regression Formula: y = –3857.984 + 2357.532lnx
Calculating Estimated Values
Based on the regression formula obtained by paired-variable statistical calculation, the estimated value of y can be calculated for a given x -value. The corresponding x -value (two values, x1 and x2, in the case of quadratic regression) also can be calculated for a value of y in the regression formula.
 To determine the estimate value for y when x = 160 in the regression formula produced by logarithmic regression of the data in
  . Specify Fix 3 for the result. (Perform the following operation after completing the operations in .)


Result: 8106.898
Regression coefficient, correlation coefficient, and estimated value calculations can take considerable time when there are a large number of data items.
Performing Normal Distribution Calculations
While single-variable statistical calculation is selected, you can perform normal distribution calculation using the functions shown below from the menu that appears when you perform the following key operation:

P, Q, R: These functions take the argument t and determine a probability of standard normal distribution as illustrated below.

 : This function is preceded by the argument X, and determines the normalized variate
  .
.
 For the single variable data
 = {0;1, 1;2, 2;1, 3;2, 4;2, 5;2, 6;3, 7;4, 9;2, 10;1}, to determine the normalized variate (
  ) when x = 3, and P( t ) at that point up to three decimal places (Fix 3).


Results: Normalized variate (): –0.762
P( t ): 0.223
Base-n Calculations (BASE-N)
 Press (BASE-N) to enter the BASE-N Mode when you want to perform calculations using decimal, hexadecimal, binary, and/or octal values. The initial default number mode when you enter the BASE-N Mode is decimal, which means input and calculation results use the decimal number format. Press one of the following keys to switch number modes:
  (DEC) for decimal,
  (HEX) for hexadecimal,
  BIN) for binary, or
  (OCT) for octal.
")
Note:
- Use the following keys to input the letters A through F for hexadecimal values: -(A), $(B), w(C), s(D), c(E), t(F). • In the BASE-N Mode, input of fractional (decimal) values and exponents is not supported. If a calculation result has a fractional part, it is cut off.
- The input and output ranges is 16 bits for binary values, and 32 bits for other types of values. The following shows details about input and output ranges.
| Base-n Mode | Input/Output Ranges |
| Binary | Positive: 0000000000000000  0111111111111111 0111111111111111Negative: 1000000000000000 1111111111111111 |
| Octal | Positive: 00000000000 17777777777 Negative: 20000000000 37777777777 |
| Decimal | –21474836482147483647 |
| Hexadecimal | Positive: 00000000 7FFFFFFF Negative: 80000000 FFFFFFFF |
Specifying the Number Mode of a Particular Input Value
You can input a special command immediately following a value to specify the number mode of that value. The special commands are: d (decimal), h (hexadecimal), b (binary), and o (octal).

Converting a Calculation Result to another Type of Value
You can use any one of the following key operations to convert the currently displayed calculation result to another type of value: (DEC) (decimal),
  (HEX) (hexadecimal),
  (BIN) (binary),
  (OCT)(octal).

Logical and Negation Operations
Your calculator provides you with logical operators (and, or, xor, xnor) and functions (Not, Neg) for logical and negation operations on binary values. Use the menu that appears when you press  (BASE) to input these logical operators and functions.
All of the following examples are performed in the binary mode (l(BIN)).


Note: In the case of a negative binary, octal or hexadecimal value, the calculator converts the value to binary, takes the two's complement, and then converts back to the original number base. For decimal (base-10) values, the calculator merely adds a minus sign.
Equation Calculations (EQN)
You can use the following procedure in the EQN Mode to solve simultaneous linear equations with two or three unknowns, quadratic equations, and cubic equations.
- Press
![]() (EQN) to enter the EQN Mode.
(EQN) to enter the EQN Mode. - On the menu that appears, select an equation type.
| To select this calculation type: | Press this key: |
| Simultaneous linear equations with two unknowns |  |
| Simultaneous linear equations with three unknowns |  |
| Quadratic equation |  |
| Cubic equation |  |
- Use the Coefficient Editor that appears to input coefficient values.
- To solve 2x2 + x – 3 = 0, for example, press
![]() in step 2, and then input the following for the coefficients ( a = 2, b = 1, c = –3):
in step 2, and then input the following for the coefficients ( a = 2, b = 1, c = –3):![]()
![]() .
. - To change a coefficient value you already have input, move the cursor to the appropriate cell, input the new value, and then press
![]() .
. - Pressing
![]() will clear all of the coefficients to zero.
will clear all of the coefficients to zero.
 in step 2, and then input the following for the coefficients ( a = 2, b = 1, c = –3):
 .
.
The following operations are not supported by the Coefficient Editor:  . Pol, Rec, and multi-statements also cannot be input with the Coefficient Editor.
- After all the values are the way you want, press
![]() .
.
- This will display a solution. Each press of
![]() will display another solution. Pressing
will display another solution. Pressing ![]() while the final solution is displayed will return to the Coefficient Editor.
while the final solution is displayed will return to the Coefficient Editor. - You can scroll between the solutions using the
![]() and
and ![]() keys.
keys. - To return to the Coefficient Editor while any solution is displayed, press
![]() .
.
Note:
- Even if Natural Display is selected, the solutions of simultaneous linear equations are not displayed using any form that includes
![]() .
. - Values cannot be converted to engineering notation on the solution screen.
 .
.Changing the Current Equation Type Setting
Press(EQN) and then select an equation type from the menu that appears. Changing the equation type causes the values of all Coefficient Editor coefficients to change to zero.
EQN Mode Calculation Examples

Matrix Calculations (MATRIX)
Use the MATRIX Mode to perform calculations involving matrices of up to 3 rows by 3 columns. To perform a matrix calculation, you first assign data to special matrix variables (MatA, MatB, MatC), and then use the variables in the calculation as shown in the example below.
")
- Press
![]() (MATRIX) to enter the MATRIX Mode.
(MATRIX) to enter the MATRIX Mode. - Press
![]()

- This will display the Matrix Editor for input of the elements of the 2 × 2 matrix you specified for MatA.
![]()

- Input the elements of MatA:
![]() .
. - Perform the following key operation:
![]()
![]() .
.
 .
.
 .
.- This will display the Matrix Editor for input of the elements of the 2 × 2 matrix you specified for MatB.
- Input the elements of MatB:
![]() .
. - Press
![]() to advance to the calculation screen, and perform the first calculation (MatA × MatB):
to advance to the calculation screen, and perform the first calculation (MatA × MatB): ![]()
![]() .
.
 .
.
 .
.- This will display the MatAns screen with the calculation results.
![]()

Note: "MatAns" stands for "Matrix Answer Memory". See "Matrix Answer Memory" for more information.
- Perform the next calculation (MatA+MatB):
![]()
![]() .
.
![]()

 .
.
Matrix Answer Memory
Whenever the result of a calculation executed in the MATRIX Mode is a matrix, the MatAns screen will appear with the result. The result also will be assigned to a variable named "MatAns".
The MatAns variable can be used in calculations as described below.
- To insert the MatAns variable into a calculation, perform the following key operation:
![]() (MATRIX)
(MATRIX) ![]() (MatAns).
(MatAns). - Pressing any one of the following keys while the MatAns screen is displayed will switch automatically to the calculation screen:
![]()
![]() . The calculation screen will show the MatAns variable followed by the operator or function for the key you pressed.
. The calculation screen will show the MatAns variable followed by the operator or function for the key you pressed.
 (MATRIX)
  (MatAns).
 . The calculation screen will show the MatAns variable followed by the operator or function for the key you pressed.
Assigning and Editing Matrix Variable Data
The following operations are not supported by the Matrix Editor: . Pol, Rec, and multi-statements also cannot be input with the Matrix Editor.
To assign new data to a matrix variable:
- Press
![]() (MATRIX)
(MATRIX) ![]() (Dim), and then, on the menu that appears, select the matrix variable to which you want to assign data.
(Dim), and then, on the menu that appears, select the matrix variable to which you want to assign data. - On the next menu that appears, select dimension (m ×n ).
- Use the Matrix Editor that appears to input the elements of the matrix.

 (MATRIX)
  (Dim), and then, on the menu that appears, select the matrix variable to which you want to assign data.
To edit the elements of a matrix variable:
- Press
![]() (MATRIX)
(MATRIX) ![]() (Data), and then, on the menu that appears, select the matrix variable you want to edit.
(Data), and then, on the menu that appears, select the matrix variable you want to edit. - Use the Matrix Editor that appears to edit the elements of the matrix.
 (Data), and then, on the menu that appears, select the matrix variable you want to edit.
- Move the cursor to the cell that contains the element you want to change, input the new value, and then press
![]() .
.
 .
.To copy matrix variable (or MatAns) contents:
- Use the Matrix Editor to display the matrix you want to copy.
- If you want to copy MatA, for example, perform the following key operation:
![]() (MATRIX)
(MATRIX) ![]() (Data)
(Data) ![]() (MatA).
(MatA). - If you want to copy MatAns contents, perform the following to display the MatAns screen:
![]() (MATRIX)
(MATRIX) ![]() (MatAns)
(MatAns)![]() .
.
 (MATRIX)
  (MatAns)
 .
.- Press
![]() (STO), and then perform one of the following key operations to specify the copy destination:
(STO), and then perform one of the following key operations to specify the copy destination:![]() (MatA),
(MatA), ![]() (MatB), or
(MatB), or ![]() (MatC).
(MatC).
 (STO), and then perform one of the following key operations to specify the copy destination:
 (MatA),
  (MatB), or
  (MatC).
- This will display the Matrix Editor with the contents of the copy destination.
Matrix Calculation Examples
The following examples use  and
and  from
from  and
and  from
from  . You can input a matrix variable into a key operation by pressing
  (MATRIX) and then pressing one of the following number keys:
 (MatA),
  (MatB),
  (MatC).


Creating a Number Table from a Function (TABLE)
TABLE generates a number table for x and f (x ) using an input f ( x ) function.
Perform the following steps to generate a number table.
- Press
![]() (TABLE) to enter the TABLE Mode.
(TABLE) to enter the TABLE Mode. - Input a function in the format f ( x ), using the X variable.
- Be sure to input the X variable
![]() when generating a number table. Any variable other than X is handled as a constant.
when generating a number table. Any variable other than X is handled as a constant. - The following cannot be used in the function: Pol, Rec, ∫,d / dx , Σ.
 when generating a number table. Any variable other than X is handled as a constant.
- In response to the prompts that appear, input the values you want to use, pressing
![]() after each one.
after each one.
 after each one.
| For this prompt: | Input this: |
| Start? | Input the lower limit of X (Default = 1). |
| End? | Input the upper limit of X (Default = 5). Note: Make sure that the End value is always greater than the Start value. |
| Step? | Input the increment step (Default = 1).
|
- Inputting the Step value and pressing
![]() generates and displays the number table in accordance with the parameters you specified.
generates and displays the number table in accordance with the parameters you specified. - Pressing
![]() while the number table screen is displayed will return to the function input screen in step 2.
while the number table screen is displayed will return to the function input screen in step 2.
 - Part 1")
 - Part 2")
 - Part 1")
 - Part 2")
Note:
- You can use the number table screen for viewing values only. Table contents cannot be edited.
- The number table generation operation causes the contents of variable X to be changed.
The function you input for number table generation is deleted whenever you display the setup menu in the TABLE Mode and switch between Natural Display and Linear Display.
Vector Calculations (VECTOR)
Use the VECTOR Mode to perform 2-dimensional and 3-dimensional vector calculations. To perform a vector calculation, you first assign data to special vector variables (VctA, VctB, VctC), and then use the variables in the calculation as shown in the example below.
 To assign (1, 2) to VctA and (3, 4) to VctB, and then perform the following calculation: (1, 2) + (3, 4)
- Press
![]() (VECTOR) to enter the VECTOR Mode.
(VECTOR) to enter the VECTOR Mode. - Press
![]() .
.
 .
.- This will display the Vector Editor for input of the 2-dimensional vector for VctA.
![]()

- Input the elements of VctA:
![]() .
. - Perform the following key operation:
![]()
![]() .
.
 .
.
 .
.- This will display the Vector Editor for input of the 2-dimensional vector for VctB.
- Input the elements of VctB:
![]() .
. - Press
![]() to advance to the calculation screen, and perform the calculation (VctA + VctB):
to advance to the calculation screen, and perform the calculation (VctA + VctB):![]()
![]() .
.
 .
.
 .
.- This will display the VctAns screen with the calculation results.
![]()

Note: "VctAns" stands for "Vector Answer Memory". See "Vector Answer Memory" for more information.
Vector Answer Memory
Whenever the result of a calculation executed in the VECTOR Mode is a vector, the VctAns screen will appear with the result. The result also will be assigned to a variable named "VctAns".
The VctAns variable can be used in calculations as described below.
- To insert the VctAns variable into a calculation, perform the following key operation:
![]() (VECTOR)
(VECTOR) ![]() (VctAns).
(VctAns). - Pressing any one of the following keys while the VctAns screen is displayed will switch automatically to the calculation screen:
![]() . The calculation screen will show the VctAns variable followed by the operator for the key you pressed.
. The calculation screen will show the VctAns variable followed by the operator for the key you pressed.
 (VECTOR)
  (VctAns).
 . The calculation screen will show the VctAns variable followed by the operator for the key you pressed.
Assigning and Editing Vector Variable Data
The following operations are not supported by the Vector Editor:  . Pol, Rec, and multi-statements also cannot be input with the Vector Editor.
To assign new data to a vector variable:
- Press
![]() (VECTOR)
(VECTOR) ![]() (Dim), and then, on the menu that appears, select the vector variable to which you want to assign data.
(Dim), and then, on the menu that appears, select the vector variable to which you want to assign data. - On the next menu that appears, select dimension (m ).
- Use the Vector Editor that appears to input the elements of the vector.
 (VECTOR)
  (Dim), and then, on the menu that appears, select the vector variable to which you want to assign data.
 To assign (2, –1, 2) to VctC

To edit the elements of a vector variable:
- Press
![]() (VECTOR)
(VECTOR) ![]() (Data), and then, on the menu that appears, select the vector variable you want to edit.
(Data), and then, on the menu that appears, select the vector variable you want to edit. - Use the Vector Editor that appears to edit the elements of the vector.
 (Data), and then, on the menu that appears, select the vector variable you want to edit.
- Move the cursor to the cell that contains the element you want to change, input the new value, and then press
![]() .
.
To copy vector variable (or VctAns) contents:
1. Use the Vector Editor to display the vector you want to copy.
- If you want to copy VctA, for example, perform the following key operation:
![]()
- If you want to copy VctAns contents, perform the following to display the VctAns screen:
![]()


- Press
![]() (STO), and then perform one of the following key operations to specify the copy destination:
(STO), and then perform one of the following key operations to specify the copy destination: ![]() .
.
 (STO), and then perform one of the following key operations to specify the copy destination:
  .
.- This will display the Vector Editor with the contents of the copy destination.
Vector Calculation Examples
The following examples use VctA = (1, 2) and VctB = (3, 4) from  1, and VctC = (2, –1, 2) from
  . You can input a vector variable into a key operation by pressing
  (VECTOR) and then pressing one of the following number keys:
  (VctA),
 (VctB),
  (VctC).

Scientific Constants
Your calculator comes with 40 built-in scientific constants that can be used in any mode besides BASE-N. Each scientific constant is displayed as a unique symbol (such as π ), which can be used inside of calculations.
To input a scientific constant into a calculation, press  (CONST) and then input the two-digit number that corresponds to the constant you want.

The following shows the two-digit numbers for each of the scientific constants.


The values are based on CODATA recommended values (March 2007).
Metric Conversion
The calculator's built-in metric conversion commands make it simple to convert values from one unit to another. You can use the metric conversion commands in any calculation mode except for BASE-N and TABLE.
To input a metric conversion command into a calculation, press  (CONV) and then input the two-digit number that corresponds to the command you want.

The following shows the two-digit numbers for each of the metric conversion commands.


Conversion formula data is based on the "NIST Special Publication 811 (1995)".
Note: The J  cal command performs conversion for values at a temperature of 15°C.
Calculation Ranges, Number of Digits, and Precision
The calculation range, number of digits used for internal calculation, and calculation precision depend on the type of calculation you are performing.
Calculation Range and Precision
| Calculation Range | ± 1 × 10 –99 to ± 9.999999999 × 10 99 or 0 |
| Number of Digits for Internal Calculation | 15 digits |
| Precision | In general, ± 1 at the 10th digit for a single calculation. Precision for exponential display is ± 1 at the least significant digit. Errors are cumulative in the case of consecutive calculations. |
Function Calculation Input Ranges and Precision


- Precision is basically the same as that described under "Calculation Range and Precision", above.
![]() type functions require consecutive internal calculation, which can cause accumulation of errors that occur with each calculation.
type functions require consecutive internal calculation, which can cause accumulation of errors that occur with each calculation.- Error is cumulative and tends to be large in the vicinity of a function's singular point and inflection point.
- The range for calculation results that can be displayed in π form when using Natural Display is
![]() . Note, however, that internal calculation error can make it impossible to display some calculation results in π form. It also can cause calculation results that should be in decimal form to appear in π form.
. Note, however, that internal calculation error can make it impossible to display some calculation results in π form. It also can cause calculation results that should be in decimal form to appear in π form.
 type functions require consecutive internal calculation, which can cause accumulation of errors that occur with each calculation.
 . Note, however, that internal calculation error can make it impossible to display some calculation results in π form. It also can cause calculation results that should be in decimal form to appear in π form.
Errors
The calculator will display an error message whenever an error occurs for any reason during a calculation. There are two ways to exit an error message display: Pressing or to display the location of the error, or pressing to clear the message and calculation.
Displaying the Location of an Error
While an error message is displayed, press or to return to the calculation screen. The cursor will be positioned at the location where the error occurred, ready for input. Make the necessary corrections to the calculation and execute it again.

Clearing the Error Message
While an error message is displayed, press to return to the calculation screen. Note that this also clears the calculation that contained the error.
Error Messages
Math ERROR
Cause:
- The intermediate or final result of the calculation you are performing exceeds the allowable calculation range.
- Your input exceeds the allowable input range (particularly when using functions).
- The calculation you are performing contains an illegal mathematical operation (such as division by zero).
Action:
- Check the input values, reduce the number of digits, and try again.
- When using independent memory or a variable as the argument of a function, make sure that the memory or variable value is within the allowable range for the function.
Stack ERROR
Cause:
- The calculation you are performing has caused the capacity of the numeric stack or the command stack to be exceeded.
- The calculation you are performing has caused the capacity of the matrix or vector stack to be exceeded.
Action:
- Simplify the calculation expression so it does not exceed the capacity of the stack.
- Try splitting the calculation into two or more parts.
Syntax ERROR
Cause: There is a problem with the format of the calculation you are performing.
Action: Make necessary corrections.
Argument ERROR
Cause: There is a problem with the argument of the calculation you are performing.
Action: Make necessary corrections.
Dimension ERROR (MATRIX and VECTOR Modes only)
Cause:
- The matrix or vector you are trying to use in a calculation was input without specifying its dimension.
- You are trying to perform a calculation with matrices or vectors whose dimensions do not allow that type of calculation.
Action:
- Specify the dimension of the matrix or vector and then perform the calculation again.
- Check the dimensions specified for the matrices or vectors to see if they are compatible with the calculation.
Variable ERROR (SOLVE feature only)
Cause:
- You did not specify a solution variable, and there is no X variable in the equation you input.
- The solution variable that you specified is not included in the equation you input.
Action:
- The equation you input must include an X variable when you do not specify the solution variable.
- Specify a variable that is included in the equation you input as the solution variable.
Can't Solve Error (SOLVE feature only)
Cause: The calculator could not obtain a solution.
Action:
- Check for errors in the equation that you input.
- Input a value for the solution variable that is close to the expected solution and try again.
Insufficient MEM Error
Cause: The configuration of TABLE Mode parameters caused more than 30 X-values to be generated for a table.
Action: Narrow the table calculation range by changing the Start, End, and Step values, and try again.
Time Out Error
Cause: The current differential or integration calculation ends without the ending condition being fulfilled.
Action: Try increasing the tol value. Note that this also decreases solution precision.
Before Assuming Malfunction of the Calculator...
Perform the following steps whenever an error occurs during a calculation or when calculation results are not what you expected. If one step does not correct the problem, move on to the next step.
Note that you should make separate copies of important data before performing these steps.
- Check the calculation expression to make sure that it does not contain any errors.
- Make sure that you are using the correct mode for the type of calculation you are trying to perform.
- If the above steps do not correct your problem, press the
![]() key. This will cause the calculator to perform a routine that checks whether calculation functions are operating correctly. If the calculator discovers any abnormality, it automatically initializes the calculation mode and clears memory contents. For details about initialized settings, see "Configuring the Calculator Setup".
key. This will cause the calculator to perform a routine that checks whether calculation functions are operating correctly. If the calculator discovers any abnormality, it automatically initializes the calculation mode and clears memory contents. For details about initialized settings, see "Configuring the Calculator Setup". - Initialize all modes and settings by performing the following operation:
![]()

Replacing the Battery
A low battery is indicated by a dim display, even if contrast is adjusted, or by failure of figures to appear on the display immediately after you turn on the calculator. If this happens, replace the battery with a new one.
Removing the battery will cause all of the calculator's memory contents to be deleted.
- Press
![]() (OFF) to turn off the calculator.
(OFF) to turn off the calculator. - To ensure that you do not accidentally turn on power while replacing the battery, slide the hard case onto the front of the calculator (fx-991ES PLUS).
- Remove the cover as shown in the illustration and replace the battery, taking care that its plus (+) and minus (–) ends are facing correctly.


- Replace the cover.
- Initialize the calculator:
![]()
- Do not skip the above step!

Specifications
Power Requirements:
fx-570ES PLUS: AAA-size battery R03 (UM-4) × 1
fx-991ES PLUS: Built-in solar cell; button battery LR44 (GPA76) × 1
Approximate Battery Life:
fx-570ES PLUS: 17,000 hours (continuous display of flashing cursor)
fx-991ES PLUS: 3 years (based on one hour of operation per day)
Power Consumption: 0.0002 W (fx-570ES PLUS)
Operating Temperature: 0°C to 40°C (32°F to 104°F)
Dimensions:
fx-570ES PLUS:
13.8 (H) × 80 (W) × 162 (D) mm
1 / 2" (H) × 31 / 8" (W) × 63 / 8" (D)
fx-991ES PLUS:
11.1 (H) × 80 (W) × 162 (D) mm
3 / 8" (H) × 31 / 8" (W) × 63 / 8" (D)
Approximate Weight:
fx-570ES PLUS: 100 g (3.5 oz) including the battery
fx-991ES PLUS: 95 g (3.4 oz) including the battery
Frequently Asked Questions
How can I perform input and display results the same way I did on a model that does not have Natural Textbook Display?
Perform the following key operation:(SETUP)  (LineIO). See "Configuring the Calculator Setup" for more information.
How can I change a fraction form result to decimal form?
How can I change a fraction form result produced by a division operation to decimal form?
See "Toggling Calculation Results" for the procedure.
What is the difference between Ans memory, independent memory, and variable memory?
Each of these types of memory acts like "containers" for temporary storage of a single value.
Ans Memory: Stores the result of the last calculation performed. Use this memory to carry the result of one calculation on to the next.
Independent Memory: Use this memory to totalize the results of multiple calculations.
Variables: This memory is helpful when you need to uses the same value multiple times in one or more calculations.
What is the key operation to take me from the STAT Mode or TABLE Mode to a mode where I can perform arithmetic calculations?
Press(COMP).
How can I return the calculator to its initial default settings?
Perform the following operation: (Setup)
 (Yes)
(Yes)
When I execute a function calculation, why do I get a calculation result that is completely different from older CASIO calculator models?
With a Natural Textbook Display model, the argument of a function that uses parentheses must be followed by a closing parenthesis. Failing to press  after the argument to close the parentheses may cause unwanted values or expressions to be included as part of the argument.

| Manufacturer: Responsible within the European Union: |
Documents / Resources
References
Download manual
Here you can download full pdf version of manual, it may contain additional safety instructions, warranty information, FCC rules, etc.
Advertisement


Need help?
Do you have a question about the fx-570ES PLUS and is the answer not in the manual?
Questions and answers