Advertisement
Quick Links
Installation Instructions
PART# QTEC33 / QTEC66
Installing the Toggle Switch
• Make sure that the vehicle battery has been disconnected.
• The new QTEC switch should be located in a place that is easy to access (i.e. center console, kick panel, etc.)
• Connect the RED wire to a 12 volt source (a switched power source is acceptable).
• Connect the BLACK wire to a good, clean ground.
• Drill a 1 /2" hole where you wish to mount the switch.
• Remove the first lock ring from the shaft of the switch.
• Install switch in the hole you just drilled.
• Slide the lock ring over the switch an tighten ring so that there is no play in switch.
Routing the Wire Harness
•
Make sure that you have the wire(s) oriented so that the connectors mate. They are different , so make sure you pull the proper end into the vehicle.
•
Route the wire up through the underside of the car. *Be careful to ensure that that the exhaust pipes or drive shaft do not interfere with the cable.
•
Route the cables into the car. You can often open up a factory drain plug in the floor pan and snake the wire through.
*NOTE: For manual transmission cars, you can also come up through the transmission shifter area. Remove the boot/seal of the transmission shifter.
•
Plug the cable into the toggle switch, slide on the included shrink tubing and heat with a heat gun to seal toggle switch connection. On the connector near
the motor, align and press together, then turn the coupling ring until it locks.
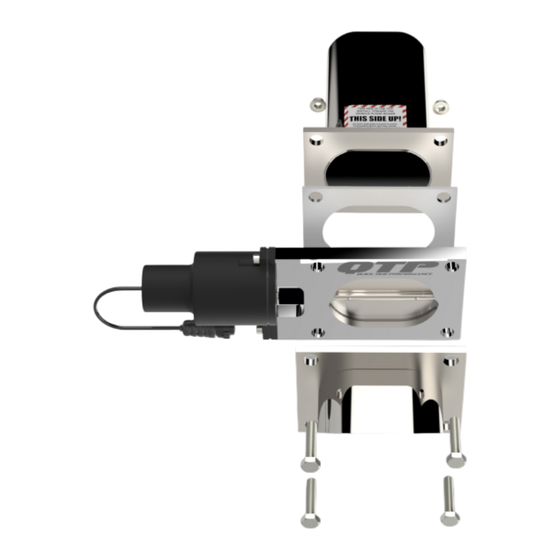
Installi ng the Oval Pipe
•
Mount the Electric Valve to the connection tube flange and check to be sure you have the valve aligned to the tube correctly.
There is a top and a bottom. Mounting the valve incorrectly can cause the butterfly to come into contact with the flange which will result in a binding situation.
A simple "dry run" will normally help you spot any problems. Cut and shape the oval pipe at the angle you need for mounting. Ref.
Outline the inside of oval pipe hole onto org. exhaust with a marker:
Cut out hole in org. exhaust pipe with plasma cutter or desired cutting tool.
Weld oval cutout on to your exhaust pipe.
*MAKE SURE 'iOU POSITION THE OTEC IN THE RIGHT ANGLE SO IT DOES NOT SCRAPE THE GROUND OR HIT THE CHASSIS OF THE CAR.
LEAVE ROOM F OR ENGINE MOVEMENT ANY DAMAGE TO THE BODY VOIDS WARRANTY*
Image A
Image D
Installi ng the QTEC
Position the OTEC over the collector of the oval cutout. Place the OTEC on the bolts on the cutout with the gasket in between. Coat all bolts liberally with a
thread locker. Start the nuts on all four bolts before tightening. Be sure that the butterfly does not come into contact with the mounting flange.
Finishing the Install
Reconnect the positive lead on the battery.
Lower the vehicle back to the ground.
Before starting vehicle, turn key to run position and push up and down to open and close the valve.
Ensure that the valve is not binding or sticking (i.e. is centered in the exhaust and is not hilling any objects).
It only takes 4.75 seconds for ii to go from closed to open and vice versa.
Start the car and enjoy!
Maintenance
•
We recommend lubricating the butterfly plate, body, and shaft using a quality lubricant such as Liquid Wrench(tm) from Gunk. This will help prevent carbon
build up naturally generated by the exhaust system and keep the butterfly sealing properly. This should be done on a monthly basis.
For harsher climates, you should remove the cutouts and store them. Using the supplied block off plates will insure operation while cutouts are removed.
•
Check screws every now and then to make sure they are tight . If not, reapply a red thread locker and reinstall.
Made in the USA
Image B
Image D
Image E
Image B
Image E
and
Image C
Then clean up the hole with a dremel or drill.
Image A
Image C
Image F
R2-032320
Advertisement

Related Manuals for QTP QTEC33


Summary of Contents for QTP QTEC33
- Page 1 Installation Instructions PART# QTEC33 / QTEC66 Installing the Toggle Switch • Make sure that the vehicle battery has been disconnected. • The new QTEC switch should be located in a place that is easy to access (i.e. center console, kick panel, etc.) •...
- Page 2 Installation Instructions PART# PART# QTEC33 / QTEC66 **Optional Accessories** One Touch Wireless Remote Wireless Remote PN: 10900 PN: 10901 Oval Turndown PN: 11338 Notice of Disclaimer and Liability The Federal Government, each of the fifty states, local municipalities, towns and counties all regulate emissions production, noise levels, and safety standards.
- Page 3 A L T E R N A T I V E V A L V E P O S I T I O N I N G S H O WN...
Need help?
Do you have a question about the QTEC33 and is the answer not in the manual?
Questions and answers