Advertisement
- 1 PROJECTOR DIAGRAM
- 2 WHAT'S IN THE BOX?
- 3 CONNECTION INTRODUCTION
- 4 REMOTE INTRODUCTION
- 5 SPECIFICATIONS
- 6 INSTALLATION
- 7 MULTI-MEDIA CONNECTIONS
- 8 MULTISCREEN CONNECTIONS
- 9 SETTINGS MENUS
- 10 CLEANING THE AIR FILTER MONTHLY
- 11 CONTACT INFORMATION
- 12 IMPORTANT SAFETY INSTRUCTIONS
- 13 Documents / Resources
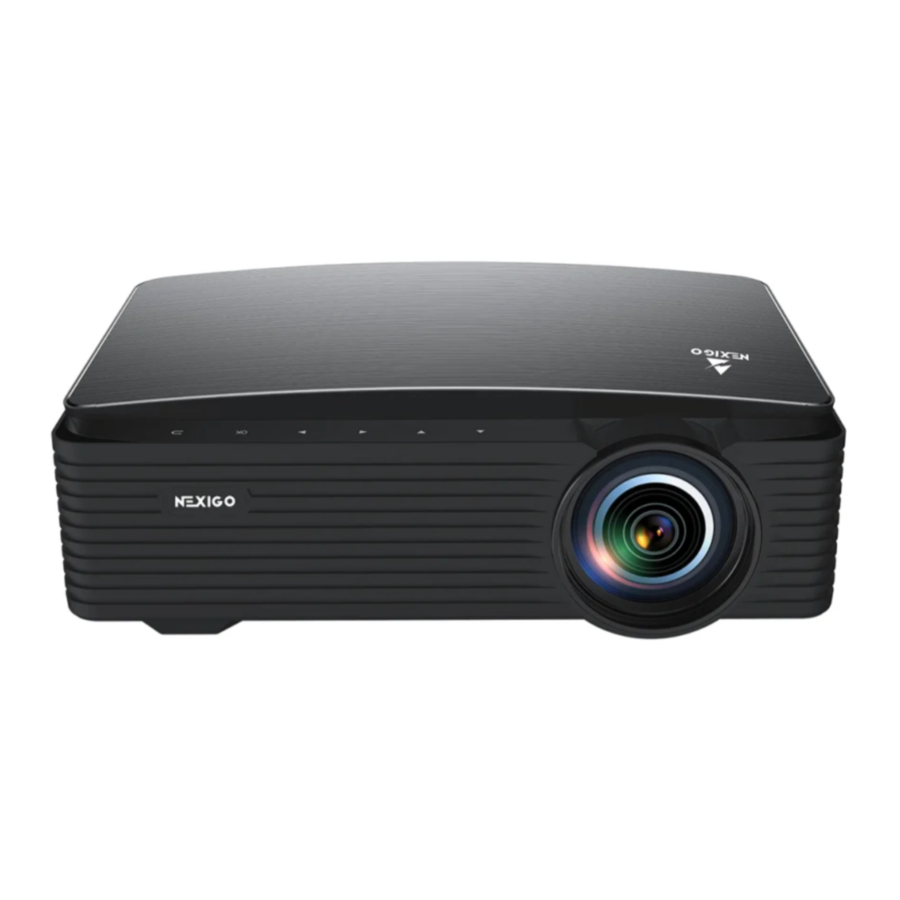
PROJECTOR DIAGRAM

- Power Switch
- Keystone Adjustment
- 3.5mm Audio Jack
- AV Input Port
- USB Input Port
- USB Input Port/ Screen Monitor
- HDMI Input Ports
- Power Input Jack
- IR Receiver

- Lens
- Up
- Down
- Left
- Right
- OK
- Return
WHAT'S IN THE BOX?
1 x Projector
1 x Remote (Requires 2 AAA batteries, not included)
1 x Power Cable
1 x AV Cable
1 x User Manual
CONNECTION INTRODUCTION

- Audio device
- DVD and VCD
- Mobile hard disk and USB flash disk
- Mobile hard disk, USB flash disk, iPhone and iPad
- TV box, TV stick and computer
REMOTE INTRODUCTION

Power Switch: Toggles power on and off
Mute: Toggles audio on and off
Focus Out: Pushes the focal point further away
Focus In: Pushes the focal point closer in
Left/Right/Up/Down: Moves the cursor in the on-screen display
OK: Selects the option your cursor is currently on
Return: Returns to the last screen
Input (Short Press): Displays the source selection bar
Menu (Long Press): Displays the menu
Vol +: Increases the volume level
Vol -: Decreases the volume level
SPECIFICATIONS
| Imaging Technology | TFT LCD |
| Native Resolution | 1920x1080 |
| Maximum Compatible Resolution | 1920x1080 |
| Light Source | LED |
| Focusing Mode | Manual operation |
| Projection Distance | 4.8-21.8 ft |
| Projection Size | 40-200 inches |
| Aspect Ratio | 16:9/4:3 |
| Projection Ratio | 1.56:1 |
| Keystone | Manual correction ±15° |
| Power Input | 100V-240V @ 50/60Hz |
| Integrated Watt Use | 140W |
| Input | HDMIx2, USBx2, AVx1 |
| Output | 3.5mm audio jackx1 (speakers/headphones) |
| Speaker | 5Wx1 |
INSTALLATION
Installation Video:

CHOOSING A LOCATION
The room layout and the desired room design will be the most important factors in choosing where to place the projector. Consider the following when selecting a location:
- The size, shape, and position of your screen.
- Location of a suitable power outlet.
- Ensure the projector has sufficient room around it for airflow.
The projector is designed to be installed in one of four layouts. You can either hang the projector from the ceiling via a special mounting bracket (NOT INCLUDED), or simply place it on a stable surface. You may need to change the projection mode so the images project correctly. Select Projection Mode under the Setting tab, then choose the corresponding projection mode for your needs.
- Ceiling mount (front projection)
![]()
- Desktop mount (front projection)
![]()
- Ceiling mount (rear projection)
![]()
- Desktop mount (rear projection)
![]()


 Note: For Rear Projection: A specific rear projection screen is required to use the rear projection function.
For Ceiling Mounting
- Please remove the 4 feet at corners on the bottom of the projector for mounting on the ceiling.

- The projector's mounting holes are M4 x 9.7mm in size. The distance between these mounting holes on the back of the projector measures 11.7" diagonally, 10.3" horizontally, and 6.2" vertically. You could find a suitable ceiling mount based on these specifications.


PROJECTOR DISTANCE & SIZE

Note: Due to manufacturing tolerances there will be variances of about 3% from unit to unit. The above data is for reference only. Please use actual measurements when installing the device.
KEYSTONE CORRECTION
Keystone correction, also known as keystoning, refers to adjusting the image of a projector that is displaying an angled image. This is often an issue when mounting a projector, as it often will be mounted above or below the horizontal center line of the screen. This will mean that the image will be displayed on the screen at an angle and this will change the shape of the image to a trapezoid instead of a rectangle.
To correct this, please attempt:
Please use the Keystone Adjustment knob to adjust the vertical keystone if the projection image shows up tilted, as shown below.

FOCUS ADJUSTMENT
There are two ways to adjust the focus. You can either adjust focus using the remote or by using the on-screen menu.
Option 1 - On-Screen Menu:
In the menu go to the Setting tab, select Focusing, and then press and hold the Left/Right button on the projector panel (or Left/Right button on the remote) until the image is clear. If the image does not clear and instead becomes more fuzzy, press and hold the other button until the image clears up.

Option 2 - Remote Control:
Press and hold one of the focus buttons on the remote until the image is clear. If the image does not clear and instead becomes more fuzzy, press and hold the other focus button until the image clears up.

MULTI-MEDIA CONNECTIONS
This section guides you on how to connect the projector with other equipment.
USB CONNECTIONS
Insert a USB drive into either of the USB ports shown in the diagram below. In the on-screen menu select the Multi-media tab. Then choose the content which you want to display: Movie, Music, Photo, Text.

| Multi-media Supported Format | Audio Format | MP3/AAC/WAV/LOAS/PCM/OGG/ FLAC/AC3 |
| Photo Format | JPEG/BMP/PNG | |
| Video Format | DIVX/RM/3GP/AVI/MKV/FLV/MOV/ MP4/MPG/VOB/MPG/RMVB/RM | |
| Text Format | TXT |
HDMI CONNECTIONS
Plug a HDMI cable into the device you want to connect to the projector and then insert the other end of the HDMI cable into either of the HDMI ports shown in the diagram below. Open the on-screen menu and select the correct HDMI source (HDMI1 or HDMI2) in the Input Source tab. This will then allow you to display the screen of whatever device has been plugged in.


| Supported Resolution | 640 x 480 | 1280 x 720 | 1366 x 768 | 1600 x 1200 |
| 800 x 600 | 1280 x 800 | 1440 x 900 | 1680 x 1050 | |
| 1024 x 768 | 1280 x 1024 | 1440 x 960 | 1920 x 1080 |
AV CONNECTIONS
In order to use a device with a standard RCA connection you will need to obtain an RCA to 3.5 mm adapter. Connect the adapter to the projector as shown below, and then connect the RCA plugs from the device to the RCA jacks on the adapter. You can also just use a singular AV cable if this is an option for your device. Once connected, go into the on-screen menu and select AV under Input Source as shown below.

3.5MM AUDIO CONNECTIONS
Headphones or speakers could be connected to the projector with the 3.5mm audio jack.

MULTISCREEN CONNECTIONS
You can wirelessly connect your iPhone, iPad, MacBook, computer, or a wide range of other devices to the projector, or you can use a wired connection with your iPhone or iPad to share your screen.
For wireless connections: Ensure the projector and your device are connected to the same network. Instructions on how to connect the projector to a network are available in the Settings Menus section.
Once both devices are connected to the same network, or in the case of a wired connection once the device has been plugged into the projector, in the on-screen menu select the Input Source tab, and then select MultiScreen to connect to the screencast software. Then select the corresponding MultiScreen connection option:

WINDOWS CAST
SHARE THE SCREEN OF YOUR WINDOWS COMPUTER WIRELESSLY.
To connect, make sure both devices are connected to the same network, your computer is Windows 10 or above and has built-in dual-band WiFi. On the projector, select Windows Cast from the options. On your computer, input Windows key + K to open the Connect sidebar for Miracast, and then select "NexiGo-PJ20" in the devices list. The connection is now complete.

- On your computer, open the settings menu.
- Access your display settings or screen-mirroring.
- Select your Miracastreceiver: NexiGo-PJ20
Waiting for connection...
Select "NexiGo-PJ20"

IOS CABLE CAST
SHARE THE SCREEN OF YOUR IPHONE OR IPAD USING A USB WIRED CONNECTION.
Note: This is only available on iPhone and iPad devices.
Plug your iPhone or iPad into the USB port (Screen Monitor) shown in the diagram below. On the projector, select iOS Cable Cast from the options. Tap Trust when the phone/tablet shows a message saying "trust this device", and then enter the device password to finish the connection.

MIRACAST
SHARE THE SCREEN FROM THE ANDROID PHONE/ TABLET WIRELESSLY.
Note: Android devices may have mixed functionality with Miracast.
Most devices will support it in some way:
OnePlus/Google Pixel - Search Cast, Samsung - Search Smart View, Sony - Search Screen Mirroring (Different Android devices have different ways of opening multi-screen functions, please refer to the instructions of your Android device for details). Additionally, there may be third party apps you can download to your android device to provide Miracast functionality. We cannot guarantee that this device will work as intended with all android devices. Check your device manufacturer for information regarding support for this standard.
To connect, make sure both devices are connected to the same network. On the projector, select Miracast from the options. Enter into the System Settings on the Android device and then search for the cast software for your device. Once you have opened the cast software for your device, look at the list of available mirroring devices and select the "NexiGo-PJ20" from the list. The connection is now complete.

- On your Android Mobile/Pad, open the settings menu.
- Access your display settings or screen-mirroring.
- Select your Miracast receiver: NexiGo-PJ20
Waiting for connection...
IOS CAST
SHARE THE SCREEN OF YOUR IPHONE, IPAD, OR MACBOOK WIRELESSLY USING AIRPLAY.
To connect, make sure both devices are connected to the same network. On the projector, select iOS Cast from the options. Enter into the control center on the iOS device, click Screen Mirroring. In the list of available mirroring devices, select the device "NexiGo-PJ20" from the list. The connection is now complete.
Mirror your iPhone, iPad or iPod touch
Make sure that iOS device is connected to the same network as your projector, or connect iOS device with AP by Projector
- On your iOS device, open Control Center and tap screen Mirroring.
![]()
- Looking for devices that can be mirrored on.
![]()
- Select NexiGo-PJ20 from the list.
![]()


DLNA
SHARE THE DISPLAY OF YOUR DEVICE THAT SUPPORTS DLNA CONNECTIONS.
To connect with DLNA, as with the other steps, first ensure that both devices are connected to the same network.
On the projector, select DLNA from the options. On the device you want to cast from, open an app that supports casting, YouTube is an example, and then tap the button on the app that allows you to cast. Select "NexiGo-PJ20" from the list of options. Press the play button on the video, and it will now display the video via the projector.

CAST SETTINGS
CHANGE CASTING SETTINGS. SETTINGS ARE LISTED BELOW:
WiFi Setting: Setup the WiFi connection for the projector.
Online Update: Update the casting firmware. (This is a separate update from the primary projector firmware update that you will find in the projector settings. This firmware will automatically update, so this is only needed in case of an error with the auto updater.)
Restore Factory Default: Reset the cast software to factory default. (Clears the WiFi password and/or caches.)
Software Version: Shows the current casting firmware version.

SETTINGS MENUS
PICTURE SETTING
Under the Settings tab you will find the options listed below. The top options are the Picture Setting.

Projection Mode: To shift the mode of the projector. The options are: standard, mirrored, flipped, and flipped and mirrored.
Image Scaling: Changes the size of the objects shown on the screen.
Aspect Ratio: The aspect ratio is a figure that identifies the size of an image by its width and height. Common aspect ratios are 4:3 and 16:9.
Picture Mode: Adjust projector settings. Adjust color, brightness, contrast, and/or sharpness.
Note: The "Picture Mode" adjustment in the settings only impacts the picture parameters of the HDMI input source, excluding the Home page.
Focusing: Adjust the focus of the projector.
SYSTEM SETTINGS
Under the Setting tab you will find the options listed below. The bottom options are the System Setting.

OSD Language: Choose the language used in the projector menus.
Software Update: Update the software version on the projector.
- Please check nexipc.com/pages/pj20 if you have any issues for update downloads.
- Download the latest firmware to a USB flash drive, and then insert the flash drive into a USB port on the projector.
- In the on-screen menu select Setting > System Setting > Software Update.
- The software will be updated automatically, do not try to use the projector until the update is completed.
Note: The projector will be reset after the software updates, all saved settings will be erased.
Restore Factory Setting: Reset the projector to factory default.
Auto Sleep: Allows you to set a timer to turn the projector power off automatically.
CONNECTION SETTING
SCROLL DOWN IN THE SETTING MENU TO LOCATE THESE SETTINGS.
WiFi Connection: Connect your projector to WiFi.
- In the on-screen menu, select Setting, and then scroll down until you see the option labeled WiFi Setting. Select that option.

- Select your wireless network from the list as shown below, to connect your projector to the WiFi network.


BLUETOOTH CONNECTION
CONNECT YOUR PROJECTOR WITH A BLUETOOTH AUDIO DEVICE.
- In the on-screen menu, select Setting, and then scroll down until you see the option labeled Bluetooth. Select that option.

- Turn on Bluetooth for the projector, as well as on the device you would like to connect to, and then search the list shown below for the Bluetooth audio device to connect.

- Select that device and pair the two devices. The Bluetooth connection is now complete.


CLEANING THE AIR FILTER MONTHLY
In order to keep air circulating in the air inlet, and prolong the projector's life. Please clean the projector's air filter in follow steps every month:
Step 1: Turn off the projector and unplug the power adapter.
Step 2: Place the projector bottom-up, push down the air filter cover to pop up the air filter. Take the air filter out of the projector.

Step 3: Gently remove the dust using a small vacuum designed for computers or a soft brush (such as a paintbrush).
Note: Do not rinse the air filter in water, or use any detergent or solvent to clean it.
Step 4: Place the air filter back in the projector as shown. Push it down and hold until it clicks into place.

CONTACT INFORMATION
Website: www.nexigo.com
E-mail: cs@nexigo.com
Tel: +1(458) 215-6088
IMPORTANT SAFETY INSTRUCTIONS
PLEASE READ THE FOLLOWING SAFETY INSTRUCTIONS BEFORE YOU START USING THE PROJECTOR.
- Read the user manual in full before operating your projector and make sure to save it for future reference. Follow all instructions provided, failure to do so may result in the loss of the device or injury.
- This appliance can be used by children aged from 8 years and above and persons with reduced physical, sensory or mental capabilities or lack of experience and knowledge if they have been given supervision or instruction concerning use of the appliance in a safe way and understand the hazards involved. Children shall not play with the appliance. Cleaning and user maintenance shall not be made by children without supervision.
CHILD SAFETY MEASURES
- Children should not play with this appliance. Cleaning and user maintenance should not be made without direct supervision by an adult.
- Children less than 3 years of age should be kept away from this device unless continuously supervised.
- Children from 3 to 8 years of age should not plug in, regulate, clean, or perform any type of maintenance on this device.
- Children from 3 to 8 years of age shall only switch the appliance on/off after all the following safety precautions have been met:
- The product has been placed or installed in its intended operating position.
- The child has direct supervision or has been given full instructions on how to use the device safely.
- The child is capable of understanding the hazards involved.
OPERATIONAL SAFETY MEASURES
- For appliances having a specially prepared cord, if the supply cord is damaged, it must be replaced by a special cord or assembly available from the manufacturer or its service agent.
- To ensure the projector is operating smoothly and is protected from any potential overheating issues, make sure to install the projector in a location that does not block ventilation.
- To reduce the risk of fire and/or electric shock, do not expose the projector to moisture or liquids.
- Do not install the projector near heat sources or any other appliance that emits heat.
- Do not allow small objects to enter the projector. They may cause the projector to short circuit, which could start a fire or create an electric shock.
- Do not use the projector under the following conditions:
- In extremely hot, cold, or humid environments.
- Ensure that the ambient room temperature is within ~5°C - ~35°C
- Ensure that the relative humidity is ~30% - ~90%
- In areas susceptible to excessive dust and dirt.
- Near any appliance generating a strong magnetic field.
- In direct sunlight.
- In extremely hot, cold, or humid environments.
- Do not use the projector if it has been physically damaged or abused. Physical damage/abuse could include (but is not limited to) the following circumstances:
- The projector has been dropped.
- The power supply cord or plug has been damaged.
- Liquid has been spilled onto/into the projector.
- The projector has been exposed to rain or moisture.
- Something has fallen into the projector, or something is loose inside.
- Do not place the projector on an unstable surface. The projector may fall over, resulting in injury or damage to the unit.
- Do not block the light coming out of the projector lens when in operation. Objects in the light's path may melt, cause burns, or start a fire.
- Please do not open or disassemble the projector, as this may result in an electrical shock.
- Do not attempt to service the unit yourself. Opening the unit may expose you to dangerous voltages and/or other hazards. The unit should only be repaired by the manufacturer or its service agent. Only use attachments/accessories directly specified by the manufacturer.
- Do not look straight into the projector lens during operation. Excessively bright lighting has been shown to harm vision under some circumstances.
- When switching the projector off, please ensure the cooling cycle has been completed before disconnecting the power. Allow at least 90 seconds for the projector to cool down.
- Do not use a power source with a voltage other than what is specified in this manual.
- Disconnect the power plug from the AC outlet if the product is not being used for a long period of time.
- Do not set up the projector in areas where it might be subjected to vibration or shock.
- Do not touch the lens with your bare hands.
- Remove the battery/batteries from the remote control before storage. If the battery/batteries are left in the remote for a long period of time, they may leak.
- Do not use or store the projector in places where smoke may be present, as it can negatively affect the quality of the projector's performance.
- Please refer to the manual for how to properly install your projector, as nonstandard installation may affect the projector's performance. Use a power strip and/or surge protector with this device. Power outages and/or brownouts can damage your device.
- When installing or adjusting a ceiling or wall mount, do not use adhesives, oils, and/or lubricants. These may cause the projector case to crack and allow it to fall from its ceiling mount causing damage to the device and/or serious injury.
- Do not stand the projector vertically. Doing so may cause the projector to fall over, causing damage and/or injury.
- While the projector is operating, you may notice hot air and a strong odor emanating from its ventilation grill. This is normal and not a malfunction.
CLEANING THE PROJECTOR
- Turn off the projector and unplug the power plug from the AC outlet before cleaning the unit.
- Use a soft, dry cloth with mild detergent to clean the product housing. Do not use harsh cleaners, waxes, or solvents to clean the unit.
CLEANING THE LENS
- 15-20 minutes before cleaning the lens, turn off the projector and unplug the power cord to allow the lens to cool down completely. Failure to do so may cause damage to the lens that is not covered by warranty.
- Use compressed air to remove dust from the surfaces of the projector. Use a microfiber cloth for cleaning and make sure to wipe the lens gently. Do not touch the lens with your fingers.
- Do not use detergents or solvents such as alcohol to clean the lens, only use water as a cleaning agent. Damaging the lens during cleaning is not covered under warranty.
- Do not wipe or tap the lens with a hard object.
PHOTOSENSITIVE SEIZURE WARNING
- Some viewers may experience a medical issue such as epileptic seizure or stroke when exposed to flashing images and/or lights displayed by this device. If you suffer from or have a family history of epilepsy or stroke, please consult with a medical specialist before using the projector.
Documents / Resources
References
Download manual
Here you can download full pdf version of manual, it may contain additional safety instructions, warranty information, FCC rules, etc.
Advertisement


Need help?
Do you have a question about the PJ20 and is the answer not in the manual?
Questions and answers