
Related Manuals for Nexigo PJ01


Summary of Contents for Nexigo PJ01
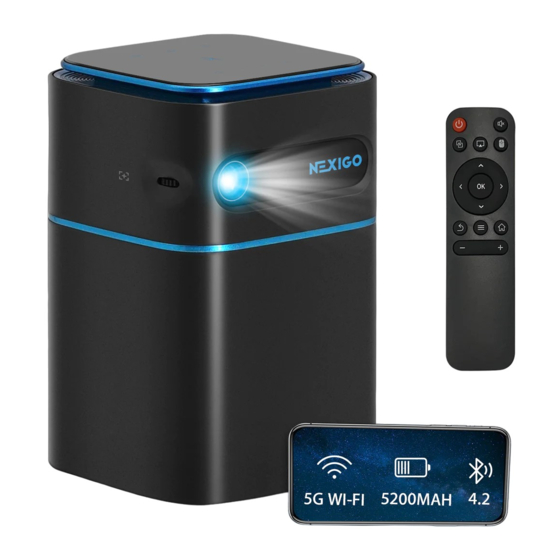
- Page 1 NexiGo Mini DLP Projector User Manual-PJ01 Scan the QR code or visit our link to download the latest manual here: www.nexigo.com...
- Page 2 TWO Years! From all of us here at NexiGo, we want to welcome you again to the family. We thank you deeply for your trust and for your business. We know you'll love it here. We look forward to serving you again in the near future.
-
Page 3: What's In The Box
What’s in the Box? 1 x Projector 1 x HDMI Cable 1 x 12V DC Adapter 1 x User Manual 1 x Remote Control (2 x AAA ba�eries NOT included) Product Diagram: Tripod Mount (1/4" Thread) Volume - Volume + Touch Control Area Home Return... - Page 4 LED Indicator USB Input Port IR Receiver Power Input Port Lens HDMI Input Port Air Vents Power Switch 3.5mm Audio Port Focus Adjustment Wheel 01 03...
- Page 5 ON/OFF Mute ON/OFF: Toggles power on/off Mute: Toggles audio on/off EShare Mouse Control EShare: Switches to EShare connec�on Airplay Airplay: Switches to Airplay connec�on Mouse Control: Toggles to use the Direc�onal direc�onal bu�ons on the remote as a Bu�ons mouse Menu Direc�onal Bu�ons: Moves the cursor Return...
- Page 6 Specifica�ons: Projec�on Na�ve 480P (854 x 480); Max Resolu�on 0.86 - 8.64 �; 10 - 100 inches Distance/Size Compa�ble 4K (3840 x 2160) Light Source Aspect Ra�o RGB LED 16:9/4:3 Projec�on Memory RAM 2 GB; ROM 16GB 1.2:1 Ra�o ±40° horizontal/ver�cal Wi-Fi Keystone 5G Wi-Fi...
-
Page 7: Installa�On
Installa�on: Choosing a Loca�on: The room layout and the desired room design will be the most important factors in choosing where to place the projector. Consider the following when selec�ng a loca�on: ● The size, shape, and posi�on of where you wish to project your screen. ●... - Page 8 Projector Distance & Size: 100ʺ 70ʺ 50ʺ 30ʺ 10ʺ (ft) 0.86 2.59 4.32 6.04 8.64 Note: Due to manufacturing tolerances there will be variance of about 3% from unit to unit. The above data is for reference only. Please use actual measurements when installing the device.
- Page 9 Wireless Connec�on Methods: ① EShare - Works with all devices that support Eshare ② AirPlay - Works with Apple devices like iPhone, iPad, and Mac computers ③ Internal Storage - Apps stored on the internal storage (YouTube, Ne�lix, etc.) ④ Bluetooth Audio - Bluetooth Speakers, Earbuds, and Headphones ①...
- Page 10 Usage Instruc�ons: First Time Use: Before using the projector for the first �me, please use the included charger to fully charge the projector’s ba�ery. While charging, the charging indicator light will turn red, and when fully charged the charging indicator light will turn yellow. Normal Use: 1.
- Page 11 Video Support HEVC/MVC/H2.63/H.264/H.265/MPEG-1/MPEG-2/MPEG-4/VP8/VP9 MPEG 1/MPEG 2/MPEG 2.5/Audio Layer 1, 2, 3/AAC/HEAAC/WMA/ Audio Support PCM/IMA-ADPCM/MS-ADPCM Mul�media Image Support JPG/PNG/BMP Text Support 01 10...
- Page 12 HDMI Connec�on: Connect the projector to your device using the included HDMI cable. On the homepage, select Source > HDMI and the projector will display the screen of the connected device. 854 x 480 1280 x 720 1366 x 768 1600 x 1200 2560 ×...
- Page 13 On the homepage, select EShare, then follow the displayed instruc�ons to download the EShare applica�on on your device. Open EShare on your device, click “NexiGo PJ01 -XXXX” on the device list, and your device is now connected to the projector.
- Page 14 Once connected, you can select between the different icons on the EShare interface on your device to use the different available func�ons: 1. Share Screen: Displays the screen of your Android device on the projector 2. TV Mirror: Displays the screen of the projector on your smartphone or tablet ①...
- Page 15 AirPlay bu�on on the remote. The projector display will then show this message: “Search for the above device name (NexiGo PJ01) via AirPlay mirroring on AirPlay compa�ble devices to connect.” Open your iDevice and go into the AirPlay program and select the correct device name shown above.
- Page 16 To add your preferred applica�ons on the homepage, select Add at the bo�om right corner of the homepage. Move your cursor to the apps you would like to add and hit OK on the remote to put a check mark on them. Back out to the main menu a�er selec�ng all applica�ons you would like to add and these applica�ons will be added at the bo�om of the screen.
- Page 17 To view all the applica�ons installed on the projector, select Applica�ons on the homescreen menu to see the full list. 01 16...
- Page 18 To delete an installed applica�on: Select Applica�ons on the homescreen menu and scroll over to the applica�on that you want to uninstall. Press and hold the OK bu�on on your remote, a pop-up window will appear asking “Do you want to uninstall this app?”. Click OK if you wish to con�nue and the applica�on will be uninstalled from the projector, or press Return if you do not want to delete the app.
- Page 19 Hotspot Se�ngs: To make your projector show up as a Wi-Fi hotspot, from the homepage, select Se�ngs > Networking Se�ngs > Hotspot Se�ngs. Make sure the toggle at the top of the page is set to On, select OK, and then choose the projector as your Wi-Fi source on your device. 01 18...
- Page 20 Bluetooth Se�ngs: To connect your projector to Bluetooth audio, on the homepage, select Se�ngs > Bluetooth Se�ngs. Make sure the toggle at the top of the page is set to ON, then choose the Bluetooth device you want to connect on the right side of the screen. Wait for 5-10 seconds for the connec�on to occur, and your projector will be connected to the Bluetooth device.
- Page 21 Language Se�ngs: To change the display language for the projector, on the homepage, select Se�ngs > Language Se�ngs > Language Se�ngs. Choose the language you want and hit OK, and the display language of the projector will be changed to that language. Note: This will only change the display language but will not affect the input language.
- Page 22 Factory Reset: To reset your projector to default se�ngs, on the homepage, select Se�ngs > Other Se�ngs > Factory Reset. When you see this message “A�er performing a factory reset all se�ngs will be returned to defaults. Are you sure you want to do this?” select Reset, and all the se�ngs of the projector will be reset to defaults.
- Page 23 Projec�on Mode Se�ngs: To change the projector mode so you can move the projector to a different orienta�on, on the homepage, select Se�ngs > Projec�on Se�ngs > Projec�on Mode Se�ngs. Choose the projec�on mode you need and hit OK, and the projected display will be adjusted correspondingly.
- Page 24 Keystone Correc�on Se�ngs: To adjust the keystone correc�on for the projector, on the homepage, select Se�ngs > Projec�on Se�ngs > Keystone Correc�on Se�ngs. If you would like this to adjust itself automa�cally, then ac�vate the AutoKeystone Correc�on Se�ngs. This will allow the system to adjust this for you as needed.
- Page 25 If you prefer to adjust the keystone correc�on manually, ensure that the AutoKeystone Correc�on Se�ngs toggle is not selected. Then select Manual Keystone Correc�on and use the Le�/Right/Up/Down and OK bu�ons on the remote control to manually adjust the keystone correc�on. 01 24...
- Page 26 Brightness Adjustment Se�ngs: To change the brightness level, on the homepage, select Se�ngs > Projec�on Se�ngs > Brightness Adjustment. Then use the Le�/Right bu�ons on the remote control or click on the brightness bar to set the brightness of the projector display to your preferred se�ng. 01 25...
- Page 27 Color Temperature Adjustment Se�ngs: To adjust the color tone of the projector, on the homepage, select Se�ngs > Projec�on Se�ngs > Color Temperature Adjustment. Choose the color temperature you want, and the color temperature of the projector display will be changed correspondingly. 01 26...
- Page 28 Fan Speed Adjustment Se�ngs: To change the projector fan speed, on the homepage, select Se�ngs > Projec�on Se�ngs > Fan Speed, select the fan’s spin speed you want, and the cooling fan of the projector will be changed correspondingly. If you plan to use the projector for an extended period of �me, please use a higher fan speed to maximize the lifespan of the projector.
- Page 29 Digital Zoom Se�ngs: On the homepage, select Se�ngs > Projec�on Se�ngs > Zoom Se�ngs, use the Le�/Right bu�ons on the remote control or click on the Digital Zoom bar. From here you can adjust the zoom levels of the projector display from level 1 to level 5. 01 28...
- Page 30 Bluetooth Speaker Se�ngs: On the homepage, select Se�ngs > Bluetooth Speaker, click the Speaker Mode bu�on, search for the Bluetooth name on your phone or other device and connect it. The projector will work as a Bluetooth speaker to output audio from your connected device. System Informa�on: On the homepage, select Se�ngs >...
- Page 31 On the homepage, select Se�ngs > About Us > USB Update and download the upgrade file from www.nexigo.com or contact cs@nexigo.com. Store this file into a USB flash drive or SD card with a card reader and insert the USB flash drive or the card reader into the USB port.
- Page 32 If you want to update the system online instead, select Se�ngs > About Us > Online Update, select the Check For Updates bu�on, and wait for a few minutes for the projector system to update. 01 31...
- Page 33 01 32...
- Page 34 ● If your projector begins to smoke, make unusual noises, or any strange odor is no�ced, immediately unplug your projector. Ensure that it is placed in an open area with ven�la�on, away from any objects that may be a fire hazard. Contact cs@nexigo.com for further details.
- Page 35 ● If the projector is unused for a prolonged period of �me unplug it from the power source. ● If there are any mechanical issues with the projector, please contact NexiGo Support to exercise the warranty; Do not a�empt to repair the item yourself.
- Page 36 Register to get EXTRA ONE year Get in touch with warranty. Only valid in registering FREE online services within 14 days of product delivery. facebook.com/nexigo1 nexigo.com/warranty...
Need help?
Do you have a question about the PJ01 and is the answer not in the manual?
Questions and answers