Table of Contents
Advertisement
Quick Links
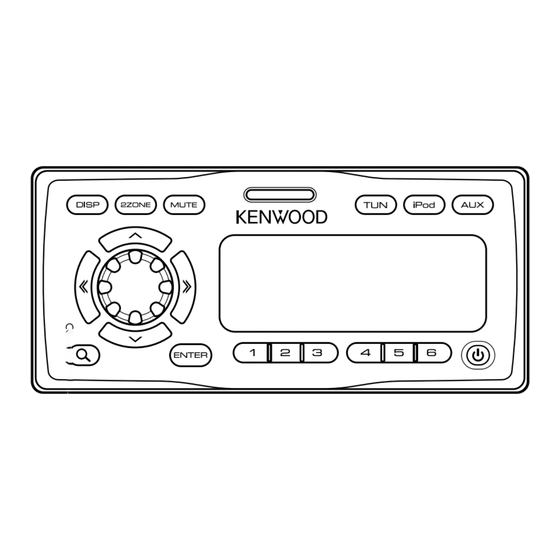
Marine iPod/USB Receiver
KMR-700U
INSTRUCTION MANUAL
Take the time to read through this instruction manual.
Familiarity with installation and operation procedures will help you obtain the best
performance from your new Marine iPod/USB Receiver.
For your records
Record the serial number, found on the back of the unit, in the spaces designated on the
warranty card, and in the space provided below. Refer to the model and serial numbers
whenever you call upon your Kenwood dealer for information or service on the product.
Model KMR-700U Serial number
US Residence Only
Register your Kenwood product at
www.Kenwoodusa.com
© B64-4406-00/00 (KW)
Register Online
Advertisement
Table of Contents

Related Manuals for Kenwood KNR-700U


Summary of Contents for Kenwood KNR-700U
- Page 1 Record the serial number, found on the back of the unit, in the spaces designated on the warranty card, and in the space provided below. Refer to the model and serial numbers whenever you call upon your Kenwood dealer for information or service on the product. Model KMR-700U Serial number...
-
Page 2: Table Of Contents
Contents Before use Favorite Control Favorite Preset Memory Getting Started Favorite Preset Recall Connecting iPod or USB device Favorite Preset Memory Delete Removing iPod or USB device Favorite Name Setting Clock & Date Adjustment Satellite Radio tuner control (Optional Basic Operation accessory) General functions Basic Operation... -
Page 3: Before Use
To prevent injury or fire, take the following • When you purchase optional accessories, check with precautions: your Kenwood dealer to make sure that they work • To prevent a short circuit, never put or leave any with your model and in your area. -
Page 4: Getting Started
Getting Started ⁄ ⁄ ⁄ ⁄ ⁄ Conn nnec ting devi • Be sure to use the cushion bag which protects iPod Press the Release button. USB device against shock. • Do not overload the opened faceplate. If you do so, the faceplate may be damaged. - Page 5 Cloc & & & & djust ment Select the “Date Mode” display Turn the [VOL] knob. Enter Date format mode Press the [ENTER] button for at least 1 second. The date is displayed. Select Date format Turn the [VOL] knob. Select from 7 types.
-
Page 6: Basic Operation
Basic Operation [VOL] [DISP] [2ZONE] [MUTE] [TUN] [iPod] [AUX] Release [ ] [ENTER] [2] [3] [4] [5] [6 ] Switching display: [DISP] General functions Changing the information displayed. Refer to <Display Power button: [ Settings> (page 9). Power turns ON and OFF each time this button is Text/Title scroll: [DISP] pressed. -
Page 7: Tuner Functions
Scan play: [2] Tuner functions Successively plays the intro of the music in the folder. FM band: [u] When Scan Play is turned on, “File Scan ON” is Switches between FM1, FM2, and FM3 each time the displayed. [u] button is pressed. ⁄... -
Page 8: Menu System
Menu System Set up the following functions. Item Setting Entry Setting overview Condition Page “Skip Search” “0.5%”*/ “1%”/ Sets the ratio of skip performed with <Music Search for iPod>. “5%”/ “10%” “Beep” “OFF”/ “ON”* Setting the operation check sound (beep sound) ON/OFF. —... -
Page 9: Display Settings
Display Settings Display Type Selection Display Side Selection Shown below are examples of display types. Setup the left side of the display. Display Display Type Enter Display setup mode “TYPE [A]” Displays 4 lines of text. Press the [DISP] button. “TYPE [B]”... -
Page 10: Text Display Selection
Display Settings Text Display Selection Select the text display part Press the [u] or [d] button. The following display text appears differently The selected text display part blinks. depending on display type setting; Select the Display text In Tuner source Tune the [VOL] knob. -
Page 11: Tuner Operation
Tuner Operation Auto memory entry Putting stations with good reception in the memory automatically. Select Auto memory item Select the “Auto Memory” display. For how to select Menu items, refer to <Menu System> (page 8). Execute Auto Memory Entry Press the [ENTER] button for at least 2 seconds. When 6 stations that can be received are put in the memory, auto memory entry closes. -
Page 12: Ipod/Usb Device Operation
iPod/USB device Operation ⁄ Drive Search • Music Search cannot be performed during Random play Selecting the device inserted in the Multi Card or scan play. Reader. Put the playback to pause Press the [1] button. Function of iPod source Select a device Music Search for iPod Press the [u] or [d] button. -
Page 13: Searching For Music By Initial
Function of iPod source Function of iPod source Searching for Music by Initial Related Search You can select an alphabetic character from the list Browses for music of the same artist or genre as the in the browse item (artist, album, etc.) selected now. one being played. -
Page 14: Audio Adjustments
Audio Adjustments Treble level Audio Control Adjustment Item Display Range You can adjust following Audio Control items; Treble Center Frequency “TRE FREQ” 10.0, 12.5, 15.0, 17.5 kHz Adjustment Item Display Range Rear volume “Rear volume” 0 — 35 Select the Basic Audio item Subwoofer level “Sub-W Level”... -
Page 15: Audio Preset Memory
Audio Preset Recall Adjust the Audio setup item Press the [ ] or [ ] button. Recalling the sound setup registered by <Audio Exit Audio Setup mode Preset Memory> (page 15). Press the [ENTER] button for at least 1 second. Select the source For how to select source item, refer to <General function>... -
Page 16: Dual Zone Control
Audio Adjustments Other Functions Dual zone control Backup memory delete Connecting USB or iPod to the unit when the Initializes the settings of “MENU”, etc. dual zone function is set to on, the front and rear Enter Menu mode channels are switched to the USB/iPod source. Press the [ ] button for at least 1 second. -
Page 17: Favorite Control
Favorite Control Favorite Preset Memory Favorite Preset Recall Registering the operation procedure to select your Retrieving an item registered to Favorite. favorite broadcast station or iPod Playlists/ Artists, Enter Search mode (In iPod/USB/SIRIUS source etc. only) Display a favorite item Press the [ ] button. -
Page 18: Favorite Name Setting
Favorite Control Favorite Name Setting Giving a name to Preset Memory registered to Favorite. Enter Search mode (In iPod/USB/SIRIUS source only) Press the [ ] button. “SEARCH/FAVORITE” is displayed. Enter Favorite mode Press the [ ] button. Registered favorite items are displayed. Select the number you want to Name set Turn the [VOL] knob. -
Page 19: Satellite Radio Tuner Control (Optional Accessory)
Satellite Radio tuner control (Optional accessory) Basic Operation Category and Channel Search Selecting the channel and category you want to Selecting Satellite Radio source receive. Press the [TUN] button. Select the “SIRIUS” display. Enter Category and Channel Search mode ⁄ Press the [ ] button. -
Page 20: Remote Control (Optional Accessory) Setup
Remote control (Optional accessory) setup Remote control ID setup Remote control ID delete When connecting the remote control KCA-RC107MR Delete the ID registered for the remote control KCA- (Optional accessory) to this unit, you should register RC107MR (optional accessory). the ID for KCA-RC107MR. Enter Remote control setup mode Enter Remote control setup mode Press the [2ZONE] button for at least 1 second. -
Page 21: Appendix
Changing the browse AAC-LC (.m4a), MP3 (.mp3), WMA (.wma), item will display a correct title, etc. WAV (.wav) • You cannot operate iPod if “KENWOOD” or “✓” • Playable USB device displayed on iPod. USB mass storage class •... - Page 22 OFF: Does not dim the illumination. TOKYO, JAPAN • DISP Dimmer Reduces the display Illumination brightness. KENWOOD CORP. CERTIFIES THIS EQUIPMENT Auto: Dims the illumination in conjunction with the CONFORMS TO DHHS REGULATIONS N0.21 CFR Light switch of the vehicle.
-
Page 23: Accessories/ Installation Procedure
Accessories/ Installation Procedure Accessories 2WARNING If you connect the ignition wire (red) and the battery wire (yellow) to the negative ground point, you may cause a short circuit, that in turn may start a fire. Always connect those wires to the power source running through the fuse box. ¤... -
Page 24: Connecting Wires To Terminals
Connecting Wires to Terminals Clamper (Accessory6) I/F cable (Accessory2) Main unit * Terminals are provided with covers. Remove the To SIRIUS cover from the terminal To Remote unit* before connecting it to control* the cable. KCA-RC107MR REMOTE CONTROL SIRIUS I/F HEAD UNIT (Optional accessory;... -
Page 25: Installation
Installation Main unit Installation Hideaway unit Installation Attach the template (accessory 5) at the Tapping screw (Φ4 x 16 mm) (Accessory4) installation position. Tap holes (main unit mounting hole x 1, screw holes x 7) on the mounting surface based on the template (accessory 5). -
Page 26: Troubleshooting Guide
Troubleshooting Guide Some functions of this unit may be disabled by What might seem to be a malfunction in your unit some settings made on this unit. may just be the result of slight misoperation or miswiring. Before calling service, first check the •... - Page 27 REMO ERROR: Some trouble may have occurred to the The messages shown below display your connected Remoto control. systems condition. ➪ Remove the Remoto control and then reconnect it. Protect (Blink): The speaker wire has a short-circuit or USB REMOVE (Blink): touches the chassis of the vehicle, and then The Remove mode has been selected for the the protection function is activated.
-
Page 28: Specifications
: Compliant with Windows Media Audio AAC decode : AAC-LC “.m4a” files WAV signal : Linear-PCM Specifications subject to change without notice. This symbol mark indicates that Kenwood manufactured this product so as to decrease harmful infl uence on the environment. KMR-700U...
Need help?
Do you have a question about the KNR-700U and is the answer not in the manual?
Questions and answers