Table of Contents
Advertisement
Available languages
Available languages
Quick Links
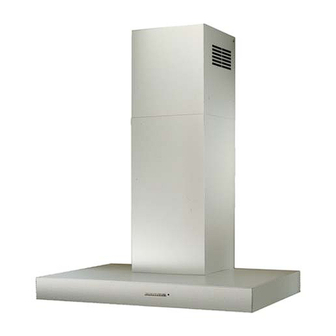
Lido Murale
NOTICE D'INSTALLATION ET D'UTILISATION
INSTRUCTIONS FOR INSTALLATION AND DIRECTIONS FOR USE
MONTAGE- UND GEBRAUCHSANWEISUNG
LIBRETTO DI ISTRUZIONI
IN N S S T T R R U U C C C C I I O O N N E E S S D D E E I I N N S S T T A A L L A A C C I I O O N N E E U U T T I I L L I I Z Z A A C C I I O O N N
MONTAGE- EN GEBRUIKSHANDLEIDING
Advertisement
Table of Contents

Related Manuals for ROBLIN LIDO MURALE


Summary of Contents for ROBLIN LIDO MURALE
- Page 1 Lido Murale NOTICE D’INSTALLATION ET D’UTILISATION INSTRUCTIONS FOR INSTALLATION AND DIRECTIONS FOR USE MONTAGE- UND GEBRAUCHSANWEISUNG LIBRETTO DI ISTRUZIONI IN N S S T T R R U U C C C C I I O O N N E E S S D D E E I I N N S S T T A A L L A A C C I I O O N N E E U U T T I I L L I I Z Z A A C C I I O O N N...
-
Page 2: Table Of Contents
SOMMAIRE CONTENTS RACCORDEMENT ÉLECTRIQUE ELECTRICAL WIRING CONSEILS D’INSTALLATIONS INSTALLATION ADVICE POSE DE L’APPAREIL FITTING THE APPLIANCE FONCTIONNEMENT OPERATION CONSEILS D’UTILISATIONS USEFUL HINTS ENTRETIEN MAINTENANCE GARANTIE ET SERVICE APRÈS-VENTE GUARANTEE AND AFTER-SALES-SERVICES REMARQUES REMARKS INHALT CONTENUTI NETZANSCHLUSS COLLEGAMENTO ELETTRICO MONTAGEHILFEN CONSIGLI DI INSTALLAZIONE MONTAGE DES GERÄTES POSA DELL’... -
Page 3: Raccordement Électrique
Nous vous remercions de la confiance que vous nous avez accordée en choisissant un appareil de la gamme ROBLIN. Celui-ci a fait l’objet de toute notre attention dans sa conception et sa réalisation. Afin qu’il vous donne entière satisfaction, nous vous recommandons de lire avec attention cette notice qui vous expliquera comment l’installer, l’utiliser et l’entretenir dans les meilleures conditions. - Page 4 cas d’accrochage défectueux dû au perçage et chevillage. 1) Tracer sur la paroi une verticale jusqu’au plafond à l’emplacement de la hotte au centre de la zone prévue pour le montage de la hotte (Fig.1, rep. 1). Cette ligne sert pour aligner verticalement les diffé- rentes parties.
-
Page 5: Fonctionnement
FONCTIONNEMENT a) Configuration Evacuation extérieure ou recyclage : Votre hotte est programmée pour fonctionner en mode évacuation extérieure. Si vous souhaitez l’utiliser en mode recyclage, vous devez impérativement la configurer suivant la procédure suivante : Mise en recyclage ( l’air est filtré puis renvoyé dans la cuisine) : Moteur et éclairage éteints, appuyer sur la touche (+) jusqu’aux clignotements des 5 leds : Deux clignotements des 5 leds indiquent l’enregistrement de la mise en recyclage. -
Page 6: Conseils D'utilisations
Un clignotement des Leds 2, 3, et 4 = fonction désactivée. Deux clignotements des Leds 2, 3, et 4 = fonction activée. Il est possible d’arrêter manuellement la vitesse intensive avant le délai de 5 minutes en appuyant à nouveau sur la touche 5 (Vitesse intensive). -
Page 7: Entretien
pour les cuissons à feu doux et pour les sauces. La deuxième pour les cuissons soutenues, grillades et friteuses. La troisième est indiquée pour les cuissons à forte émanation de graisses et vapeur. • IMPORTANT . NE JAMAIS FLAMBER DE METS AU DESSOUS DE L’APPAREIL Ne laissez jamais de flammes libres sous la hotte en fonctionnement. -
Page 8: Installation Advice
Thank you for buying a Roblin product which has been manufactured to the highest quality standards to meet your requirements. We recommend you carefully read this booklet in which you will find instructions for installation, hints for use and maintenance. - Page 9 markings identifying the terminals in your plug, proceed as follows. - The wire which is coloured green and yellow must be connected to the terminal in the plug which is marked with the letter E or by the earth symbol or coloured green or green and yellow. - The wire which is coloured blue must be connected to the terminal which is marked with the letter N or coloured black.
- Page 10 chimney stacks to the brackets using the two M4 screws item 12c provided. Fit the lower chimney sections by expanding the chimneys slightly to allow them from the top of the canopy to clamp around the upper chimney sections. IN THE RECIRCULATION MODE: a.
- Page 11 Press LED button 5 to obtain the boost position for maximum effect and the LED will illuminate to confirm fan is switched ‘ON’. C - COMPLEMENTARY INSTRUCTIONS • Boost speed : To obtain the best performance it is advisable to switch ‘ON’ the cooker hood a few minutes (in the boost setting) before you start cooking.
-
Page 12: Useful Hints
After 400 hours use, two quick flash of the LED 1 will indicate that you must replace the active charcoal filter and clean the metal grease filters. (See chapter on ‘Maintenance’). To reset the 400-hour timer the motor and lights must be switched ‘OFF’. Push the LED button ‘+’... -
Page 13: Guarantee And After-Sales-Services
MAINTENANCE Before carrying out any maintenance or cleaning isolate the cooker hood from the mains supply. The cooker hood must be kept clean; a build up of fat or grease can be a fire hazard. Casing • Wipe the cooker hood frequently with a clean cloth, which has been immersed in warm water containing a mild detergent and wrung out. - Page 14 REMARKS This appliance complies with European regulations on low voltages Directive 2006/95/CE on electrical safety, and with the following European regulations: Directive 2004/108/CE on electromagnetic compat- ibility and Directive 93/68 on EC marking. When this crossed-out wheeled bin symbol is attached to a product it means the product is cov- ered by the European directive 2002/96/EC.Your product is designed and manufactured with high quality materials and components, which can be recycled and reused.Please inform yourself about the local separate collection system for electrical and electronic product.
- Page 15 Wir danken Ihnen für Ihre Kaufentscheidung und das Vertrauen, welches Sie mit dem Kauf dieses Roblin- Produktes bewiesen haben. Dieses Gerät wurde mit einem hohen Maß an Kreativität entwickelt und mit größter Sorgfalt gefertigt. Um volle Zufriedenheit mit Leistung und Funktion dieser Dunstesse zu erlangen und zu erhalten, empfeh- len wir dringend, sowohl die Montageanweisung sorgfältig zu beachten und danach zu arbeiten als...
- Page 16 geprüft und gegebenenfalls durch die Anbringung von geeigneten Befestigungs-oder Stabilisie- rungselementen hergestellt werden. Kann eine hinreichende Tragfähigkeit nicht sichergestellt werden, ist von einer Montage abzusehen. 1) An der Wand eine vertikale Linie 1 (Abb. 1) bis zur Decke zeichnen (Mittellinie des Bereiches, indem die Haube montiert werden soll), um die zu montierenden Einzelteile vertikal ausrichten zu können.
- Page 17 BETRIEB DES GERATES A ) Ausführung Abluft- oder Umluftbetrieb Die Elektronikschaltung der Dunstesse ist für Abluftbetrieb programmiert. Um die Esse für Umluftbetrieb einzustellen bitte folgende Schritte ausführen : Umluftbetrieb: (die verschmutzte Luft wird gereinigt und dann wieder in den Raum zurückgeführt.) Motor und Beleuchtung müssen abgeschaltet sein.
- Page 18 schalten sein. Auf die Schaltertaste Stufe (-) : „ 1 mal „ Blinken der LED 2, 3 und 4 zeigen die „Aus“ Funktion an. „ 2 mal „ Blinken der LED 2, 3 und 4 zeigen die „Ein“ Funktion an. Es ist möglich beim Wiederdrücken auf die Schaltertaste 5 (Intensivstufe) vor der 5 Minuten Frist mit der Hand die Intensivstufe auszuschalten.
- Page 19 Motor und Beleuchtung müssen abgeschaltet sein. Auf den Bedienknopf 1 (Beleuchtung) bis zum Blin- ken der LED 1 drücken: Zwei Blinken der LED 1 zeigen an = Funktion Fernbedienung = EIN Ein Blinken der LED 1 zeigt an = Funktion Fernbedienung = AUS Vorsicht ! Die Fernbedienung muss mit Zink-Kohle Alkali-Batterien im Standard-Format LR03-AAA zu 1.5 V, wie in Fig.
- Page 20 Typenschild hinter dem Gehäuse befindet, an. • Für die Anwendung der vertraglicher Garantie wird nur die Einkaufsrechnung des Gerätes verbindlich anerkannt. Von der Garantieleistung ausgenommen sind: - Die Beleuchtung : Klassik - und Halogenbeleuchtung - Die Filter (Die Filter sind als Verbrauchsgut anzusehen). WICHTIGE HINWEISE Dieses Gerät entspricht den europäischen Niederspannungsrichtlinien 2006/95/EWG zur elektri- schen Sicherheit, den europäischen Richtlinien 2004108/EWG zur elektromagnetischen Verträg-...
-
Page 21: Collegamento Elettrico
La ringraziamo per la fiducia accordataci nell’aver scelto un prodotto della gamma ROBLIN. Questo apparecchio è stato studiato e realizzato con la massima cura, secondo i più alti criteri di qualità. Le rac- Le rac- comandiamo di leggere attentamente questo opuscolo, nel quale troverà le istruzioni per installare, utilizzare e conservare al meglio il suo apparecchio ed ottenere dal suo acquisto il massimo dei benefici. - Page 22 della cappa (Fig. 1, rif. 1); questa operazione serve ad effettuare l’allineamento verticale delle diverse parti della cappa. 2) Posizionare il supporto del camino sulla parete (Fig. 1 , rif. 2), allineando il suo centro sulla linea verticale, ad 1-2 mm.dal soffitto o dal limite superiore. Segnare sulla parete i due fori asolati del supporto.
- Page 23 FUNZIONAMENTO A) CONFIGURAZIONE Evacuazione esterna o riciclo : La vostra cappa é programmata per funzionare con sistema di evacuazone esterna. Se desiderate utilizzarla con sistema filtrante, dovete imperativamente riprogrammarla seguendo la procedura sottoindicata : Messa in funzione del sistema filtrante (L’aria viene filtrata dalla cappa e riemessa nella cucina) : Con motore et luci spenti, tenere premuto il tasto (+) fino al lampeggio delle 5 led : Due lampeggi dei 5 Leds confermano la registrazione della messa in funzione del sistema filtrante.
-
Page 24: Consicli Di Utilizzo
A cottura terminata, spegnere totalmente la cappa (motore e luci). Per accedere alla programmazione di questa funzione, le luci ed il motore della cappa devono essere spenti. Premere il tasto velocità intensiva 5 : - 2 lampeggi dei leds 1 e 5 confermeranno la registrazione dell’arresto automatico dopo 5 minuti. - 3 lampeggi dei Leds 1 e 5 confermeranno la registrazione dell’arresto automatico dopo 10 minuti. -
Page 25: Garanzia Ed Assistenza Tecnica
MANUTENZIONE Staccare il cavo di alimentazione prima di qualsiasi intervento elettrico. L’apparecchio é stato pensato per facilitare al massimo le operazioni di manutenzione, sinonimo di buon funzionamento e rendimento nel tempo. • Pulizia dei filtri metallici. E’ necessario procedere ad una PULIZIA PERIODICA dei filtri a mano (con un detergente liquido diluito in acqua tiepida e risciacquo) oppure in lavastoviglie , con una frequenza che dipenderà... - Page 26 Le agradecemos la confiancia que nos participan ustedes elegiendo un aparato de la gama Roblin quien fue el objeto de toda nuestra atención en su concepción y realisación. Para que les de entera satisfac- ción, les aconsejamos ustedes leer con atención esta noticia que les explicara ustedes como instalarle, utilisarle y mantenerle en las mejores condiciones.
- Page 27 1) Marcar en la pared una linea vertical hasta el techo en el centro de la zona prevista para el montaje de la campana (Fig.1 , Rep.1). Sirve para alinear verticalmente las diferentes partes. 2) Colocar el soporte de la chimenea ( Fig.1, Rep.2), centrado en la vertical a 1 o 2 mm del techo o de la limite superior y marcar en la pared los dos alisados del soporte.Hacer en la pared dos agujeros con un broca Ø...
- Page 28 FUNCIONAMIENTO A) CONFIGURACIÓN Evacuación exterior o de reciclaje: Su campana está programada para funcionar con evacuación de humos exterior. Si usted prefiere cam- biarla a modo de reciclaje, deberá imperativamente configurarla siguiendo estos pasos: Puesto a modo de reciclaje : (el aire esta filtrado antes devolver en la cocina) : Motor y luz apagados, apretar el botón (+) hasta el parpardeo de los 5 LEDS : Dos parpadeos de los 5 LEDS indicará...
- Page 29 en el botón 5 (Velocidad intensiva). Durante esta parada retardada de 5 minutas, la indicación de saturación de los filtros esta desactivada. Si una parada retardada de la campana esta programada, la velociadad intensiva mandada manualmen- te o en temporisada sera desactivada por esta parada retardada despues 5, 10 o 15 minutas. Es posible detener manualmante la velocidad intensiva antes la parada retardada de la campana apre- tandode nuevo en el botón 5 (Velocidad Intensiva) PARADA RETARDADA :...
- Page 30 5 minutos antes y después de la cocción de los alimentos. La primera velocidad la aconsejamos para las cocciones a fuego lento y para salsas. La segunda para las cocciones más largas, parrilladas y fritos. La tercera está indicada para las cocciones con una gran emanación de grasa y vapor. •...
- Page 31 que el producto está bajo la Directiva Europea 2002/96/EC.Su producto ha sido diseñado y fabricado con materiales y componentes de alta calidad, que pueden ser reciclados y reutilizados. Deberá informarse sobre el sistema de reciclaje local separado para productos eléctricos y electrónicos.Siga las normas locales y no se deshaga de los productos usados tirándolos en la basura normal de su hogar.
-
Page 32: Electrische Bedrading
Wij danken U voor de goede keuze en het vertrouwen dat U ons, Roblin specialist op het gebied van afzuigkappen geeft, om in de toekomst met een afzuigkap uit het gamma Roblin te werken. Wij raden U aan om alvorens U de Roblin afzuigkap in werking zet deze handleiding aandachtig te lezen. - Page 33 1) Trek in het midden van de zone bestemd voor de montage van de afzuigkap een verticale lijn op de wand tot aan het plafond (Afb.1, ref. 1). Deze lijn dient om de verschillende onderdelen verticaal uit te lijnen. 2) Positioneer de schachtsteun (Afb. 1, ref. 2), gecentreerd op de verticale lijn op 1 à 2 mm van het plafond of van de bovenkant en teken de twee uitboringen van de steun op de wand af.
- Page 34 BEDIENING A) CONFIGURATIE Uitgang naar buiten of recyclage Standaard is uw afzuigkap geprogrammeerd om zijn afvoer naar buiten te hebben, wenst U deze op recyclage te zetten dient U dit te programmeren. Starten van recirculatie (de vervuilde lucht wordt door de schouw gevoerd via de vetfilters en de koolstof- filters en komt terug in de keuken door de roosters in de schacht).
-
Page 35: Gebruiksadvies
matisch uitschakelen is geactiveerd, en de 5-minuten timer is nog steeds ingeschakeld, zal de intensief stand uitschakelen samen met de automatische uitschakelfunctie. Nalooptijd : Deze functie laat U toe om, nadat het koken gedaan is, de laatste resterende dampen en geuren in de keuken af te voeren. -
Page 36: Onderhoud
ONDERHOUD Schakel de stroomtoevoer altijd uit indien er onderhoud aan wordt gepleegd. Het apparaat is op een dermate manier ontworpen dat het schoonmaken ervan op zeer eenvoudige wijze kan worden uitgevoerd, waardoor het langer mee gaat. • Verwijderen van de filters: De filters dienen regelmatig gereinigd te worden in overeenstemming met het gebruik. - Page 38 Composants Componenti Components Componentes Bauelemente Onderdelen...
- Page 39 1200 1198...
- Page 40 PURPLE - MAUVE - MALVER FARBIG WHITE - BLANC - WEISS YELLOW - JAUNE - GELB 350 W 220 - 240 V 50Hz Green-Yellow 220 - 60Hz LIDO Murale 900 & 1200 depuis : Avril 2006 ( From) 3S_Lido_M_90_120_V2006-04 Page 1/1 MAJ (UPDATE) : 19/06/06...
- Page 41 900 : C = 258 mm 1200 : C = 358 mm...
- Page 42 900 : A = 310 mm B = 260 mm 1200 : A = 330 mm B = 360 mm (1200)
- Page 43 LR03 / AAA / 1,5V ACCESSOIRES ACCESSORI ACCESSORIES ACCESORIA ZUBEHÖRE ACCESSOIRES 12EC004...
- Page 44 Eclairage Lighting Beleuchtung Illumiazione Iluminación Verlichting 2 x 11 W...
- Page 45 Plaque Signalétique de la hotte Rating plate of the cookerhood Typenschild im Inneren der Dunstesse Etichetta all'interno della cappa Etiqueta de la campana Typeplaatje van de afzuigkap Modèle Model Modell Modello Modelo Model Numéro de série Serial number Seriennummer Numero di serie Numero de serie Serienummer...
- Page 48 50800 VILLEDIEU-LES-POËLES - France Tél. 02 33 91 26 50 - Fax 02 33 51 54 79 - e-mail : com.france@roblin.fr For outside France : Tel. +33 (0)2 33 91 26 57 - Fax. : +33 (0)2 33 51 54 79 e-mail : com.export@roblin.fr...
Need help?
Do you have a question about the LIDO MURALE and is the answer not in the manual?
Questions and answers