Advertisement
Quick Links
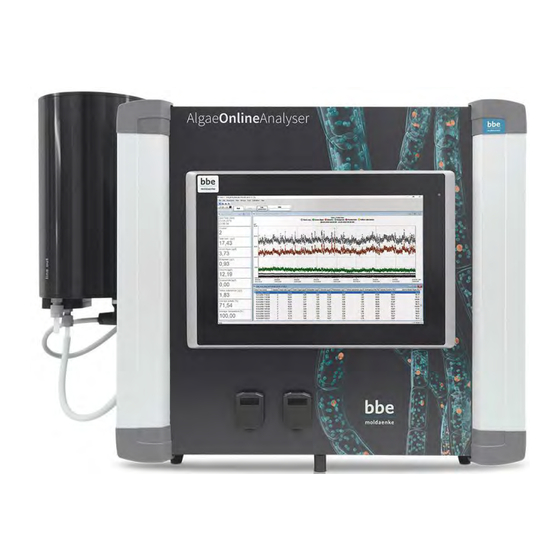
AlgaeOnlineAnalyser II
Version 2.10 E1, August 2020
Nijverheidsstraat 9
6987 EN Giesbeek
Nederland
bbe Moldaenke GmbH
Preetzer Chaussee 177
24222 Schwentinental
Germany
+49 (0) 431/380 400
+49 (0) 431/380 4010
bbe@bbe-moldaenke.de
User Manual
+ 31 313 880 200
info@eijkelkamp.com
royaleijkelkamp.com
Phone
Fax
E-mail
Advertisement

Related Manuals for BBE AlgaeOnlineAnalyser II


Summary of Contents for BBE AlgaeOnlineAnalyser II
- Page 1 Moldaenke GmbH Preetzer Chaussee 177 24222 Schwentinental Germany Phone +49 (0) 431/380 400 +49 (0) 431/380 4010 E-mail bbe@bbe-moldaenke.de AlgaeOnlineAnalyser II User Manual Version 2.10 E1, August 2020 Nijverheidsstraat 9 + 31 313 880 200 6987 EN Giesbeek info@eijkelkamp.com Nederland royaleijkelkamp.com...
- Page 2 Measurement Procedures ........................19 Measuring Sequence (Standard sequence) ........................19 Measuring Sequence (flow through) ..........................19 Measuring Sequence (multichannel version) ......................... 20 Interval pumping vs. continuous pumping ........................20 bbe++ Software ..........................21 Manual for the bbe AlgaeOnlineAnalyser Page 2...
- Page 3 Menu structure (“Basic functionality”) ....................25 Menu structure (”Advanced functionality”) .................... 26 General considerations for storing and displaying data and parameters in bbe++ ........27 What is stored in a bbe++ database? ..........................27 Where is the database stored? ............................27 How to display the data? ..............................
- Page 4 Enable advanced/basic functionality .......................... 83 Connect COM port ..............................83 Device ..................................84 AOA device Submenu..............................84 SQL Script ..................................88 Calibration ..................................88 Sample temperature ..............................88 Transmission ................................88 Chlorophyll-A ................................89 Offsets ..................................89 Manual for the bbe AlgaeOnlineAnalyser Page 4...
- Page 5 Correction of a fingerprint ............................93 Calibration of Fingerprints with Subsequent Wet-Chemical Analysis: ............... 93 Help ....................................94 About … ..................................94 bbe++ manuals … ................................ 94 The Views .............................. 95 Table views ..................................95 History of Parameters ..............................96 Edit comment ................................
- Page 6 Measurement of the Algae Activity ..........................116 Measurement of Further Values and their Calculation ....................117 In General ..................................117 Transmission ................................. 117 Temperature of the Sensor ............................118 Brightness of the LED ..............................118 Manual for the bbe AlgaeOnlineAnalyser Page 6...
- Page 7 Fault finding ..........................130 The Algae Online Analyser will not Start ....................130 Pump is not running ..........................130 No Algae Concentration Shown ......................130 Genty Results are Zero ......................... 130 Results Too Low ........................... 130 Manual for the bbe AlgaeOnlineAnalyser Page 7...
- Page 8 Table of Contents Results Too Low or Too High ........................ 130 Humidity Detected in Sensor ........................ 130 Troubleshooting ......................... 131 Manual for the bbe AlgaeOnlineAnalyser Page 8...
- Page 9 ENERAL AFETY RECAUTIONS The bbe AlgaeOnlineAnalyser is an instrument for the determination of the concentration of chlorophyll in water. It should only be used for this purpose. only instructed staff should operate this instrument. consult appropriate safety manual in case of using hazardous compounds and solutions.
- Page 10 detection of yellow substances The user receives an instrument for the complete survey of the algae content of waterways. OMPONENTS The main components of the bbe AlgaeOnlineAnalyser are: The sensor unit with cleaning device Housing with power-supply and pump (optional valves for multichannel operation) PC unit with touchscreen display ...
- Page 11 The humidity detector prevents greater damage to the sensor in case of leakage. cleaning device measuring chamber outlet inlet removable lid for cleaning purposes cross-section of the sensor unit (Chlorophyllsensor) Manual for the bbe AlgaeOnlineAnalyser Page 11...
- Page 12 The AlgaeOnlineAnalyser The bbe Algae Online Analyser also uses a peristaltic pump – the only degradable part is the hose. The rolls on the rotor press the hose against the hose saddle and close it at that point. So there is a constant volume between the two rolls that is delivered in the direction of the rotor.
- Page 13 In case of a multichannel instrument, pinch valves are used. Please use the original type of tubes for proper operation. NVIRONMENTAL ONDITIONS For the installation of the bbe Algae Online Analyser a frost-free room has to be chosen. The temperature must not exceed 35°C. Parameters Values Temperature range during use 5 - 35°C...
- Page 14 The AlgaeOnlineAnalyser A free drain should also be provided. The bbe Algae Online Analyser is built as a tabletop instrument. LECTRICAL ONNECTIONS UPPLY ONNECTION The bbe AlgaeOnline Analyser is supplied with a mains cable with a safety plug. When connecting the instrument, please ensure a waterproof connecting socket.
- Page 15 3: output 3 + connector from the ‘screw-side’ In case of more analog outputs, the following connectors are marked consecutively. ELAY UTPUT PTION The Algae Online Analyser can be equipped with a relay output device. Manual for the bbe AlgaeOnlineAnalyser Page 15...
- Page 16 Relay 1 / Common Relay 1 / Normally Open Relay 4 / Common Relay 4 / Normally Closed Relay 4 / Normally Open Relay 3 Common Relay 3 Normally Closed Relay 3 Normally Open Manual for the bbe AlgaeOnlineAnalyser Page 16...
- Page 17 ITH INTEGRATED SAMPLE PUMP Connect the intake of the integrated pump to the water source and the outlet of the pump to the connector at the bottom of the sensor of the AlgaeOnlineAnalyser. Manual for the bbe AlgaeOnlineAnalyser Page 17...
- Page 18 The pump is required as soon as the pressure of one of the sample streams is not sufficient. Tubing diagram with valves and pump Valves (1-8) Pump to the Sensor Channel 1 Channel 2 Channel n Manual for the bbe AlgaeOnlineAnalyser Page 18...
- Page 19 EASURING EQUENCE FLOW THROUGH 1. Flushing during startup 2. Brightness tuning of the internal LED 3. Measurement (concentration measurement only) 4. Cleaning 5. Waiting for the next measurement 6. Go to step 2 Manual for the bbe AlgaeOnlineAnalyser Page 19...
- Page 20 Measurement is slower In multichannel applications it takes longer to exchange the sample Continuous mode. The pump is working (or the valve is opening) all the time for fat response. Not suitable for activity measurements. Manual for the bbe AlgaeOnlineAnalyser Page 20...
- Page 21 Software ++ S OFTWARE The bbe++ software is delivered together with bbe instruments. If a PC is delivered with the instrument or integrated in the instrument, the software is already installed. It provides the following functions: operation, control and calibration of bbe instruments ...
- Page 22 Software Choose the destination folder and click “N >” Choose a new start menu folder and click “N >” Choose your preferred language and click “N >” Manual for the bbe AlgaeOnlineAnalyser Page 22...
- Page 23 ”. INISH ESKTOP ICON OF THE BBE SOFTWARE The setup installs an icon for the bbe++ software on the desktop (if chosen during installation). SOFTWARE IN THE TART MENU The bbe++ folder in the start menu contains: bbe++ software ...
- Page 24 Updates of the bbe++ software and manuals can be downloaded from the bbe website http://www.bbe- moldaenke.de after registration. TRUCTURE OF THE SOFTWARE The following menus are available in the bbe++ software. Whether a menu is displayed, depends on the access level set. contains all the input/output functions. ...
- Page 25 (not Torches) Enable advanced Open Edit comment Online Statusbar Manuals functionality Close Measurement Import Macro Export KMZ Data navigation Export ToxTest Period Recent file list Session Data directory connection state Exit Auto update Manual for the bbe AlgaeOnlineAnalyser Page 25...
- Page 26 Export database Standard Period Single value Export KMZ Workstation Session Select data Export ToxTest ..connection state View editor Summary view Auto update Comment fields Recent file list Open windows list Data directory Exit Manual for the bbe AlgaeOnlineAnalyser Page 26...
- Page 27 The database of bbe++ is stored in the standard application folder of Windows. The name of the folder depends on the operation system and the language. For example: C:\ProgramData\bbe++ in the Windows 7 English version. To access this folder easily, there is a link in the file menu of bbe++ or start menu of Windows called “Data directory”:...
- Page 28 HO CAN ACCESS TO THE PARAMETERS OF THE INSTRUMENTS The bbe++ software has 2 access levels – basic functionality and advanced functionality. Depending on the different access levels, more or fewer menu items and parameters are shown. There are different settings for reading or writing access.
- Page 29 UND TABLE VIEWS User configurable windows with graphs and tables. ERIAL NUMBER VOLTAGE OF THE BATTERY INTERNAL CLOCK Display of the data of the connected instrument: serial number, voltage of the battery and internal clock. Manual for the bbe AlgaeOnlineAnalyser Page 29...
- Page 30 The File Menu contains all the input/output functions. Creates a new database file for data and parameters. If the new database already exists, the existing database is deleted after confirming the following message: Manual for the bbe AlgaeOnlineAnalyser Page 30...
- Page 31 This function is used to import *.FLP files into the database. These files can be results transferred from the FluoroProbe to a USB stick or files generated by the first version of the FluoroProbe software. To import, please choose the file from the file system: Manual for the bbe AlgaeOnlineAnalyser Page 31...
- Page 32 In case of FluoroProbe data, the results are recalculated from the raw data after importing. The calculation procedure takes place in subsequent steps. After importing all data, a success message is shown. Manual for the bbe AlgaeOnlineAnalyser Page 32...
- Page 33 This item is used to export parts of a database to a new (and smaller) one. The exported database can be read with bbe++ again. This might be useful when parts of the database are transferred via email. The currently selected data (“W ...
- Page 34 The Menus The database bbe++.bdb above contains data of two types of instruments: AlgaeTorch and FluoroProbe. The serial numbers and the point in time of the first measurement and the last measurement stored in the database are shown below the heading with the name of the instrument.
- Page 35 Exit Terminates the program. This menu contains commands to copy data/graphics from bbe++ and add them to the clipboard. Copy The content of the active window will be copied to the clipboard. Depending on the type of the active window, this is either a graph or a table.
- Page 36 To edit the comment of one or more datasets mark the datasets in the table view. A dataset can be marked with a mouse click. Multiple datasets can be marked be pressing Ctrl key while clicking on the dataset required. Manual for the bbe AlgaeOnlineAnalyser Page 36...
- Page 37 Go to Edit Edit comments or use right click on the marked datasets: Enter the new comment for the selected data: Click OK: Delete Data – advanced functionality only To delete data, mark the datasets as described above. Manual for the bbe AlgaeOnlineAnalyser Page 37...
- Page 38 Only parameters of the current type of instrument are shown. It depends on the user level, whether a parameter is shown or not. The higher the user level, the more parameters are shown. Manual for the bbe AlgaeOnlineAnalyser Page 38...
- Page 39 For example of parameter listings for user levels, please see the examples below. Access level “advanced functionality”: Access level “User”: Depending on the parameters and on the access level, the parameters are read only or read and write Manual for the bbe AlgaeOnlineAnalyser Page 39...
- Page 40 Matrix: shows all the calibration parameters of the connected instrument in one window. Name of parameter set Each set of parameters can be identified by its time and date. Edited parameter sets or templates have an additional name given by the user. Manual for the bbe AlgaeOnlineAnalyser Page 40...
- Page 41 Shows the current values of the parameters. Depending on the type of operation the value can be edited. History – advanced functionality only Displays the parameters of the active dataset. The history is also available on the Context Menu in table view: Manual for the bbe AlgaeOnlineAnalyser Page 41...
- Page 42 This is more convenient, than entering the parameter to a new template by hand. The new template can be edited as any template. First step is to choose the scheme with the selection of parameters. Manual for the bbe AlgaeOnlineAnalyser Page 42...
- Page 43 The Menus Giving the new template a name: Afterwards the new template can be displayed and edited. It can be used as any other template. Manual for the bbe AlgaeOnlineAnalyser Page 43...
- Page 44 When entering the first value, a name for the parameter set is requested: The name and date is shown in the headline of the table: Depending on the type of parameter, either an input box or a drop-down box is used: Manual for the bbe AlgaeOnlineAnalyser Page 44...
- Page 45 3. select the template from the drop-down box: 4. Click “U “: PLOAD bbe++ loads all the parameters from the instrument: and sends the changed parameters back to the instrument. All parameters not defined in the template will not be overwritten in the instrument. Delete a template select the template to be deleted ...
- Page 46 O ” ARAMETERS NLINE bbe++ loads all the parameters from the instrument: The parameters are shown: 3. change the parameters as described in the “Template” section. 4. click OK to upload the new parameters 5. Use the “clipboard” button to copy all the parameters to the clipboard and paste it into EXCEL for...
- Page 47 The Menus Manual for the bbe AlgaeOnlineAnalyser Page 47...
- Page 48 3. Select a new dataset from the dropdown box or create a new one by editing a copy. Please note: only copies of an original parameter set can be edited. These sets are marked with “adapted”. Manual for the bbe AlgaeOnlineAnalyser Page 48...
- Page 49 5. Select the new parameter set and edit the settings as described in the “Template” section. Please note the number and type of parameters shown depends on the user-level. Only the parameters marked with the green symbol can be changed. Manual for the bbe AlgaeOnlineAnalyser Page 49...
- Page 50 ”) INDOW ELECT 2. Go to “P R ” ARAMETERS ECALC 3. Click “U ”. Please note: This item is only available when recalculated data are available in the selected time period. Manual for the bbe AlgaeOnlineAnalyser Page 50...
- Page 51 For the parameters of the FluoroProbe and the AlgaeLabAnalyser there is another window available to edit the parameters. It is shown when the button “M ” is pushed: ATRIX Changing any parameter here has the same effect as changing the parameter in the standard view. Manual for the bbe AlgaeOnlineAnalyser Page 51...
- Page 52 The toolbar “Measurement” is different for each type of instrument. It allows quick access to functions such as starting and stopping the measurement or retrieving the parameters. The measurement toolbar of the FluoroProbe is given here as an example: Manual for the bbe AlgaeOnlineAnalyser Page 52...
- Page 53 The toolbar “Connection state” shows the status of the connection to the connected instrument: The colour indicates the status: Black: Not connected, the PC has not tried to establish a connection Yellow, blinking: Not connected, the PC is trying to establish a connection Green: Connected Manual for the bbe AlgaeOnlineAnalyser Page 53...
- Page 54 Opens a new window and displays the data according to the selected window type. (See below) Please see the list window “Concentration” of an AlgaeTorch as an example. New XYGraph Window Opens a new window and displays the data according to the selected window type. Manual for the bbe AlgaeOnlineAnalyser Page 54...
- Page 55 There are some view types pre-defined for each instrument. It is also possible to add new window types by using the view editor. The following diagram shows the development of different algae classes measured with the bbe FluoroProbe. New Single Value View Opens a new window and displays the data of one data-set according to the selected window type.
- Page 56 The data-set is shown in larger digits to help the user read the display even in bright sunlight. The latest data- set is shown. The “Single Value View” can be adapted to the screen by changing size and/or proportion of the window: Cascade Arranges the windows one behind the other. Manual for the bbe AlgaeOnlineAnalyser Page 56...
- Page 57 Selects the time range of data to be selected. It is possible to select a fixed time range such as “last month” or to do a manual selection by entering a range F “date” T “date”. Hint: Further selections can also easily be made in a graphic window. Manual for the bbe AlgaeOnlineAnalyser Page 57...
- Page 58 Bluegreen concentration and depth is generated as an example. View Selection 1. Open the view editor: 2. Choose the type of instrument the view is to be used for (in the example “FluoroProbe”). Manual for the bbe AlgaeOnlineAnalyser Page 58...
- Page 59 ” to remove the concentration of green algae from the EMOVE view. 7. Repeat with all entries but “Date/Time (date)”; “Bluegreen [µg/l]”, “Total conc. [µg/l]” and “Depth [m]”. 8. Click on “Total conc. [µg/l]” and ”U ” to change the order. Manual for the bbe AlgaeOnlineAnalyser Page 59...
- Page 60 The General Properties page allows the user to change the background color of a “Single value” view. 10. Click on the color picker box behind „Background color“ and choose a new color. The chosen color is now shown in the color picker box Manual for the bbe AlgaeOnlineAnalyser Page 60...
- Page 61 The Menus Example of a change in background color: Save View 11. Enter a name for the view. Manual for the bbe AlgaeOnlineAnalyser Page 61...
- Page 62 The Menus 12. Click “OK” to confirm. The current data is then shown with the new view. 13. The new view is now available in the Window menu. Manual for the bbe AlgaeOnlineAnalyser Page 62...
- Page 63 In case of a pre-defined view, the view can be reset to the original status (“R ”). ESET In case of a user-defined view, the custom view can be deleted (“D ”). ELETE 5. Click “N ”. Manual for the bbe AlgaeOnlineAnalyser Page 63...
- Page 64 6. Choose the design according to the given examples (in the example Y-Axis) Field Configuration 7. Select the data for the axis chosen and click on “A ”. Only one of the available entries is possible (in the example “Depth”) Manual for the bbe AlgaeOnlineAnalyser Page 64...
- Page 65 Y-axis for the depth. Please see the following example: the first picture shows the standard settings, the second one with a direction-inverted Y-axis and inverted position of the X-axis. Manual for the bbe AlgaeOnlineAnalyser Page 65...
- Page 66 The Menus 10. Click “OK” to confirm the settings. 11. Click “N ”. 12. Now the data and settings for the other axis can be selected. Manual for the bbe AlgaeOnlineAnalyser Page 66...
- Page 67 13. After selecting one type of data, only those types which have the same unit(s) remain in the right column. 14. For example, “Total chlorophyll concentration” and “Bluegreen” have to be selected here. Manual for the bbe AlgaeOnlineAnalyser Page 67...
- Page 68 In this case, it is better to use the option: lower limit: lower than upper limit: higher than This leads to a minimum span in the graph. datasets with outliners: Manual for the bbe AlgaeOnlineAnalyser Page 68...
- Page 69 Background color: click on the colored button to change the background color of the graph. For illustration, please see the examples with connected and unconnected dots, different sizes and background colors. Different dot sizes: Manual for the bbe AlgaeOnlineAnalyser Page 69...
- Page 70 Hint: The data points are not connected if the time of measurement differs more than the given value in “T ”. OOLS ETTINGS ISPLAY Different dot colors: Manual for the bbe AlgaeOnlineAnalyser Page 70...
- Page 71 18. Enter a new name for the view. It is not possible to edit pre-defined views. Please store a view based on a pre-defined view with a new name. 19. The current data is shown using the new view after clicking “OK”. Manual for the bbe AlgaeOnlineAnalyser Page 71...
- Page 72 6. Select the required datasets from the right column. Use the up and down buttons to determine the order of the data in the export table. 7. Click “Next”. Manual for the bbe AlgaeOnlineAnalyser Page 72...
- Page 73 The comments names and types can be defined within this dialog. Type of instrument: the type of instrument is defined in the settings “T S “. OOLS ETTINGS ACCESS Manual for the bbe AlgaeOnlineAnalyser Page 73...
- Page 74 1..2..3..Shows all the currently opened windows. OOLS Menu (advanced functionality) Menu (basic functionality) Settings Here, all the preferences for the general functionality of bbe++ can be set. Manual for the bbe AlgaeOnlineAnalyser Page 74...
- Page 75 Database The ‘Database’ tab shows the currently used database. The checkbox can be used to open this database after starting bbe++. We recommend you to store all the data in the same database. Automatic start of measurement For continuously working instruments (AOA or FluoroProbe / AlgaeTorch) the software can be configurated to start the measurement directly after starting the software.
- Page 76 Furthermore, this setting is used to control the drawing of lines between two dots. If the interval between two measurements is shorter than the given interval, a line is drawn – otherwise not: interval set to 10 minutes Manual for the bbe AlgaeOnlineAnalyser Page 76...
- Page 77 Depending on the access level selected, the software shows more or fewer options. The main difference is the number of items shown in the menus and the number of parameters shown. If an instrument with editable parameters is connected, the same setting is maintained for editing. Manual for the bbe AlgaeOnlineAnalyser Page 77...
- Page 78 Default Device The bbe++ software is able to control different types bbe instruments, but only one type at one time. The type of instrument is entered here. Various settings within the bbe++ software can only be made for the default type instrument.
- Page 79 The Menus Macro manager The bbe++ software provides the option to store the arrangement of the view windows. One of the stored views can be used as the default view automatically displayed after starting bbe++. To generate a new view macro: 1.
- Page 80 The Menus Logger settings The logger settings are used in case of problems with the bbe++ software. Please ask the bbe service for advice. Depending on the checked options more or less information is stored in the file “error.log” in the program folder of bbe++ software.
- Page 81 F8 shows the selected macro Language This tab shows a list of the available languages of the bbe++ software. To change the language, choose the language you wish and click “OK”. The bbe++ software must be restarted for the changes to take effect.
- Page 82 To configurate the devices goto Tools -> device -> … . This item is not available for all instruments. With “search MCU” a multi channel unit for the AlgaeOnlineAnalyser can be conncted. Manual for the bbe AlgaeOnlineAnalyser Page 82...
- Page 83 This item is used to do the configuration of writing text files and sending data via RS232. File output If the file output is configured daily text files are written by bbe++. The files are stored in the path given in “file path”.
- Page 84 The “Device” submenu varies depending on the selected type of instrument. Each type has its own submenu. DemoMode To switch the bbe++ software to the demo mode select FluoroProbe (Tools -> Settings -> Access) and disconnect all instruments. Click on “DEMO mode” in the device submenu. Now, the software can be operated as if a FluoroProbe were connected.
- Page 85 Only data of the sample source n will be applied. Depending on the number of installed analogue outputs more or less tabs will be displayed. In the screenshot below 8 analogue outputs are installed. Manual for the bbe AlgaeOnlineAnalyser Page 85...
- Page 86 The Test 4 mA, Test 12 mA and Test 20 mA buttons can be used for test purposes. If one of these buttons is clicked, the current indicated on the button can be measured at the corresponding output. Manual for the bbe AlgaeOnlineAnalyser Page 86...
- Page 87 The relay switches to the ON position if an alarm of the total chlorophyll concentration occurs. Any conc. alarm The relay switches to the ON position if any concentration alarm occurs. Hardware alarm The relay switches to the ON position if any hardware alarm occurs. Manual for the bbe AlgaeOnlineAnalyser Page 87...
- Page 88 ALIBRATION Contains the items to calibrate different bbe instruments (expert level only) Sample temperature Shows the actual internal temperature. The calibration of the internal temperature shall only be done by bbe service. Transmission Performs a calibration at the offset of the transmission measurement. This is the value that is measured if pure water (100% transmission) or no transmission (0%) is present.
- Page 89 Please use this offset calibration when the yellow substance measurement is excluded. Offsets The offset is the signal without algae that has to be subtracted during the measurement. Two offsets have to be calibrated: Manual for the bbe AlgaeOnlineAnalyser Page 89...
- Page 90 Negative pressure of 800mbar. The volume of the sample is determined by the instrument to be calibrated, BBE. For an ALA be about 100ml, requires approximately 5L filtrate for an AOA / AlgaeGuard / A-Tox sensor / AlgaeTorch about 1L and for an immersion probe.
- Page 91 2. Click on “S ” to initiate the calibration TART 3. Please fill a clean cuvette with distilled water, place it in the AlgaeLabAnalyser and click “OK”. 4. Subsequently 3 x 10 measurements are excecuted.: Manual for the bbe AlgaeOnlineAnalyser Page 91...
- Page 92 3. Insert the concentration. Concentration values should be in a range of 20 – 80 µg/l. 4. If the concentration is determined later insert “1” and use the “calibration by factor” feature to adapt the calibration after specifying the concentration. Manual for the bbe AlgaeOnlineAnalyser Page 92...
- Page 93 1.96 or later. Otherwise, this option is greyed out. Calibration of Fingerprints with Subsequent Wet-Chemical Analysis: If the AlgaeLabAnalyser is calibrated with a reference solution where the concentration is determined subsequently, the following steps have to be carried out: Manual for the bbe AlgaeOnlineAnalyser Page 93...
- Page 94 New version can be downloaded from http://www.bbe-moldaenke.de/. bbe++ manuals … List of currently installed bbe++ manuals. Depending on the selection made during the installation, there may be manuals in different languages and for different instruments. To make further manual available, please store the PDF files in the following folder:...
- Page 95 ABLE VIEWS A table view is opened by “W N T “. INDOW ABLE ABLE Within the list view, the right mouse button offers detailed information about the selected data set. Manual for the bbe AlgaeOnlineAnalyser Page 95...
- Page 96 Edit comment allows the user to change the comments of a specific data set retrospectively. DIT COMMENTS The dropdown list contains previously entered comments (if applicable). Manual for the bbe AlgaeOnlineAnalyser Page 96...
- Page 97 To delete data rows from the data base, mark one or more row by clicking on the row. Hold the Ctrl. key while clicking to add more rows to the selection. Hold the Shift. key while clicking to expand the. Select “Delete Data” Manual for the bbe AlgaeOnlineAnalyser Page 97...
- Page 98 The list view is sorted by date/time. It can be sorted by any other column by clicking on the header of the column. Clicking twice leads to the reversed order. Sorted by time/date ascending: Manual for the bbe AlgaeOnlineAnalyser Page 98...
- Page 99 1. Select data of interest 2. Scaling of the axes (right click) 3. Display of the corresponding parameters (right click) 4. Editing a XY view, to change colours the type of graph. 5. Navigation within the data Manual for the bbe AlgaeOnlineAnalyser Page 99...
- Page 100 The Menus Select data of interest Please click and draw the mouse to select the required data. A pop-up window is shown to choose the axis to which the selection is to be applied. Manual for the bbe AlgaeOnlineAnalyser Page 100...
- Page 101 Y only only the selection on the vertical axis is applied. X and Y the selection on the horizontal and the vertical axis is applied. X only applied Y only appliedMinimal Manual for the bbe AlgaeOnlineAnalyser Page 101...
- Page 102 In the right-click menu, there is a “Scale axis” option: In case of a time axis, the scaling tab of this axis is as follows: Manual for the bbe AlgaeOnlineAnalyser Page 102...
- Page 103 In this case, it is difficult to analyse the data because the auto scaling generates a high span value. To prevent this, please use the lower limit: higher than for outliners with low values Manual for the bbe AlgaeOnlineAnalyser Page 103...
- Page 104 Enables the auto-scaling feature. The axis will be scaled so that all selected data are visible. Parameters Show the parameters of the data-set Default scaling Click here to undo all the changes in the scaling options. Manual for the bbe AlgaeOnlineAnalyser Page 104...
- Page 105 Number of measurements that are executed and averaged for one data set. Measurement duration (f, fm, fo, transmission) Please enlarge the measurement duration to enhance the accuracy of the measurements. Minimum chlorophyll (f) concentration Below this concentration no algae activity is calculated. Manual for the bbe AlgaeOnlineAnalyser Page 105...
- Page 106 Continuous measurements If enabled a continuous measurement is performed. Number of available sample channels Shows the number of available sample channels – can only be changed by the bbe service Pump mode Please select the way the sample pump is working.
- Page 107 These parameters control the alarm generation. Alarms are generated as soon as a threshold is exceeded. For each algae class and the total chlorophyll concentration a threshold can be set. In combination with a relais output, the alarms can be used to trigger an external device (like a sampler). Manual for the bbe AlgaeOnlineAnalyser Page 107...
- Page 108 Parameters Alarm limit Set the threshold for the algae class Enable alarm Enables the alarm. OMMON PARAMETERS Manual for the bbe AlgaeOnlineAnalyser Page 108...
- Page 109 The enabled for fit section allows selecting maximum 5 of 8 calibrated algae classes for the calculation of the concentration of the different classes. Please take care, that all algae classes available in the water are activated. Manual for the bbe AlgaeOnlineAnalyser Page 109...
- Page 110 Yellow Substances Correction Please select, whether this is a Yellow Substances fingerprint or not. Yellow substances content is not included in the total chlorophyll concentration. Offsets The results of the offset calibrations are shown here. Manual for the bbe AlgaeOnlineAnalyser Page 110...
- Page 111 Parameters Transmission offsets / gradients Shows the result of the transmission offset calibration. Fingerprints Displays the results of the algae class calibrations. Manual for the bbe AlgaeOnlineAnalyser Page 111...
- Page 112 Factors to convert the chlorophyll concentration [µg/l] results to cell counts [cell/l]. These factors can be defined separately for each algae class. Fo measurement brightness Brightness of the LED light during the fo measurement in relation to the brightness during the standard chlorophyll measurement. Manual for the bbe AlgaeOnlineAnalyser Page 112...
- Page 113 Values result of the brightness regulation (service, do not change) Temperature and Humidity offsets / gradients Shows the result of the Temperature and humidity sensor calibration. Required values of the LEDs Values for the basic calibration of the ALA Manual for the bbe AlgaeOnlineAnalyser Page 113...
- Page 114 Parameters Temperature correction Temperature correction factors for the given temperature ranges. Manual for the bbe AlgaeOnlineAnalyser Page 114...
- Page 115 ATA ANALYSIS Offset The LEDs in the bbe fluorometer are switched on one after the other at high frequency. The fluorescence signal for each LED is taken and averaged during a given measuring time. The fluorescence values for each of the LEDs are given at the end.
- Page 116 The different algae classes used for the statistical fit need to have significantly different fluorescence spectra such as the spectra calibrated by bbe in the bbe fluorometer. In case of queries, please ask bbe Service. EASUREMENT OF THE...
- Page 117 The correction is done separately for each LED. Offset compensation: Offset corr. (λ) = Offset(λ) + a * (100-Transmission (λ))² + b * (100-Transmission (λ)) * Average Fingerprint (LED) a, b are parameters, determined by bbe. Manual for the bbe AlgaeOnlineAnalyser Page 117...
- Page 118 In case of the presence of algae types that are not calibrated or in case of different types of yellow substances, the bbe Algae Online Analyser needs to be calibrated to these special needs first. This is most important if there are only low concentrations of algae (< 10µg/l).
- Page 119 Apply the values after the calibration. Apply ultra-filtrated sample water and start using Calibration -> Offsets (ultra-filtrated) . Apply the values after the calibration. ALIBRATION OF THE LGAE INGERPRINTS Do an offset calibration first. Manual for the bbe AlgaeOnlineAnalyser Page 119...
- Page 120 Depending on the features of the chlorophyll sensor the Activity and Transmission click boxes are greyed or not greyed. The sample can be taken from a canister or similar container. To get the sample into the sensor, either the internal pump or a syringe can be used. Manual for the bbe AlgaeOnlineAnalyser Page 120...
- Page 121 It also helps to use the clean option while pure water is in the chamber. This requires one more rinsing afterwards. If there is enough sample water, it is recommended to use the next sample for rinsing. Manual for the bbe AlgaeOnlineAnalyser Page 121...
- Page 122 To evaluate the data, either the PC of the instrument itself can be used or any other PC on which the AOA software is installed. On a desktop PC, please install the bbe++. Now any bbe++ database file (*.BDB) can be opened for evaluation. The file can either be on the PC or in the LAN network.
- Page 123 = 4; /* Prüfsumme und erstes TAB nicht berücksichtigen */ unsigned char checksum = 0; /* Startwert ist 0 */ while (response[i] && (response[i] != '\r') && (response[i] != '\n')) checksum = checksum ^ response[i]; Manual for the bbe AlgaeOnlineAnalyser Page 123...
- Page 124 Externer Rechner sendet „d“, Antwort: 02.00 33 25.11.2014 14:27:38 0,00 1,66 0,00 0,00 0,00 0,00 0,00 0,00 1,66 100,00 -0,10 15,10 0 1656 1656 354,22 4,29 4,01 12,29 2,37 7,68 2,59 0,99 16,95 15,46 Manual for the bbe AlgaeOnlineAnalyser Page 124...
- Page 125 6 mm internal hose connection Sample pump Marprene Tubing ID = 4.8 mm Valves (option) Silicon tubing ID=4.80 / OD=7.90mm ATOM N270 12" touchscreen panel - ca. 1.6 GHz, 1 GB RAM Windows XP Pro (SP3) Manual for the bbe AlgaeOnlineAnalyser Page 125...
- Page 126 Technical Data Description Value Hard disk 80 GB Modem 2 x analogue output 4-20 mA Outputs (options) 2 x relay output SDI-12 with bbe converter Manual for the bbe AlgaeOnlineAnalyser Page 126...
- Page 127 Hose diameter and hose types In any case, only hoses in accordance with the specifications must be used! Marprene hose 4.8 x 1.6 mm (inner diameter x wall thickness) Manual for the bbe AlgaeOnlineAnalyser Page 127...
- Page 128 View from the bottom of the sensor. Arrows mark the socket screws which have to be removed to demount the removable measuring chamber base (lower lid). Manual for the bbe AlgaeOnlineAnalyser Page 128...
- Page 129 If the instrument does not start, a fuse may have blown. There are two fuses on the right side of the instrument. To change them: Disconnect the mains Open the lid Take out the fuse Replace it (3.1 A T) Close the lid Manual for the bbe AlgaeOnlineAnalyser Page 129...
- Page 130 You are using a different method of chlorophyll calibration than HPLC. So a certain factor has to be used UMIDITY ETECTED IN ENSOR The software shows the following message: Please disconnect the sensor from the power supply and the sample and contact bbe service. Manual for the bbe AlgaeOnlineAnalyser Page 130...
- Page 131 ROUBLESHOOTING Please call us: Tel.: +49 431 380 40-40 (Service) Tel.: +49 431 380 40-0 Fax: +49 431 380 40-10 Or send an email to: e-mail: bbe@bbe-moldaenke.de www.bbe-moldaenke.de We will gladly help you. Manual for the bbe AlgaeOnlineAnalyser Page 131...
Need help?
Do you have a question about the AlgaeOnlineAnalyser II and is the answer not in the manual?
Questions and answers