
Related Manuals for BBE BenthoTorch


Summary of Contents for BBE BenthoTorch
- Page 1 P.O. Box 4, 6987 ZG Giesbeek Nijverheidsstraat 30, 6987 EM Giesbeek, The Netherlands T +31 313 880 200 E info@eijkelkamp.com www.eijkelkamp.com BenthoTorch User Manual Version 2.4 E1, October 2014...
-
Page 2: What's New
What’s new What’s new Software PC Software bbe++ supports the BenthoTorch. Hardware First version Please Note: Decimal points are according to local settings of Windows, i.e. internationally, the decimal point is “ . ” but in most of Europe it is „ , “. Please pay attention to this. Most import/export difficulties are caused by the use of the “point”... -
Page 3: Table Of Contents
Measuring Procedure ..................... 19 Single Measurement...................... 19 Interval / continuous measurement ................20 Reference method for chlorophyll-a measurement for validation of the bbe BenthoTorch 20 Substrate used for reference ..................20 Measurement by bbe BT ....................21 Scraping and transport ....................21 Extraction and measurement of chlorophyll-a(DIN 38 412-L16) ........ - Page 4 Show voltage: ........................ 32 Calibrate voltage: ......................32 Factory settings ......................32 Correction factor ......................33 Connecting the bbe AlgaeTorch / BenthoTorch / AlgaeLabAnalyzer via USB to a PC33 USB Driver Set-Up ......................33 BBE++ SOFTWARE Software Set-Up ......................35 Desktop icon of the bbe++ software ................
- Page 5 File Menu ........................44 Open Close Import (FluoroProbe / AlgaeTorch / BenthoTorch) Export (ASCII) Export (Database) Export (KMZ) – AlgaeTorch / BenthoTorch / FluoroProbe Export (ToxTest protocol) – AlgaeLabAnalyser only Summary View 1..2..3..Data Directory Exit Edit Menu ........................
- Page 6 Parameters Default scaling PARAMETERS THE GPS MODULE The GPS module of the bbe AlgaeTorch and bbe BenthoTorch ........98 General remarks ......................98 Actvating and deactivating ..................... 98 position (Settings -> GPS -> position) ................98 Required quality (Settings -> GPS -> required quality) ..........98 Version (Settings ->...
-
Page 7: General Safety Precautions
General Safety Precautions General Safety Precautions The bbe BenthoTorch is an instrument for determination of the concentration of chlorophyll on surfacees or on the ground of a water body. It should only be used for this purpose. Only instructed staff should operate this instrument. -
Page 8: Quick Start Instructions
2. Start the BenthoTorch by turning it upside down and back again in one quick movement. If the BenthoTorch is equipped with a reed contact to switch it on with a magnet, a symbol is printed on the label of the BenthoTorch. Please tip on the symbol with the magnet to switch the BenthoTorch on. The magnetic switch can be used alternatively to the shaking switch. - Page 9 Time remaining The end of the measurement is signalled by a short vibration. The result can be read from the display. The results of 3 algae classes are shown alternating. green: 0.7µg/cm’2 more <- -> bbe BenthoTorch Manual Page 9...
- Page 10 Quick start instructions cyanos: 0.7µg/cm’2 more <- -> diatoms: 0.7µg/cm’2 more <- -> ESC Press “ESC” to return to the start measurement item. bbe BenthoTorch Manual Page 10...
-
Page 11: Operating Principles And Design
(with a fixed emission wavelength at 680nm) is significant. Thus, it is possible to differentiate divisions of algae by their fluorescence excitation spectrum. The bbe BenthoTorch for algae differentiation uses 7 LEDs for fluorescence excitation. The LEDs emit light at 3 selected wavelengths (470nm, 525nm, 610nm). -
Page 12: Design
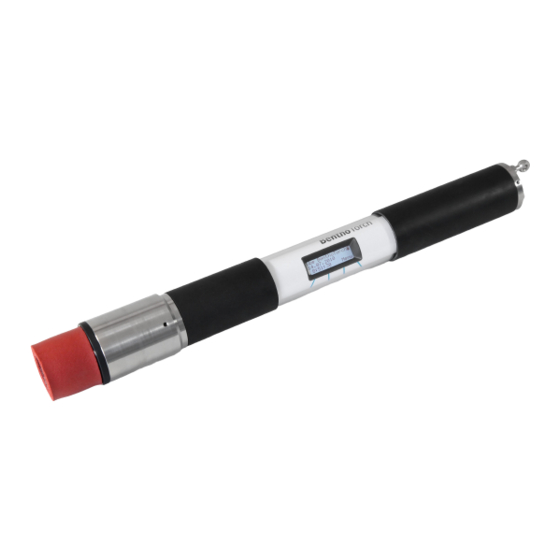
• internal rechargable batteries • internal display • 4 capacitive softkeys • vibration feedback • position sensors to start the BenthoTorch • power-down features Carrying eye Connector Sensor head with 4 capacitive keys LEDs and photodiode Display bbe BenthoTorch Manual... -
Page 13: Use Of The Benthotorch
Use of the BenthoTorch Use of the BenthoTorch USB connecting cable of the BenthoTorch The BenthoTorch comes with a connecting cable. This cable has two functions: connecting the Torch to a PC and connecting a power supply to the torch. Power supply... -
Page 14: Charging The Benthotorch With The Powersupply
Press the right key to enter the main menu. Automatic Power-Down If the BenthoTorch is being used without a power supply, it switches off automatically after 5 minutes without any operation. It then has to be re-started as described above. -
Page 15: Operation Modes
Operation of the BenthoTorch by Capacitive Touch Keys The BenthoTorch is equipped with 4 capacitive keys with vibration feedback. The keys are located below the display. To actuate a key, just touch the marked area. The actuation is reconfirmed by the BenthoTorch via a short palpable vibration. -
Page 16: Storing The Benthotorch
The keys are reactivated when the keys are dry again. Storing the BenthoTorch The best way to store the BenthoTorch is in the original case. The cable and the accessories can also be stored in this case. bbe BenthoTorch Manual... -
Page 18: Navigation Within The Software
To navigate within the same menu level. NTERING ETTINGS To change the settings of the BenthoTorch, choose the parameter in the SETTINGS menu: Measuring time: The underlined number is currently changeable by using the + and – keys. Confirms the underlined number and moves the cursor one position to the right. If the last number is underlined, OK confirms the new setting and returns to the SETTINGS menu. -
Page 19: Operating The Bbe Benthotorch
• Go to “Start measurement” • Apply the BenthoTorch in to the benthic algae. Ensure that the red foam shadows the algae from the light. • Replicate the measurement on one stone and average to reduce the effect of patchiness •... -
Page 20: Interval / Continuous Measurement
Go to “Start -> Start continuous measurement” • Apply the BenthoTorch in to the benthic algae. Ensure that the red foam shadows the algae from the light. • To stop the BenthoTorch, turn it upside down and back between two measurements when the BenthoTorch switches off because of the selected measuring interval. -
Page 21: Measurement By Bbe Bt
Operating the bbe BenthoTorch EASUREMENT BY BBE The samples are measured directly on site with the BT. Each plate is measured a few times (around 5) to “cover” the whole area. If the biofilm shows high patchiness, more measurements for a more representative average value are performed. - Page 22 Operating the bbe BenthoTorch After incubation, approximately 3ml of the extract is filtrated with a syringe filter into a cuvette. The sample is measured with a spectrophotometer first at a wavelength of 665nm and then at 750nm both against the offset of reference 90% ethanol solution. The second measurement at 750nm is used for the compensation of the sample’s turbidity.
-
Page 23: Data Menu / View Data
The display shows the date and time of the latest result. For details please see the single measurement section on page 19. -> DELETE Deletes all data from the memory of the BenthoTorch. DATA-DELETE <- -> Deletes all data from the memory. -
Page 24: Settings Menu
• Single: One single measurement is performed after starting. • Continuous: The BenthoTorch performs one measurement directly after the other. • Interval: Performs one measurement after the other with the given measuring interval. EASURING DURATION Sets the duration of a single measurement (default = 10s) Measuring dur.:... -
Page 25: Autopowerdown
Operating the bbe BenthoTorch OWER Sets the time after which the BenthoTorch is automatically turned off, when not operated. It is also possible to disable this function. In this case the BenthoTorch will not be switched off. There are several predefined period available by using the + and –... -
Page 26: Clock -> Utc Time Shift
Operating the bbe BenthoTorch Sync. GPS time 15:47:12 -> UTC LOCK TIME SHIFT Sets the time zone Set hours UTC +1h 0min Next Next Go to the setting of minutes Increase the setting of the hour Decrease the setting of the hour Discard entries Set the hours first, click next, set the minutes and click OK. -
Page 27: Software Version
This calibration has to be conducted with a low and a high concentration of each algae class. The calibration of the BenthoTorch requires a calibration of all backgrounds and fingerprints at once, because all dependencies have to be recalculated. Only the offset can be recalibrated seperately. -
Page 28: Offset Calibration Procedures
Black calibration plate 1. Put the BenthoTorch on the black calibration plate containing 100µl of destilled water. Do not reuse an algae calibration plate to avoid contaminations. 2. Got to calibration -> offset CALIBRATION: <... -
Page 29: Reflectance Calibration Procedures
The grey and the white plate are made for reflectance measurements only. For the calibration procedures using the calibration plates, please remove the red foam from the BethoTorch. 1. Put the BenthoTorch on the grey calibration without water. 2. Got to calibration -> background -> gray CALIBRATION: <... - Page 30 To get a increase the concentration of the algae solution it can be centrifuged with about 2000 rpm for about 20min. 1. Apply 100µl of the first calibration solution to the first calibration plate 2. Put the BenthoTorch on the calibration plate bbe BenthoTorch Manual Page 30...
- Page 31 Operating the bbe BenthoTorch 3. Go to calibration -> Fingerprint -> diatoms 4. Touch the OK key to choose diatoms. SET FP < diatoms > <- -> 5. Select low concentration SET FP DIAS < low conc. > <- ->...
-
Page 32: Internal Temperature
12. When all calibrations are done, the all calibration parameter can be calculated at once: Cal. Competed: Calculate now? Internal Temperature The internal temperature of the BenthoTorch can be shown. HOW INTERNAL TEMPERATURE Int.Temperature: 25.5 °C Shows the internal temperature. -
Page 33: Correction Factor
1.00 Connecting the bbe AlgaeTorch / BenthoTorch / AlgaeLabAnalyzer via USB to a PC To connect the bbe AlgaeTorch, BenthoTorch or AlgaeLabAnalyser to a PC a USB driver has to be installed first. Hint: Older versions of the converter do not work with Windows 8 and up. Please contact the bbe service. - Page 34 Operating the bbe BenthoTorch Please restart the PC. After that you will find the USB COM port in the system configuration (in this case COM5): This port is used in the PC software to communicate with the Instrument. bbe BenthoTorch Manual...
-
Page 35: Bbe++ Software
(http://www.bbe-moldaenke.de/log-in/ The Windows autorun function should start the installation automatically. If it does not, open the Explorer and click on setup.exe on the CD for installation. Welcome window: click “N >” bbe BenthoTorch Manual Page 35... - Page 36 Software Choose the destination folder and click “N >” Choose a new start menu folder and click “N >” Choose your preferred language and click “N >” bbe BenthoTorch Manual Page 36...
-
Page 37: Desktop Icon Of The Bbe++ Software
The setup installs an icon for the bbe++ software on the desktop (if chosen during installation). SOFTWARE IN THE TART MENU The bbe++ folder in the start menu contains: bbe++ software installed manuals link to the data folder of bbe++ bbe BenthoTorch Manual Page 37... -
Page 38: Software Update
OOLS of operating the instruments. • contains the items to calibrate different bbe instruments (advanced functionality level only) ALIBRATION • contains information about the current bbe++ version. bbe BenthoTorch Manual Page 38... -
Page 41: General Considerations For Storing And Displaying Data And Parameters In Bbe
After opening a database file, the data of different instruments of the same type may be displayed simultaneously. To display the data of another type of instrument from the same database file, this file can be opened more than once. bbe BenthoTorch Manual Page 41... -
Page 42: Who Can Access To The Parameters Of The Instruments
ESKTOP OF THE BBE OFTWARE Toolbar Data table Toolbar Instrument Graph 1 Serial number, voltage of Graph 2 the battery, internal clock OOLBAR Toolbar to navigate within the datasets. OOLBAR INSTRUMENT Toolbar to operate the instrument bbe BenthoTorch Manual Page 42... - Page 43 UND TABLE VIEWS User configurable windows with graphs and tables. ERIAL NUMBER VOLTAGE OF THE BATTERY INTERNAL CLOCK Display of the data of the connected instrument: serial number, voltage of the battery and internal clock. bbe BenthoTorch Manual Page 43...
- Page 44 The Menus The File Menu contains all the input/output functions. Creates a new database file for data and parameters. If the new database already exists, the existing database is deleted after confirming the following message: bbe BenthoTorch Manual Page 44...
- Page 45 Close Closes the active database. Import (FluoroProbe / AlgaeTorch / BenthoTorch) This function is used to import *.FLP files into the database. These files can be results transferred from the FluoroProbe to a USB stick or files generated by the first version of the FluoroProbe software.
- Page 46 In case of FluoroProbe data, the results are recalculated from the raw data after importing. The calculation procedure takes place in subsequent steps. After importing all data, a success message is shown. bbe BenthoTorch Manual Page 46...
- Page 47 ”) are exported. INDOW ELECT Export (KMZ) – AlgaeTorch / BenthoTorch / FluoroProbe This item is used to export geo data from instruments with GPS receiver to be displayed in Google Earth. Export (ToxTest protocol) – AlgaeLabAnalyser only This item is used to export the results of toxicity tests conducted with the AlgaeLabAnalyser to Excel.
- Page 48 Data Directory Opens the explorer with the current data directory to copy or rename the data base. This is the same function as in the start menu up to Windows 7. Exit Terminates the program. bbe BenthoTorch Manual Page 48...
- Page 49 Please note: only the columns from the active view are exported. • click on “E ” • open Excel with an empty datasheet • click on “E ” in Excel ASTE bbe BenthoTorch Manual Page 49...
- Page 50 To edit the comment of one or more datasets mark the datasets in the table view. A dataset can be marked with a mouse click. Multiple datasets can be marked be pressing Ctrl key while clicking on the dataset required. bbe BenthoTorch Manual Page 50...
- Page 51 Edit comments or use right click on the marked datasets: Enter the new comment for the selected data: Click OK: Delete Data – advanced functionality only To delete data, mark the datasets as described above. bbe BenthoTorch Manual Page 51...
- Page 52 It depends on the user level, whether a parameter is shown or not. The higher the user level, the more parameters are shown. For example of parameter listings for user levels, please see the examples below. bbe BenthoTorch Manual Page 52...
- Page 53 The Menus Access level “advanced functionality”: Access level “User”: Depending on the parameters and on the access level, the parameters are read only or read and write bbe BenthoTorch Manual Page 53...
- Page 54 Each set of parameters can be identified by its time and date. Edited parameter sets or templates have an additional name given by the user. YPE OF PARAMETER Each tab shows the parameters of a specific topic. bbe BenthoTorch Manual Page 54...
- Page 55 Shows the current values of the parameters. Depending on the type of operation the value can be edited. History – advanced functionality only Displays the parameters of the active dataset. The history is also available on the Context Menu in table view: bbe BenthoTorch Manual Page 55...
- Page 56 The recalculation option is available in all instruments except for the AlgaeTorch. For the BenthoTorch the recalculation is limited to the recalculation by using another parameter set from the BenthoTorch. Editing of the parameter sets and templates are not available for the BenthoTorch.
- Page 57 The Menus 4. To create a new parameter set (not in the BenthoTorch), select one, click “C ” and enter a name REATE COPY for this parameter set. 5. Select the new parameter set and edit the settings as described in the “Template” section. Please note the number and type of parameters shown depends on the user-level.
- Page 58 1. Select the instrument and time period (“W ”) INDOW ELECT 2. Go to “P ” ARAMETERS ECALC 3. Click “U ”. Please note: This item is only available when recalculated data are available in the selected time period. bbe BenthoTorch Manual Page 58...
- Page 59 Select the parameter sets to be deleted and click “D ”. ELETE Toolbar Displays or hides the toolbar. The toolbar allows quick access to some important instructions: Copy graphic or table to clipboard New database Open the Settings dialog Open database bbe BenthoTorch Manual Page 59...
- Page 60 Concentration vs. Time graphs. go to the first dataset one page backwards one page forwards go to the last dataset Period The toolbar “Period” contains buttons to scale the time axes to a given value: bbe BenthoTorch Manual Page 60...
- Page 61 Window – Advanced functionality only This menu contains commands to show, arrange and edit different views to display the data. New Table Window Opens a new window and displays the data according to the selected window type. bbe BenthoTorch Manual Page 61...
- Page 62 The following diagram shows the development of different algae classes measured with the bbe FluoroProbe. New Single Value View Opens a new window and displays the data of one data-set according to the selected window type. bbe BenthoTorch Manual Page 62...
- Page 63 The data-set is shown in larger digits to help the user read the display even in bright sunlight. The latest data-set is shown. The “Single Value View” can be adapted to the screen by changing size and/or proportion of the window: Cascade Arranges the windows one behind the other. bbe BenthoTorch Manual Page 63...
- Page 64 Selects the time range of data to be selected. It is possible to select a fixed time range such as “last month” or to do a manual selection by entering a range F “date” T “date”. Hint: Further selections can also easily be made in a graphic window. bbe BenthoTorch Manual Page 64...
- Page 65 To explain the function of the View Editor, in the following steps a table view showing date/time, total chlorophyll concentration, Bluegreen concentration and depth is generated as an example. View Selection 1. Open the view editor: 2. Choose the type of instrument the view is to be used for (in the example “FluoroProbe”). bbe BenthoTorch Manual Page 65...
- Page 66 8. Click on “Total conc. [µg/l]” and ”U ” to change the order. 9. Click “Next”. General Properties The General Properties page allows the user to change the background color of a “Single value” view. bbe BenthoTorch Manual Page 66...
- Page 67 10. Click on the color picker box behind „Background color“ and choose a new color. The chosen color is now shown in the color picker box Example of a change in background color: Save View 11. Enter a name for the view. bbe BenthoTorch Manual Page 67...
- Page 68 13. The new view is now available in the Window menu. ENERATING AND EDITING A GRAPHIC VIEW WINDOW To explain this function, in the following steps a graphic view showing date/time and total chlorophyll concentration is generated as an example. View Selection bbe BenthoTorch Manual Page 68...
- Page 69 In case of a user-defined view, the custom view can be deleted (“D ”). ELETE 5. Click “N ”. Independent Axis 6. Choose the design according to the given examples (in the example Y-Axis) Field Configuration bbe BenthoTorch Manual Page 69...
- Page 70 Some properties can be set for each axis. For the first axis, this is the position and the direction. Normally the first axis is on the lower or left side of the graph. The direction is normally defined as: bbe BenthoTorch Manual Page 70...
- Page 71 Y-axis and inverted position of the X-axis. 10. Click “OK” to confirm the settings. 11. Click “N ”. 12. Now the data and settings for the other axis can be selected. bbe BenthoTorch Manual Page 71...
- Page 72 13. After selecting one type of data, only those types which have the same unit(s) remain in the right column. 14. For example, “Total chlorophyll concentration” and “Bluegreen” have to be selected here. Axis Properties - second axis bbe BenthoTorch Manual Page 72...
- Page 73 15. Click “Next” Attributes This sets the color and size of the dots and lines as well as the color of the background. 16. Set the value in the attributes window according to your needs. bbe BenthoTorch Manual Page 73...
- Page 74 For illustration, please see the examples with connected and unconnected dots, different sizes and background colors. Different dot sizes: Different background colors: Column Attributes bbe BenthoTorch Manual Page 74...
- Page 75 Unconnected dots / connected dots: 17. Click “Next” Save view 18. Enter a new name for the view. It is not possible to edit pre-defined views. Please store a view based on a pre-defined view with a new name. bbe BenthoTorch Manual Page 75...
- Page 76 4. Choose one existing view to edit or as a template for a new view. The delete button is used to delete a view. It is not possible to delete pre-defined views. 5. Click “N ” bbe BenthoTorch Manual Page 76...
- Page 77 10. Enter a new name for the view. It is not possible to edit pre-defined views. Please store a view based on a pre-defined view with a new name. 11. The new view is now available in the “File” menu. bbe BenthoTorch Manual Page 77...
- Page 78 1..2..3..Shows all the currently opened windows. OOLS Menu (advanced functionality) Menu (basic functionality) Settings Here, all the preferences for the general functionality of bbe++ can be set. bbe BenthoTorch Manual Page 78...
- Page 79 ISPLAY Enter the time period which defines the maximum interval between two measurements of the same series. The setting is used for the “Next measurement” button in the toolbar. bbe BenthoTorch Manual Page 79...
- Page 80 Furthermore, this setting is used to control the drawing of lines between two dots. If the interval between two measurements is shorter than the given interval, a line is drawn – otherwise not: Minimal interval set to 10 minutes Minimal interval set to 1 minute bbe BenthoTorch Manual Page 80...
- Page 81 To make entries for an other type of instrument, the default type has to be changed before. Offline Mode: Choose the offline mode to display data of different type of instruments. If the offline mode is active, no measurement is possible. bbe BenthoTorch Manual Page 81...
- Page 82 To generate a new view macro: 1. Arrange the windows. 2. Enter the name of the new view. 3. Check the “Use at program start” box as required. 4. Confirm. bbe BenthoTorch Manual Page 82...
- Page 83 Depending on the checked options more or less information is stored in the file “error.log” in the program folder of bbe++ software. HORTCUTS With the F8 key, one single view can be retrieved. Please enter the single view macro to be used for this. bbe BenthoTorch Manual Page 83...
- Page 84 This tab shows a list of the available languages of the bbe++ software. To change the language, choose the language you wish and click “OK”. The bbe++ software must be restarted for the changes to take effect. bbe BenthoTorch Manual Page 84...
- Page 85 To configurate the devices goto Tools -> device -> … . This item is not available for all instruments. Enable advanced/basic functionality Change between advanced and basic functionality. See also Tools -> Settings -> Access. bbe BenthoTorch Manual Page 85...
- Page 86 Once the DEMO mode is selected, the submenu changes to the FluoroProbe entries: LGAE ORCH ENTHO ORCH UBMENU Enter comment at start of measurement: Check to enter one or more comments when starting the measurement procedure. bbe BenthoTorch Manual Page 86...
- Page 87 The software does not look for older, not-imported data to reduce the importing time. Parameters utility Receiving the complete parameters set from the AlgaeTorch / BenthoTorch and sending a Parameters file to the instrument. This is supplied by the bbe service in most of the cases. SQL Script This function can be used to run an SQL script on the database to reorganise it or to do some special calculations.
- Page 88 The Views ABLE VIEWS A table view is opened by “W “. INDOW ABLE ABLE Within the list view, the right mouse button offers detailed information about the selected data set. bbe BenthoTorch Manual Page 88...
- Page 89 ISTORY OF ARAMETERS see the description of the data menu. Edit comment allows the user to change the comments of a specific data set retrospectively. DIT COMMENTS The dropdown list contains previously entered comments (if applicable). bbe BenthoTorch Manual Page 89...
- Page 90 The list view is sorted by date/time. It can be sorted by any other column by clicking on the header of the column. Clicking twice leads to the reversed order. Sorted by time/date ascending: Sorted by time/date descending: bbe BenthoTorch Manual Page 90...
- Page 91 13. Navigation within the data Select data of interest Please click and draw the mouse to select the required data. A pop-up window is shown to choose the axis to which the selection is to be applied. bbe BenthoTorch Manual Page 91...
- Page 92 Y only only the selection on the vertical axis is applied. X and Y the selection on the horizontal and the vertical axis is applied. X only applied bbe BenthoTorch Manual Page 92...
- Page 93 The Menus Y only applied X and Y applied Right-click menu bbe BenthoTorch Manual Page 93...
- Page 94 In the auto-scaling mode, the graph looks as if there are extreme variations, but the range is very small due to the auto-scaling. In this case, it is better to use the options: lower limit: lower than bbe BenthoTorch Manual Page 94...
- Page 95 Enables the auto-scaling feature. The axis will be scaled so that all selected data are visible. Parameters Show the parameters of the data-set Default scaling Click here to undo all the changes in the scaling options. bbe BenthoTorch Manual Page 95...
- Page 96 Factor to convert µg/l in cells /l Service Cellcount factor Diatoms cells/µg/cm² Factor to convert µg/l in cells /l Service Global correction factor 1/100 Factor to adapt the results to a local reference method Time to Auto Power- Downminutes bbe BenthoTorch Manual Page 96...
- Page 97 Expert req. val. LED 2 [nm] digits For brightness control Expert req. val. LED 3 [nm] digits For brightness control Expert Name algae class 0 Expert Name algae class 1 Expert Name algae class 2 bbe BenthoTorch Manual Page 97...
- Page 98 ENTHO ORCH ENERAL REMARKS The bbe AlgaeTorch and bbe BenthoTorch are equipped with a GPS module that allows the user to determine the position of each measurement. The position data are stored additionally with each dataset within the instrument. For data evaluation, the results can be read from the instruments display or transferred to the bbe++ PC software.
- Page 99 The display shows the date and time of the latest result. Touch “more” as long as longitude / latitude can be read: 54°20.3644`N 10°05.8699`E more <- -> ESC ATA EVALUATION WITHIN BBE After importing the data to bbe++ go to “Window -> New list window -> Default” to display results and position: bbe BenthoTorch Manual Page 99...
- Page 100 If the longitude / latitude columns are not available, use the right mouse button “-> Data selection” to add these columns. ATA EXPORT TO OOGLE EARTH To display the data with Google Earth, execute the following steps: • Activate the GPS measurement within the Algae/BenthoTorch • Conduct the measurements • Transfer the data to bbe++ on your PC •...
- Page 101 The GPS module bbe BenthoTorch Manual Page 101...
- Page 102 1. Get the Software “BBEFirmwareTool.exe” from bbe service 2. Get the latest firmware version from bbe service 3. Charge the AlgaeTorch resp. BenthoTorch 4. Connect the AlgaeTorch/BenthoTorch to a PC 5. Start BBEFirmwareTool.exe: 6. Choose the COMport 7. Select the firmware update file from your PC...
- Page 103 Update of the firmware 8. Click OK. The software starts checking the device, its current software version and the status of the internal battery. If everything is fine, the firmware update starts. Afterwards the AlgaeTorch/BenthoTorch reboots. 9. The version of the current firmware can be checked at the device display in the settings menu (Settings - >...
- Page 104 Instrument Does Not Start • rechargeable battery is empty • power supply is not connected • timing problem when turning the BenthoTorch. Try again a bit more slowly or quickly. Use the magnetic switch, if available. Results vary • Replicate and average the measurements on one stone to reduce the effects of patchiness.
- Page 105 Options telescopic rod, nylon shoulder bag, SDI-12 with bbe converter P.O. Box 4, 6987 ZG Giesbeek Nijverheidsstraat 30, 6987 EM Giesbeek, The Netherlands T +31 313 880 200 E info@eijkelkamp.com www.eijkelkamp.com bbe BenthoTorch Manual Page 105...
Need help?
Do you have a question about the BenthoTorch and is the answer not in the manual?
Questions and answers