Table of Contents
Advertisement
Available languages
Available languages
Quick Links
Cat. No. / No de Cat.
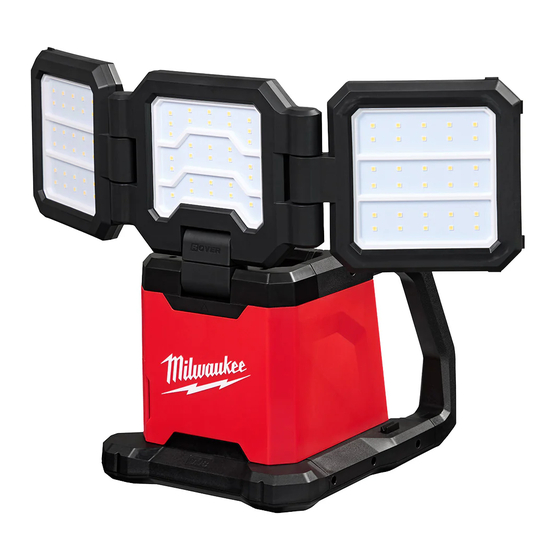
2368-20
M18™ ROVER™ DUAL POWER TRIPLE-PANEL FLOOD &
AREA LIGHT
LAMPE DE ZONE ET PROJECTEUR TRIPLE PANNEAUX À
PUISSANCE DOUBLE M18™ ROVER™
LÁMPARA DE ÁREA Y REFLECTOR DE TRIPLE PANEL CON
ALIMENTACIÓN DOBLE M18™ ROVER™
WARNING
WARNING
AVERTISSEMENT
AVERTISSEMENT
comprendre le manuel.
comprendre le manuel.
ADVERTENCIA
ADVERTENCIA
To reduce the risk of injury, user must read and understand operator's manual.
To reduce the risk of injury, user must read and understand operator's manual.
Afin de réduire le risque de blessures, l'utilisateur doit lire et bien
Afin de réduire le risque de blessures, l'utilisateur doit lire et bien
Para reducir el riesgo de lesiones, el usuario debe leer y entender el manual.
Para reducir el riesgo de lesiones, el usuario debe leer y entender el manual.
OPERATOR'S MANUAL
MANUEL de L'UTILISATEUR
MANUAL del OPERADOR
Advertisement
Table of Contents

Related Manuals for Milwaukee M18 ROVER 2368-20


Summary of Contents for Milwaukee M18 ROVER 2368-20
- Page 1 OPERATOR'S MANUAL MANUEL de L'UTILISATEUR MANUAL del OPERADOR Cat. No. / No de Cat. 2368-20 M18™ ROVER™ DUAL POWER TRIPLE-PANEL FLOOD & AREA LIGHT LAMPE DE ZONE ET PROJECTEUR TRIPLE PANNEAUX À PUISSANCE DOUBLE M18™ ROVER™ LÁMPARA DE ÁREA Y REFLECTOR DE TRIPLE PANEL CON ALIMENTACIÓN DOBLE M18™...
-
Page 3: General Power Tool Safety Warnings
GENERAL POWER TOOL • Remove any adjusting key or wrench before turning the power tool on. A wrench or a key left SAFETY WARNINGS attached to a rotating part of the power tool may Read all safety warnings, instruc- WARNING result in personal injury. -
Page 4: Extension Cords
Do not use this tool if you do not understand these operating instructions or you feel the work is beyond your capability; contact Milwaukee Tool or a trained professional for additional information or training. • Maintain labels and nameplates. These carry im- portant information. -
Page 5: Specifications
SPECIFICATIONS SYMBOLOGY Cat. No............2368-20 Volts Volts.............. 18 DC Battery Type ..........M18™ Direct Current Charger Type..........M18™ Alternating Current AC Input Volts..........120 V AC Input Amps ..........0.5 A Amps DC Input Volts ..........18 V DC Input Amps ...........2 A Hertz Lumen Output Range ......400 - 4500 lm Ingress Protection.......... -
Page 6: Operation
Ensure the hanging surface is OPERATION WARNING sturdy and the rafter hook is se- To reduce the risk of injury, do not WARNING cure before using. A falling light could strike look directly into the light when the people or objects below. light is on, causing vision damage. -
Page 7: Maintenance
Keep the tool, battery pack and charger in good defects in material and workmanship. Subject to certain exceptions, MILWAUKEE will repair or replace any part on this power tool which, repair by adopting a regular maintenance program. after examination, is determined by MILWAUKEE to be defective... -
Page 8: Sécurité Électrique
SÉCURITÉ INDIVIDUELLE RÈGLES DE SÉCURITÉ GÉNÉRALES RELATIVES AUX OUTILS ÉLECTRIQUES • Rester attentif, prêter attention au travail et faire preuve de bon sens lors de l'utilisation de tout Lire toutes les consignes AVERTISSEMENT outil électrique. Ne pas utiliser cet appareil en de sécurité, consignes, cas de fatigue ou sous l'influence de l'alcool, illustrations et spécifications fournies avec cet... -
Page 9: Utilisation Et Entretien De La Batterie
; peut créer un risque de blessures et d'incendie. veuillez contacter Milwaukee Tool ou un professionnel • Lorsque le bloc-piles n'est pas utilisé, le tenir formé pour recevoir plus d'information ou formation. -
Page 10: Cordons De Rallonge
CORDONS DE RALLONGE SPÉCIFICATIONS Si l'emploi d'un cordon de rallonge est nécessaire, No de Cat..........2368-20 un cordon à trois fils doit être employé pour les outils Volts.............. 18 CD mis à la terre. Pour les outils à double isolation, on Type de batterie ...........M18™... -
Page 11: Montage De L'outil
PICTOGRAPHIE MONTAGE DE L'OUTIL Ne recharger la batterie AVERTISSEMENT Volts qu'avec le chargeur spéci- fié. Pour les instructions de charge spécifiques, Courant direct lire le manuel d'utilisation fourni avec le chargeur Courant alternatif et les batteries. Insertion / Retrait de la batterie Ampères Pour retirer la batterie, enfoncer les boutons de déverrouillage et la tirer hors de l'outil. - Page 12 Retournez votre outil à un centre de service La lampe peut être montée de plusieurs manières : MILWAUKEE accrédité pour obtenir le service. Après • À l'aide du crochet de chevron. une période pouvant aller de 6 mois à un an, selon •...
- Page 13 Il faudra retourner l'outil poussière. Gardez les outil propres, à sec et ex- électrique à un centre de service en usine MILWAUKEE ou à un poste emptes d'huile ou de graisse. Le nettoyage doit d'entretien agréé...
-
Page 14: Seguridad En El Área De Trabajo
ADVERTENCIAS DE SEGURIDAD SEGURIDAD PERSONAL GENERALES PARA LA • Manténgase alerta, atento a lo que está haciendo y HERRAMIENTA ELÉCTRICA utilice el sentido común al utilizar una herramienta eléctrica. No utilice una herramienta eléctrica Lea todas las advertencias ADVERTENCIA mientras está cansado o bajo la influencia de de seguridad, instrucciones, drogas, alcohol o medicamentos. -
Page 15: Mantenimiento
Milwaukee Tool o con • Utilice las herramientas eléctricas únicamente un profesional capacitado para recibir capacitación con baterías específicamente diseñadas. -
Page 16: Especificaciones
EXTENSIONES ELECTRICAS ESPECIFICACIONES Las herramientas que deben conectarse a tierra Cat. No............2368-20 cuentan con clavijas de tres patas y requieren Volts.............. 18 CD que las extensiones que se utilicen con ellas sean Tipo de batería ..........M18™ también de tres cables. Las herramientas con doble Tipo de cargador ..........M18™... -
Page 17: Descripcion Funcional
DESCRIPCION FUNCIONAL ENSAMBLAJE Recargue la batería sólo con ADVERTENCIA el cargador especificado para ella. Para instrucciones específicas sobre cómo cargar, lea el manual del operador sumin- istrado con su cargador y la batería. Como se inserta/quita la batería en la herramienta Para retirar la batería, presione los botones de liberación y jale de la batería para sacarla de la... - Page 18 Si aun asi la herramienta no trabaja correctamente, regrésela, con el cargador y la batería, a un centro de servicio MILWAUKEE. Imanes Orificios para colgar...
- Page 19 Mantenga los herramienta, limpios, secos y libres compra a menos que se indique lo contrario. Al devolver la herramienta eléctrica a un centro de servicio de fábrica de MILWAUKEE o a una de aceite o grasa. Use solo jabón neutro y un trapo estación de servicio autorizada de MILWAUKEE, es necesario que la...
- Page 20 Miguel de Cervantes Saavedra No.301 Piso 5, Torre Norte 11520 Colonia Ampliación Granada Miguel Hidalgo, Ciudad de Mexico, Mexico Modelo: Fecha de Compra: Sello del Distribuidor: MILWAUKEE TOOL 13135 West Lisbon Road Brookfield, WI 53005 USA 58148977d1 01641000101Q-01(A) 04/24 Printed in...
Need help?
Do you have a question about the M18 ROVER 2368-20 and is the answer not in the manual?
Questions and answers