Table of Contents
Advertisement
Quick Links
Advertisement
Table of Contents

Related Manuals for Penlon Prima 460


Summary of Contents for Penlon Prima 460
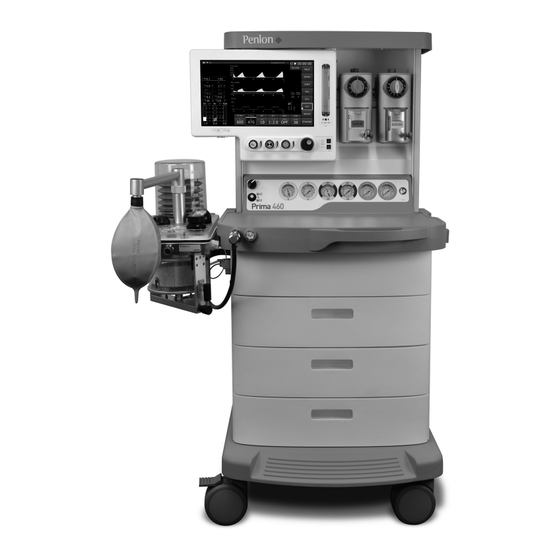
- Page 1 User Manual Prima 460 Anaesthetic Machine A N A E S T H E S I A S O LU T I O N S...
- Page 3 The machine must be serviced to the schedule detailed in section 8. Details of these service operations are given in the Prima 460 service manual, available only for Penlon-trained engineers. For any enquiry regarding the servicing or repair of this device,...
- Page 4 Anaesthesia systems have the capability to deliver mixtures Prima 460 anaesthetic machine. of gases and vapours to the patient which could cause injury Information contained in this manual is correct at the date of or death unless controlled by a qualified anaesthetist.
-
Page 5: Table Of Contents
Ventilation Modes ..................27 Prima 460... - Page 6 Breathing System Connections ............... . . 68 Prima 460...
- Page 7 Manometer ..................98 Prima 460...
- Page 8 Appendix 8 Electromagnetic compatibility (EMC) ..............126 Prima 460...
-
Page 9: User Responsibility
This device and any of its constituent parts must be repaired only in accordance with written instructions issued by Penlon Limited and must not be altered or modified in any way without the written approval of Penlon Limited. The user of this equipment shall have the sole responsibility... -
Page 10: Warnings And Cautions
General warnings 2. To isolate the machine from the mains power supply, 1. The Prima 460 must not be altered or modified in any way disconnect the flexible mains cable from the hospital without the written approval of Penlon Limited. - Page 11 Vaporizers 2. Attaching or removing a medical gas cylinder: 1. The Prima 460 machine must only be used with a vaporizer that complies with BS EN ISO 80601-2-13. a) Follow appropriate manual handling guidelines when In addition, the vaporizer must be a Selectatec- lifting.
- Page 12 Software error. Calibration and output checks must be carried out by a Penlon-trained engineer, following the procedure in the 9. The High and Low airway pressure alarms are important Service Manual. for patient care. It is important that the sensor is properly located in the expiratory limb of the circuit 2.
- Page 13 10. Connect the external communication ports only to approved is used clinically. devices using protocol provided by Penlon Ltd. Refer to Check that at all times that the switch is free to move section 3.15.
- Page 14 2. Do not allow any liquid to run into the heater pad area. Do not autoclave the heater pad. 3. Autoclaving the absorber canister: a) Discard the absorbent and drain the condensate from the canister, then refit the canister to the absorber assembly, before autoclaving Prima 460 User Manual...
-
Page 15: Purpose
Intended Use Configurations The Prima 460 is intended for use by a trained, professional, The Prima 460 has been designed to give a wide choice of clinical operator in a professional healthcare environment, and configurations and accessories, including: must be continually attended when in use. -
Page 16: Description
Do not obstruct the extractor fan outlet (4). Mounting Systems a) Top shelf fitted with a secure GCX™ mounting system (5) for patient monitors b) Upper and lower GCX™ compatible aluminium uprights (6), and medical rail (7) for additional accessory mounting. Prima 460 User Manual... -
Page 17: Controls And Indicators
6. High priority alarm 7. Low and Medium priority alarm 8. Navigator wheel 9. Anaesthesia system switch 10. Gas flow controls - O2 / Air / Nitrous oxide 11. Oxygen supply visual indicator 12. Oxygen flush valve button Prima 460 User Manual... -
Page 18: Gas Circuit Components
3.3.5 Secondary Pressure Regulator The secondary regulators for oxygen and nitrous oxide enhance the performance of the mechanical AHD system. Secondary regulation also stabilises the output from the flowmeters. Prima 460 User Manual... -
Page 19: Flow Tube - Total Combined Fresh Gas Flow
• Masimo Nomoline ISA Sidestream AX+ and OR+ modules (optional - see Appendix 7) NOTE If a Masimo Nomoline OR+ gas module with paramagnetic O2 monitoring is fitted, the integral oxygen monitor system (fuel cell sensor type) is disabled. Refer to Appendix 7. Prima 460 User Manual... -
Page 20: Safety Devices And Systems
3.4.3.2 Oxygen Supply Visual Indicator The indicator (1) is mounted on the front of the machine and is operated from the oxygen supply. The indicator shows GREEN when the supply is at working pressure, and RED if the pressure falls. Prima 460 User Manual... -
Page 21: Oxygen Monitor (Fuel Cell Sensor)
(1), refer to section 3.5. CAUTION The oxygen control is restricted to prevent the needle valve from fully closing. This ensures a minimum oxygen basal flow. DO NOT attempt to close the flow to zero. Do not overtighten the knob. Prima 460 User Manual... -
Page 22: Anaesthesia System Switch
Pressure gauges (50 mm diameter) are located on the front panel (1). The gauges are colour coded and labelled. The gauge for Air is positioned between Oxygen and Nitrous Oxide. Unused gauge positions are blanked out. The gauges are calibrated in kPa x 100. Prima 460 User Manual... -
Page 23: Vaporizer Mounting System
Removal of the vaporizer from the station closes the valves on that station. Vaporizer interlock system Selectatec compatible vaporizer interlock systems are described in the literature supplied with the vaporizer. See also, section 5.5. Prima 460 User Manual... -
Page 24: Gas Outlet Options And Oxygen Flush Control
The emergency oxygen flush valve button (5) is marked ‘O2+’. Depressing the button provides a delivery of between 25 - 75 L/min of oxygen through the selected gas outlet (2 or 4). Releasing the button allows the spring-loaded valve to return to its normal position. Prima 460 User Manual... -
Page 25: Electrical Power Supply
3.9.1 Mains Power Supply The Prima 460 has a centralised power supply that supplies the machine, the ventilator, display, and absorber and spirometer systems. NOTE 1. The anaesthetic system switch (2) controls the electrical supply and must be in the ‘On’... -
Page 26: Connecting Other Devices
LOW BATTERY condition, the machine will not function correctly until the back-up battery voltage raises above the LOW BATTERY level. 3. A fourteen-hours recharge will be necessary to bring a completely discharged back-up battery to full charge. Prima 460 User Manual... -
Page 27: Absorber
60 cmH2O excess pressure relief valve. WARNING The APL valve is out of circuit when the system is in Open Closed ‘Ventilator’ mode. The ventilator is equipped with a pressure Clockwise rotation relief valve. Prima 460 User Manual... - Page 28 WARNING The adjustable pressure limiting (APL) valve (2) is out of circuit when the system is in ‘Ventilator’ mode. Prima 460 User Manual...
-
Page 29: Heaters
Breathing system gas path: integrated heat pad. b) Spirometer sensors: heater elements 3.10.3 Absorber rear components and connections 1. Spirometry interface 2. Spirometer heater ‘system active’ light 3. Exhaust 4. Patient pressure port 5. Fresh gas input 6. Drive gas input. Prima 460 User Manual... -
Page 30: Touchscreen
11. Masimo ISA AX+ and ISA OR+ module display (if installed) NOTE Additional screen displays for optional Masimo ISA AX+ and ISA OR+ modules are shown in Appendix 7. Resetting variable parameter values See section 3.12.7.4 (Selecting Functions and Parameters). Prima 460 User Manual... -
Page 31: Fresh Gas Display
Setting some parameters to an extraordinarily high value will require the user to confirm the change a second time. When a second confirmation is required, “RE-CONFIRM HIGH SETTING” will be displayed in the Message Information Area. Prima 460 User Manual... -
Page 32: Sub-Menu Operation
Select the Third Waveform option to display a third waveform. Use the sub-menu to alter the third waveform to one of the following configurations: 1. None, No third waveform displayed 2. P-T, Pressure against Time 3. V-T, Volume against Time Prima 460 User Manual... -
Page 33: Alarm Menu
(15 to 180 seconds). 8. ALARM VOLUME defaults to 100%; the user can alter to between 50 and 100%. 9. BACK LIGHT LEVEL defaults to 0%; the user can alter to between 0 and 100%. Prima 460 User Manual... -
Page 34: Gas Mixture Selection
Press the control button (2) to start the stopwatch. When in use, the icon (3) is displayed. To pause the stopwatch, press the button (3). Press again to recommence timing. To reset to zero, press the reset button (4). Prima 460 User Manual... -
Page 35: Ventilator
SMMV is not displayed if SMMV/SIMV or spirometry are disabled. SIMV SIMV is not displayed if SMMV/SIMV or spirometry are disabled. PSV is not displayed if support modes or spirometry are disabled. Spontaneous Available when the absorber is switched to bag mode. Prima 460 User Manual... -
Page 36: Waveform Area
BAG or VENT mode. VENT The SIGH symbol is visible when the SIGH MAIN system SIGH option is active. Inspiratory The symbol is visible when the pause INSPIRATORY PAUSE option is active. Prima 460 User Manual... -
Page 37: Parameter Area
The inspiration time being less than 200 ms, or b) The required drive gas flow falling outside the range 2 to 75 L/min. Attempts to do this will result in an “INCORRECT RATE OR RATIO” alarm being displayed. Prima 460 User Manual... - Page 38 4 to 70 cmH2O To select the range 41 to 80 cmH2O an additional confirmation “RE- CONFIRM HIGH SETTING” is required. On entry to the pressure-controlled ventilator mode, the pressure target parameter defaults to 10 cmH2O. Prima 460 User Manual...
-
Page 39: Alarm Message Area
Use the menu systems to set the required limits. Press the menu switch on the front panel and select ALARM SETTING, or use the touchscreen. High Priority Alarms High priority alarms are accompanied by five ascending tones that are repeated. Prima 460 User Manual... -
Page 40: Configuration
The options will remain, even after the ventilator is turned off. 3.12.7.3 Site Default Settings The values listed are examples. Adjust the parameter values from within the Site Defaults menu (1). Press to confirm the new settings for site defaults. Prima 460 User Manual... - Page 41 PRESSURE mode or PSV (pressure supported ventilation) mode the TARGET value or PSUPP value are pre- selected. Changing either of these limits in their active modes will maintain the value when changing between PSV, PRESSURE, and STANDBY modes. Prima 460 User Manual...
-
Page 42: Operational Capability
In addition, high fresh gas flows will lead to an increased VT being delivered to the patient. The patient must be monitored independently from the ventilator. It is the responsibility of the user to monitor the patient for adequate ventilation. Prima 460 User Manual... - Page 43 3. In compliance compensation mode any fresh gas used will be in addition to the set tidal volume. 3.12.9.4 Altitude Compensation This function monitors ambient pressure, and adjusts the delivered volume accordingly. Altitude compensation is automatically applied during calibration of the oxygen monitor. Prima 460 User Manual...
-
Page 44: Ventilation Modes
The screen will display the previous ventilation mode, highlighted in yellow, within the relevant box. The last used parameters will also be displayed. • In Standby mode, the on-screen underline (4) indicates the last used ventilation mode. Prima 460 User Manual... -
Page 45: Volume Mode
NOTE Pressure limit (3) will default to the previous Pressure Target value + 5 cmH2O At confirmation, the ventilator will switch to VCV Mode. NOTE Volume mode will commence at the beginning of an exhalation phase. Prima 460 User Manual... - Page 46 • Use the Navigator Wheel to select the required value. Press the Wheel to confirm, and exit the menus. The legend for Sigh will appear on the display Sigh function is cancelled when Standby is selected. Prima 460 User Manual...
- Page 47 If the maximum pressure limit is achieved, the ventilator cycles to the expiratory phase. 3.13.2.5 Touchscreen Access to Mode Configuration Options Touch the screen in the area containing the icons to access mode configuration options (including INSP PAUSE, SIGH), see section 3.12.4. Prima 460 User Manual...
-
Page 48: Pressure Mode
Site Defaults have been selected with preset values. • A high inspiratory flow is used to achieve and maintain the target pressure. • The exhaust valve operates to prevent excess pressure. • There is no Inspiratory Pause function in pressure mode. Prima 460 User Manual... -
Page 49: Prvc (Pressure-Regulated Volume Control) Mode
120 ml Adult: 100 to 1600 ml 510 ml 4:1 to 1:10 1 to 100 bpm 1 bpm 15 bpm PEEP OFF, 3 to 30 cmH2O 1 cmH2O Tslope 0 to 2 s 0.1 s 0.2 s Prima 460 User Manual... -
Page 50: Spontaneous Mode
2. The alarm mute time period is selectable through the alarm settings menu, or accessed by touching the alarm area of the screen. 3. When the alarm mute is selected, the mute period is displayed on the screen (2), and count-down starts. Prima 460 User Manual... - Page 51 The alarm message will be removed if the patient breathes. If re-triggered, the alarm message will be displayed again, but the audible alarm will remain muted if the mute period is still active. Prima 460 User Manual...
-
Page 52: Patient Support Modes
D = Mandatory breath at the end of the trigger window at the set V If the patient makes no effort to breathe during a cycle, a mandatory breath, at the end of the trigger window, will still be delivered at the preset volume and rate. Prima 460 User Manual... - Page 53 (at the set V If the patient makes no effort to breathe during a cycle, a mandatory breath, at the end of the trigger window, will still be delivered at the preset volume and rate Prima 460 User Manual...
- Page 54 During this transition the set value of PEEP will be unchanged. Prima 460 User Manual...
- Page 55 Select by touching the screen tab PEEP (1), or using the Navigator Wheel. The setting will flash. 2. Use the Navigator Wheel to set the required PEEP pressure. A confirm message will be displayed. 3. Press the Screen Tab, or the Navigator Wheel to confirm. Prima 460 User Manual...
-
Page 56: Spirometry
1. In Pressure vs. Time and Volume vs. Time modes the scale adjusts as Rate is changed (0 to 15 sec, 5 sec, 3 sec) 2. In Volume vs. Pressure mode the scale adjusts as ‘P limit’ is changed (-20 to 40, 60, 80 cmH2O). Prima 460 User Manual... -
Page 57: Alarms
The Alarm mute symbol is displayed adjacent to the Icons. The symbol is shown with a numeric value (1) that represents seconds of mute time that remains. If a Masimo Nomoline AX+ or OR+ module is installed refer to Appendix 7 - Alarms. Prima 460 User Manual... -
Page 58: Oxygen Monitor (Fuel Cell Sensor)
‘on’ in the sub menu (1). Scroll to O2 MONITOR, rotate the wheel to ‘on’, press the wheel to confirm. NOTE 1. The oxygen monitor defaults to the previous values for high and low alarm settings. Prima 460 User Manual... -
Page 59: Display
The oxygen percentage, set by the user, which the high alarm will be activated. Note that in certain conditions of excess pressure, the readout may show a value above 100%. To set the high alarm, see section 7.4.4. Prima 460 User Manual... -
Page 60: Oxygen Monitor Alarms
The switch will illuminate, and a single note will sound. The alarm mute cannot be operated: 1. Until the mute time is over, or the alarm condition has been rectified. 2. When oxygen concentration drops below 18%. Prima 460 User Manual... -
Page 61: Communication Ports
(tech.support@penlon.com). 3.16 Anaesthetic gas scavenge system (AGSS) The Penlon AGSS receiver (1) is supplied as an option, and is mounted on the side of the machine. All sources of expired anaesthetic gases (e.g. directed from the absorber APL valve, and the ventilator bellows patient gas exhaust), are directed internally to the outlet on the side of the machine. -
Page 62: Specification
240 mm Weight 5.7 kg (12.5 lb) Gas scavenging fixing Bracket on frame upright Common gas outlet: 22 mm male taper with coaxial 15 mm female taper connections Mass (weight): 130 kg (280 lb), including accessories Prima 460 User Manual... -
Page 63: Gas Supplies
152-241 kPa (22-35 psig) 152-241 kPa (22-35 psig) 207-283 kPa (30-41 psig) 207-283 kPa (30-41 psig) Fresh gas supply pressure: Safety valve 90 cmH2O 90 cmH2O NOTE Measured values are STPD (standard pressure and temperature and dry) conditional Prima 460 User Manual... -
Page 64: Auxiliary Gas Outlets - Optional
Three outlets, country specific Fuse (mains supply) Type T 2 AH, fused L and N 2 A, 250 V rating, 5x20 mm, anti-surge, ceramic Fuse (battery) Type T 5 AH, 5 A, 250 V rating, 5x20 mm, anti-surge, ceramic Prima 460 User Manual... -
Page 65: Absorber
15 V DC Current: 1.3 A at 15 V DC Electromagnetic Compatibility The Prima 460 meets the requirements of EN 60601-1-2 (electromagnetic compatibility - requirements and tests). Refer also to Appendix 8. Battery 12 V, 4 Ah, sealed, lead-acid battery... - Page 66 A ‘wet’ valve is defined as a valve in a flow of Pressure humidified gas, such that moisture is visible on (kPa) the surface of the valve. 0.02 0.04 0.06 0.08 0.10 Mode of Operation Mode of Operation: Continuous Prima 460 User Manual...
-
Page 67: Ventilator
2 to 50 L Breathing Circuit Pressure Range -10 to 100 cmH2O Rate 4 to 100 bpm I:E Ratio 1 : 0.2 to 1: 8.0 (normal operation) 1 : 2.0 to 1 : 8.0 (effective in support modes) Prima 460 User Manual... - Page 68 Delivered volumes ±10% (>300 ml) PRVC: ±15% (>300 ml) ±20% (100 to 300 ml) ±50%, or ± 10 ml, whichever is greater (<100 ml) High airway pressure limit ±5 cmH2O Rate (bpm) ±10% Tidal volume + (50±5%) Prima 460 User Manual...
- Page 69 None (always use a bacterial filter in the breathing system to protect the oxygen sensor). Fail Safe Mechanism Battery back-up in case of mains electricity failure Gas shut-off in the event of electronic failure Reliability Not applicable Waveform Tests Not applicable Volume Tests Not applicable Prima 460 User Manual...
-
Page 70: Oxygen Monitor (Fuel Cell Sensor)
The sensor measures O2 partial pressure, and its output will rise and fall due to pressure change (e.g. changes in barometric pressure, or breathing system pressure). An increase in pressure of 10% at the sensor inlet will produce a 10% increase in sensor output. NOTE Altitude compensation is automatically applied during calibration. Prima 460 User Manual... -
Page 71: Environmental
Classification according to the degree of protection against ingress of water: IPX0 (not protected). Labelling Refer to Appendix 4. Patient Class All patient types: No residual risks from phthalates that are carcinogenic, mutagenic, or toxic to reproduction. No latex-based products are present. Prima 460 User Manual... -
Page 72: Commissioning
4. Additional equipment placed on the top shelf must be securely attached. 5. MRI compatibility - Prima 460 is not MRI compatible. 6. This machine must only be used with Selectatec- compatible vaporizers installed on the backbar. -
Page 73: Electrical Supply
LOW BATTERY condition, the ventilator will not function correctly until the voltage raises above the LOW BATTERY level. 3. A fourteen hours recharge will be necessary to bring the battery to full charge. Battery care See Appendix 6 for battery care procedures. Prima 460 User Manual... -
Page 74: Absorber
Push in the tube as far as possible. b) Do not use excessive force. c) The connector end piece will also move inwards. d) Pull the tube carefully outwards. The end piece will be pulled outwards to the ‘locked’ position. Prima 460 User Manual... - Page 75 If a Masimo Nomoline ISA AX+ or OR+ Module is fitted, the integral oxygen monitor system (fuel cell sensor type) is disabled. 5.3.2.7 Exhaust port Connect the Exhaust gas outlet (14) to the anaesthetic gas scavenge system Y-piece. Refer to section 5.7. Prima 460 User Manual...
-
Page 76: Breathing System Connections
When the switch (3) is in the upper position (as illustrated) fresh gas is delivered to the outlet (4) at the rear of the machine, for connection to the absorber (5). The system operates in a closed circuit configuration. Prima 460 User Manual... -
Page 77: Vaporizers
1. The machine low pressure test (refer to section 6.3.1.3) incorporates a vaporizer leak test. 2. Always follow the procedures and checklist given in the instruction manual supplied with the vaporizer, particularly when filling the vaporizer with anaesthetic agent. Prima 460 User Manual... -
Page 78: Gas Supplies
Dust and dirt presents a fire hazard in the presence of high pressure gas. Leakage of high pressure gas can cause serious injury. 7. Open the cylinder valves one at a time and check the pressure on each gauge (4). Prima 460 User Manual... -
Page 79: Anaesthetic Gas Scavenge System (Agss)
A receiving system with a positive and negative pressure control function must be interposed. Installation - Penlon Anaesthetic Gas Scavenge System 1. The anaesthetic gas receiver (1) is fixed to the mounting system built into the side upright (2) of the machine. -
Page 80: Pre-Use Checks
6.3.1.2 Breathing System Hose, Reservoir Bag, Ventilator Connectors for the inspiratory hose and expiratory hose, and the reservoir bag connector are 22 mm male. All connectors comply with ISO 5356/1. Check all connections for gas tightness. Prima 460 User Manual... - Page 81 Pre-use Checks 6.3.1.3 Fresh Gas Supply Hose Connections Connection to Absorber The fresh gas hose (1) supplied with the machine has a Penlon connector for fitting to the inlet at the rear of the absorber. Connection to the Fresh Gas Outlet The hose has a 22 mm taper for connection to the fresh gas outlet of the anaesthetic machine.
-
Page 82: Start-Up Test
3. Set the anaesthesia system switch to the ON position. 4. Check that the ‘System operational’ status LED (3) is on. 5. Check that audible beep sounds are heard. 6. Check that the start-up screen is displayed. 7. Follow the on-screen instructions. Prima 460 User Manual... -
Page 83: Ventilator
(or disconnect the hose at the receiver). 4. a) Remove the bag (6), and set the Bag/Vent control (7) to Bag position. Ensure that the ventilator bellows (8) is empty, 5. Calibrate the spirometer via the ventilator menu procedure. Prima 460 User Manual... -
Page 84: Pressure Monitor Connections
2. If the tubing is undamaged and the connections are secure, the operation of the sensors must be checked by a service engineer. CAUTION The ventilator will continue to function, although the target pressure may be exceeded by up to 10 cmH2O. Prima 460 User Manual... -
Page 85: Leak Test / Compliance Value Calculation
Upper limit is 18 cmH2O (sufficient for normal breathing system capacities). b) The ventilator will continue to operate, irrespective of any detected leak. It is the responsibility of the user to determine if the detected leak is significant. Prima 460 User Manual... -
Page 86: Bellows Assemblies
Check for correct assembly, as illustrated (4). 4. Fit the paediatric bellows housing (7) to the base by pushing down, then twisting clockwise until the bayonet tabs completely engage. 5. Function test the ventilator - section 7.3.3.2. Prima 460 User Manual... -
Page 87: System Alarm Test
Air, if fitted, continues to flow. e) Reinstate the oxygen supply. Check that the flow of nitrous oxide is reinstated, and that the visual indicator (1) turns green again. NOTE All gases must be included in the pre-use check. Prima 460 User Manual... -
Page 88: Operating The Anaesthesia System
4. Turn the anaesthesia system switch (4) to the ON position. 5. Select the menu (5). 6. The device will prompt the user to perform a pre-use test. Press the ACCEPT button to access the test screen. Prima 460 User Manual... -
Page 89: Absorber Pre-Use Checks
7.2.1.1 Leak Test - Patient circuit fitted NOTE The Prima 460 must be fitted with a patient circuit complying with approved design parameters, at the selection of the qualified practitioner. The patient circuit components do not constitute part of the... - Page 90 (6). 5. Remove the bung and attach a spare reservoir bag to the inspiratory valve connector (5). 6. Turn on a 2 L/min oxygen flow and fully inflate this bag (and the absorber reservoir bag). Prima 460 User Manual...
- Page 91 10. Repressurise the system to 3 kPa (30 cmH2O) and turn off the gas flow. 11. Check that the pressure does not fall to zero within one minute, then open the APL valve to release pressure. 12. Repeat the absorber leak test - see section 7.2.1.1. Prima 460 User Manual...
-
Page 92: Ventilator Default Settings And Start-Up
2. SITE DEFAULT is editable in standby mode. a) Adjust the parameter values from within the Service menu (SITE DEFAULTS). b) Press to confirm the new settings for site defaults. Prima 460 User Manual... -
Page 93: Ventilating Neonates
Allowing for typical compliance in this configuration and a basal flow, the value should be between 600 ml and 800 ml. If the delivered tidal volume is outside this range, refer the ventilator to a trained engineer. Prima 460 User Manual... - Page 94 2. Set the bag/vent switch (1) on the absorber to ‘Bag’. 3. Set a flow of 5 L/min on the anaesthetic machine. 4. Use the breathing bag on the absorber to deliver a flow. 5. Check that fresh gas flows from the inspiratory port (2). Prima 460 User Manual...
-
Page 95: Weekly Checklist
Do not use the system if there is any malfunction. If the problem cannot be rectified, the system must be checked by a trained engineer. Bellows Check the condition of the bellows (1) and exhalation diaphragm valve (2). Prima 460 User Manual... -
Page 96: Oxygen Monitor System Set-Up (Fuel Cell Type)
21% oxygen, using medical air (or room air, see 7.4.2.2), which can be carried out after the primary calibration in 100% oxygen. Note that the system switch (1) must be in the ON position for gas delivery. Prima 460 User Manual... - Page 97 21% as follows. 16. Press the menu switch and select the O2 MONITOR AND SPIROMETRY sub-menu. 17. Scroll to CALIBRATION and press the navigation wheel (5) to select the calibration option. Prima 460 User Manual...
- Page 98 Allow the oxygen sensor to stabilise (30 seconds minimum). Check that the measured O2 concentration display (3) shows 100% (±1%). 10. Exit the menu system by pushing the menu button (4). 11. Turn off the gas flow, and switch the machine off. Prima 460 User Manual...
-
Page 99: Sensor Low Indication
3. Rotate the wheel to change the displayed alarm figure to the desired value, then press the wheel to confirm. 4. Scroll to ESCAPE FROM MENUS, press the wheel (3) to exit. 5. Turn off the gas flow, and switch the machine off (4). Prima 460 User Manual... -
Page 100: System Shut-Down Procedure
1. Check that the vaporizer is in the OFF position. 2. Turn the anaesthesia system switch (1) to the OFF position. 3. Wait for the power-down sequence (2) to be completed. 4. Disconnect electrical power. 5. Disconnect all gas pipelines. 6. Close the cylinder valves. Prima 460 User Manual... -
Page 101: User Maintenance
If a Masimo Nomoline ISA AX+ or OR+ Module is fitted, refer to Appendix 7. Servicing and Repair The Prima 460 machine must only be serviced or repaired by Penlon-trained engineers, according to the schedule and procedures given in the Service Manual. -
Page 102: Cleaning And Disinfection
Clean at the earliest opportunity, between patients. Appropriate disinfectants are isopropyl alcohol, or alcohol wipes (refer to CAUTION 2, above). Prima 460 User Manual... -
Page 103: Anaesthetic Gas Scavenging System
An effective, new heat and moisture exchanger with a bacterial filter should be used for every patient. 8.2.4 After cleaning Make sure that all cleaning agent residues are removed after cleaning. Allow all surfaces to dry thoroughly before clinical use. Prima 460 User Manual... -
Page 104: Absorber And Breathing System Components
CAUTION Do not reuse the heat and moisture exchanger / bacterial filter. Follow local regulations regarding disposal of hospital waste when components are discarded. 8.3.3 Remove the bag Remove the bag from the bag arm (3). Prima 460 User Manual... -
Page 105: Canister And Seals
Check that the carrier (6) is in place. Insert the pre-pack into the carrier in the canister. Bulk packed (loose) soda lime: Check that the three spacers (5) are in place, and place the container (4) in the canister. Prima 460 User Manual... -
Page 106: Manometer
Do NOT wash in an automatic cleaning/washing machine. 8.3.8 Absorber Assembly Removal and Sterilisation Instructions for removal and sterilisation are given in the Prima 460 service manual, available only for Penlon-trained service personnel. CAUTION 1. The canister may contain condensate. To drain the canister, refer to section 8.3.5. -
Page 107: Ventilator Patient Block Assembly - Cleaning And Sterilisation
Pack the control unit with material which is permeable to air and steam but has an effective maximum pore size which is small enough to exclude microbial contamination. All wrapping materials must comply with EN 868: Packaging Materials for Sterilization of Wrapped Goods. Prima 460 User Manual... - Page 108 (3) are engaged in their unions and the probe (4) locates in the port in the patient block. 4. Fit the securing knobs (5). 5. Function test the anaesthesia system before clinical use (refer to section 6). Prima 460 User Manual...
-
Page 109: Appendix 1. Standards
Appendix 1-3 Appendix 1. Standards The Prima 460 and all modules comply with the following standards: EN ISO 80601-2-13: Medical electrical equipment. Particular requirements for basic safety and essential performance of an anaesthetic anaesthetic machine. IEC 60601-1: Medical electrical equipment - Part 1: General requirements for basic safety and essential performance. -
Page 110: Appendix 4. Labelling
HL7 interface Serial port interface USB interface Do not sit. Loading: 10 kg Battery fuse label Brightness level (bright light) - Lighting system Heater Off: Lighting system Circuit breaker label Brightness level (dim light) - Lighting system Prima 460 User Manual... - Page 111 Absorber: Bag/ventilator switch - bag Caution: USA Federal Law restricts the position Rx ONLY sale and use of this device to, or on the order of, a licensed practitioner. Rotation (controls output) Multiple gasses Keep packaging dry Serial number Prima 460 User Manual...
- Page 112 Catalogue number (model number) Lot code Medical device Do not use if packaging is damaged Biohazardous waste Authorized representative in the European community Not made with natural rubber latex LATEX Class 2 equipment Paediatric Adult Prima 460 User Manual...
-
Page 113: Appendix 5. Schematics
(normally open) Pressure gauge Reservoir Vaporizer Pneumatic on/off Pressure regulator Oxygen flush valve switch Flow control valve Pressure relief valve Non-return valve (variable) Power take-off point Audible alarm Filter (or test point) Restrictor Flow sensor Visual indicator Prima 460 User Manual... - Page 114 Pressure gauge Reservoir Visual indicator Flowmeter Pneumatic on/off Pressure regulator Oxygen flush valve Vaporizer switch Pressure relief Flow control valve Circuit selector Non-return valve valve (variable) switch Power take-off point Audible alarm Filter Ventilator (or test point) Prima 460 User Manual...
- Page 115 A. Patient Gas from bellows B. Through the bag/ventilator switch C. Down to absorbent canister D. Through the absorbent E. Fresh gas flow from anaesthetic machine F. Into the inspiratory non-return valve G. Through inspiratory connector to patient breathing circuit Prima 460 User Manual...
-
Page 116: Bacterial Filter
28. Outlet from APL Valve to AGSS 13. Expiratory valve - absorber 29. Oxygen sensor 14. Inspiratory valve - absorber 30. Display 15. Bellows drive gas inlet - from ventilator control unit 31. Patient block 16. Connector - reservoir bag Prima 460 User Manual... -
Page 117: Appendix 6. Backup Battery
Disposal of used batteries: Do not dispose of in landfill, refer to an approved recycling facility. Follow your hospital, local, state and federal regulations. NOTE Removal/replacement of battery must only be undertaken by a trained technician. Prima 460 User Manual... -
Page 118: Appendix 7 Masimo Nomoline Isa Ax+ And Isa Or+ Modules (Optional)
Avoid breathing near the Nomoline ISA AX+ or ISA OR+ before or during the zeroing procedure. 14. Do not use Nomoline ISA systems for returning exhaust gases to the patient circuit. Exhaust gases should be returned to a scavenging system. Prima 460 User Manual... -
Page 119: Performance Warnings And Cautions
4. Do not sterilize, soak, or immerse the Nomoline ISA AX+ or the ISA OR+, or Nomoline Family sampling lines in any liquid solution. 5. Dispose of sampling lines in accordance with local regulations for biohazardous waste. Prima 460 User Manual... -
Page 120: Compliance Warnings And Cautions
The intended environment is the operating suite, intensive care unit and patient room. The intended patient population is adult, paediatric, infant and neonatal patients. 3. Nomoline ISA OR+ is fitted with a paramagnetic oxygen sensor. Prima 460 User Manual... -
Page 121: Specifications
Data output Breath detection Adaptive threshold, minimum 1 vol% change in CO2 concentration Respiration rate 0 to 150 ± 1 breaths/min Measured at I/E ratio 1:1, using a breath simulator according to EN ISO 80601-2-55 fig.201.101. Prima 460 User Manual... - Page 122 Rise time at 50 ml/min sample flow Nomoline ISA AX+ and ISA OR+ CO2 ≤300 ms N2O, ENF, ISO, SEV, DES≤400 ms O2 (ISA OR+ only): ≤400 ms HAL≤500 ms Prima 460 User Manual...
- Page 123 Halothane 0.1 - 7.9% Enflurane 0 - 7.9% Isoflurane 0 - 7.9% Sevoflurane 0 - 9.9% Desflurane 0 - 19.9% Default alarm settings High 105% Inspiratory: 23 mmHg Expiratory: 61 mmHg Halothane Enflurane Isoflurane Sevoflurane Desflurane Prima 460 User Manual...
- Page 124 Effects from water vapor partial pressure on gas readings, and Interfering gas and vapour effects. Accuracy ±0.3 kPa + 4% of reading) ±2 kPa + 5% of reading) O2 (ISA OR+ only) < ±0.2% Agents ±0.2 kPa + 10% of reading) Prima 460 User Manual...
- Page 125 6%. This means that if measuring on a mixture containing 5.0 vol% CO2 and 50 vol% Helium, the actual measured CO2 concentration will typically be (1-0.06) * 5.0 vol% = 4.7 vol% CO2. Note 4: According to the EN ISO 80601-2-55:2011 standard. Note 5: In addition to the EN ISO 80601-2-55:2011 standard. Prima 460 User Manual...
-
Page 126: System Setup
3. Replace the sampling line: a) If the sampling line input connector LED (1) starts flashing red. b) If the Prima 460 display screen shows a ‘Gas Bench Sampling Line’ warning. c) For a new patient. Description... - Page 127 4. Connect a sampling line to the inlet (1) and exhaust port (2), located on the left-hand side upright of the Prima 460. 5. The outlet (2) must be connected to the Prima 460 anaesthetic gas scavenging system (AGSS). 6. Power up the Prima 460.
-
Page 128: Operation Display
NOTE O2 values are displayed only if a ISA OR+ module is installed. If a ISA AX+ module is installed, the Prima 460 O2 monitor (fuel cell sensor type) displays O2 values (see section 3.14 in this manual. 8. Fresh gas settings 9. - Page 129 Gas Bench Comms Error Medium Gas Bench Software (SW) Error Medium Gas Bench Hardware (HW) Error Medium Gas Bench Motor Failure Medium Gas Bench UNCAL Medium Gas Bench Temp Error Medium Mixed Agent / minimum alveolar concentration < 3 Prima 460 User Manual...
-
Page 130: Device Classification
Type B Applied Part Degree of protection against electric shock This symbol denotes: Type B equipment Defibrillation proof part, Type BF Gas inlet Gas outlet 9. Trademarks Masimo ISA NomoLine All rights reserved. © 2023 Masimo Sweden AB Prima 460 User Manual... -
Page 131: Maintenance
Masimo Nomoline ISA AX+ and ISA OR+ Maintenance Annual Maintenance Maintenance and servicing must be carried out only by Penlon-trained engineers, according to the schedule and procedures given in the Service Manual. Once every year, or whenever gas readings are questionable: 1. - Page 132 During zeroing, if the exhaust gas is returned to the patient circuit, the returned gas level will be different from the gas level at the sampling site. The zeroing procedure is indicated by the sampling line inlet indicator (1) blinking green. Prima 460 User Manual...
-
Page 133: Electromagnetic Compatibility
4. Portable RF communications equipment (including peripherals such as antenna cables and external antennas) should be used no closer than 30 cm (12 inches) to any part of the Nomoline ISA AX+ and ISA OR+ including cable. Otherwise, degradation of the performance could result. Prima 460 User Manual... -
Page 134: Appendix 8 Electromagnetic Compatibility (Emc)
Appendix 8 Electromagnetic compatibility (EMC) Electromagnetic environment The Prima 460 anaesthetic machine is suitable for use in the specified electromagnetic environment. The user of the Prima 460 anaesthetic machine should assure that it is used in an electromagnetic environment as described below. - Page 135 Guidance and manufacturer’s declaration - electromagnetic immunity The Prima 460 anaesthetic machine is intended for use in the electromagnetic environment specified below. The customer or user of the Prima 460 anaesthetic machine should assure that it is used in such an environment.
- Page 136 Prima 460 User Manual...
- Page 138 5010480-en D / August 2023 A Medcaptain Company © Penlon Ltd. 2023. All rights reserved. Penlon is a trademark of Penlon Limited. All other trademarks are the property of their respective owners. Penlon Limited Technical Support International Sales UK Sales...
Need help?
Do you have a question about the Prima 460 and is the answer not in the manual?
Questions and answers