
Related Manuals for Heritage Bathrooms Lynton Furniture


Summary of Contents for Heritage Bathrooms Lynton Furniture
- Page 1 Installation Guide Models Covered: Lynton Furniture Lynton Basins Please keep this booklet for future reference. Installer: When you have read these instructions, please ensure you leave them with the user.
-
Page 2: Table Of Contents
I N T R O D U C T I O N Thank you for buying a Heritage Product. When you buy a Heritage product, you can be confident that it not only features a beautiful, distinctive, classic design, but that it has also been made to the very highest quality standards. -
Page 3: Safety Notes
S A F E T Y N O T E S Please make sure you read these instructions and retain for future use. All products manufactured by Heritage Bathrooms are safe, providing they are installed and used correctly and also receive maintenance when needed. -
Page 4: Installer Guidelines
I N S TA L L E R G U I D E L I N E S The installation of these products greatly depends on the floor and wall being level. If this is not the case, it must be corrected before installation. Installing this product requires experience within plumbing. -
Page 5: Installation - Wc Unit
I N S TA L L AT I O N - W C U N I T Before installing, ensure plumbing is in place first. If required to aid installation, remove required skirting boards before fixing. The WC unit fascia is not pre-cut. Using your toilet pan as a guide, cut out necessary areas to allow for installation. -
Page 6: Installation - Wc Lids
I N S TA L L AT I O N - W C L I D S Your WC Unit comes supplied with a painted lid - this can be fitted, or you have the option to purchase a separate worktop for your bathroom. Both will follow the same installation steps. Scan the QR code below to check on our website, to see the available worktops in our range. -
Page 7: Installation - Freestanding & Wall Hung Tall Cabinets
I N S TA L L AT I O N - F R E E S TA N D I N G & W A L L H U N G TA L L C A B I N E T S If required to aid installation, remove required skirting... - Page 8 I N S TA L L AT I O N - F R E E S TA N D I N G & W A L L H U N G TA L L C A B I N E T S Snap the wall plate in half.
- Page 9 I N S TA L L AT I O N - F R E E S TA N D I N G & W A L L H U N G TA L L C A B I N E T S WALL BRACKET ADJUSTMENT The wall brackets can be adjusted from inside the unit.
-
Page 10: Installation - Wall Hung Cloakroom Unit
I N S TA L L AT I O N - W A L L H U N G C L O A K R O O M U N I T Fit the mounting plate on for the desired orientation of your door. - Page 11 I N S TA L L AT I O N - W A L L H U N G C L O A K R O O M U N I T Use the two screws shown above to adjust the wall brackets.
-
Page 12: Installation - Wall Hung Cabinet
I N S TA L L AT I O N - W A L L H U N G C A B I N E T Determine the position of the cabinet and mark a vertical centre point on the wall. CRUCIAL MEASUREMENTS Use a spirit level to make sure levelling is accurate. - Page 13 I N S TA L L AT I O N - W A L L H U N G C A B I N E T Use the two screws shown above to adjust Go to the basin installation steps to install the wall brackets.
-
Page 14: Installation - Freestanding Cloakroom Unit
I N S TA L L AT I O N - F R E E S TA N D I N G C L O A K R O O M U N I T Fit the mounting plate on for the desired orientation of your door. - Page 15 I N S TA L L AT I O N - F R E E S TA N D I N G C L O A K R O O M U N I T Go to the basin installation steps to install the basin to the furniture unit.
-
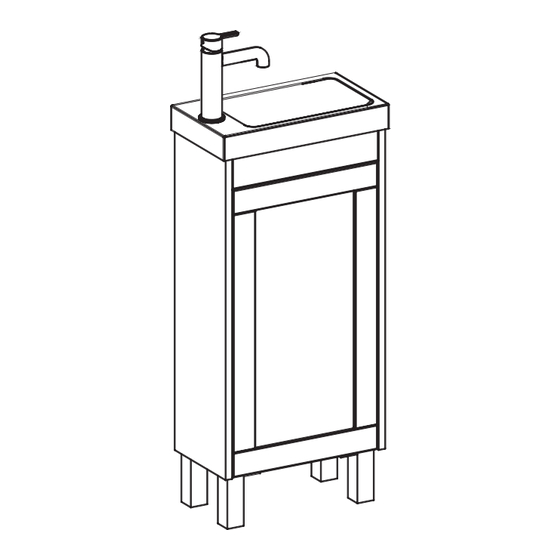
Page 16: Installation - Freestanding Cabinet
I N S TA L L AT I O N - F R E E S TA N D I N G C A B I N E T Attach the legs to the bottom of the Position the cabinet in your unit using the screws provided. -
Page 17: Drawer Removal
I N S TA L L AT I O N - F R E E S TA N D I N G C A B I N E T Once suitable handles have been chosen (not supplied), holes will need to be drilled to fit them. -
Page 18: Drawer Adjustments
D R A W E R A D J U S T M E N T S Drawer Adjustments Remove grey cover on the inside of the drawer. Turn screw 1 to adjust the height of the drawer. Turn screw 2 to adjust the drawer from left to right. -
Page 19: Installation - Basins
I N S TA L L AT I O N - B A S I N S All Lynton basins can be fitted using the guide Once your Lynton basin is ready to below. Basins are available with no holes, install, apply silicone sealant along the 1, 2, or 3 holes pre-drilled. -
Page 20: Installation - Hinges
I N S TA L L AT I O N - H I N G E S... -
Page 21: Hinge Adjustments
H I N G E A D J U S T M E N T S... -
Page 22: Caring For Your Product
C A R I N G F O R Y O U R P R O D U C T Furniture and Basins Your fittings have high quality finishes and should be treated with care to preserve the visible sur- face. -
Page 23: Need Help
N E E D H E L P ? If your product does not function correctly when you first use it, contact your plumber and make sure that it has been installed and commissioned in line with this Installation and User Guide supplied with the product. - Page 24 If you have any queries, our dedicated customer service teams and products experts are available to help. www.heritagebathrooms.com enquire@heritagebathrooms.com 0330 026 8503 Website Email us Call us UK: Heritage Bathrooms, Pooley Hall Drive, Birch Coppice Business Park, Dordon, Tamworth B78 1SG EU: Masco Europe S.à.r.l., 14 Rue Strachen, 6933 Mensdorf, Luxembourg.
Need help?
Do you have a question about the Lynton Furniture and is the answer not in the manual?
Questions and answers