Table of Contents
Advertisement
Quick Links
Advertisement
Table of Contents

Related Manuals for AEG LF7E7431BI


Summary of Contents for AEG LF7E7431BI
- Page 1 EN User Manual | Washing Machine LF7E7431BI aeg.com\register...
-
Page 2: Table Of Contents
Welcome to AEG! Thank you for choosing our appliance. Get usage advice, brochures, troubleshooting, service and repair information: www.aeg.com/support Subject to change without notice. CONTENTS 1. SAFETY INFORMATION................2 2. SAFETY INSTRUCTIONS................4 3. PRODUCT DESCRIPTION................6 4. TECHNICAL DATA..................7 5. -
Page 3: General Safety
• Children between 3 and 8 years of age and persons with very extensive and complex disabilities shall be kept away from the appliance unless continuously supervised. • Children of less than 3 years of age should be kept away from the appliance unless continuously supervised. -
Page 4: Safety Instructions
• The appliance must be connected to the water mains using the new supplied hose sets, or other new hose sets supplied by the Authorised Service Centre. • Old hose sets must not be reused. • If the mains power supply cable is damaged, it must be replaced by the manufacturer, its Authorised Service Centre or similarly qualified persons to avoid an electrical hazard. -
Page 5: Water Connection
2.4 Use • Make sure that the parameters on the rating plate are compatible with the electrical ratings of the mains power WARNING! supply. Risk of injury, electric shock, fire, burns • Do not use multi-plug adapters and or damage to the appliance. extension cables. -
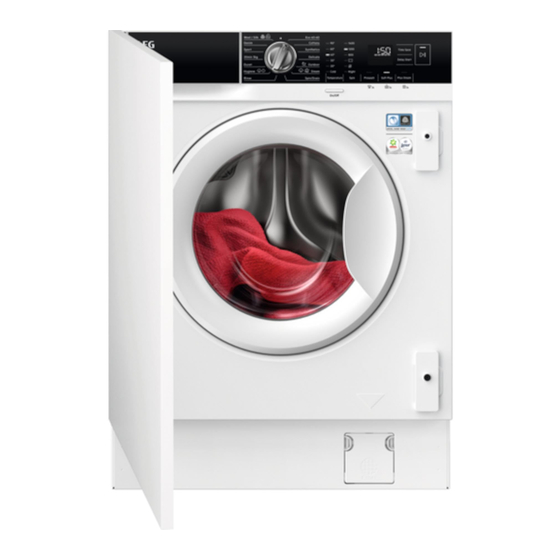
Page 6: Product Description
• Please note that some of these spare • Disconnect the appliance from the mains parts are only available to professional electrical and water supplies. repairers, and that not all spare parts are • Cut off the mains electrical cable close to relevant for all models. -
Page 7: Technical Data
The rating plate reports the model name (A), product number (B), electrical ratings (C) and serial number (D). Mod. xxxxxxxxx Prod.No. 910000000 00 000V ~ 00Hz 0000 W 00000000 4. TECHNICAL DATA Dimension Width/ Height/ Total depth 59.6 cm /81.9 cm /55.3 cm Electrical connection Voltage 230-240 V... - Page 8 5.2 The appliance is equipped with ... 5.3 Unpacking WARNING! Use the gloves. WARNING! Remove all the packaging and the transit bolts before installing the appliance. 1. Put two packaging elements on the floor under the appliance. WARNING! It is strongly recommended that this action is carries out by two persons.
- Page 9 3. Remove the protection from the bottom. 4. Return the appliance in vertical position and remove the socket protection. 5. Remove the power supply cable and the drain hose from the hose holders. It is possible to see water flowing from the drain hose.
-
Page 10: Installation On Suspended Flooring
7. Close the holes with the plastic caps you find in the user manual bag. Put the smallest cap F in upper hole and the two bigger caps G in lower holes. We recommend that you keep the packaging and the transit bolts for any movement of the appliance. -
Page 11: Hose And Cable Connection
The appliance must be level and stable. CAUTION! Do not put cardboard, wood or equivalent materials below the appliance feet to adjust the level. 5.6 Hose and cable connection 1100 mm 1450 mm 1210 mm 940 mm 1360 mm 900 mm The inlet hose 1. -
Page 12: Water Drainage
3. Connect the hose to the back of the appliance. Do not turn the inlet hose downwards, but turn it left or right depending on the position of your water tap. 4. Loosen the ring nut to fix it in the correct position. - Page 13 To a sink spigot Put the drain hose in the spigot and tighten it with the supplied cable tie L. Make sure that the drain hose makes a loop to prevent particles going into the appliance from the sink. To a wall-pipe Directly to a built-in drain pipe in the room wall and tighten it with the supplied cable tie L.
-
Page 14: Preparation And Assembly Of The Cupboard Door
596 mm 553 mm If hoses run behind the appliance, make sure that nothing closes the small recess indicated with the measures 50 x 50 mm. 819 mm 50 mm 50 mm 140 mm 76 mm The appliance is also equipped with an adhesive sponge pad H that you can find inside the drum. - Page 15 Factory pre setting The appliance is originally pre set for the assembly of a cupboard door opening from right to left. The best solution would be to screw the upper hinge to the upper hole of the top plate and the lower hinge to the lower hole of the bottom plate.
- Page 16 Cupboard door preparation For countersinking the door, it is recommended to call a professional. Align the cupboard door to the furniture correctly. Measure the distance X to fix the height of the hole to countersink the upper hinge. The centre of the hole Y should be at the same height of the stroke on the hinge support.
- Page 17 Mounting the door Fix the hinges to the hinge supports on the appliance by means of the two supplied screws The hinges can be adjusted to compensate for possible uneven thickness of the door. Counter-magnet The appliance is pre set for a magnetic closure. For a correct closure: 1.
-
Page 18: Control Panel
For any electrical work required to install this failure to comply with the above safety appliance, contact our Authorised Service precaution. Centre. The manufacturer does not accept any responsibility for damage or injury through 6. CONTROL PANEL 6.1 Control panel description 90°... - Page 19 6.2 Display Door locked indicator. Delay start indicator. The digital indicator can show: • Reset position ( • Programme duration (e. g. • Delay time (e. g. • Cycle end ( • Warning code (e.g. • Error indicator ( • Indication of total operating hours of the appliance.
-
Page 20: Dial And Buttons
7. DIAL AND BUTTONS 7.1 Introduction 7.5 Spin When you set a programme, the appliance automatically sets the default spin speed allowed for each programme. The options/functions are not available with all washing programmes. Check the By means of this button, you can change compatibility between options/functions the default spin speed or set one of the and washing programmes in the... -
Page 21: Permanent Extra Rinse
The corresponding indicator above the touch button illuminates and also stays permanently on during next cycles until this option is The appliance empties the water out deactivated. automatically after approximately 18 hours. 7.9 Permanent Extra Rinse 7.6 Prewash With this option you can permanently have an extra rinse when you set a new programme. -
Page 22: Child Lock
• Press the On/Off button for a few seconds Touch Time Save button to reduce the to activate or the deactivate the appliance. programme duration according to your needs. • Turning the programme dial in another The display shows the new programme position. -
Page 23: Programmes
8. PROGRAMMES 8.1 Programme Chart Programme Reference Maxi‐ Programme description Default tempera‐ spin speed (Type of load and level of soiling) ture load Temperature range Washing programmes Eco 40-60 1400 rpm 7.0 kg White cotton and fast-coloured cotton. Normally soiled (1400 - 800) items. - Page 24 Programme Reference Maxi‐ Programme description Default tempera‐ spin speed (Type of load and level of soiling) ture load Temperature range 1200 rpm 2.0 kg Outdoor 1.0 kg Do not use fabric softener and make sure that 30 °C 40 °C - Cold there is no softener residue in the detergent dispenser.
- Page 25 The AEGSteam Fragrance allows you to refresh even your delicate clothes, removing wrinkles and adding fresh‐ ness with a gentle fragrance developed exclusively by AEG. By refreshing your garments with steam, rather than running full wash cycles, you will keep your clothes looking and feeling new longer. You can even safely use the fragrance with Cashmere and Steam programmes - if they are available - for delicate fabrics like cashmere and wool.
- Page 26 Programme Reference Maxi‐ Programme description Default tempera‐ spin speed (Type of load and level of soiling) ture load Temperature range 1400 rpm 7.0 kg All fabrics, except woollens and delicate fabrics. To spin the laundry and to drain the water in the drum. Spin/Drain 1400 rpm 7.0 kg...
-
Page 27: Programme Options Compatibility
Programme Reference Maxi‐ Programme description Default tempera‐ spin speed (Type of load and level of soiling) ture load Temperature range 1200 rpm 1.5 kg Machine washable wool, hand washable wool and other fabrics with «hand washing» care symbol Wool/Silk 40 °C 40 °C - Cold According to UK Ecodesign for Energy-Related Products and Energy Information Regulations and to the EU Ecodesign Regulation 2019/2023 and the EU Energy Label Regulation 2019/2014, this programme at 40 °C is able... - Page 28 Programme ■ ■ Steam ■ ■ ■ Spin/Drain ■ ■ ■ ■ ■ Rinse ■ ■ ■ ■ ■ ■ ■ ■ Hygiene ■ ■ ■ Duvet ■ ■ ■ 20min 3kg ■ ■ ■ ■ ■ ■ Sport ■ ■...
-
Page 29: Settings
Programme Universal Liquid Univer‐ Liquid for col‐ Delicates Special oureds woollens powder 1) ▲ ▲ ▲ Hygiene Duvet ▲ ▲ 20min 3kg ▲ ▲ Sport ▲ ▲ ▲ Denim ▲ ▲ ▲ Wool/Silk ▲ ▲ At temperature higher than 60 °C the use of powder detergent is recommended. ▲... -
Page 30: Factory Reset
9.3 Factory Reset pauses, delayed start time). To visualise this value, proceed as follows: This function allows to restore the factory 1. Switch the appliance on by pressing default options. To activate this option follow On/Off button. steps below: 2. Turn the programme knob to the Eco 1. -
Page 31: Filling The Detergent And Additives
Always follow the instructions that you find on the packaging of the detergent products, but we recommend that you do not exceed the maximum indicated level ). This quantity will however guarantee the best washing results. After a washing cycle, if necessary, remove any detergent residue from the detergent dispenser. -
Page 32: Starting A Programme With The Delay Start
• Do not exceed to liquid detergent dose The related indicator stops flashing and stays indicated on the flap. • Do not set the prewash phase. The programme starts, the door is locked. • Do not set the delay start function. The display shows the indicator and the 5. -
Page 33: Interrupting A Programme And Changing The Options
11.8 The ProSense System load 11.10 Cancelling a running detection programme 1. Press the button On/Off to cancel the programme and to deactivate the appliance. The programme duration in the display is 2. Press the button On/Off again to activate referred to a medium/high load. -
Page 34: End Of The Programme
11.12 End of the programme 2. Press the Start/Pause button: the appliance drains the water and spins. When the programme has finished, the The option indicator Rinse Hold appliance stops automatically. The acoustic disappears. signals operate (if they are active). The display shows The indicator of the Start/Pause button goes If you have set Night... -
Page 35: Hints And Tips
12. HINTS AND TIPS WARNING! Refer to Safety chapters. 12.1 The laundry load • Divide the laundry into: white, coloured, synthetics, delicates and wool. • Follow the washing instructions on the laundry care labels. • Empty pockets and unfold the items. •... -
Page 36: Water Hardness
• Use only detergents and other treatments • inadequate rinsing, specially made for washing machines. • a greater impact for the environment. First, follow these generic rules: 12.4 Savings tips – powder detergents (also tablets and single-dose detergents) for all types of To save water, energy and detergent we fabric, excluding delicate. -
Page 37: Removing Foreign Objects
After each cycle, keep the door and the CAUTION! detergent dispenser slightly open to get air circulation and dry the humidity inside the Do not clean the metal surfaces with appliance: this will prevent mildew and chlorine-based detergent. odours. 13.4 Descaling If the appliance is not used for a long time: close the water tap and unplug the appliance. -
Page 38: Cleaning The Drum
Occasionally, at the end of a cycle the display may show the icon : this is a recommendation to perform the “drum cleaning”. Once the drum cleaning has been performed, the icon disappears. 13.8 Cleaning the detergent dispenser Clean it when needed, using ammonia cream To prevent possible deposits of dried cleanser agent without scratching the seal detergent or clotted fabric softener and/or... -
Page 39: Cleaning The Drain Pump Filter
13.9 Cleaning the drain pump filter the recess. Use a small brush to clean the recess. WARNING! Disconnect the mains plug from the mains socket. Regularly check the drain pump filter and make sure that it is clean. Clean the drain pump if: •... - Page 40 2. Place a suitable bowl below the drain pump access to collect the water that flows out. Always keep a rag nearby to dry up any water spillages when removing the filter. 180˚ 3. Turn the filter 180 degrees in anti-clockwise direction to open it, without removing.
- Page 41 7. If it is necessary, remove fluff and objects from the filter recess. Make sure that the impeller of the pump can rotate. If it does not rotate, contact the Authorised Service Centre. 8. Clean the filter under the water tap. 9.
-
Page 42: Cleaning The Inlet Hose And The Valve Filter
When you drain the water with the emergency drain procedure, you must activate the drain system again: 1. Put 2 litres of water in the main wash compartment of the detergent dispenser. 2. Start the programme to drain the water. 13.10 Cleaning the inlet hose and remove any deposit, collected over the time. -
Page 43: Troubleshooting
WARNING! Make sure that the temperature is higher than 0 °C before you use the appliance again. The manufacturer is not responsible for damages caused by low temperatures. 14. TROUBLESHOOTING WARNING! Refer to Safety chapters. 14.1 Alarm Codes and Possible failures The appliance does not start or it stops during operation. - Page 44 • Make sure that the water tap is open. • Make sure that the pressure of the water supply is not too low. For this infor‐ The appliance does not fill mation, contact your local water authority. with water properly. •...
-
Page 45: Emergency Door Opening
Problem Possible solution • Set the spin programme. • Make sure that the drain filter is not clogged. Clean the filter, if necessary. Re‐ The spin phase does not op‐ erate or the washing cycle fer to "Care and cleaning". lasts longer than usual. -
Page 46: Consumption Values
Before opening the door: 2. Disconnect the mains plug from the mains socket. CAUTION! 3. Pull the emergency unlock trigger downward once. Pull it once again, keep Risk of burns! Make sure that the it tensed and, in the meanwhile, open the water temperature is not too high and appliance door. - Page 47 Values and programme duration may differ depending on different conditions (e.g. room temperature, water temperature and pressure, load size and type of laundry, supply voltage) and also if you change the default setting of a programme. 15.3 According to UK Ecodesign for Energy-Related Products and Energy Information Regulations Eco 40-60 pro‐...
-
Page 48: Environmental Concerns
Programme rpm 1) Litres hh:mm °C Wool 0.200 55.0 01:05 30.00 30.0 1200 30°C Reference indicator of the spin speed. Suitable for washing heavily soiled textiles. Suitable for washing lightly soiled cottons, synthetic and mixed fabrics. It also performs as quick washing cycle for lightly soiled laundry. 16. - Page 52 157070411-C-412024...
Need help?
Do you have a question about the LF7E7431BI and is the answer not in the manual?
Questions and answers