
Related Manuals for DRY AGER Premium DX 2500


Summary of Contents for DRY AGER Premium DX 2500
- Page 1 Use and Care Manual for DRY AGER DX 2500 Premium ® ® Are you ready for professional dry aging? Perfect - get started with DRY AGER ®...
- Page 2 Locking and unlocking door We wish you much joy and pleasure with Dry Aging. Loading the Device with Food Founder of the DRY AGER® Manufacture Select food Wait for temperature setpoint to be reached Christian, Aaron, Andreas & Manfred Landig...
- Page 3 Safety Instructions WARNING and Warnings Do not use mechanical devices or other me- ans to speed up defrosting other than those recommended by the manufacturer. • T o prevent injury or damage to the unit, the appliance should be unpacked and set up by two people. • In the event that the appliance is damaged on delivery, con- WARNING tact the supplier immediately before connecting to the mains.
- Page 4 Climate rating Disposal notes The climate rating indicates the ambient temperature at which The appliance contains reusable materials and should the appliance may be operated in order to achieve full cooling be disposed of properly - not simply with unsorted capacity.
- Page 5 STARTER TIPS The quick starter tips do not replace the elaborate operation instructions, warning and danger notes in the other chapters of this manual. Clean the inside of the DRY AGER Load capacity with chain suspension (hanging): ® Tip: DRY AGER SPECIAL CLEANER, item no.
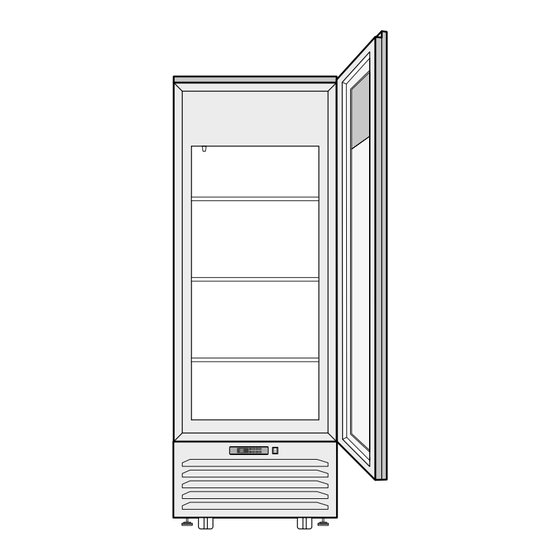
- Page 6 Dimensions (mm) Integrated systems Humicontrol © Electronic humidity control from 60 % to 90 % (for this system there is no water connection or water container necessary). DX Airreg © Optimum air flow, fresh air activated carbon filter and UVC disinfection DX Led interior light The light spectrum does not contain any ultraviolet radiation, the...
- Page 7 Instruction for unpacking Setting up the appliance • A void locations in direct sunlight, next to stove, radiator and similar. • The floor at the location should be hori- zontal and level. Level out any unevenness using the levelling feet. • Do not cover ventilation openings or grill.
- Page 8 Operating the Appliance Overview of Control Panel Controller Display and Symbols Led 2 Led 3 Temperature display Humidity display Controller Keys Led 4 Increases the displayed value. To turn On / Off the UVC disinfection, press the Led / Symbol Mode Function button for a minimum of 5 sec.
- Page 9 Starting the Operation For dry aging beef and pork we recommend 1,5 °C and 82 % relative humidity. 1. Electrical connection For post-maturing ham and salami we recommend 8°C and 75% RH. Carefully read section Electrical Safety (page 22), before con- 6.
- Page 10 Loading the Device with Food Option 1: position food lying down 1. Select food IMPORTANT Only use food with a maintained cold chain that was handled under good hygienic conditions. Some hints for suitable meat: • Use fresh meat on the bone at maximum 5 days after slaught- ering or max.
- Page 11 Option 2: position food hanging 4. Consider aging time The optimal aging time depends on many parameters. Typical aging times, which can be considered as a rough reference, are as follows: Fresh meat of beef: ~ 21-28 days Fresh meat of pork: ~ 14-21 days Vacuum packed meat (remove foil before aging): up to ~ 14-18 days During Device Operation...
- Page 12 • R emove all accessories such as chain suspension, rack inserts and the tray from the appliance. 2. Cleaning the accessories • C lean the chain suspension, rack inserts and the tray with warm water and a suitable detergent such as the DRY AGER ® SPECIAL CLEANER. • C lean other accessories according to the cleaning instruc-...
- Page 13 Error Messages Action Order only the original DRY AGER UVC replacement bulb (item ® no. DX0101) and replace it according to the instruction. The error messages in the following table are indicated in the display. They are accompanied by an acustic alarm, which can...
- Page 14 Description DX Remote Control Brightness + ON / OFF Cold light Cold light (color temperature – ) (color temperature + ) Brightness – Pairing/deletion code CR2032-Battery Install battery DX Remote Control Step 1 Step 2 Open the battery cover. Install the battery as shown in the picture (CR2032 battery).
- Page 16 Landig + Lava GmbH & Co. KG – DRY AGER Manufaktur Mackstraße 90 – 88348 Bad Saulgau Telefon: +49 7581 90 43 0 – E-Mail: info@dry-ager.com Web: www.dry-ager.com www.facebook.com/thedryager www.instagram.com/dryager www.dry-ager.com Erfüllt die Vorgaben zur Trockenreifung von Fleisch gemäß der Änderungsverordnung (EU) 2024/1141 zur Verordnung (EG) 853/2004.
Need help?
Do you have a question about the Premium DX 2500 and is the answer not in the manual?
Questions and answers