Table of Contents
Advertisement
Quick Links
Advertisement
Table of Contents

Related Manuals for Ronch RONCHWELD LASER WELD 35


Summary of Contents for Ronch RONCHWELD LASER WELD 35
- Page 1 SERIES USER MANUAL laser weld 35, 45 & 65 E N G L I S H...
-
Page 2: Table Of Contents
CONTENT Chapter 1 - General Safety Information • 1. Safe Use of Handheld Laser Welding Machines • 2 .Signals Explanation • 3. Laser Protection • 4. Weld Safety Hazards • 5. Safety Guidance • 6. Reference Standard • 7 .General Safety Instructions •... - Page 3 6. Torch Instructions • 7. Operation Panel Description • Chapter 3 - Specification • 1. Optical Features Parameters • 2. General Features Parameters • 3. Structural Layout • Chapter 4 - Assembly and Disassembly Guide • 1. Shipping Unpacking Instructions •...
- Page 4 8. Wire Feeder and Welding Torch Connection • 9. Wire Feed Frame and Welding Torch Connection • 10. Wire Feeder Software Operation • 11. Maintenance and Troubleshooting • 12. Routine Maintenance • 13. Startup Steps • 14. Welding Process Parameters •...
- Page 5 This product has no parts or components that users need to change or fix by themselves. Ronch’s warranty will be lost if the equipment or any accessories are disassembled by non-authorized personnel.
-
Page 6: Chapter 1 - General Safety Information
Chapter 1 – General Safety Information 1. Safe use of Handheld Laser Welding Machines • Handheld laser welding machines are classified as hazardous, invisible laser radiation Class 4 laser products. This product emits infrared laser radiation with a wavelength of 1080 nm, and the average power radiated by the welding head is greater than 100W, which can cause damage to eyes and skin directly or indirectly exposed to such light intensity. -
Page 7: Signals Explanation
and humidity can cause a short circuit, affecting the normal use of the laser and provoking potential safety hazards Do not expose the welding machine to excessive humidity The laser head is air cooled. Please ensure that the ambient air is dry and clean Operation or adjustment beyond the scope specified in this manual may result in dangerous radiation injury Keep the welding area clean. - Page 8 Warning Note: A warning symbol shows a potential product hazard. It points out an operating procedure that, if not followed correctly, can result in damage or destruction of the product or a component. Laser Welding Room Note: If someone enters unexpectedly into the welding cabin, the interlock automatically shuts down the welding system.
-
Page 9: Laser Protection
There are several suppliers of laser safety equipment like welding enclosures. Ronch does not endorse or recommend any of these suppliers. Ronch assumes no responsibility for their advice, products or... -
Page 10: Weld Safety Hazards
4 .Weld Safety Hazards • • 1 -Eyes and Ultraviolet Radiation Hazard Visible and invisible radiation is generated during welding. The interaction between the high-power laser beam and the target material to be welded can create a plasma that generates ultraviolet radiation and “blue light,” which can lead to conjunctivitis, photochemical damage to the retina, or a sunburn like reaction to the skin. -
Page 11: Safety Guidance
5 -Cylinder Safety • The gas cylinder may explode if it is damaged or placed too close to the welding area. A gas regulator suitable for the required gas and pressure is essential. All hoses and fittings should also be in good working condition and suitable for the application. - Page 12 WARNING: If the product is not used in compliance with the instructions the protection mechanism provided may be affected. This product must and should only be used under conventional conditions. CAUTION: When operating laser welded output cables (such as installing optical cables, using optical instruments, etc.), be sure to keep AC power off.
- Page 13 particles, and sparks. All personnel working near laser welding areas must also wear personal protective equipment. WARNING: Take protective measures to prevent skin damage. Wear protective clothing, such as laser/heat resistant gloves, hats, leather aprons, protective clothing, etc. Button sleeves and necklines up. WARNING: If flammable materials are near the welding area, the heat and sparks generated during welding may cause a fire or an explosion.
- Page 14 not try to look at that area nor place any part of your body inside the expected specular cone. WARNING: Operators and people passing by must also be aware of reflections. If the laser parameters are not set properly to achieve melting of the workpiece, more reflection may occur.
-
Page 15: Optical Safety
form ozone and nitrogen oxides, which can be deadly at high concentrations. Shielding gases used during welding may displace air and cause injury or death. • Keep yourself away from fumes during welding. Always weld in a well- ventilated area to ensure that the air is safe to breathe •... - Page 16 When the device is powered on, do not directly observe the laser torch, neither the output optical fiber nor the welding connector. Always wear safety glasses and a welding mask when handling the product. The people nearby must also wear the same safety gear. Ensure that all personal protective equipment is suitable for the power output and wavelength range listed on the laser safety label attached to the device.
-
Page 17: Electrical Safety
9- Electrical Safety • WARNING: All electrical and welding gas connections must be checked before supplying power to the unit. Also, if applicable, all connections must be secured with screws to ensure proper function. All electrical and welding gas connections must be connected before power is supplied to the unit. -
Page 18: Reference Standard
The laser may be damaged unless careful handling of equipment. Refer to the product specification for more information. This device is not to be used where unprotected people may be present. Keep away from shock or vibration sources. Appropriate protective measures should be applied to ensure a laser- safe working area. -
Page 19: General Safety Instructions
WARNING: The output laser beam intensity of Ronch handheld laser welding machine is enough to weld metal, burn skin, clothing and paint, and ignite volatile substances such as alcohol, gasoline, ether, etc. Therefore, during operation and use, be sure to remove the flammable items around the welding area. - Page 20 9. Operate the equipment strictly in accordance with the instructions in this document, otherwise the protection device and performance of the equipment will be impaired, and Ronch warranty will be voided. NOTICE: The optical output of the handheld laser welding machine will be sent out after passing through a lens with an anti-reflection coating.
- Page 21 • 4- Electrical Operating Instructions Ronch strongly recommends that you read the following operating points before using the handheld laser welding machine: Make sure that the equipment is well grounded. Any interruption in the grounding circuit may cause personal injury...
- Page 22 Cooling and temperature: The laser unit is cooled by air. Operating at higher temperatures accelerates aging, increases threshold current and reduces slope efficiency. If the device overheats, do not use it and call Ronch for help. When the temperature of the laser is too high, the device will trigger an alarm and stop emitting light.
-
Page 23: Safety Information
NOTICE: Operate the equipment carefully to avoid accidental damage to the equip- ment. The filter at the bottom of the laser needs to be cleaned from dust and dirt from the air inlet periodically. 8.Safety Information • If you need more laser safety information, please refer to: Laser Institute of America (LIA) 13501 Ingenuity Drive, Suite 128, Orlando, Florida 32826 Phone: 407 380 1553, Fax: 407 380 5588... - Page 24 2 -Eye damage • All personnel in the laser welding area are advised to wear personal protective equipment, including safety glasses and welding masks, to protect eyes from any direct or reflected laser beams and welding glare, ultraviolet light, heat, and sparks.
-
Page 25: Chapter 2 - Product Description
2 .Module Configuration • Ronch provides many configurable modes. All modes will be explained in detail in this manual, please refer to Chapter 6, entitled “Usage Guide”. 3. Laser Model Description and Product Function Safety •... -
Page 26: Certification
After you receive this product, check the packaging for any signs of external damage, check whether the equipment is damaged, and if so, immediately notify the carrier and Ronch after-sales personnel. When you unbox the welding machine, check that the fiber optic cables are not cracked or damaged. -
Page 27: Back Panel / Function Description
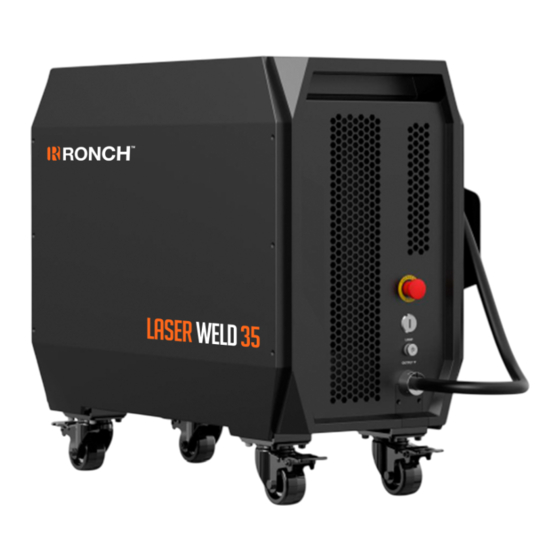
5.2 Back Panel / Function Description (Images: Left: 35 / Right: 45 and Back Panel Function Description ON/OFF 200-240 VAC AC power switch EX-CTRL External control interface (For Safety & Cobot) RS232 Welding platform RS232 input POWER 200-240 VAC AC power input FEEDER Wire feeder input GAS IN... - Page 28 RS232 Interface Description Pin# Description RxD Serial data input TxD Serial data output EX-CTRL Description (Security interface) (DB25)
- Page 29 Pin# Signal Name Type Functionality Enable + Laser Enable Laser Enable ON/OFF: When the voltage Enable - is high(24V), Laser Enable is ON; when voltage is low(0V), Laser Enable is OFF. EX-CTRL + External Start External control Laser Emission ON/OFF: When the voltage is high(24V), Laser Emission is ON;...
-
Page 30: Torch Instructions
6 -Torch Instructions • 1. Laser trigger button 2. Copper nozzle 3. Extension tube 4. Protective mirror 5. Focus lens 6. Status indicator 7. Feed wire start/stop button The indicator light on the welding torch can show different working status. When the communication between the welding torch and the laser is successful and the working status of the equipment is normal, the indicator light turns yellow. -
Page 31: Operation Panel Description
7 .Operation Panel Description • This machine is equipped with a 7-inch industrial screen and uses a UART interface to control and monitor the equipment. The equipment must be assembled while it is not connected to power, to avoid surge impact damage. •... -
Page 32: Operation Interface
2 .Operation interface • The interface provides two operation modes: simplified and professional. 1) Simplified mode In this mode you only need to select the material, plate thickness, welding mode, and then push the start button in the middle of the interface. You can start welding immediately. - Page 33 2) Professional mode In this mode more professional and detailed welding parameters can be set up. The professional mode has a home, process parameters, advanced settings, and machine information interfaces. Clicking on the buttons in the left column will allow you to navigate among interfaces. Home interface: is divided into three sub-interfaces: Status, Alarm, and Details.
- Page 34 Functional Functional Note Classification Specifications Action buttons Laser launch Laser start button for starting laser welding. Red means laser is on, gray means laser is off Set the item Laser power 0~100% adjustable, 100% power setting for the machine nominal maximum power Sweep frequency Laser reciprocating scanning frequency,...
- Page 35 Functional Functional Note Classification Specifications Numerical Gas pressure It shows the current gas pressure status Lens temperature It shows the current temperature of the laser lens Enabling status Laser Red: Laser ready. Gray: Standby Reticle Red: Emitting red light. Gray: Standby Red: Gas output ready.
- Page 36 Functional Functional Note Classification Specifications Alarm Communication The communication between the laser machine and the torch is not normal. Contact after-sales service Wobble The galvanometer is not working normally. Contact after-sales service Feeder Wire feeding is not normal. Check the power supply of wire feeding device and whether the welding wire is missing or contact after- sales service...
- Page 37 Detailed interface: It displays the detailed parameters of the current professional mode settings. These parameters can be changed in this interface. Note: The laser power, scanning frequency and scanning width of this interface are consistent with the values of the home interface. Click on any value to enter the editable mode.
- Page 38 Functional Functional Note Classification Specifications Pattern Light Mode The light mode includes three ways to Adjustment work. Continuous: Continuous laser output Point: A single laser output Pulse: Pulsating laser output according to the set duty cycle Wire Feeding Orange light means the wire feeder is properly connected to the machine.
- Page 39 Functional Functional Note Classification Specifications Wire Feeding Wire Feeding Continuous: Continuous wire feeding Parameters Mode Pulse: Intermittent wire feeding according to the set pulse period Wire Feeding Wire Feed Set the wire feed speed (this function only Parameters: Speed works with its own wire feed torch) Continuous Pumping Rate Set the pumping speed and speed of wire...
- Page 40 Click any parameter document name to enter the interface for detailed view/ modification of parameters, as shown below. Click on any blank space to enter editable mode, as shown below. Click Save, enter a name for the parameter, click Save as in the pop-up window, and the parameters will be saved to the user defined parameter interface.
- Page 41 Functional Functional Note Classification Specifications Process Model Parameter The process library comes with 32 sets of Library process parameters, so that customers can use them in different situations Parameter Click on any parameter slot to access Document the parameter detail interface, where the specific parameters are displayed.
- Page 42 Click on any parameter name to access the parameter detail interface. By default, parameters are read-only. Click on any blank space to edit, so the parameters can be read and written. Click on “Save” in the pop-up prompt box to save the changes or “Cancel” to return to the custom interface.
- Page 43 If the stored parameters memory is full, after changing the parameters and clicking “Save As”, the system will prompt a pop-up box. Changing the existing name to empty will clear this parameters entry. Functional Functional Note Classification Specifications Process Model Parameter There are 32 memory slots available for Library...
-
Page 44: Settings Interface
4 -Settings interface • To access the settings interface, you are asked to introduce your login credentials. If the user or password is not correctly entered, the system will display an error screen. When login credentials are entered correctly, you will access the setting interface. - Page 45 Functional Functional Note Classification Specifications Basic Settings Screensaver The user can customize when the screen saver timeout is going to start. The value ranges from 1 to 120 minutes. This way, you can set the standby mode when not in use. Zero calibration The user can customize the zero-correction value.
- Page 46 Functional Functional Note Classification Specifications Power Supply System data It shows the total machine usage time & Fan Status Voltage It displays the current power supply voltage of Settings the machine Current It displays the current power supply current of the machine Temperature It displays the current temperature of the ma-...
- Page 47 Functional Functional Note Classification Specifications Reference Point VRef- The user can customize the overcurrent Settings Overcurrent reference voltage. The parameter can be set to a range of 0.00 V to 5.00 V. Note: Clicking on the Restore Factory Settings button cannot reset this data. Backward lock The user can customize the number of continuous optical locks.
- Page 48 Alarms Settings Pump Temp The user can customize the pump source temperature alarm value. The parameter can be set to a range of 0-100 °C. This parameter value is associated with the boundary warning value. Note: Clicking on the Restore Factory Settings button cannot reset this data.
-
Page 49: Information Interface
Interlock Enable When the user enables interlock alarm, the button is on. If not enabled, the button is off. Note: Clicking on the Restore Factory Settings button cannot reset this data. Gas Flow Alarm When the user enables the gas flow alarm, Enable the button is on. - Page 50 Functional Functional Note Classification Specifications Basic Model Name of the model Information Mainboard S/N The mainboard serial number Weld Head S/N The welding torch serial number FW Version The firmware version number HW Version The hardware version number MCU Version The machine version number Laser Version The laser version number...
- Page 51 Functional Functional Note Classification Specifications Laser Model Name of the model Information HW version Machine’s hardware version number MCU Version Machine’s firmware version number The laser P/N number The laser S/N number Model ID ID of the laser module...
-
Page 52: Chapter 3 - Specification
Chapter 3 – Specifications • 1 -Optical Features Parameters N° Feature Test Conditions Min. Nom. Max. Unit Operation Mode CW/Modulated Polarization Random Output Power 100% CW 1200 (Room temperature 28 °C) 1500 4 Power Regulation Range 1% Gradient (Room tempe- rature 28 °C) 5 Emission Wavelength 100 % CW... -
Page 53: General Features Parameters
• 2 -General Features Parameters N° Feature Test Conditions Min. Nom. Max. Unit Operating Voltage Input Power 100 % Output Model 35 100 % Output Model 45 100 % Output Model 65 Operating Room °C Temperature 4 Operating Room Relative Humidity 5 Laser Cooling Method Phase change heat dissipation... -
Page 54: Structural Layout
• 3- Structural Layout Welding Laser Machine Three Views (Unit: mm) Laserweld 35... - Page 55 Welding Laser Machine Three Views (Unit: mm) Laser Weld 45 / 65...
-
Page 56: Chapter 4 - Assembly And Disassembly Guide
Chapter 4 – Assembly and Disassembly Guide 1 .Shipping Unpacking Instructions • If the packaging shows any signs of external damage, inspect the equipment for damage and notify the supplier immediately. Special care must be taken when removing the device from its packaging to ensure that the fiber optic cable is not broken or damaged. -
Page 57: Packing List
3. Packing List • • 3.1 Model 35 Packing List N° Part Name or Description Unit. Laser Welding Model 35 Part Machine Welding Torch Torch Part Power Cable 5 meters (15 feet) cable Part Ground Cable 5 meters (15 feet) cable Part Eye Protection Support the 0D8+... - Page 58 • 3.2 Models 45 & 65 Packing List N° Part Name or Description Unit. Laser Welding Model 45 or Model 65 Part Machine Welding Torch Torch Part Power Cable 10 meters (30 feet) cable Part Ground Cable 10 meters (30 feet) cable Part Eye Protection Support the 0D7+...
-
Page 59: Chapter 5 - Operation Guide
N=0 VAC, PE=ground. Make sure that the wiring is correct before starting the machine and that PE is connected. Ronch strongly recommends that you connect a 32 A circuit breaker (air switch) in series between the power supply unit and the laser, to ensure safety. -
Page 60: Safety Lock Connection
One end of the ground wire is clamped on the ground stud. The other end of the grounding wire should be securely clamped to the outdoor grounding pole. 4 .Safety Lock Connection • Before turning on the laser, the safety lock must be connected to the laser loop interface. -
Page 61: Wire Feeder Installation Instructions
Connect the gas hose with an outer diameter of 6mm (¼ in) to the Gas-in port, and adjust the gas flow to 15-20 L/min. The gas valve mode selects normally open (in the advanced setting interface) to adjust the gas flow. Device Connection Diagram 6 .Wire Feeder Installation Instructions •... - Page 62 • 3 -Size and Features of the Wire Feeder Size: 580 mm × 360 mm × 244.5 mm Features: Laser coupling, double driving force, closed circuit board design, cold rolled plate shell 2. Wire feeding/drawing speed of 2~100 mm/s. Support continuous wire feeding and pulse wire feeding (fish scale) 3.
- Page 63 The wire feeder is mainly used in case the wire feeding welding mode is needed or the weld beam is large. Diameter of welding wire: 0.8 / 1.0 / 1.2 / 1.6 mm • 4- General Definition of Circuit Connection Connection Definition Pins 1 and 2 Connect to power +24V...
- Page 64 • 6 -Installation of Wire Feeder Wheel Wire feeder Turntable Wire feeder Assembly Assembly As shown in the figure above, remove the fixing nut of the rotary wire feeding table, place the welding wire tray on the rotary wire feeding table and lock the fixing nut of the rotary wire feeding table 2.
-
Page 65: Wire Feeder And Welding Torch Connection
• 7- Wire Feeder Pipeline Installation Connect the communication wire of the wire feeder (left) according to the above figure (the red point of the wire plug corresponds to the upward direction of the machine) and connect the other end to the wire feeding plug of the laser 2. - Page 66 Wire feed tube assembly 2. Fixed wire feeder Wire feeder assembly 3. Adjust the wire feed frame position First determine the length of the torch barrel to determine the welding focus. Then, adjust the wire feed nozzle to the center of the welding copper nozzle. Finally, adjust the length of the wire feeding tube so that it can be close to the welding copper nozzle.
-
Page 67: Wire Feed Frame And Welding Torch Connection
• 9-Wire Feeder Frame and Welding Torch Connection Power: The power button of the wire feeder. When powered on, the button will light up the red light 2. Manual Wire Feeding: The manual wire feeding button, which is commonly used for debugging. When the button is pushed, the green light will be on, which means that the wire feeding is underway 3. - Page 68 Continuous mode: When the continuous mode is selected, the button will display orange, while the unselected mode will display gray. Click the button to switch modes, or to differentiate the current continuous/pulse mode. 1. Wire feeding speed: It controls the wire feeding speed during welding. Range 2-100 mm/s. You can click “number”...
- Page 69 the wire is broken, which is used to compensate the “drawing length” and keep the consistency of the joint when restarts welding. The value ranges from 0 to 100 mm. It is by default set to 14 mm. Pulse mode: When the pulse mode is selected, this button will turn orange, while the unselected mode will display gray.
-
Page 70: Maintenance And Troubleshooting
To sum up, pulse mode mainly serves for fish scale effect welding. The above parameters are reference values. Some parameters like automatic pullback speed, pullback length, automatic filling speed, filling length, feed delay and filling delay are common for both continuous and pulse mode. •... - Page 71 The correct use of copper nozzles Stitch Welding Outside Corner Welding Inside Corner Welding Lap Welding Edge Seam Welding Figure 6-1 Note: For the wire feeding welding of the workpiece, the copper nozzle of the wire slot is selected to ensure the direction of the welding wire and the smooth wire feeding.
-
Page 72: Startup Steps
Wire feeding speed adjustment: turn on the wire feeding switch on the touch screen, turn off the laser enable, press and hold the handheld welding torch switch, adjust the wire feeding speed at low speed (about 10 mm/s), and turn left and right according to the tightness of the wire feeding. -
Page 73: Welding Process Parameters
• 13 -Welding Process Parameters • Handheld laser welding process parameter table Laserweld 35 Material Type Welding Type Thickness Laser Power Swing Swing Defocus Air Flow Welding Effect (mm) Percentage (%) Range (mm) Frequency Amount Volume (hz) (mm) (L/min) Carbon Stitch welding 60~80 -1~1... - Page 74 NOTICE: Stack welding, fillet welding, lap welding, etc. can refer to the above process parameters. • Handheld laser welding process parameter table with wire feeding Laserweld 35 Material Material Wire Feeder Laser Scanning Scanning Defocus Air Flow Welding Wire Welding Thickness Speed Power...
- Page 75 • Handheld laser welding process parameter table Laserweld 45 Material Type Welding Type Thickness Laser Power Swing Swing Defocus Air Flow Welding Effect (mm) Percentage (%) Range (mm) Frequency Amount Volume (hz) (mm) (L/min) Carbon Stitch welding 60~80 -1~1 15~20 Penetration Steel Stitch welding...
- Page 76 • Handheld laser welding process parameter table with wire feeding Laserweld 45 Material Material Wire Feeder Laser Scanning Scanning Defocus Air Flow Welding Wire Welding Thickness Speed Power Width Frequency Amount Volume Consumables Diameter Effect Percentage mm/s L/min Carbon 12~15 60~80 1~-1 15~20...
- Page 77 • Handheld laser welding process parameter table with wire feeding Laserweld 65 Material Material Wire Feeder Laser Scanning Scanning Defocus Air Flow Welding Wire Welding Thickness Speed Power Width Frequency Amount Volume Consumables Diameter Effect Percentage mm/s L/min Carbon 12~15 60~80 1~-1 15~20...
- Page 78 • Handheld laser welding process parameter table with wire feeding Laserweld 65 Material Material Wire Feeder Laser Scanning Scanning Defocus Air Flow Welding Wire Welding Thickness Speed Power Width Frequency Amount Volume Consumables Diameter Effect Percentage mm/s L/min Carbon 12~15 60~80 1~-1 15~20...
-
Page 79: How To Use The Fish Scale Function
15.How to Use the Fish Scale Function • Method one: Enable the fish scale pattern Built-in default parameters of fish scale pattern (no need to set, just turn on the switch) Firing time: 150 ms 2. Interval: 40 ms The fish scale effect is better if is used in conjunction with the parameters of wire feeding machine (set to 7-10) Method 2: Professional mode. -
Page 80: Cleaning Accessories And Guide
• Wear powder-free gloves or finger coats to clean the device in a dust-free environment. Ronch will not warrant damage to the equipment due to improper operation or incorrect cleaning procedures • When cleaning, the concentration of absolute ethanol should be greater... - Page 81 2 Steps for Cleaning Please follow the following procedure to clean and keep the laser welding machine: Turn off the laser switch and cut off the power supply 2. Rotate the locking screw on the protective mirror from the torch and pull out to protect the mirror holder (the protective mirror drawer by default is sealed with clean masking tape to prevent dust from entering).
- Page 82 1. Loosen the locking screw of 2. Take out the protective lens 3. Masking with tape to protect the protective lens holder shell holder the lens area 4. Gently wipe the lens with a 5. Remove the protective mirror 6. Put back the protective clean cotton swab or clean holder and wipe it out mirror into the protective...
-
Page 83: Chapter 6 -Service And Maintenance
Chapter 6 – Service and Maintenance 1 .Maintenance Notes • • No operator serviceable parts inside. Refer all servicing to qualified Ronch personnel • To ensure the repairs or replacement within the warranty scope send the application to the Ronch distributor immediately after finding the defect. -
Page 84: Chapter 7- Warranty
Chapter 7 – Warranty 1 .General • Ronch grants warranty for any defect of the product caused by its material and production technology within the warranty period agreed in contract and ensures that its product meet the relevant quality and specification requirements defined in the document under normal use condition. - Page 85 . c o m . b r R o n c h R o n c h M e x i c o U n i t e d S t a t e s ronch.com.mx ronch.us RON-MA-101-EN...
Need help?
Do you have a question about the RONCHWELD LASER WELD 35 and is the answer not in the manual?
Questions and answers