Table of Contents
Advertisement
Quick Links
Advertisement
Table of Contents
Troubleshooting

Subscribe to Our Youtube Channel
Related Manuals for Ronch Ronch Weld 200ARC DV


Summary of Contents for Ronch Ronch Weld 200ARC DV
- Page 1 SERIES 160ARC / 200ARC STICK •...
-
Page 2: Table Of Contents
CONTENT 1. Safety • 1.1. Symbols Explanation • 1.2. Machine Operating Warnings • 1.3. EMC Device Classification • 1.4. EMC Measure • 1.5. Warning Label • 2. OVERVIEW • 2.1. Features • 2.2. Technical Data • 2.3. Brief Introduction • 2.4. - Page 3 4. Maintenance & Troubleshooting • 4.1. Maintenance • 4.2. Troubleshooting • 4.3. List of Error Codes • 4.4. Electrical Schematic Drawing •...
-
Page 4: Safety
1. Safety Welding and cutting equipment can be dangerous to both the operator and people in or near the surrounding working area, if the equipment is not correctly operated. Equipment must only be used under the strict and comprehensive observance of all relevant safety regulations. Read and understand this instruction manual carefully before the installation and operation of this equipment. - Page 5 Never touch live electrical parts. Wear dry, hole-free gloves and clothes to insulate your body. Be sure to install the equipment correctly and ground the work or metal to be welded to a good electrical (earth) ground according to the operation manual. ...
- Page 6 Read and understand the manufacturer’s instructions for this equipment and the consumables to be used, including the material safety data sheet and follow your employer’s safety practices. ARC RAYS: Harmful to people’s eyes and skin. Arc rays from the welding process produce intense visible and invisible ultraviolet and infrared rays that can burn eyes and skin.
- Page 7 WELDING SPARKS can cause fire or explosion. Welding on closed containers, such as tanks, drums, or pipes, can cause them to explode. Flying sparks from the welding arc, hot work piece, and hot equipment can cause fires and burns. Accidental contact of electrode to metal objects can cause sparks, explosion, overheating, or fire. Check and be sure the area is safe before doing any welding.
- Page 8 Never allow the electrode, electrode holder or any other electrically “hot” parts to touch a gas cylinder. Keep your head and face away from the cylinder valve outlet when opening the cylinder valve. Valve protection caps should always be in place and hand tight except when the cylinder is in use or connected for use.
-
Page 9: Emc Device Classification
evidences show that EMF may have effects on health. However, the research on the effect of EMF is still ongoing. Before any conclusion, we should minimize exposure to EMF as few as possible. In order to minimize EMF, we should use the following procedures: ... -
Page 10: Emc Measure
Radiation Class B device. It can meet the radiation requirements of residential area and industrial area. It also can be used in residential area which power is supplied by public low voltage circuit. EMC device can be classified by power nameplate or technical data. ... -
Page 11: Warning Label
• 1.5. Warning label The device with a warning label. Do not remove, destroy or cover this label. These warnings are intended to avoid incorrect device operations that could result in serious personal injury or property damage. -
Page 12: Overview
2. Overview • 2.1. Features Multi voltage input Works with 110V and 220V. Tig Mode Capable of welding with Lift Tig Mode. Extra functions "Hot Start", "Arc Force" and "Anti-sticking" built in. "Hot Start" function for easier arc striking; "Arc Force"... -
Page 13: Technical Data
• 2.2. Technical Data Models ARC 125 LT DV ARC 140 LT DV Parameters Power Supply Voltage (V) 1-110V±10% 1-220V±10% 1-110V±10% 1-220V±10% Frequency(HZ) 50/60 Rated input current (A) 33.5 33.5 Rated input power (KW) 15% 120A 40% 125A 15% 120A 30% 140A Duty cycle (40°C 10 min.) 60% 60A... -
Page 14: Brief Introduction
Dimensions (mm) 290*135*280 Electrode Diameter ø1.6~ ø5.0 Electrode Type 6013, 7018, etc. Note: The above parameters are subject to change with future machine improvement! Models RONCHWELD 200 ARC DV ARC 220 LT DV Parameters Power Supply Voltage (V) 1-110V±10% 1-220V±10% 1-110V±10% 1-220V±10% Frequency (HZ) -
Page 15: Duty Cycle And Over-Heat
on and at the same time the output current will be cut off. It can self-protect, prolong the usefull life, greatly improved the reliability and practicality of the welding machine. ARC series of welding machines can also realize TIG operation. While MMA operation, if the electrode touches workpiece over two seconds, the welding current will drop to the minimum current automatically to protect the electrode. -
Page 16: Working Principal
• 2.5. Working Principle The working principle of ARC series of welding machines is shown in the following figure. Single-phase 110V/220V line frequency AC is rectified into DC, then is converted to medium frequency AC by inverter device (IGBT), after reducing voltage by medium transformer (the main transformer) and rectified by medium frequency rectifier (fast recovery diode), and is outputted by inductance filtering. -
Page 17: Installation & Operation
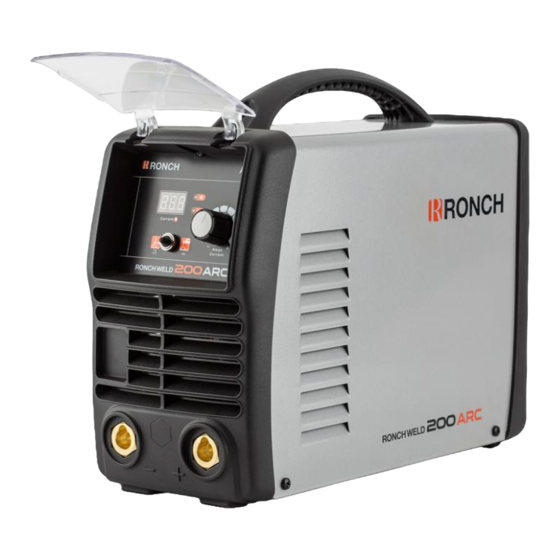
3. Installation & Operation • 3.1. Layout for the front and rear panel (1) “+” Output terminal. (2) “-” Output terminal. (3) Conversion switch: Choose (left) LIFT TIG; choose (right) MMA. (4) Current digital display. (5) Power light: Power indicator, power on light on. -
Page 18: Operation For Mma Welding
(1) Connect the earth lead to “-“, tighten clockwise; (2) Connect the earth clamp to the work piece. Contact with the work piece must be firm contact with clean, bare metal, with no corrosion, paint or scale at the contact point. (3) Connect the electrode lead to “+”, tighten clockwise;... -
Page 19: Mma Welding
(3) Set the welding current relevant to the electrode type and size being used as recommended by the electrode manufacturer. (4) Place the electrode into the electrode holder and clamp tight. (5) Strike the electrode against the work piece to create and arc and hold the electrode steady to maintain the arc. - Page 20 The arc is initiated by momentarily touching the electrode to the base metal. The heat of the arc melts the surface of the base metal to form a molten pool at the end of the electrode. The melted electrode metal is transferred across the arc into the molten pool and becomes the deposited weld metal.
-
Page 21: Mma Welding Fundamentals
• 3.2.4. MMA Welding Fundamentals Electrode Selection As a general rule, the selection of an electrode is straight forward, in that it is only a matter of selecting an electrode of similar composition to the parent metal. However, for some metals there is a choice of several electrodes, each of which has particular properties to suit specific classes of work. -
Page 22: Mma Welding Troubleshooting
poor quality welds. General rule of thumb for down hand welding is to have an arc length no greater than the diameter of the core wire. Electrode Angle The angle that the electrode makes with the work is important to ensure a smooth, even transfer of metal. - Page 23 Increase the amperage or choose a Insufficient heat input larger electrode Remove moisture and materials like Work piece dirty, contaminated paint, grease, oil, and dirt, including or moisture mill scale from base metal Weld sits on top, lack of fusion Use the correct welding technique or Poor welding technique seek assistance for the correct...
-
Page 24: Installation And Operation For Tig Welding
• 3.3. Installation & Operation for TIG Welding • 3.3.1. Set up installation for TIG Welding (1) Switch the ON/OFF Switch (located on the rear panel) to OFF. (2) Connect the earth lead to “+”, tighten clockwise; (3) Connect the TIG torch cable to “-“, tighten clockwise;... -
Page 25: Tig Welding Fundamentals
(4) The tungsten must be ground to a blunt point in order to achieve optimum welding results. It is critical to grind the tungsten electrode in the direction the grinding wheel is turning. (5) Install the tungsten with approximately 3mm to 7mm sticking out from the gas cup, ensuring you have correct sized collet. -
Page 26: Dc Tig Welding Troubleshooting
Nickel Alloy Welding Argon Copper Welding Argon Titanium Welding Argon Tungsten Electrode Types Electrode Type Welding Application Features Colour Code (Ground Finish) DC welding of mild steel, Excellent arc starting, long life, Thoriated 2% stainless steel and copper. high current carrying capacity. AC &... - Page 27 Keep shielding gas flowing 10–15 Tungsten being oxidised after seconds after arc stoppage. 1 second weld is finished for each 10amps of weld current. Keep tungsten from contacting weld Touching tungsten into the weld puddle. Raise the torch so that the pool tungsten is off of the work piece 2 - Contaminated...
-
Page 28: Operation Environment
Check that correct type of tungsten is Tungsten incorrect or in poor being used. Remove 10mm from the condition weld end of the tungsten and re sharpen the tungsten Grind marks should run lengthwise with Poorly prepared tungsten tungsten, not circular. Use proper grinding method and wheel. -
Page 29: Operation Notices
• 3.5. Operation Notices Read Section 1 carefully before starting to use this equipment. Connect the ground wire with the machine directly. Ensure that the input is single-phase: 50/60Hz, 110V/220V ±10%. Before operation, none concerned people should not be around the working area and especially children. -
Page 30: Maintenance & Troubleshooting
4. Maintenance & Troubleshooting • 4.1. Maintenance In order to guarantee safe and proper operation of welding machines, they must be maintained regularly. Let customers understand the maintenance procedure of welding machines. Enable customers to carry on simple examination and inspections. Do your best to reduce the fault rate and repair times of welding machines to lengthen service life of arc welding machine. -
Page 31: Troubleshooting
Using the dry compressed air to clear the inside of arc welding machine. Especially for clearing up the dusts on radiator, main voltage transformer, inductors, IGBT Monthly modules, fast recover diodes, PCB’s, etc. examination Check the screws and bolts in the machine. If any is loose, please screw it tight. If it is shaved, please replace. - Page 32 Only professional maintenance staff that isauthorized by our company could overhaul the machine! Be sure to shut off the Main Input Power before doing any repair work on the welding machine! If there is any problem and there is no authorized professional maintenance personal on site, please contact local agent or the distributor! If there are some simple troubles with the welding machine, you can consult the following chart: Troubles...
-
Page 33: List Of Error Codes
The welding current adjusted Increase the welding current too low The penetration of molten pool is not enough(MMA) The arc force adjusted too small Increase the arc force Airflow disturbance Use the shelter from airflow Adjust the electrode angle The electrode eccentricity Change the electrode Incline the electrode to the Arc blow... - Page 34 Yellow lamp (lack water) No water always on No gas Red lamp always on Yellow lamp (thermal Under voltage protection) always on Yellow lamp (thermal Over voltage protection) always on Yellow lamp (thermal Over current protection) always on Wire feeder over load Button fault on operating panel when Yellow lamp (thermal switch on the machine...
-
Page 35: Electrical Schematic Drawing
• 4.4. Electrical schematic drawing... - Page 36 200ARC STICK •...
Need help?
Do you have a question about the Ronch Weld 200ARC DV and is the answer not in the manual?
Questions and answers