Aiwa NSX-D60 Operating Instructions Manual
Aiwa cd stereo system operating instructions nsx-d60
Hide thumbs
Also See for NSX-D60:
- Operating instructions manual (22 pages) ,
- Service manual (55 pages)
Table of Contents
Advertisement
Quick Links
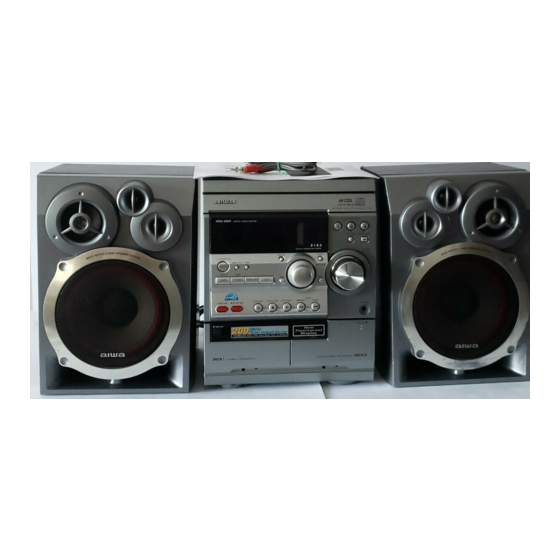
CD Stereo System
NSX-D60
U
C
OWNER'S RECORD
Record the model number and serial number of your set (found at the
rear of your set) below. Refer to them when contacting your Aiwa dealer.
Model No. _____________________________
Serial No. _____________________________
For assistance and information
(United States and Puerto Rico)
OPERATING INSTRUCTIONS
MANUAL DE INSTRUCCIONES
MODE D'EMPLOI
En
(English)
E
(Español)
F
(Français)
8C-NF7-903-11
011211BKH-U-FM
Advertisement
Table of Contents

Related Manuals for Aiwa NSX-D60


Summary of Contents for Aiwa NSX-D60
- Page 1 CD Stereo System NSX-D60 OWNER'S RECORD Record the model number and serial number of your set (found at the rear of your set) below. Refer to them when contacting your Aiwa dealer. Model No. _____________________________ Serial No. _____________________________ For assistance and information...
-
Page 2: Important Safety Instructions
WARNING To reduce the risk of fire or electric shock, do not expose this appliance to rain or moisture. CAUTION RISK OF ELECTRIC SHOCK DO NOT OPEN “CAUTION:TO REDUCE THE RISK OF ELECTRIC SHOCK, DO NOT REMOVE COVER (OR BACK). NO USER-SERVICEABLE PARTS INSIDE. -
Page 3: Table Of Contents
CD OPERATIONS ... 10 RADIO OPERATIONS ... 12 TAPE OPERATIONS ... 14 SOUND ADJUSTMENTS ... 17 TIMER OPERATIONS ... 18 REFERENCE ... 20 System and accessories NSX-D60 CX-ND60 CD stereo cassette receiver SX-ND60 Front speakers Remote control FM antenna AM antenna... -
Page 4: Preparations
PREPARATIONS Connection Plug in the AC power cord to the AC power outlet after all other connections are made. 1 Connect the front speakers. Connect the right front speaker to the SPEAKERS R terminals and place it on the right side of the unit. Connect the left to the SPEAKERS L terminals and place it on the left side.The speaker cords with the white stripes go to the 0 terminals. -
Page 5: Parts And Controls
PARTS AND CONTROLS Main unit: rear 1 AM LOOP, FM 75 Ω terminals Plug in the supplied AM and FM antennas here. 2 VIDEO/AUX jacks Accepts analog sound signals from external equipment. Connect using an optional connecting cable with RCA phono plugs (red plug to R jack, white plug to L jack). -
Page 6: Phones Jack
Main unit: front 1 TAPE/DECK 1/2 Selects Tape function, and deck 1 or 2. TUNER/BAND Selects Radio function and the radio band. VIDEO/AUX Selects the function of external equipment connected to VIDEO/AUX jacks. Selects CD function. 2 POWER 6STANDBY/ON Switches the unit on and off (standby). DEMO/ECO When the unit is turned off: switches DEMO on and off. - Page 7 Remote control Buttons with the same or similar names with the main unit basically have the same function. 1 POWER T-BASS TREBLE ENTER 2 0-9, +10 CD: selects a CD track of the specified number. Radio: tunes in to the station with the specified preset number.
-
Page 8: Adjustments Before Operations
ADJUSTMENTS BEFORE OPERATIONS Power Turning the unit on Press POWER 6 STANDBY/ON (POWER on the remote control). Pressing TAPE, TUNER, VIDEO/AUX or CD also turns the unit on (Direct Play Function.) When a disc or tape is inserted, the playback will start automatically. Turning the unit off Press POWER 6STANDBY/ON again. -
Page 9: Setting The Clock
ECO mode Reduces power consumption with the following operations, etc. - The unit blacks out when the unit is turned off. Only the red indicator lights up. (Only when the clock is set.) - If dimmer mode is set to on, the unit illumination brightens (for 10 seconds) only when you operate the unit. -
Page 10: Cd Operations
CD OPERATIONS This unit plays back finalized CD-R/RW discs as well as audio CDs. Playback 1 Press CD and load disc(s). Press zCD OPEN/CLOSE to open the disc compartment and place one or two disc(s) with the labelled side up. To place three discs, press DISC CHANGE so that the trays rotate, then place the third one. -
Page 11: Programed Playback
Programed playback Plays back up to 30 selected tracks in programed order. 1 Press SHIFT+PROGRAM on the remote control during stop. "PRGM" flashes on the display. 2 Press CD DIRECT on the remote control and then press the numbered button (1-3) within 3 seconds to select a disc. -
Page 12: Manual Tuning
RADIO OPERATIONS Manual tuning 1 Press TUNER/BAND (BAND on the remote control) repeatedly to select a band (FM or AM.) 2 Press f or g to tune in to a station. "TUNE" is displayed when a station is tuned in. "1"... - Page 13 Adjustments Antennas Keep antennas away from metallic objects, electrical equipment and cords. FM antenna: Extend fully and position for the best reception. If receiving condition is poor, connect optional outdoor antenna to FM 75 Ω terminal. Be sure to connect the shield braid of the antenna to the 2 terminal.
-
Page 14: Tape Operations
TAPE OPERATIONS Playback Use only type I (normal) tapes. 1 Press TAPE/DECK 1/2 and insert the tape in either deck. Press zPUSH EJECT to open the cassette holder, and insert with the exposed side down and playback side facing out from the unit. Push zPUSH EJECT to close. PUSH EJECT 2 Press c. -
Page 15: Ai Edit Recording
3 Press wREC/REC MUTE to start recording. When recording a CD or tape, playback starts automatically. When recording input from connected equipment, manually start playback of the source. On the remote control, press REC MODE and then press wREC/REC MUTE within 3 seconds. •... - Page 16 Programed Edit Recording As you program the CD tracks to record, Programed Edit Recording displays the remaining recording time for each side of the tape, so you can easily select a set of desired tracks within the length of your tape. 1 Insert the recording tape in DECK 2.
-
Page 17: Sound Adjustments
SOUND ADJUSTMENTS Super T-BASS Emphasizes low frequencies for a powerful sound. Press T-BASS repeatedly to select one of the three emphasis levels (1-3) or the off position (0). •When the sound becomes distorted with the T-BASS effect, cancel it. TREBLE Enhances high frequency for sound clarity . -
Page 18: Timer Operations
TIMER OPERATIONS Sleep timer Turns off the unit automatically after a specified time. 1 Press SHIFT+SLEEP on the remote control. "SLP" appears on the display. 2 Press f or g repeatedly to set the sleep timer duration. With each press, the timer duration changes in 5-minute steps between 5 to 240 minutes. -
Page 19: Timer Recording
To display the timer setting Press TIMER. The timer-on time, the source and the timer-activated duration are displayed for 6 seconds. Tip: Timer setting can be displayed even while the unit is turned off, and at that time if you press ENTER or a within 6 seconds after TIMER is pressed, you can enter the timer setting mode and change the setting. -
Page 20: Reference
REFERENCE Care and maintenance Occasional care and maintenance of the unit and the software are needed to optimize the performance of your unit. To clean the cabinet Use a soft and dry cloth. If the unit surfaces are extremely dirty, use a soft cloth lightly moistened with mild detergent solution. -
Page 21: Specifications
Specifications MAIN UNIT CX-ND60 TUNER FM tuning range 87.5 MHz to 108 MHz FM usable sensitivity (IHF) 13.2 dBf FM antenna terminal 75 ohms (unbalanced) AM tuning range 530 kHz to 1710 kHz (10 kHz step) 531 kHz to 1602 kHz (9 kHz step) AM usable sensitivity 350 µV/m AM antenna... - Page 22 NOTE This equipment has been tested and found to comply with the limits for a Class B digital device, pursuant to Part 15 of the FCC Rules. These limits are designed to provide reasonable protection against harmful interference in a residential installation.
Need help?
Do you have a question about the NSX-D60 and is the answer not in the manual?
Questions and answers