Advertisement
Quick Links
Operator's Manual
IMPORTANT: Read safety rules and instructions carefully before operating equipment.
Warning:
This unit is equipped with an internal combustion engine and should not be used on or near any unimproved forest-
covered, brush-covered or grass-covered land unless the engine's exhaust system is equipped with a spark arrester meeting
applicable local or state laws (if any). If a spark arrester is used, it should be maintained in effective working order by the operator.
In the State of California the above is required by law (Section 4442 of the California Public Resources Code). Other states may have
similar laws. Federal laws apply on federal lands. A spark arrester for the muffler is available through your nearest engine authorized
service dealer or contact the service department, P.O. Box 361131 Cleveland, Ohio 44136-0019.
PRINTED IN U.S.A.
MTD LLC, P.O. BOX 361131 CLEVELAND, OHIO 44136-0019
21" Self Propelled
Mulching Mower
Model Series 560
769-01505.fm
FORM NO.
(10/21/2004)
Advertisement

Related Manuals for White Outdoor 560 Series


Summary of Contents for White Outdoor 560 Series
- Page 1 Operator’s Manual 21” Self Propelled Mulching Mower Model Series 560 IMPORTANT: Read safety rules and instructions carefully before operating equipment. Warning: This unit is equipped with an internal combustion engine and should not be used on or near any unimproved forest- covered, brush-covered or grass-covered land unless the engine’s exhaust system is equipped with a spark arrester meeting applicable local or state laws (if any).
- Page 2 TABLE OF CONTENTS Content Page Content Page Important Safe Operation Practices Service & Adjustments Slope Gauge Off Season Storage Assembling Your Lawn Mower Trouble Shooting Know Your Lawn Mower Illustrated Parts List Operating Your Lawn Mower Warranty Maintaining Your Lawn Mower FINDING MODEL NUMBER This Operator’s Manual is an important part of your new lawn mower.
- Page 3 SECTION 1: IMPORTANT SAFE OPERATION PRACTICES WARNING: This symbol points out important safety instructions which, if not followed, could endanger the personal safety and/or property of yourself and others. Read and follow all instructions in this manual before attempting to operate this machine. Failure to comply with these instructions may result in personal injury.
- Page 4 your footing, release the blade control handle 2. Do not mow slopes greater than 15 degrees as immediately and the blade will stop rotating within shown on the slope gauge. three seconds. 3. Do not mow on wet grass. Unstable footing could 9.
- Page 5 9. Never remove gas cap or add fuel while the engine lead to improper performance and compromise is hot or running. Allow engine to cool at least two safety!” minutes before refueling. 4. Mower blades are sharp and can cut. Wrap the 10.
- Page 6 SECTION 2: SLOPE GAUGE Use this page as a guide to determine slopes where you may not operate safely.
- Page 7 SECTION 3: ASSEMBLING YOUR LAWN MOWER Removing Unit From Carton • Raise the upper handle in the direction shown in Figure 1 (step 3). Tighten the wing nuts which are • Remove staples, break glue on top flaps, or cut already on the handle.
- Page 8 Attaching Starter Rope WARNING: When using the mower to bag The rope guide is already attached to the right side of grass clippings, make sure the hooks on the the upper handle of your mower. See Figure 4 . grass catcher are firmly seated on the chute •...
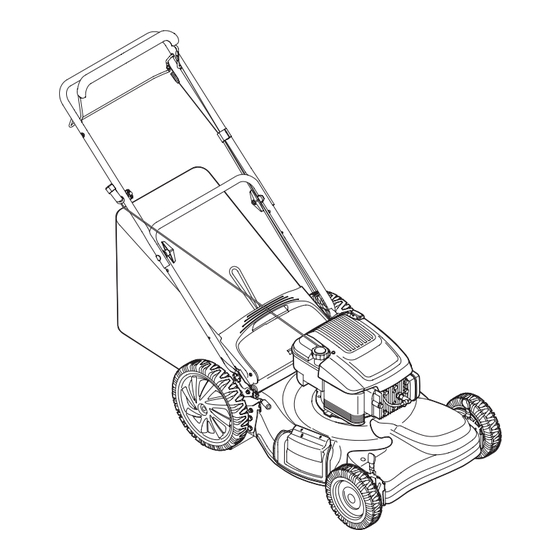
- Page 9 SECTION 4: KNOW YOUR LAWN MOWER Starter Rope Read this owner’s manual and safety rules before operating your lawn mower. Compare the illustrations The starter rope is attached to the handle. Stand behind in Figure 8 with your lawn mower to familiarize yourself the unit and pull the starter rope to start the unit.
- Page 10 SECTION 5: OPERATING YOUR LAWN MOWER To Stop Engine WARNING: Read and understand all • Release the blade control to stop engine and blade. instructions and warnings on the machine and • Disconnect spark plug wire and ground it against in this manual before operating.
- Page 11 SECTION 6: MAINTAINING YOUR LAWN MOWER • Inspect muffler periodically, and replace if WARNING: Always stop the engine and necessary. Damaged mufflers or spark arresters disconnect the spark plug wire before can create a fire hazard. performing any maintenance work or WARNING: Avoid muffler and surrounding adjustments on your lawn mower.
- Page 12 Blade Control To Replace Blade: • Lubricate the pivot points on the blade control and • Before reinstalling the blade-pulley assembly to the the brake cable at least once a season with light oil. unit, lubricate the engine crankshaft and the inner The blade control must operate freely in both surface of the blade adapter with light oil.
- Page 13 SECTION 7: SERVICE & ADJUSTMENTS Replacing Drive Belt • Tighten the screw, loosened earlier, to secure the belt tension spring to the transmission, and • Remove two shoulder screws securing the front reassemble the front drive cover. drive cover to the mower deck. See Figure 11. Right Front Left Front Wheel...
- Page 14 • For rough or uneven lawns, move the height adjustment handles to higher cutting height position. Height Adjustment Notch Lever Lower Handle Figure 14 • Reassemble the upper handle to the lower handle. • Place the hairpin clips in the inner holes of the weld pins and replace the carriage bolts and wing nuts Figure 15 on the handle brackets.
- Page 15 SECTION 9: TROUBLE-SHOOTING Problem Possible Cause Corrective Action Engine fails to start 1. Blade control disengaged 1. Engage blade control. 2. Spark plug wire disconnected 2. Connect wire to spark plug. 3. Fuel tank empty, or stale fuel 3. Fill up tank with fresh gasoline. 4.
- Page 16 SECTION 10: PARTS LIST FOR MODEL SERIES 560 53 14...
- Page 17 Model Series 560 Ref. No Part No. Description Ref. No Part No. Description 747-1214 Drive Control 687-02044 Pivot Plate Assembly 710-0599 TT Screw 1/4-20 x 0.5 710-1257 Hex Screw 3/8-24 x 2.50 736-0270 Bell Washer.265 x 0.75 749-0928A Lower Handle 17032A Deflector Chute Adapter 732-1043...
- Page 18 NOTES...
- Page 19 1. First-time starts after initial purchase mower, Tecumseh Power Company (“Tecumseh”), the 2. First-time starts following an extended manufacturer of your White Outdoor brand engine period of non-use (over three months or hereby warrants that your mower’s engine will start on...
- Page 20 MANUFACTURER’S LIMITED WARRANTY FOR: The limited warranty set forth below is given by MTD LLC with MTD does not extend any warranty for products sold or respect to new merchandise purchased and used in the exported outside of the United States, its possessions United States, its possessions and territories.
Need help?
Do you have a question about the 560 Series and is the answer not in the manual?
Questions and answers